
How to Fix FACEIT "Enable NX / DEP" – 2026
FACEIT's "Enable NX / DEP" message means Data Execution Prevention is switched off, in Windows or in the BIOS. Put DEP back to its Windows default (OptIn) with one bcdedit command, make sure NX Mode or Execute Disable Bit is on in the BIOS, and restart.
FACEIT: Enable NX / DEP
What causes FACEIT: Enable NX / DEP
DEP stops code from running in memory meant for data. Windows has it on by default. It is off when a tool or guide set nx AlwaysOff in the boot settings, or when NX Mode (AMD) or Execute Disable Bit (Intel) was turned off in the BIOS.
How to fix FACEIT: Enable NX / DEP in Windows
Suspend BitLocker first (if it is on)
manage-bde -protectors -disable C: -RebootCount 2. It turns itself back on after two restarts. Check that you can see your recovery key at aka.ms/myrecoverykey before you go on.Put DEP back to the Windows default
bcdedit /enum {current}. If the line nx says AlwaysOff, suspend BitLocker (step above), then run bcdedit /set {current} nx OptIn and restart. OptIn is the Windows default.How to fix it in the BIOS
This part happens in your PC's firmware setup (the BIOS), so open this page on your phone first. Menu names change a little between BIOS versions: if a path below does not match, look for the words in bold.
Restart into the BIOS
shutdown /r /fw /t 0 in Terminal (Admin). You can also press Del right after switching the PC on (desktops; F2 on many laptops and some ASRock and MSI boards).Change these settings
- Make sure NX Mode (AMD) or Execute Disable Bit (Intel) is Enabled. It is on by default.
Where to find them on your board:
ASUS
NX / Execute Disable Bit: Advanced > CPU Configuration > NX Mode / Execute Disable Bit
MSI
NX / Execute Disable Bit: OC > Advanced CPU Configuration > NX Mode / Execute Disable Bit
Gigabyte (AORUS)
NX / Execute Disable Bit: Tweaker > Advanced CPU Settings > NX Mode / Execute Disable Bit
ASRock
NX / Execute Disable Bit: Advanced > CPU Configuration > NX Mode / Execute Disable Bit
Laptops and prebuilt PCs
HP: Esc then F10, Advanced > Secure Boot Configuration, Security > TPM Embedded Security, Advanced > System Options > Virtualization Technology.
Lenovo: F1 on ThinkPad, F2 or the Novo button on IdeaPad and Legion, Security > Secure Boot, Security > Security Chip, Security > Virtualization.
ASUS: F2, Security > Secure Boot Control, Advanced > Trusted Computing.
Acer: F2, set a Supervisor password first or Secure Boot stays greyed out, then Boot > Secure Boot and Security > TPM.
MSI: Del, Security > Secure Boot, Advanced > Trusted Computing.
Gigabyte / AORUS: F2, Security > Secure Boot, Advanced > Trusted Computing.
Save and restart
Fix it in one click with RIP Tweaks (free)
RIP Tweaks 6.9.3 has a free anti-cheat error fixer. Open Fixes, then Anti-cheat errors, and paste FACEIT: Enable NX / DEP or pick your game. The app first checks what your PC has right now (for example Secure Boot: Off, TPM: On) and shows only the steps still missing.
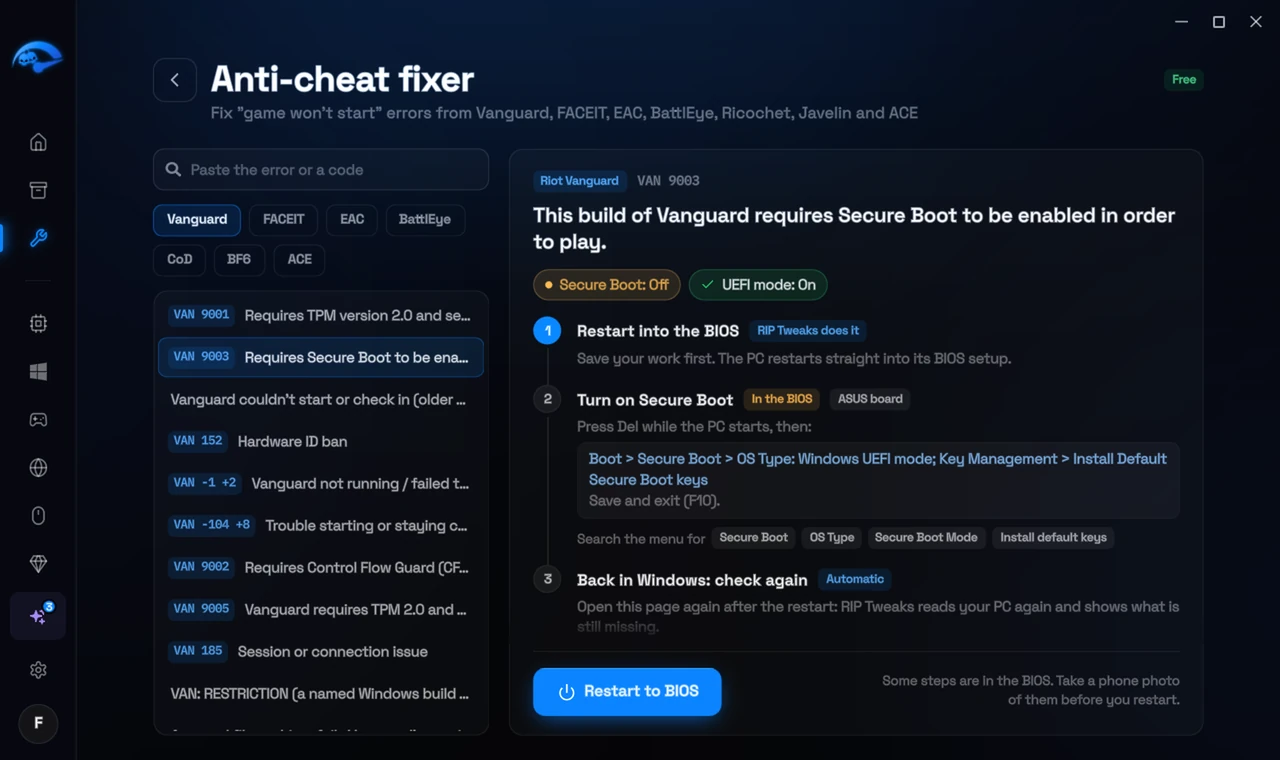
It fixes the Windows side itself
It takes you into the BIOS with the right card
It checks again after the restart
The fixer is free in every plan, also without an account. Download RIP Tweaks (free)
Check that it worked
bcdedit /enum {current} shows nx OptIn. Restart the FACEIT anti-cheat.
Frequently asked questions
Is DEP safe to turn back on?
Yes, it is the Windows default and protects against a whole class of attacks.
Should I use AlwaysOn instead of OptIn?
OptIn is the default and what anti-cheats expect. AlwaysOn can break some older programs.
BitLocker asks for a recovery key after the change. What do I do?
Enter the 48-digit key from aka.ms/myrecoverykey (signed in with the Microsoft account of that PC), or from where you saved it. That is why you suspend BitLocker before changing BIOS settings: then it does not ask.
Can changing these settings get me banned?
No. These are the anti-cheat's own requirements, and the publisher asks you to change them. Bans come from cheats and tools that tamper with the game, never from turning on Windows security features.
Sources
- FACEIT Support: Windows security requirements (checked 15 November 2026)
All anti-cheat errors: Anti-Cheat Error Fixes. Related: How to Fix "You Need to Disable Test Signing to Launch FACEIT AC" – 2026 and How to Fix FACEIT "Your Windows Kernel Has Been Modified" – 2026.