How to Reduce Background Processes on Windows 11 for More FPS (2026)

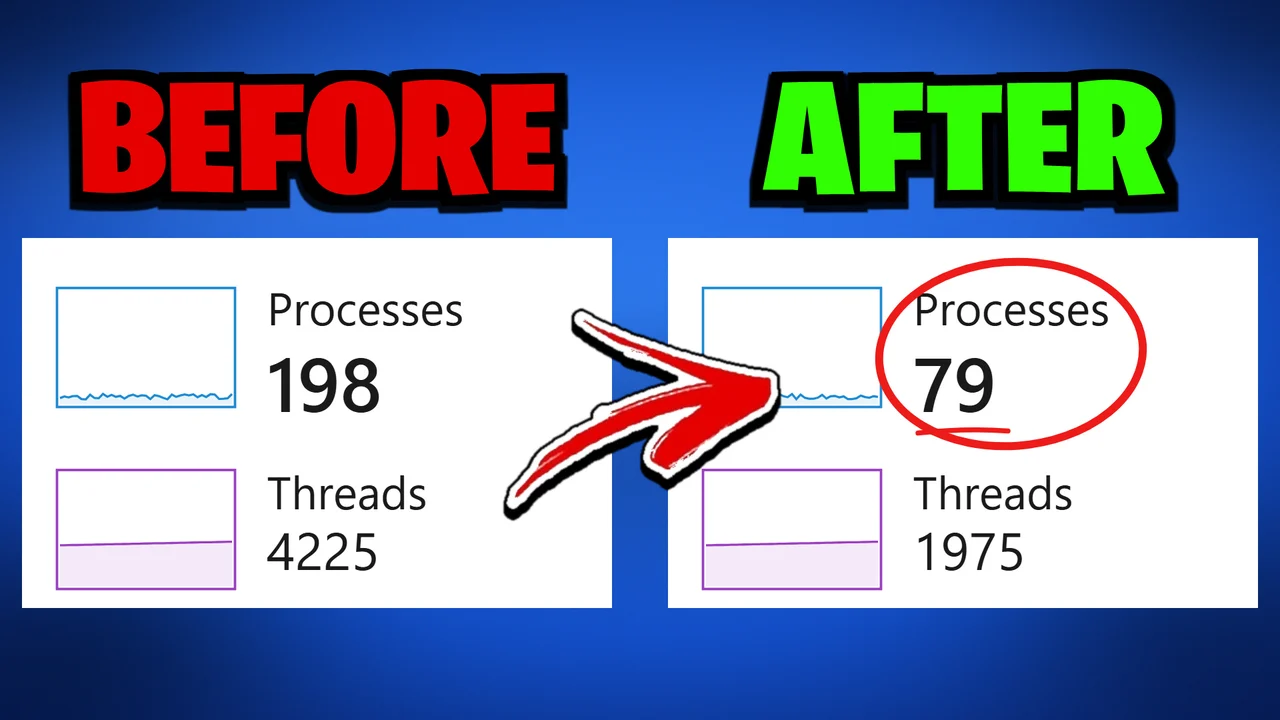
Written version of our video, every step checked against it.
Quick answer
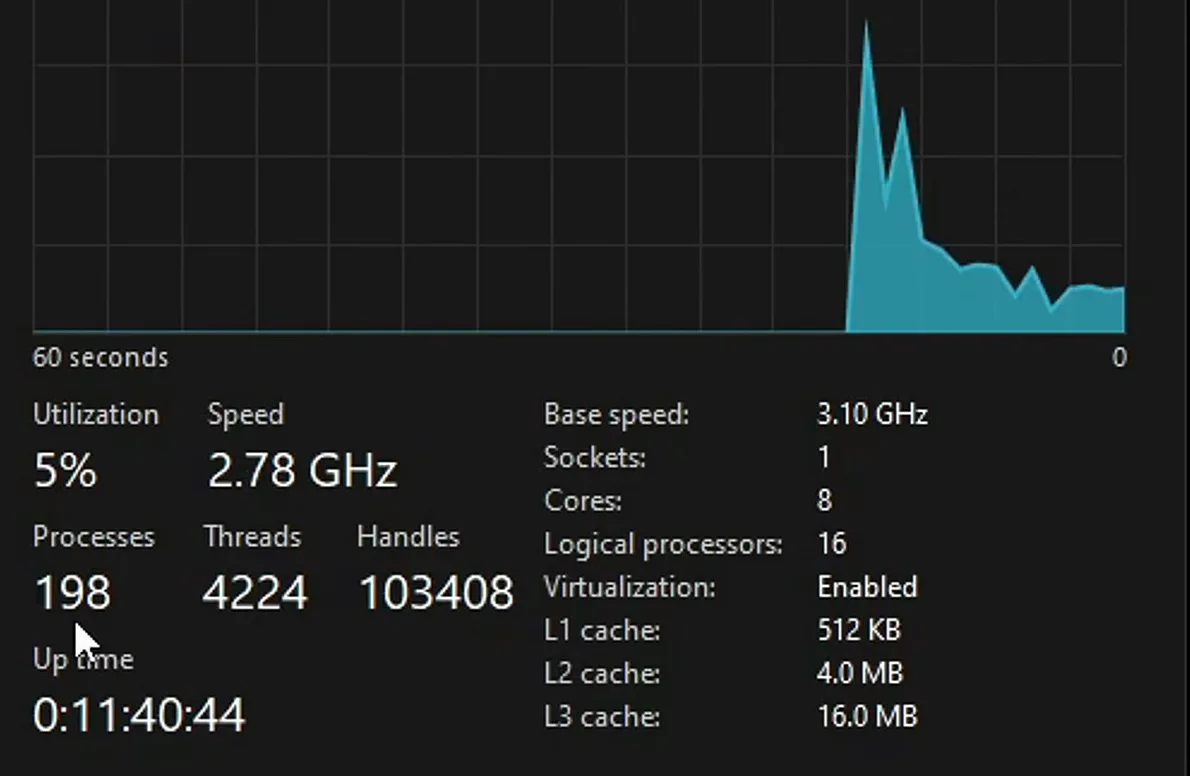
- Check the count first: Task Manager, Performance, CPU showed 198 processes on the PC in the video.
- Install RIP Tweaks and create a backup named Before RIP Tweaks under Backups.
- Run Optimize Windows 11, set Win32 Priority Separation to
26hex, activate the system tweaks and Disable all startup apps. - Turn on the four Power tweaks, then run Debloat (Basic, Advanced or Custom).
- In msconfig, tick Hide all Microsoft services, untick only what you don't use, Apply and restart: 79 processes after the restart.
This guide is for anyone whose Windows 10 or 11 PC runs far more background processes than it needs and wants that load out of the way of their games. It follows our video click by click: from 198 processes to 79 on the same PC, using the Windows, Power and Debloat sections of RIP Tweaks and the MSConfig services list, with a backup first so everything can be undone.
In this video
Before you change anything, write down where you start. Press Ctrl + Shift + Esc, open the Performance tab and click CPU. The number under Processes is everything running on the PC right now.
Task ManagerPerformanceCPUProcesses
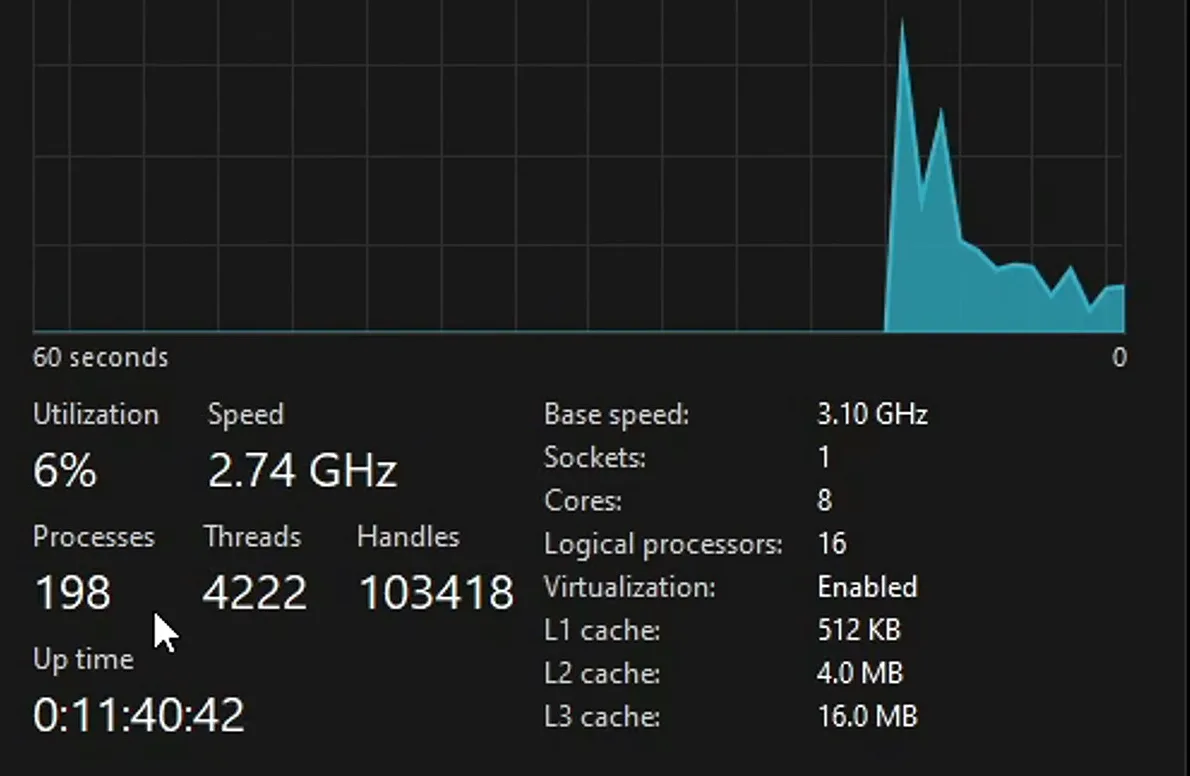
Each process is small on its own, but together they wake up on their own schedules and take turns on the processor. Fewer of them means fewer moments where something in the background competes with your game for a frame.
In your browser, type discord.gg/riptweaks and press Enter, then click Join. In the server, open the free tweaks channel and click the Download RIP Tweaks button, then Visit site and the download button on riptweaks.com. You can also go to riptweaks.com directly.

Run the installer and wait for it to finish. Then create an account with a username, your email and a password, click Create account and fill out the short questionnaire.
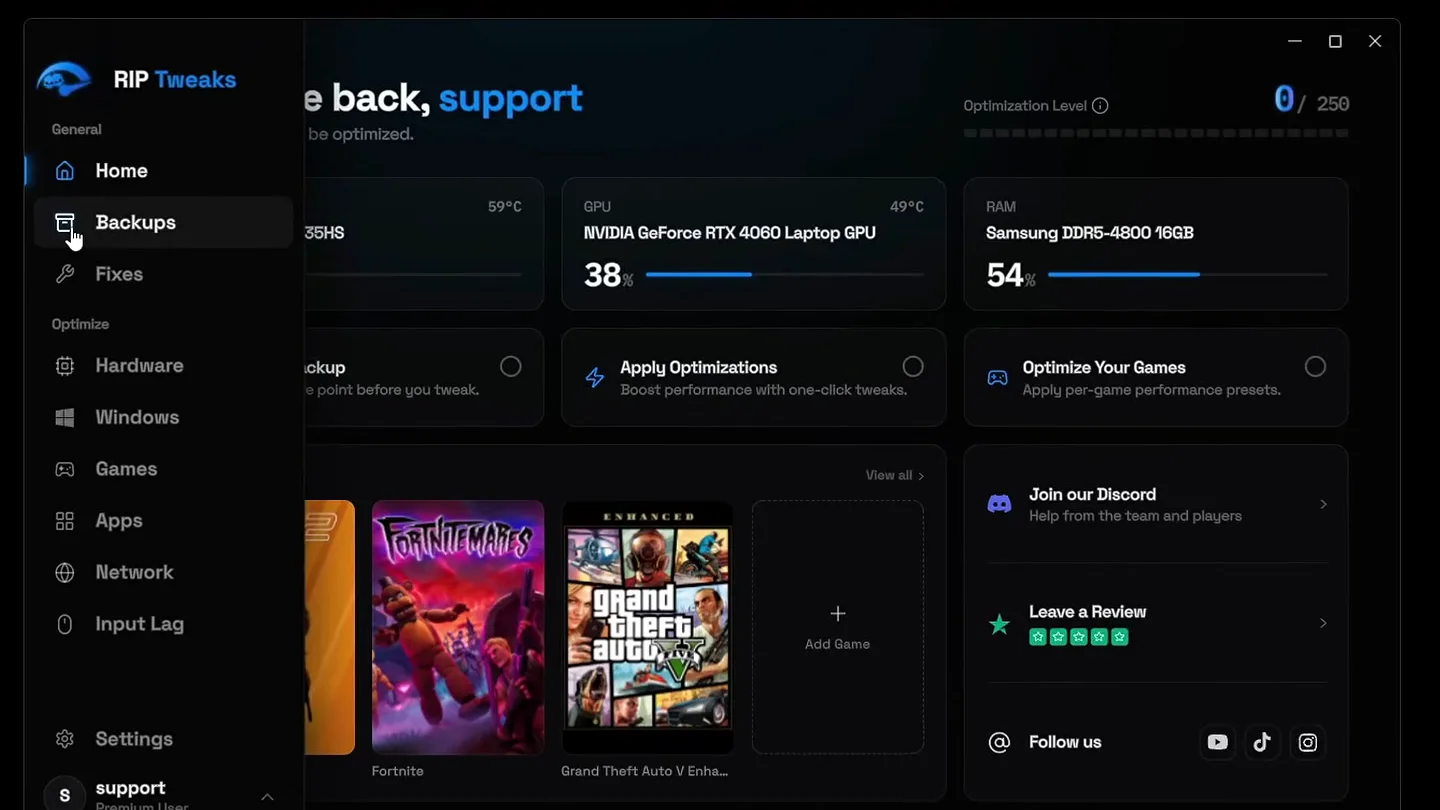
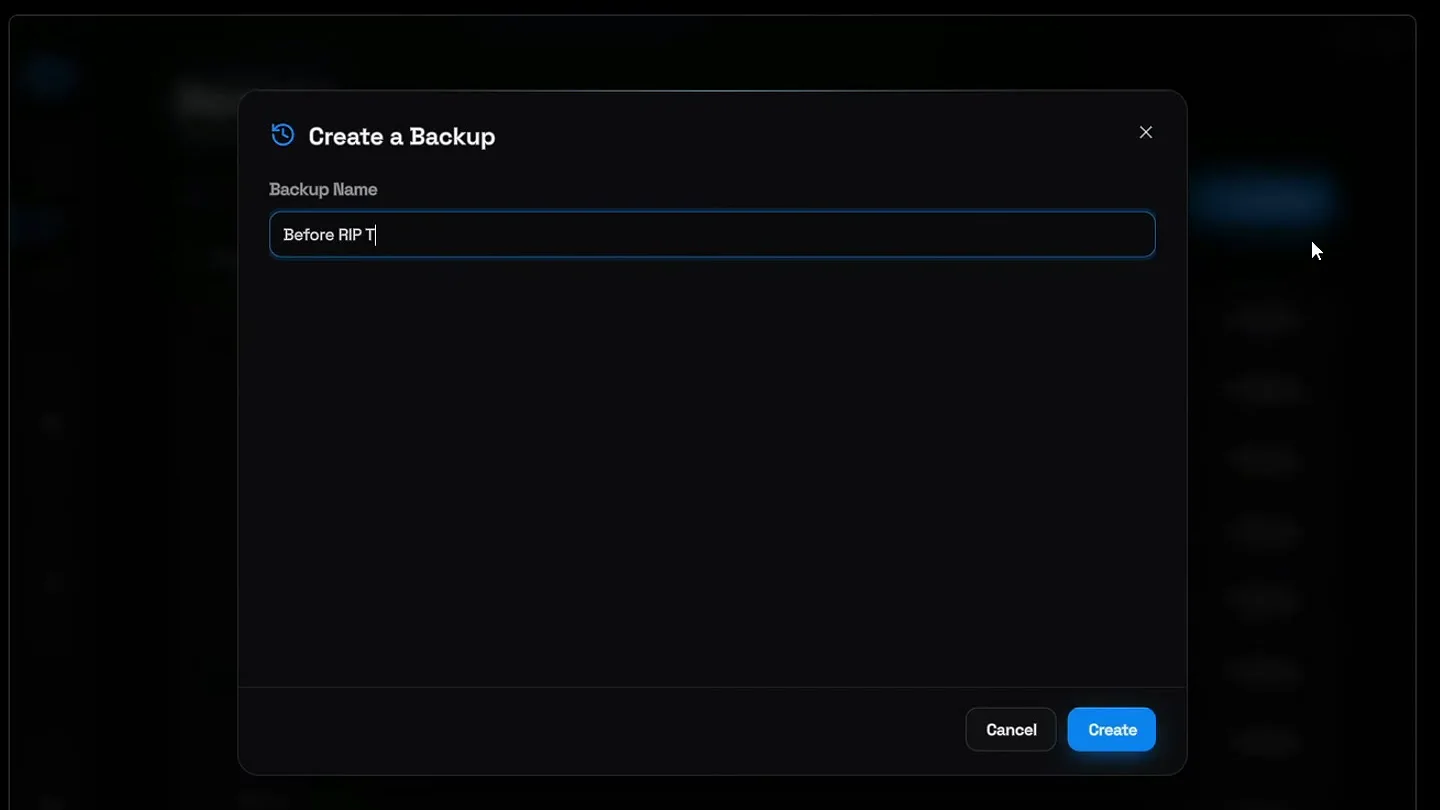
Click Backups in the sidebar, then Create new. Name it Before RIP Tweaks, click Create and wait until the backup finishes.
BackupsCreate newBefore RIP TweaksCreate
Good to know
Don't skip this one. The backup is your way back to exactly how the PC was before the video's steps, even if you change many things at once.
Open the Windows section and click Optimize Windows 11 (or Optimize Windows 10 on Windows 10). Then scroll to System Optimizations.
WindowsOptimize Windows 11
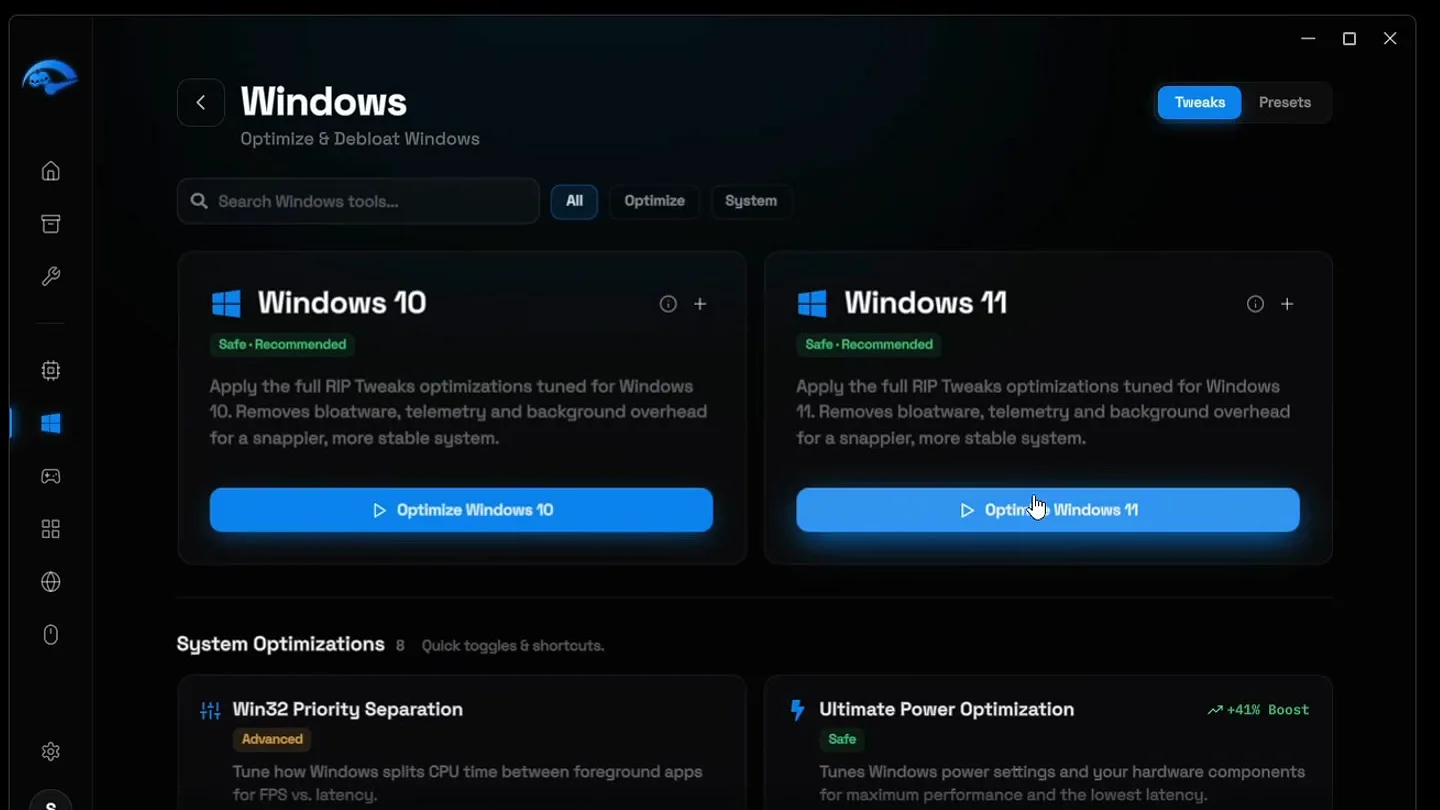
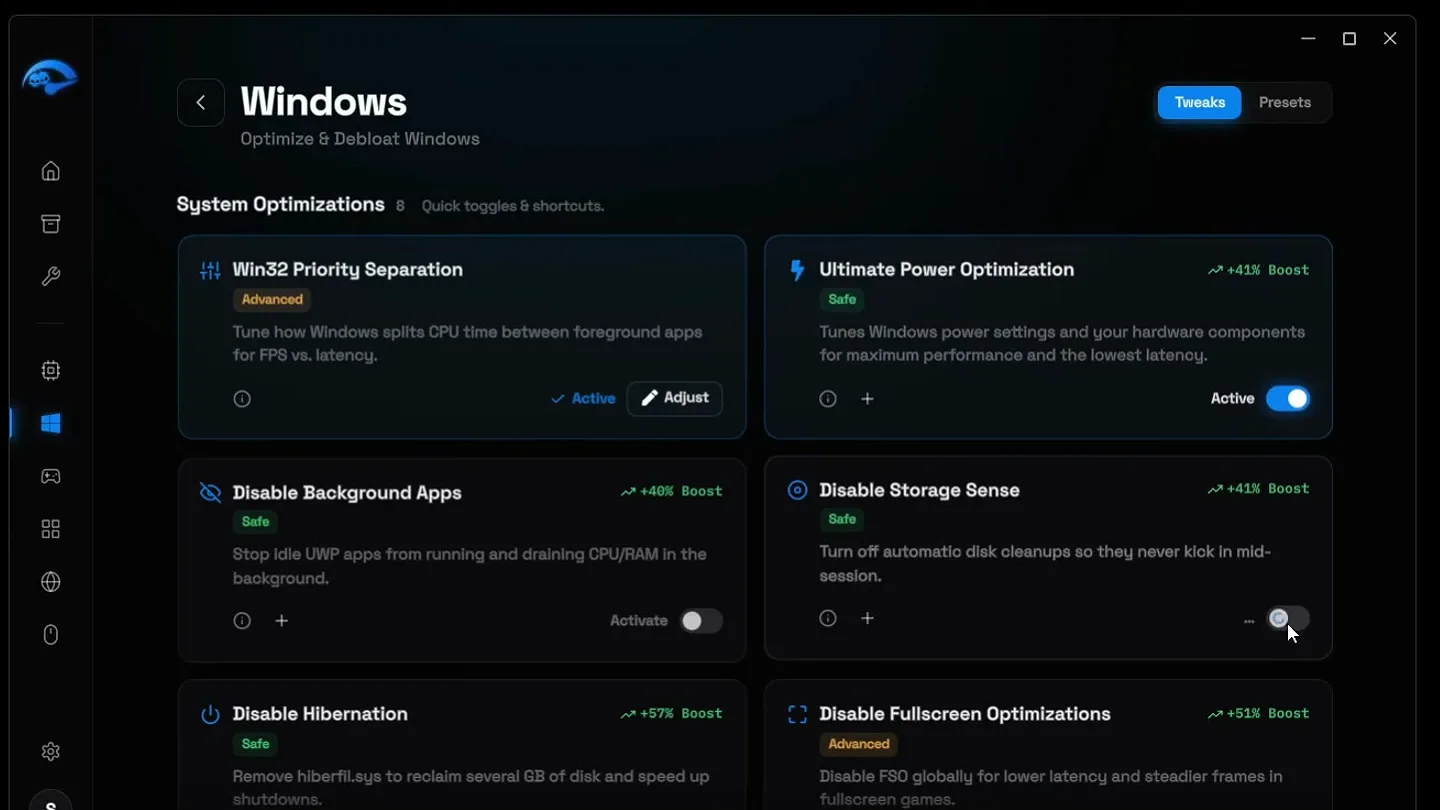
On Win32 Priority Separation, click Adjust, choose the 26 hex option and click Apply. It tunes how Windows splits processor time between the game in front and the apps behind it. Then activate all the other cards in the list, including Disable Background Apps, Disable Storage Sense and Disable Hibernation.
Last in this section: the startup programs. Click Disable all so none of them start with Windows. They still open normally when you start them yourself.
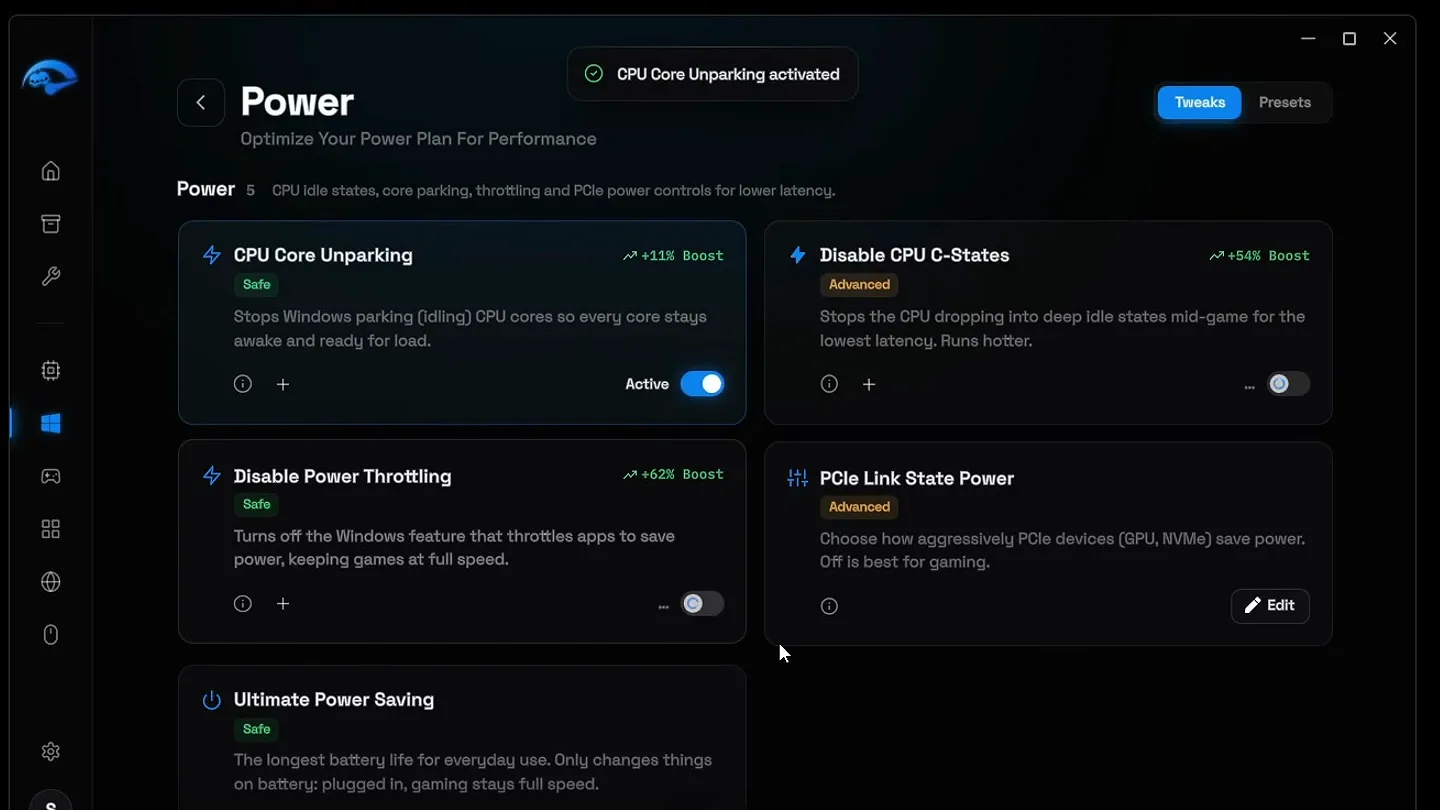
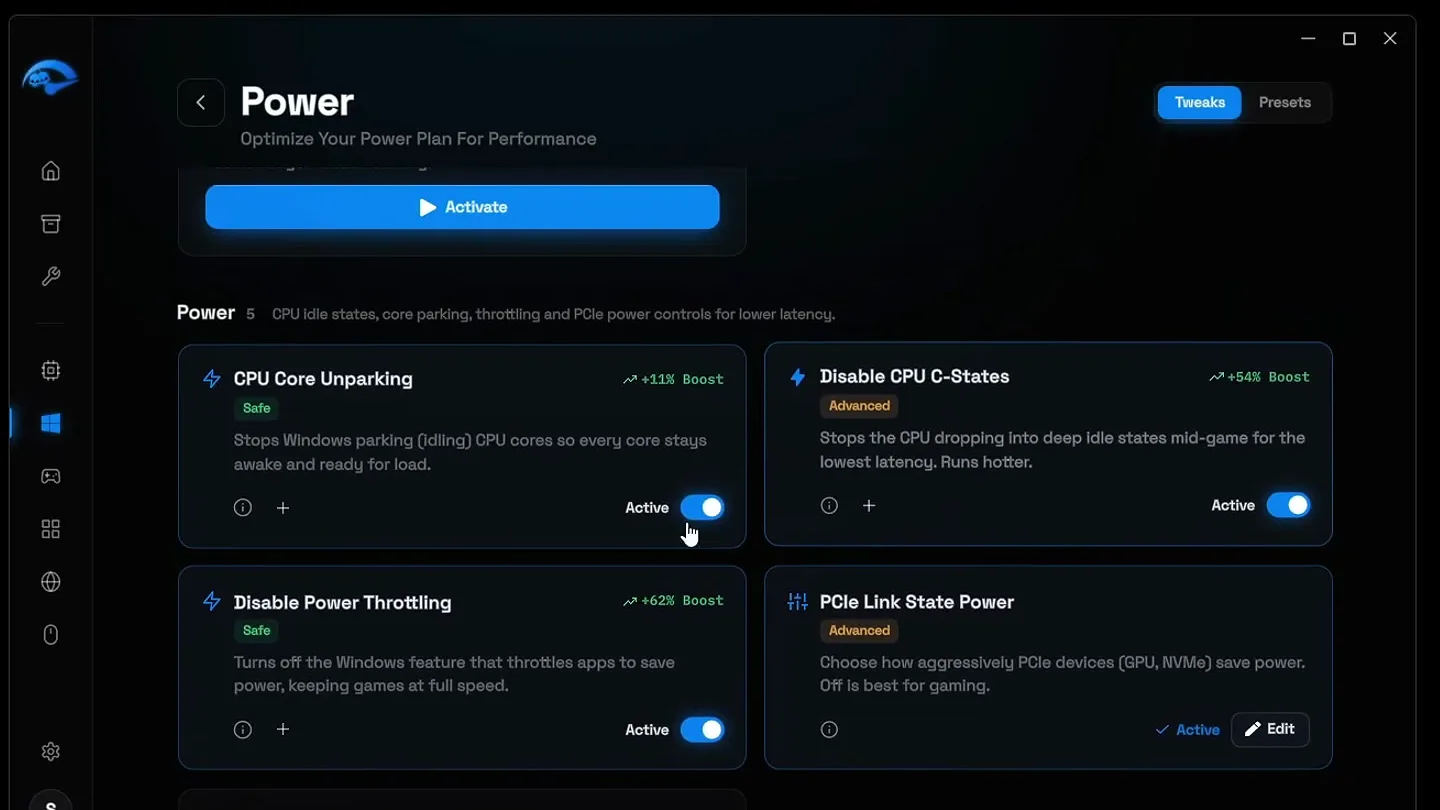
Go back and open the Power section. Turn on all four tweaks: CPU Core Unparking, Disable CPU C-States, Disable Power Throttling and PCIe Link State Power. The last one has no switch: click Edit, choose Off and click Apply.
PowerPCIe Link State PowerEditOffApply
Careful
The app itself notes that Disable CPU C-States keeps the processor out of deep idle states mid-game and runs hotter. On a laptop or a small case, keep an eye on temperatures after turning it on.
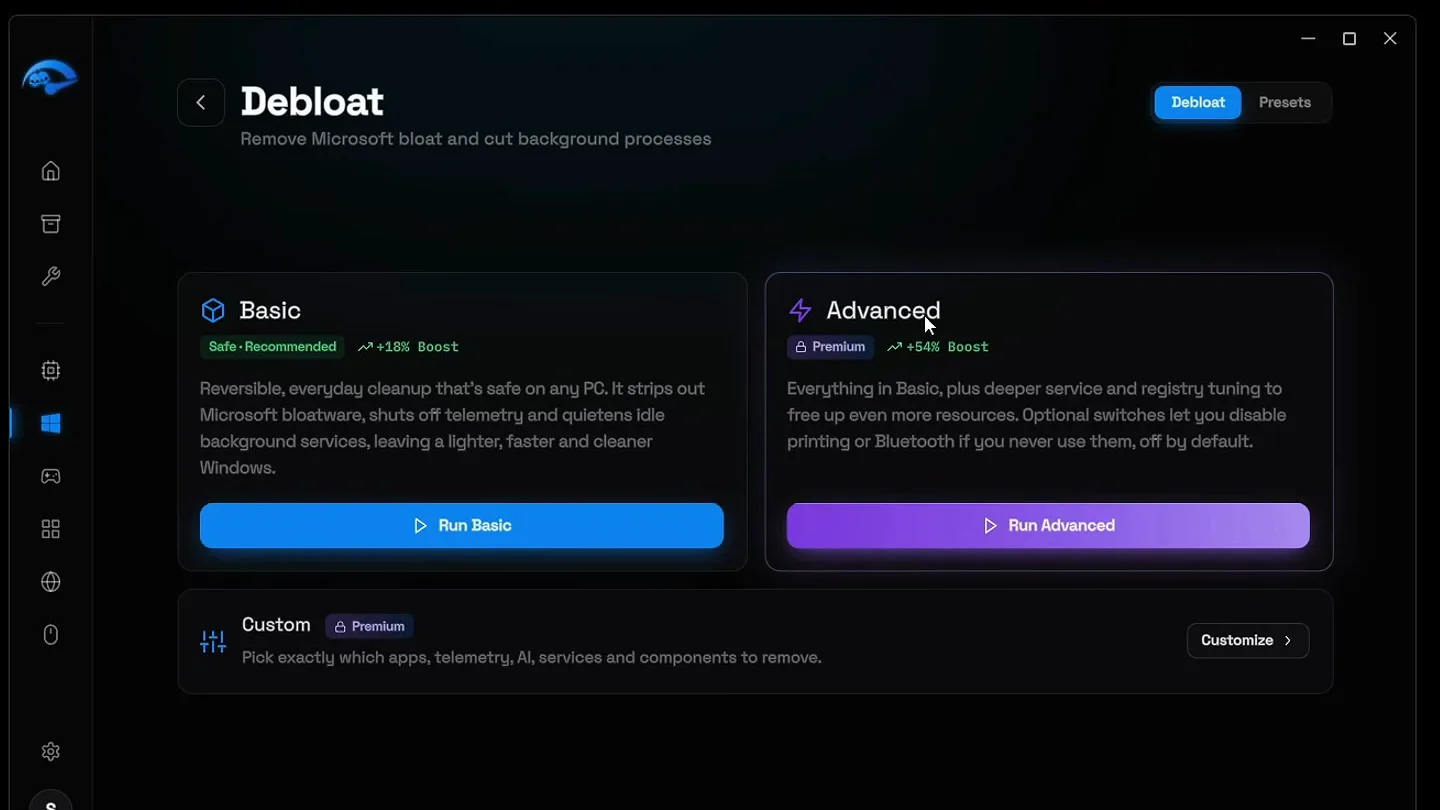
Go back and open Debloat. This is the step that removes the most. Basic is the safe, recommended mode and is reversible. Advanced adds deeper service and registry tuning, and Custom lets you pick every item yourself; both are marked Premium in the app.
WindowsDebloatRun Basic
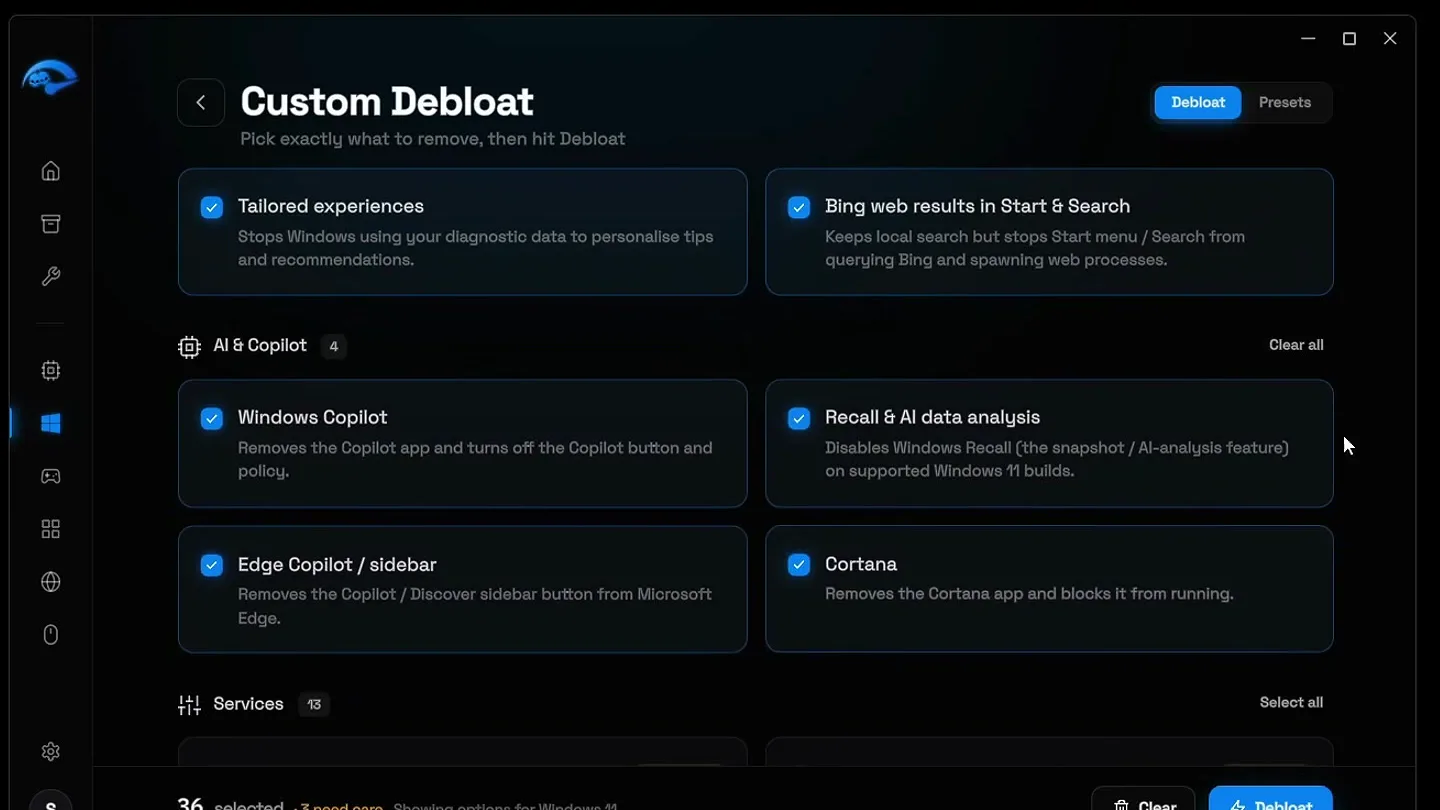
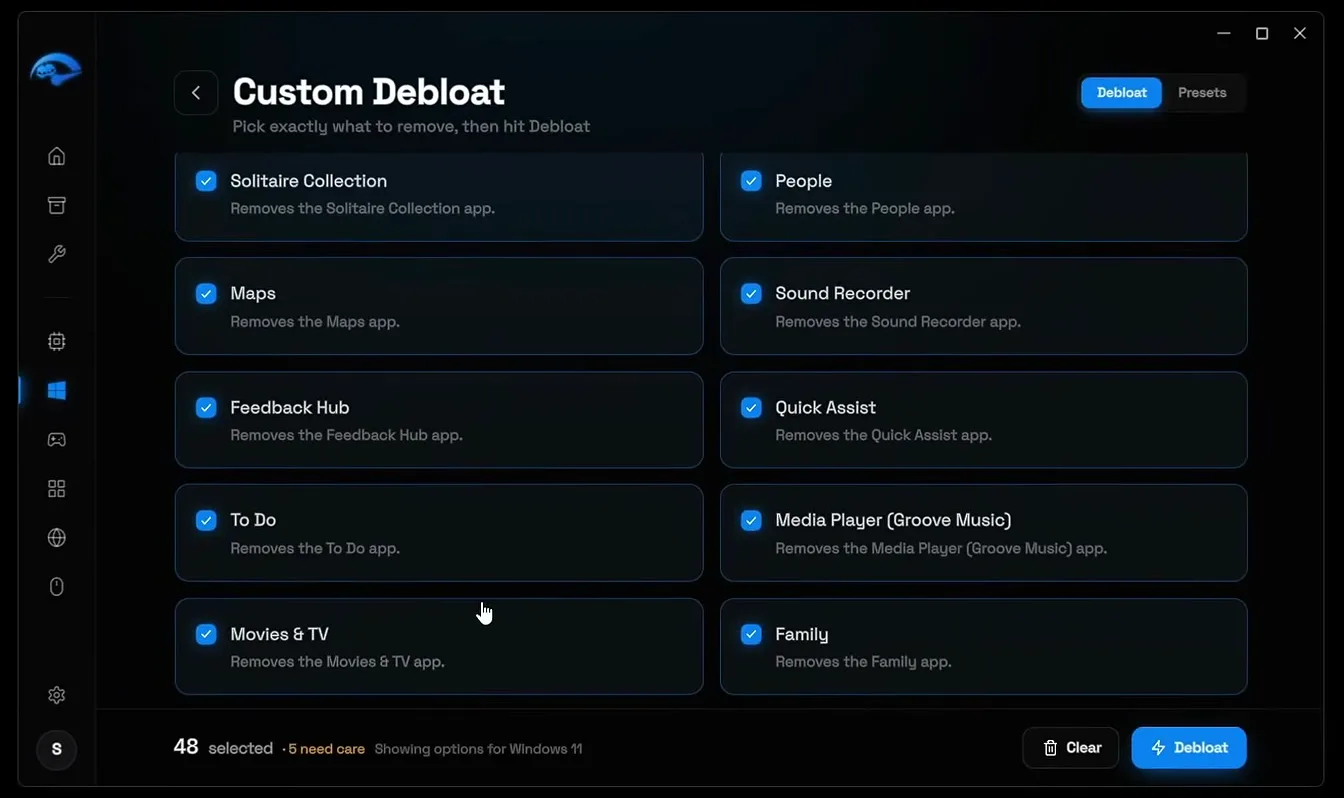
Click Customize to see what a debloat can remove: preinstalled Store apps such as To Do, Movies & TV and Phone, telemetry, the AI and Copilot parts, and services you don't use, for example Maps, Delivery Optimization and OneDrive. Select what you want or load one of the presets, then click Debloat. On the PC in the video, 48 items were debloated.
Tip
Items marked Caution in Custom stay unticked unless you know you never use them. Printer sharing, Remote Desktop and fingerprint sign-in all live there.
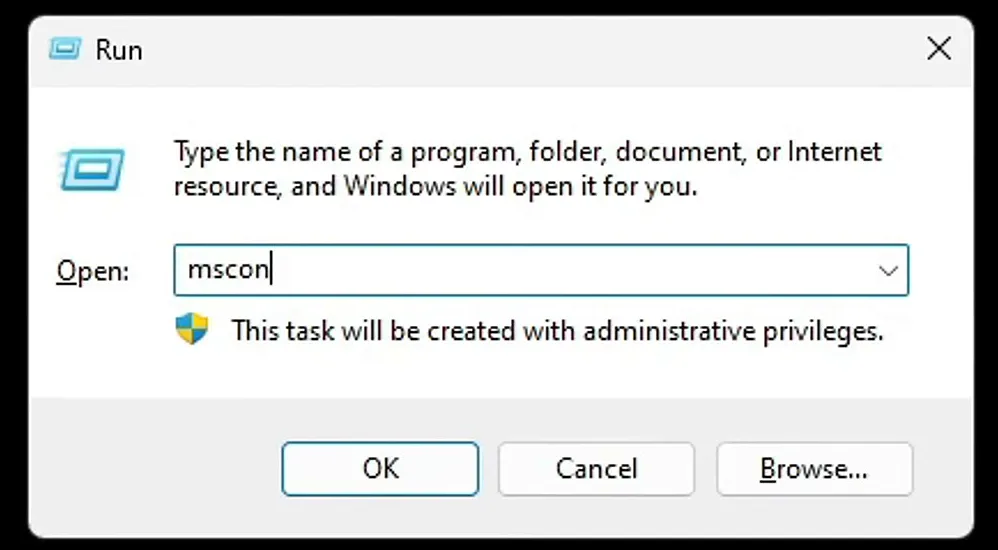
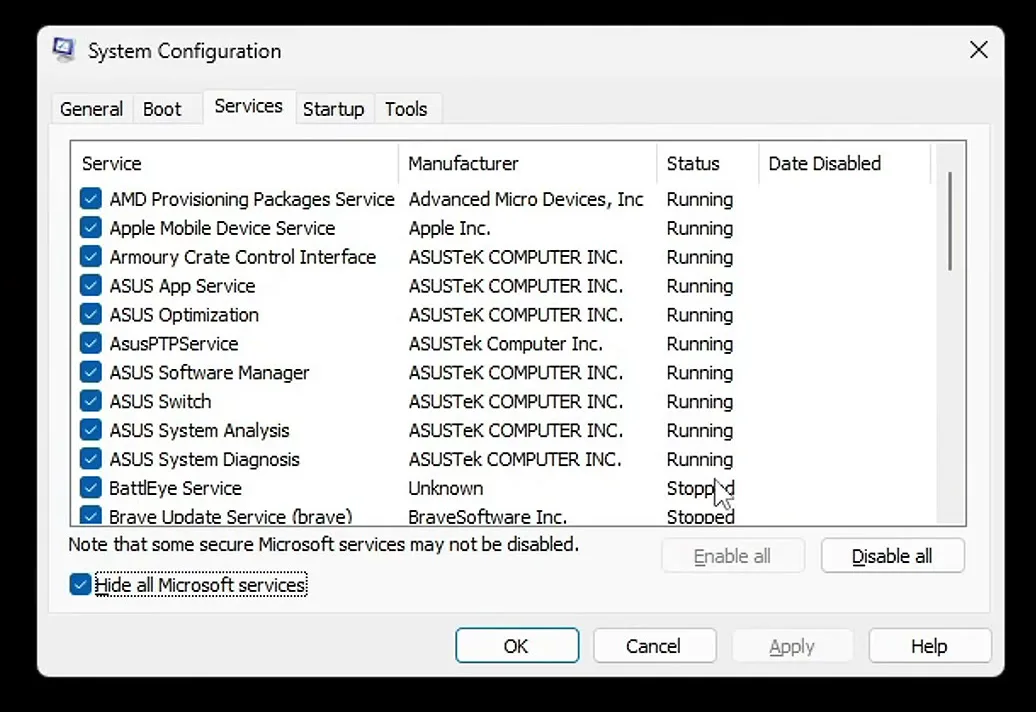
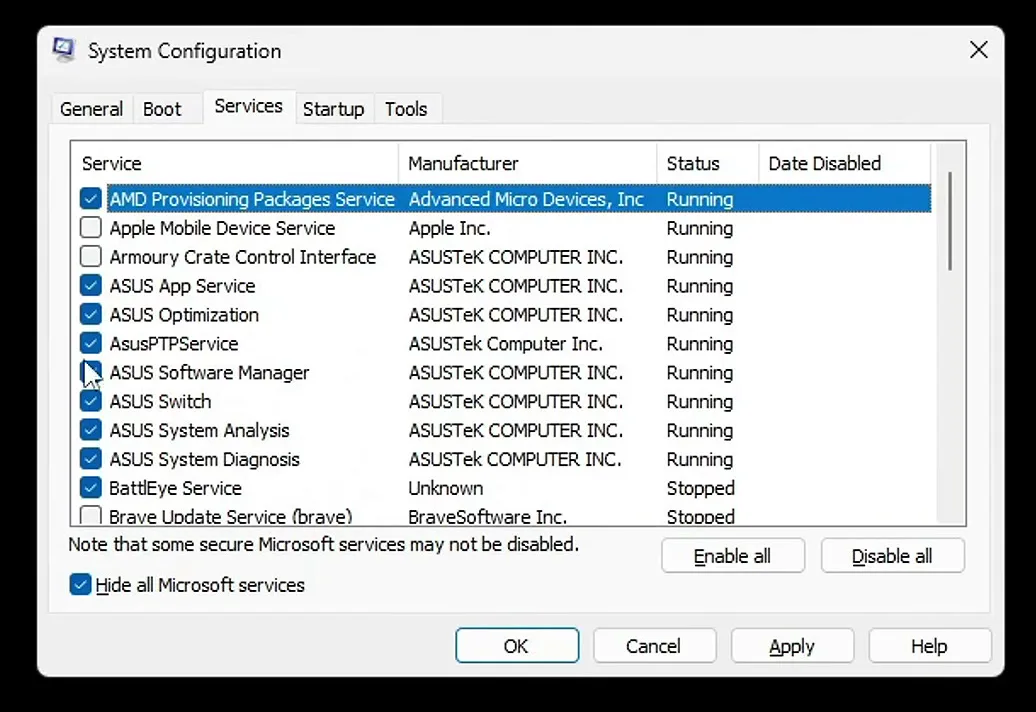
Press Windows + R, type msconfig and press Enter. Open the Services tab and tick Hide all Microsoft services. What is left was installed by other software.
Windows + RmsconfigServicesHide all Microsoft services
Disable all is there, but it can break a lot, so the video unticks only what it doesn't use: Armoury Crate, Apple services, browser services such as Google Chrome's, and tools like Samsung Magician. Then click Apply, OK and Restart.
Don't do this
Leave anti-cheat services ticked, such as BattlEye Service and Easy Anti-Cheat in this list. Games that use them won't start without them.
After the restart, open Task Manager again on the same CPU page. On the PC in the video it now shows 79 processes, about 120 fewer than the 198 at the start.
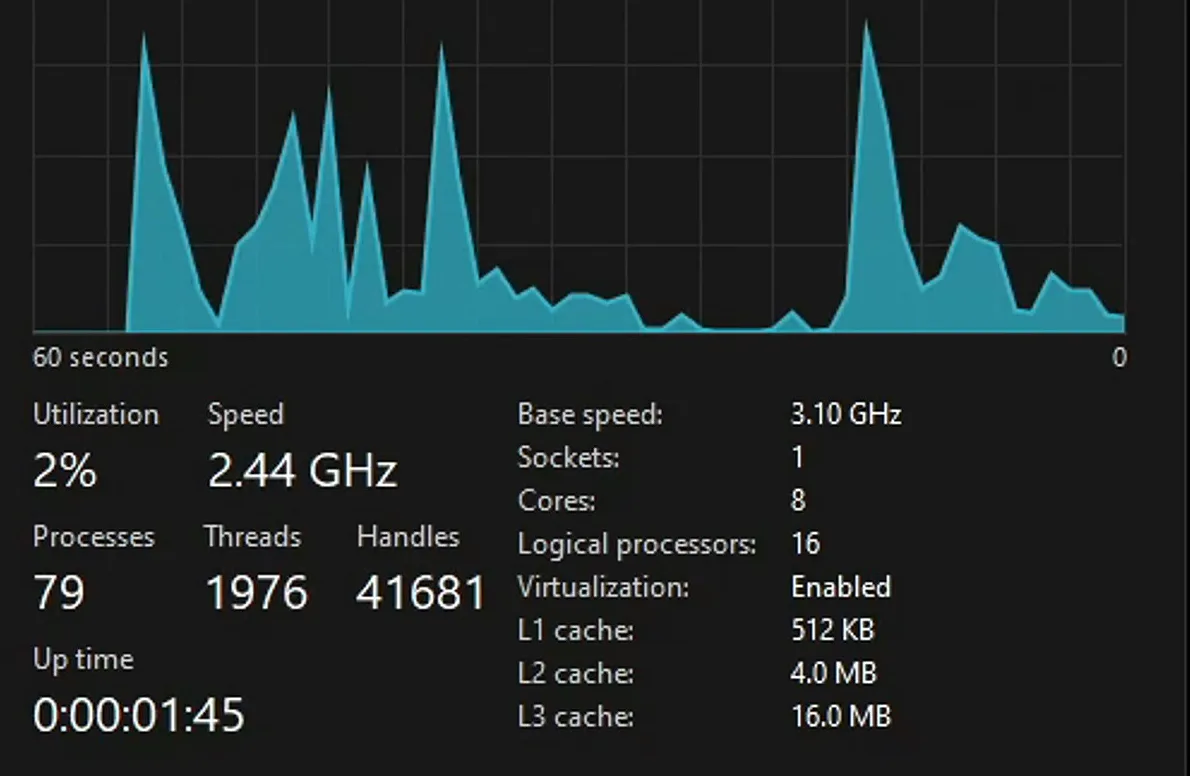
How low yours goes depends on what is installed, so compare against your own starting number, not ours.
How to check it worked
- Open Task Manager, Performance, CPU and compare the Processes number with the one you wrote down in the first step.
- Restart once more and check again. Something that comes back after every restart is still set to start with Windows or still has a service ticked in MSConfig.
- Start a game you play often, including one with anti-cheat, and make sure it launches and plays normally.
- Open the apps you kept, such as your browser or mouse software, to confirm they still work when you start them yourself.
How to undo it
To undo, switch any tweak off again in RIP Tweaks, or restore the Before RIP Tweaks backup. For services, open msconfig and click Enable all, or tick just the one you need.
Key settings at a glance
FAQ
How many background processes is normal on Windows 11?
There is no fixed number; it depends on your hardware and software. The PC in the video started at 198 and ended at 79. What matters is that the processes left are ones you actually use.
Does reducing background processes increase FPS?
It frees processor time and memory that background tasks were using, which typically helps most with stutter and uneven frames on busy PCs. The video shows the process count dropping from 198 to 79; how much your games gain depends on how loaded your PC was.
Is it safe to click Disable all in MSConfig?
The video advises against it, because it can break a lot of things, including software you rely on and anti-cheat. Tick Hide all Microsoft services and untick only services from software you don't use.
Is debloating Windows safe?
Basic debloat is labelled Safe and Recommended in the app and is reversible. Create the backup first, and in Custom leave Caution items alone unless you know you don't need them.
Will my apps still work after disabling startup programs?
Yes. Disable all only stops them from starting with Windows. Open them yourself whenever you need them.
Does this work on Windows 10?
Yes. RIP Tweaks has an Optimize Windows 10 button next to the Windows 11 one, and the MSConfig steps are the same on both.
How do I undo the changes?
Switch tweaks off one by one in RIP Tweaks or restore the backup you made at the start. In msconfig, Enable all turns every service back on.
What else can I tweak after this?
Our hidden Windows tweaks for gaming guide covers the next Windows settings to look at once your background processes are down.
 RIP Tweaks
Do it in a few minutes with RIP Tweaks
- Free plan for Windows 10 and 11
- A backup first, and every tweak can be switched off again
- Made for higher FPS, lower input lag and steadier ping
Free · Windows 10 and 11
