Valorant Optimization Guide: Boost FPS, Lower Input Lag and Ping (2026)

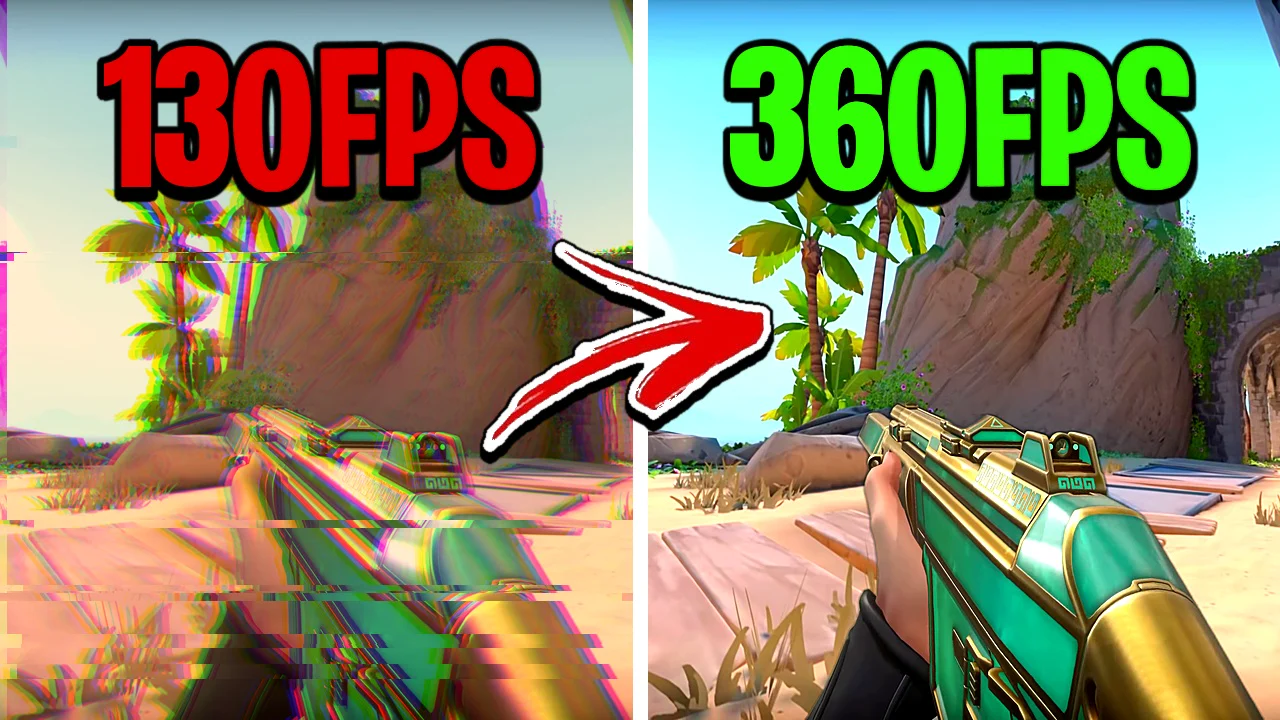
Written version of our video, every step checked against it.
Quick answer
- Install RIP Tweaks, create your account and make a backup before you change anything.
- Apply the Hardware and Windows tweaks, set Win32 Priority Separation to
26 hexand turn on the RIP Gaming Power Plan. - Debloat Windows, pick Cloudflare as custom DNS, run the Bufferbloat Test and set the Upload Limiter.
- Raise your mouse and keyboard polling rate to
1000 Hz, then launch Valorant from Games with its NVIDIA profile and a game mode. - In Valorant: Multithreaded Rendering On, everything else Low or Off, and NVIDIA Reflex Low Latency On + Boost.
This Valorant optimization guide is for anyone who wants more FPS, lower input lag and lower ping in Valorant on a Windows 10 or 11 PC. It follows our video step by step: the hardware and Windows tweaks, the debloat, the network and bufferbloat fixes, the polling rate, the Valorant game mode and the in-game settings. After a restart, the PC in the video ran Valorant at 900 to 1000 FPS.
In this video
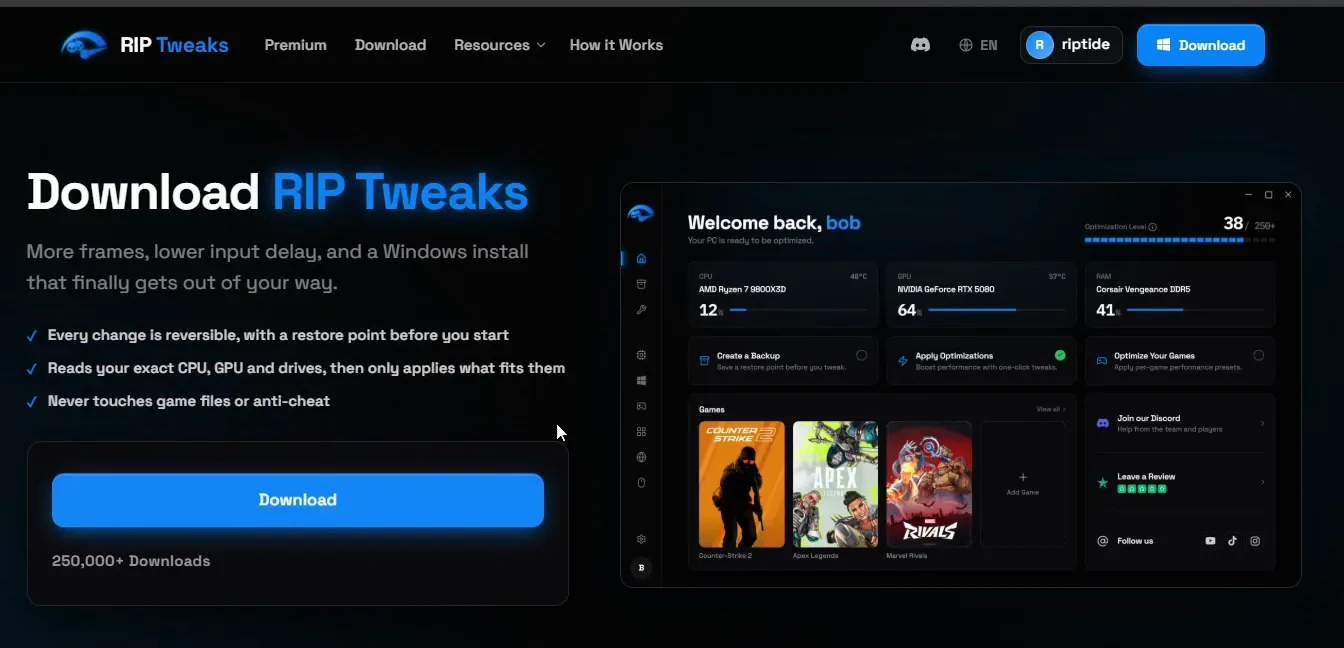
The video gets the installer from the RIP Tweaks Discord: type discord.gg/riptweaks into your browser, join the server, open the free tweaks channel and click Download RIP Tweaks. The same download is on the riptweaks.com download page. Save the file, run the installer and wait until it has fully finished.
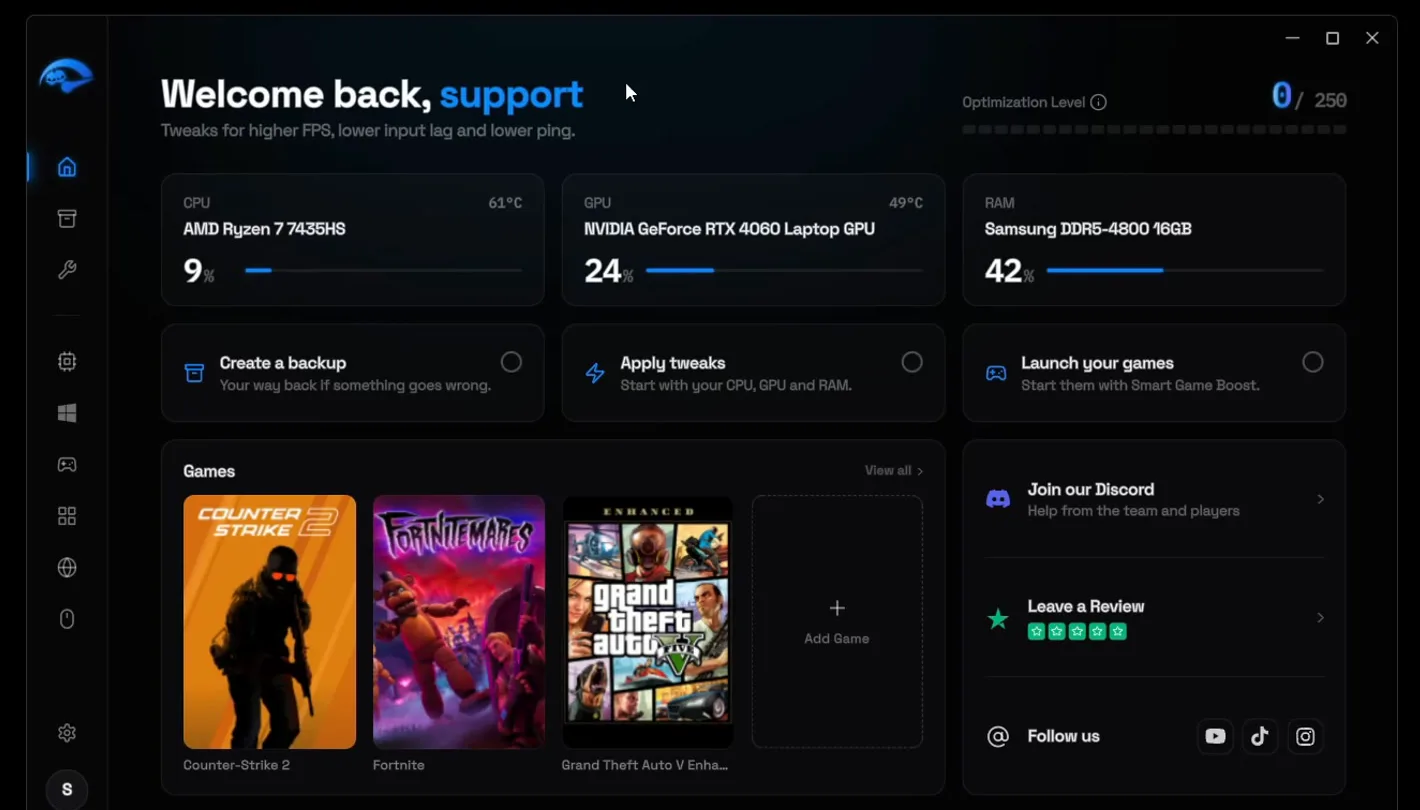
When the app opens, type a username, your email and a password and click Create Account. Then go to Backups and create a new backup. The video names it "Before RIP Tweaks", clicks Continue and waits until it is done.
BackupsCreate backupContinue
Good to know
The backup saves your Windows settings and drivers as they are now (not your files). If anything feels off later, restore it from the same Backups page.
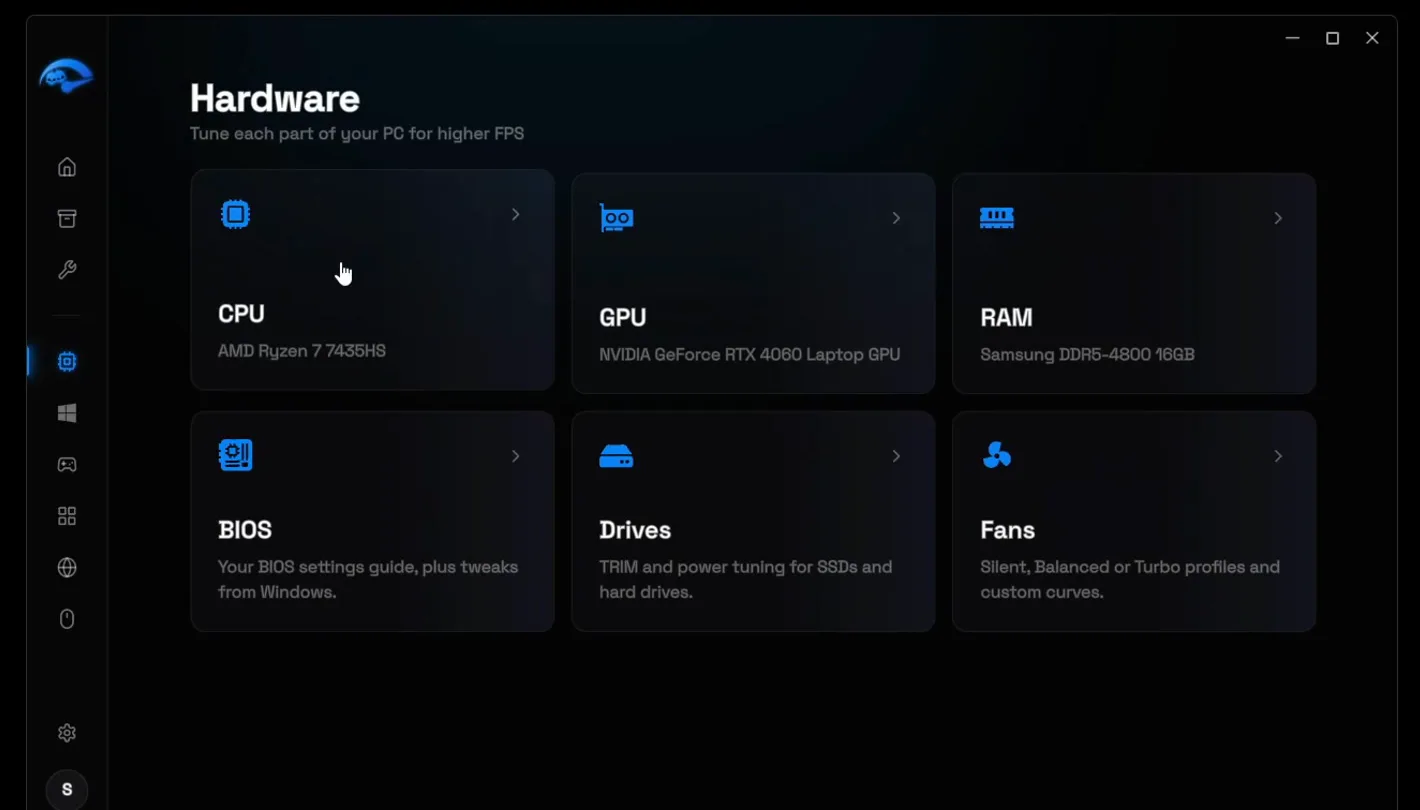
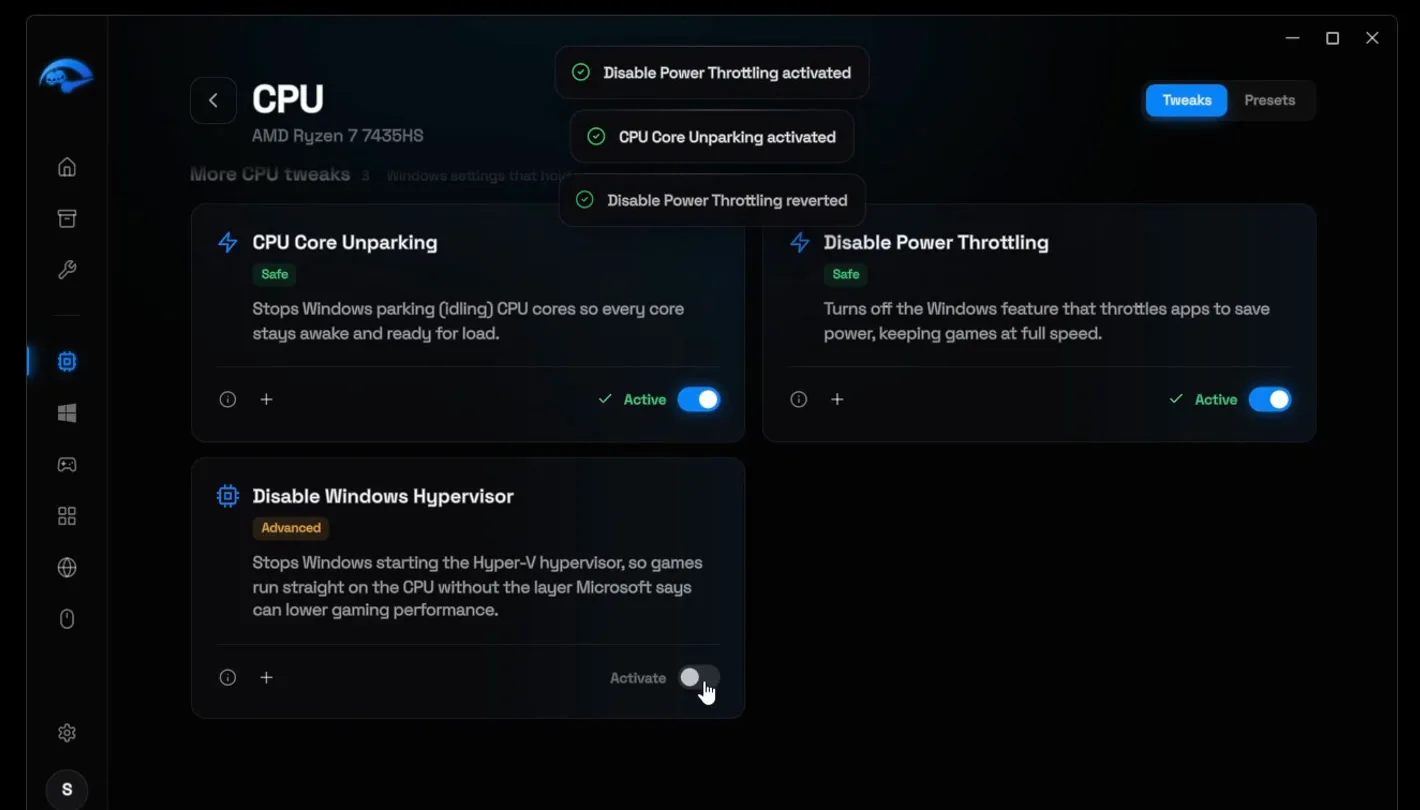
Open Hardware. The app detects your parts, so each card only shows the tweaks for your hardware: the PC in the video has an AMD processor, so the CPU page shows the AMD tweaks and nothing else. Intel and AMD graphics cards get their own GPU tweaks the same way.
- CPU: click Activate on the main CPU tweak, then turn on CPU Core Unparking, Disable Power Throttling and Disable Windows Hypervisor.
- GPU: the video turns on every NVIDIA tweak on the page.
- RAM: optimize for the amount you have (16 GB in the video).
- BIOS: one tweak, BIOS Tweaks, which works from Windows with no BIOS menu.
- Drives: all the SSD tweaks. With a hard drive, the hard drive tweaks show up instead.
For a deeper look at the BIOS side, see our Intel and AMD BIOS settings guide.
Now the software side. Open Windows, activate Windows 11 Optimization, then turn on the system tweaks under it: Disable Background Apps, Disable Storage Sense, Disable Hibernation, Disable Fullscreen Optimizations and the rest. After that, disable your startup apps, so nothing you don't need starts with your PC.
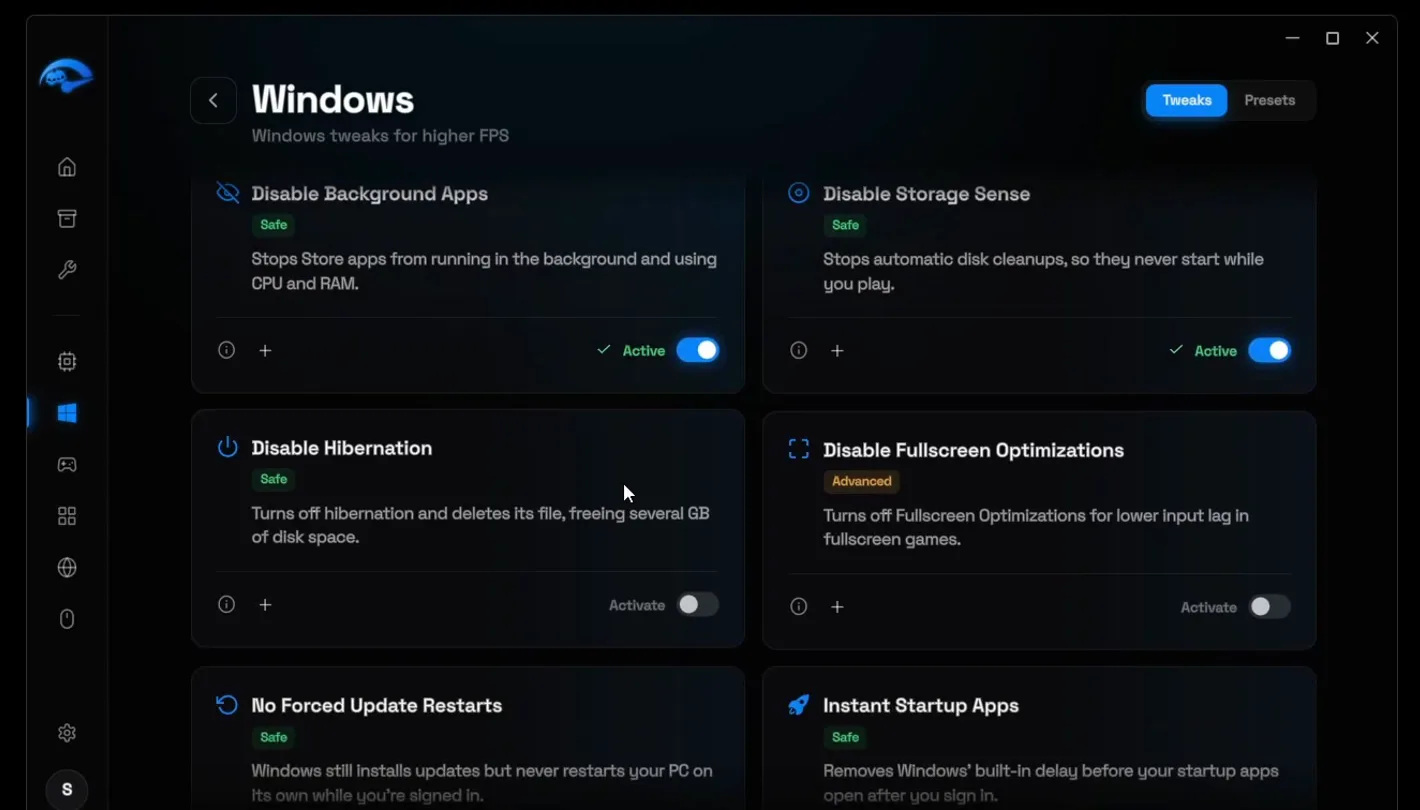
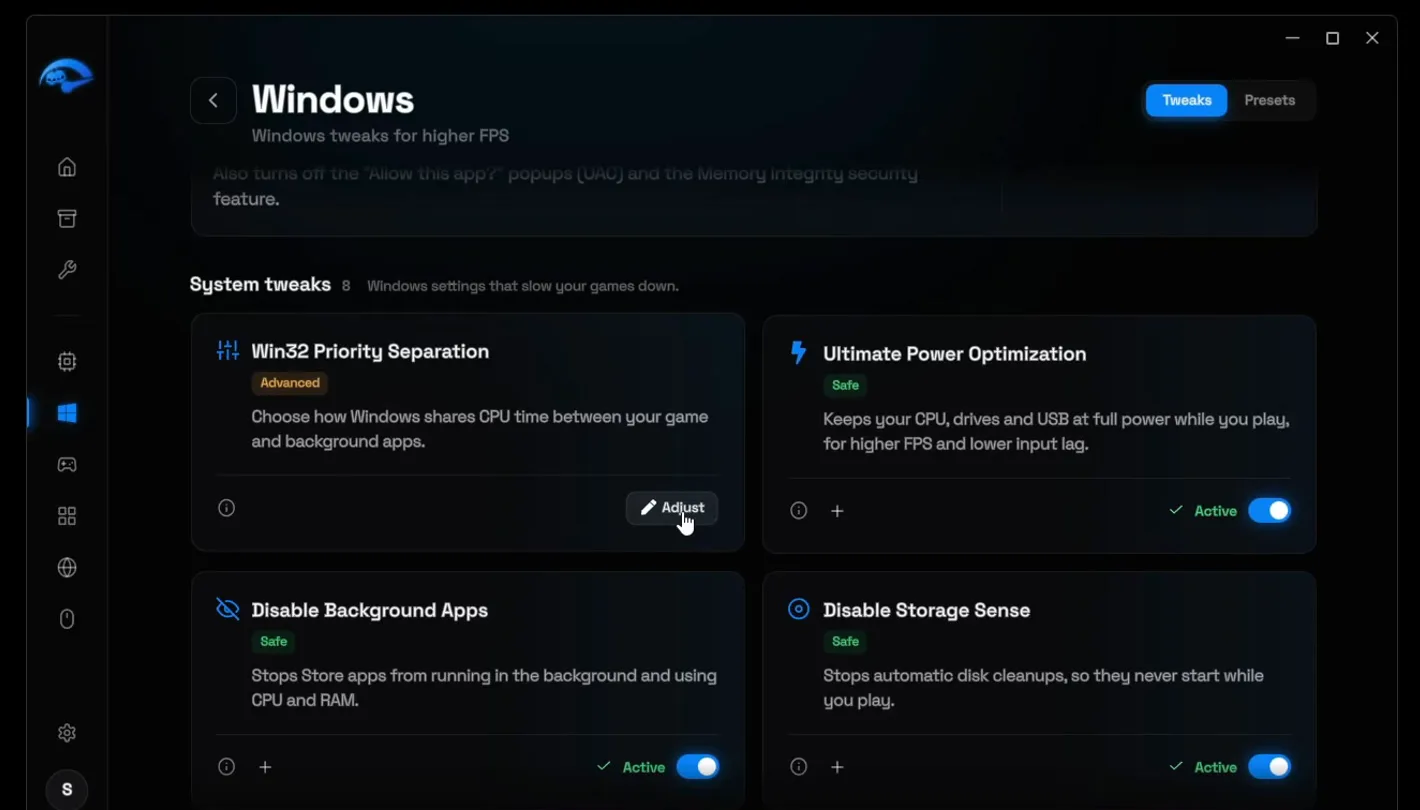
Scroll back up to Win32 Priority Separation, click Adjust, choose 26 hex and click Apply. This setting decides how Windows shares CPU time between your game and background apps.
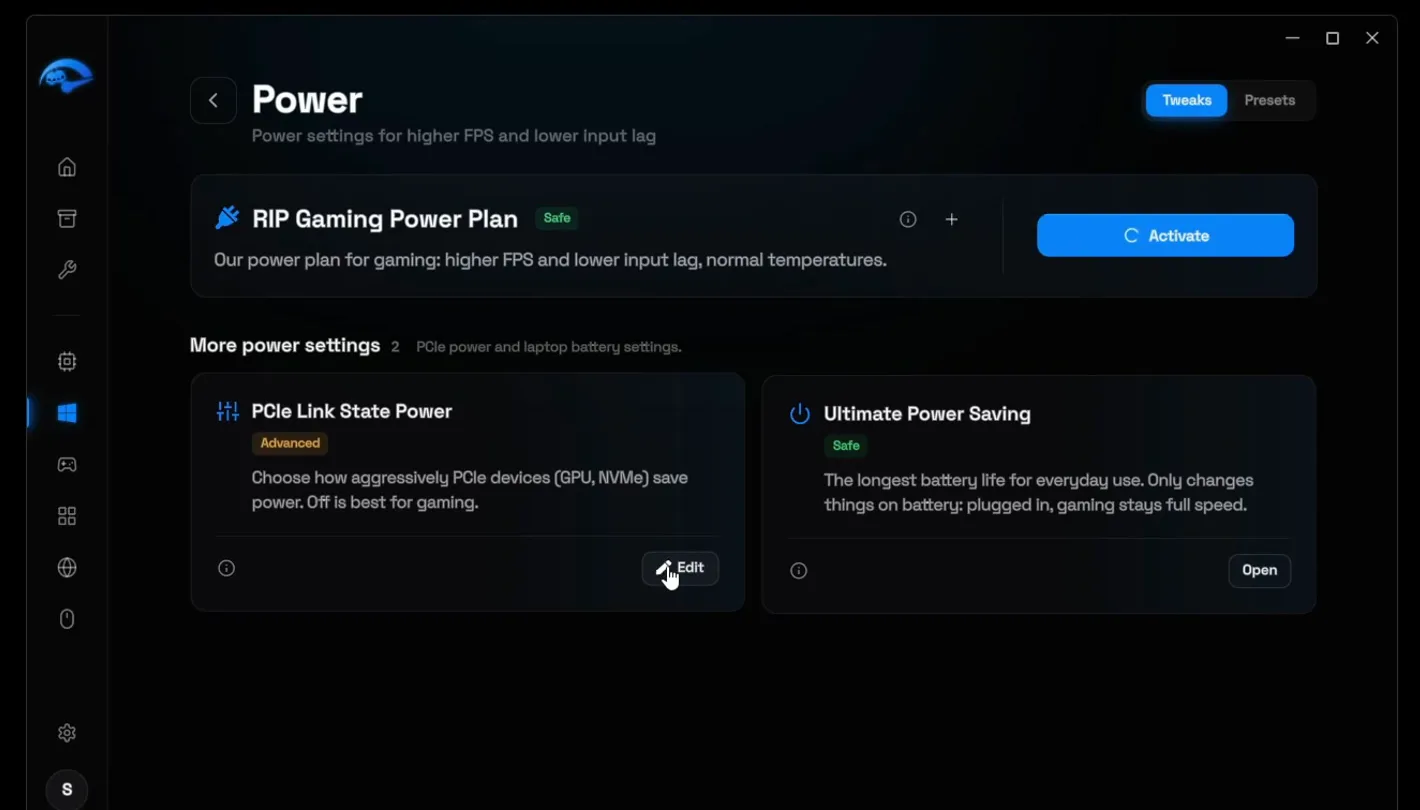
Then open Power and activate the RIP Gaming Power Plan. Under it, click Edit on PCIe Link State Power, pick Off and apply: the app itself notes that Off is best for gaming.
WindowsWin32 Priority SeparationAdjust26 hexApply
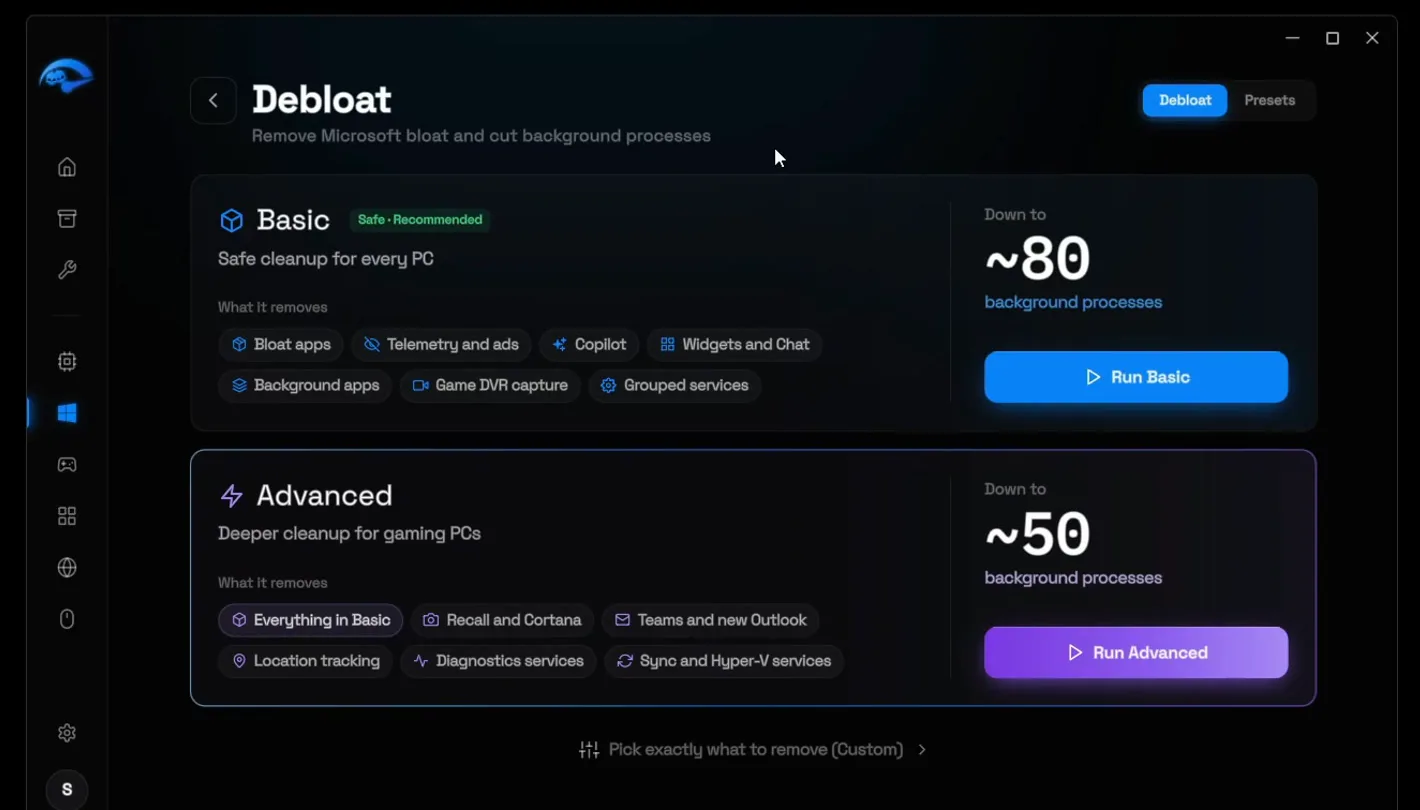
Go to the Debloat section. It removes what Windows installs for you and keeps running in the background, like Solitaire, Get Help and People. On unoptimized Windows the video counts around 163 processes; the page shows that Basic brings it down to about 80 and Advanced to about 50. Basic is free, Advanced is for Premium.
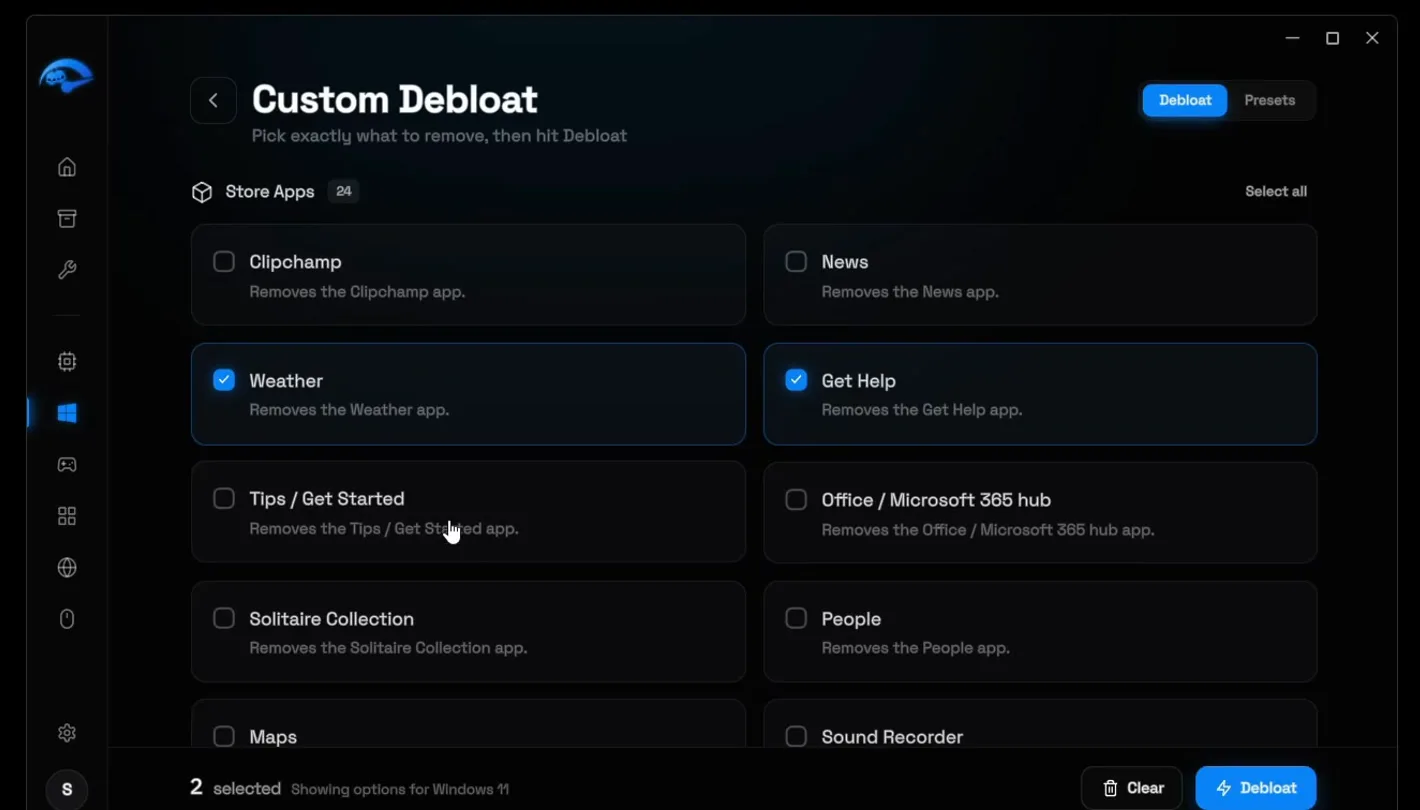
You can also click Pick exactly what to remove (Custom) and tick only what you want gone, for example Weather and Get Help but not Office. Lower down are telemetry and privacy, AI and Copilot, Recall, and services such as the Xbox services and Delivery Optimization. Click Debloat, confirm and wait: in the video, 23 items were removed.
Careful
Some Custom Debloat items carry a Caution label, such as Disable printing or Disable Bluetooth. Leave those unticked if you print or use a Bluetooth headset, mouse or keyboard.
More on this in our guide to reducing background processes.
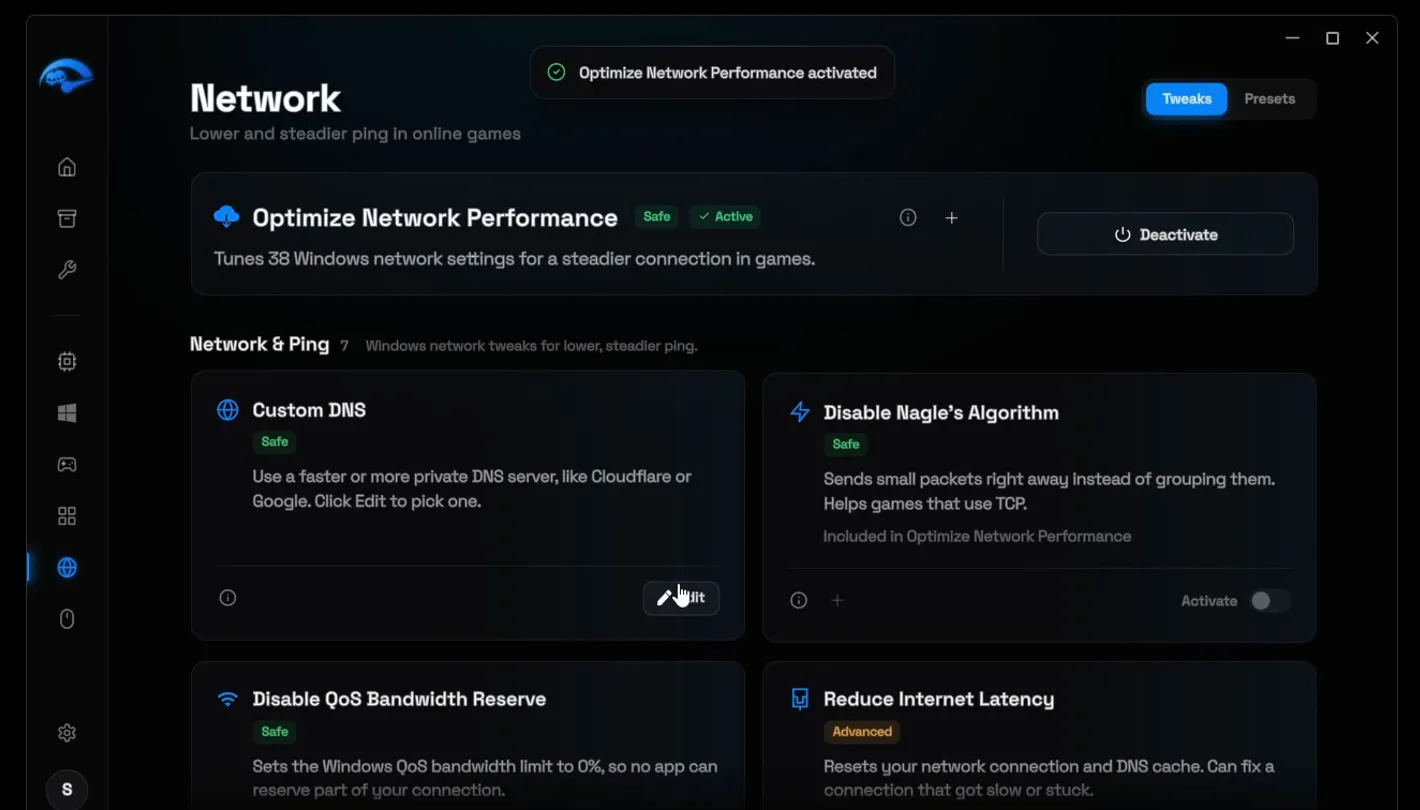
Open Network and activate Optimize Network Performance, which tunes 38 Windows network settings. Then click Edit on Custom DNS and pick the fastest server: in the video that is Cloudflare. Click apply and the app confirms Cloudflare is set.
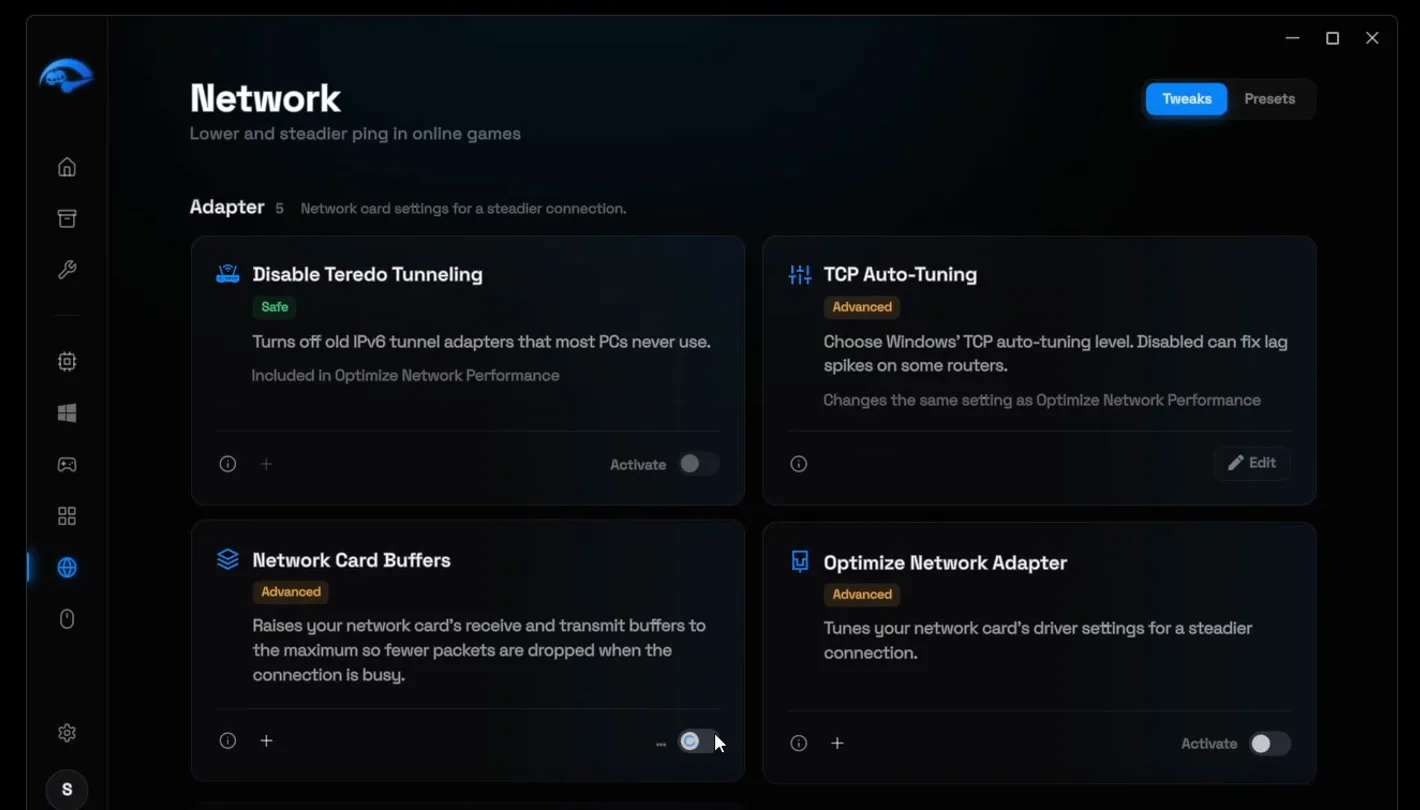
Apply the other tweaks on the page as well. Set Network Throttling Index to Disabled, activate Wi-Fi Gaming Session, then scroll down and apply the adapter tweaks, including TCP Auto-Tuning.
NetworkCustom DNSEditCloudflareApply
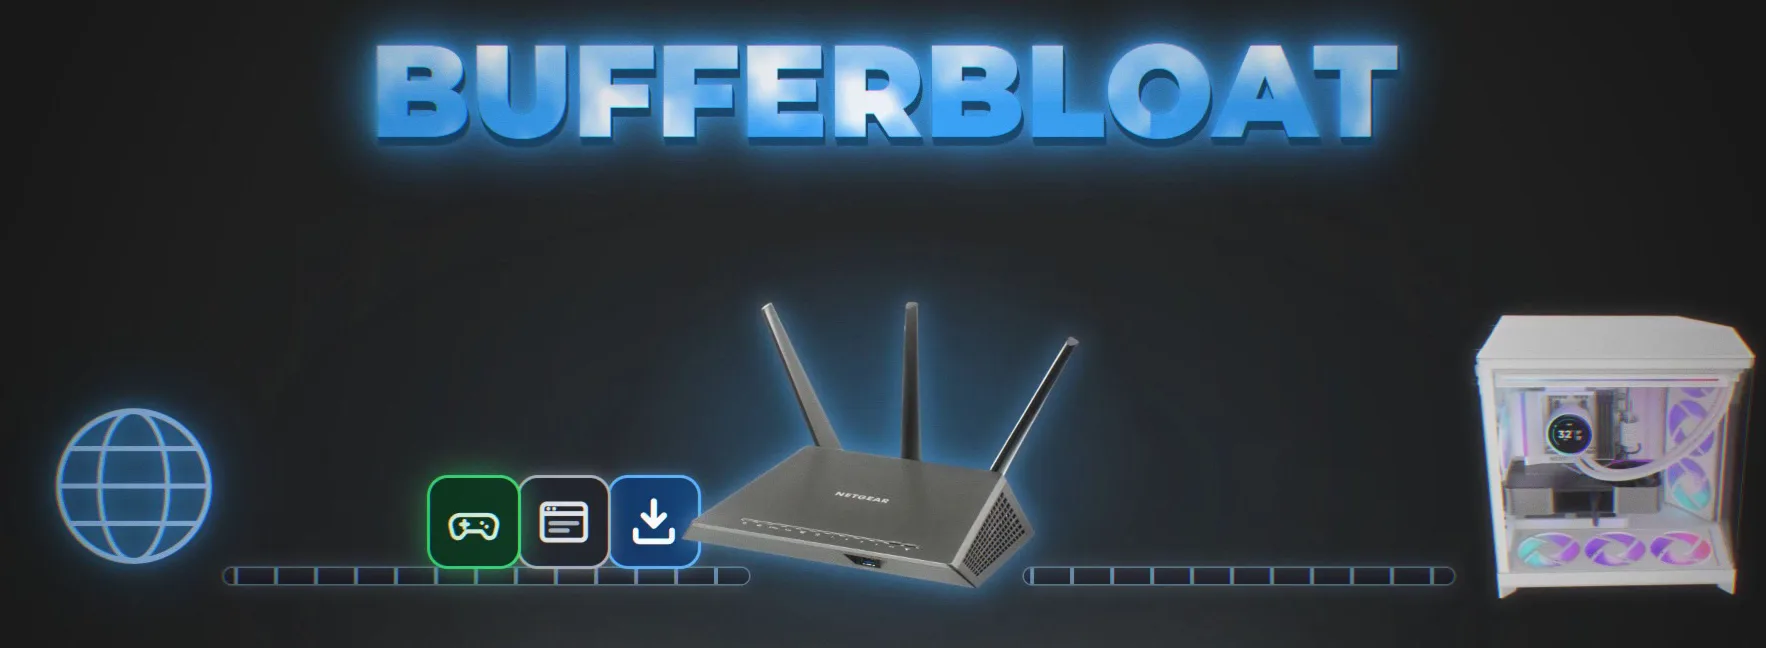
Bufferbloat is your ping rising when the connection is busy. If someone on your network watches Netflix or downloads something, everything queues at the router, and your game always comes last in that line.
The fix in the video is an upload limit. RIP Tweaks measures your real upload speed and sets Windows a little under your line's limit, so your PC never floods the router with upload requests. No long line forms, and your game packets don't wait behind everything else.
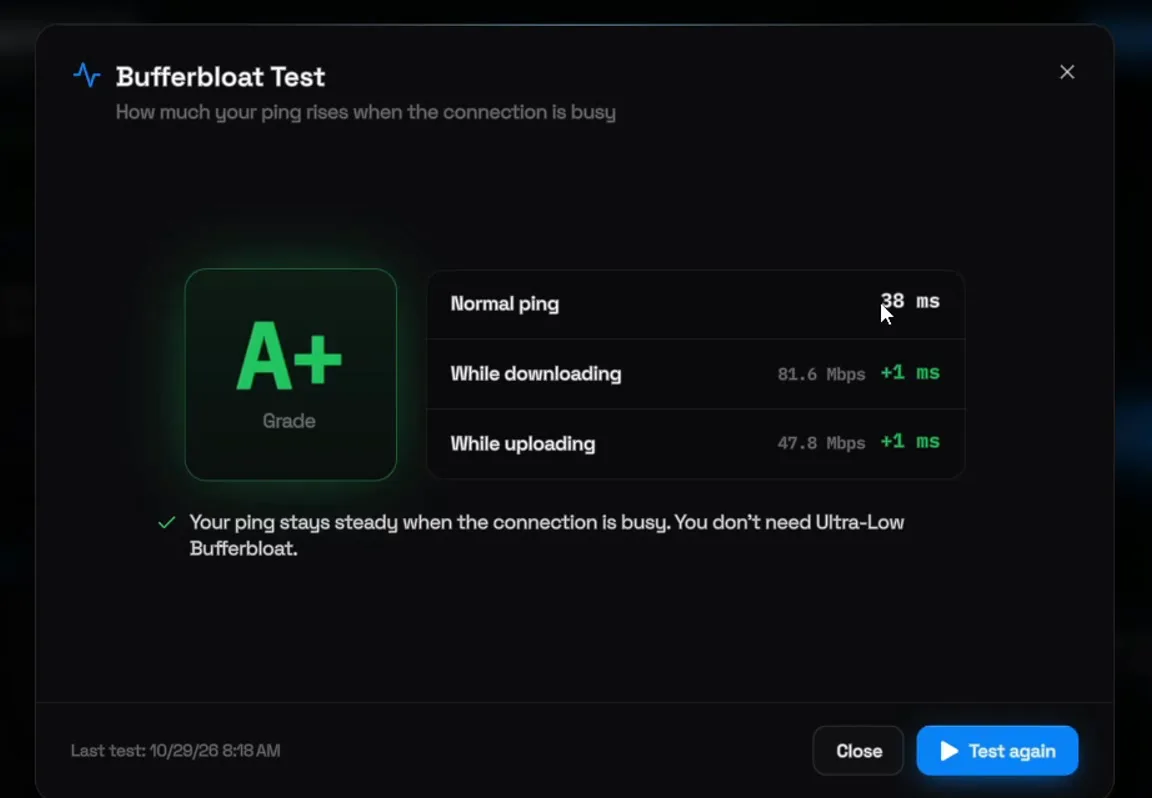
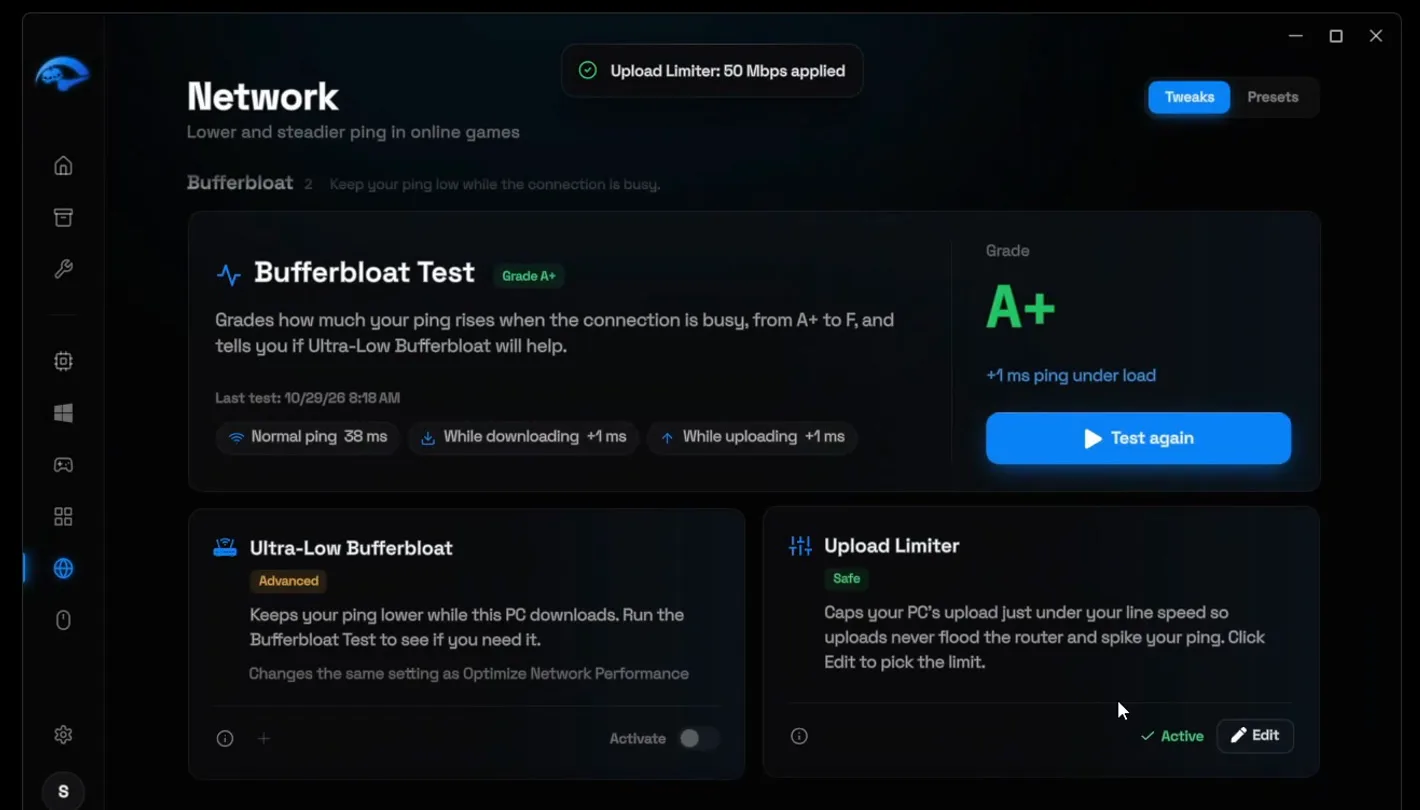
In the Bufferbloat group, click Run test. It takes about 20 seconds and measures your normal ping, your ping while downloading and your ping while uploading, then gives a grade from A+ to F. The PC in the video gets A+ (38 ms, only +1 ms under load) because it is on Ethernet and already optimized. With a grade from C to F, activate Ultra-Low Bufferbloat; with A+ the app doesn't let you, because you don't need it.
Next, look at the upload result of the test (47.8 Mbps in the video) and open Upload Limiter. Pick the nearest number above it, which is 50 in the video, and click Apply.
Tip
Run the test before you set the limiter: the number you pick comes from your own upload result. Our bufferbloat guide goes deeper into the grades.
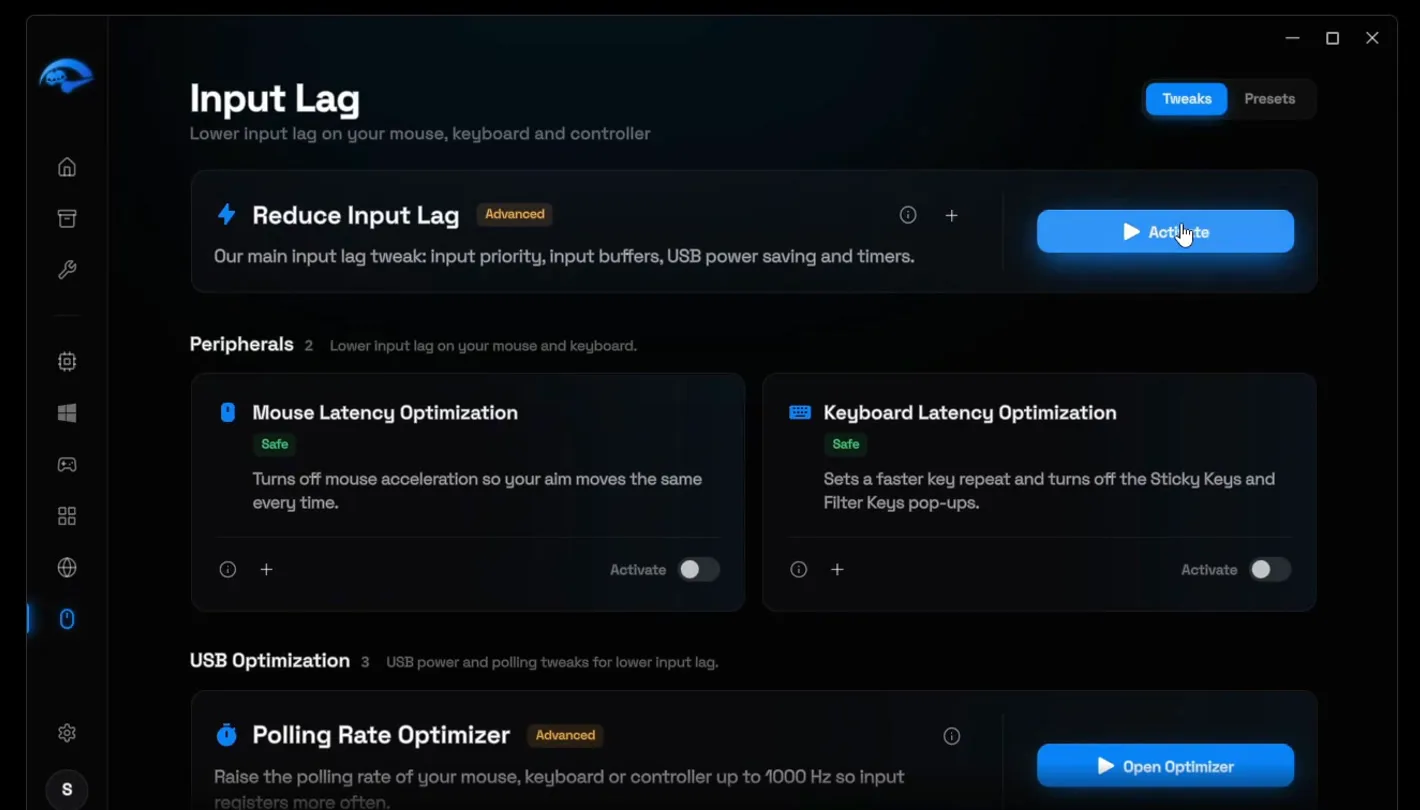
Open Input Lag and activate Reduce Input Lag, then the two peripheral tweaks: Mouse Latency Optimization and Keyboard Latency Optimization.
Polling rate is how often your mouse and keyboard report to your PC. Most sit at around 500 Hz, which means every 2 milliseconds; 1000 Hz sends it every 1 millisecond. That sounds tiny, but the video calls it the most important thing you can do for input lag, because you can feel it. Click Open Optimizer on Polling Rate Optimizer, apply the two tweaks it shows (1000 Hz), close it, then activate USB Port Optimization.
Input LagPolling Rate OptimizerOpen Optimizer1000 Hz
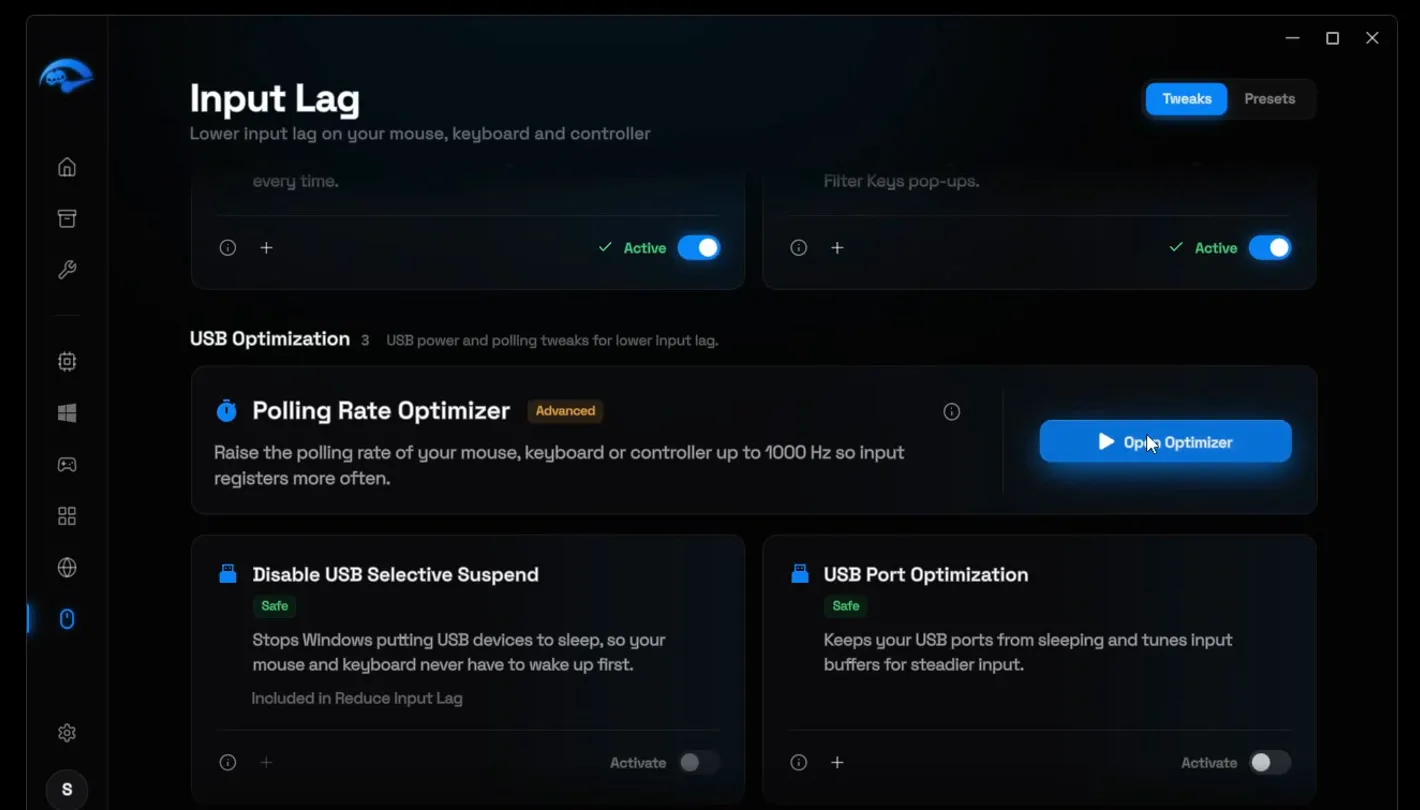
For more on the mouse side, see mouse polling rate and Enhance Pointer Precision.
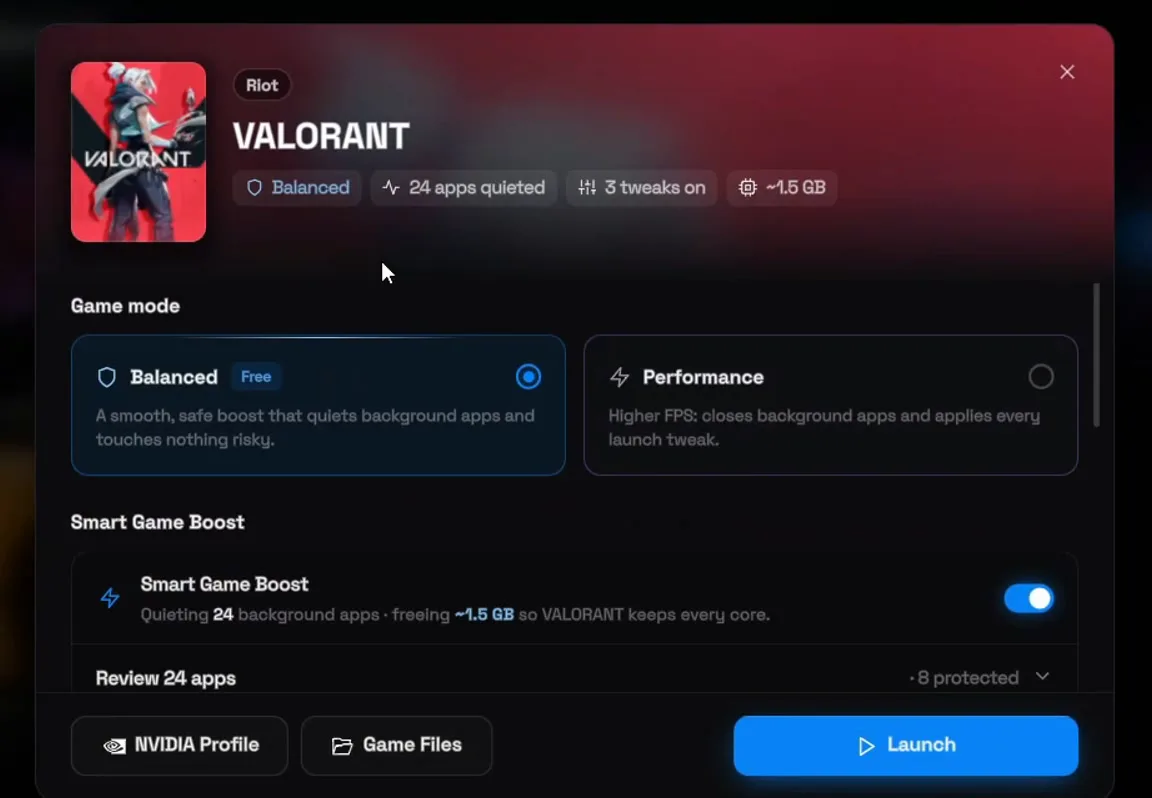
Go to Games and click VALORANT in your library. If you have an NVIDIA graphics card, click NVIDIA Profile at the bottom of the window. It uses Profile Inspector: click Next, choose the desktop FPS profile on a desktop (the laptop profile on a laptop), apply it and click Finish.
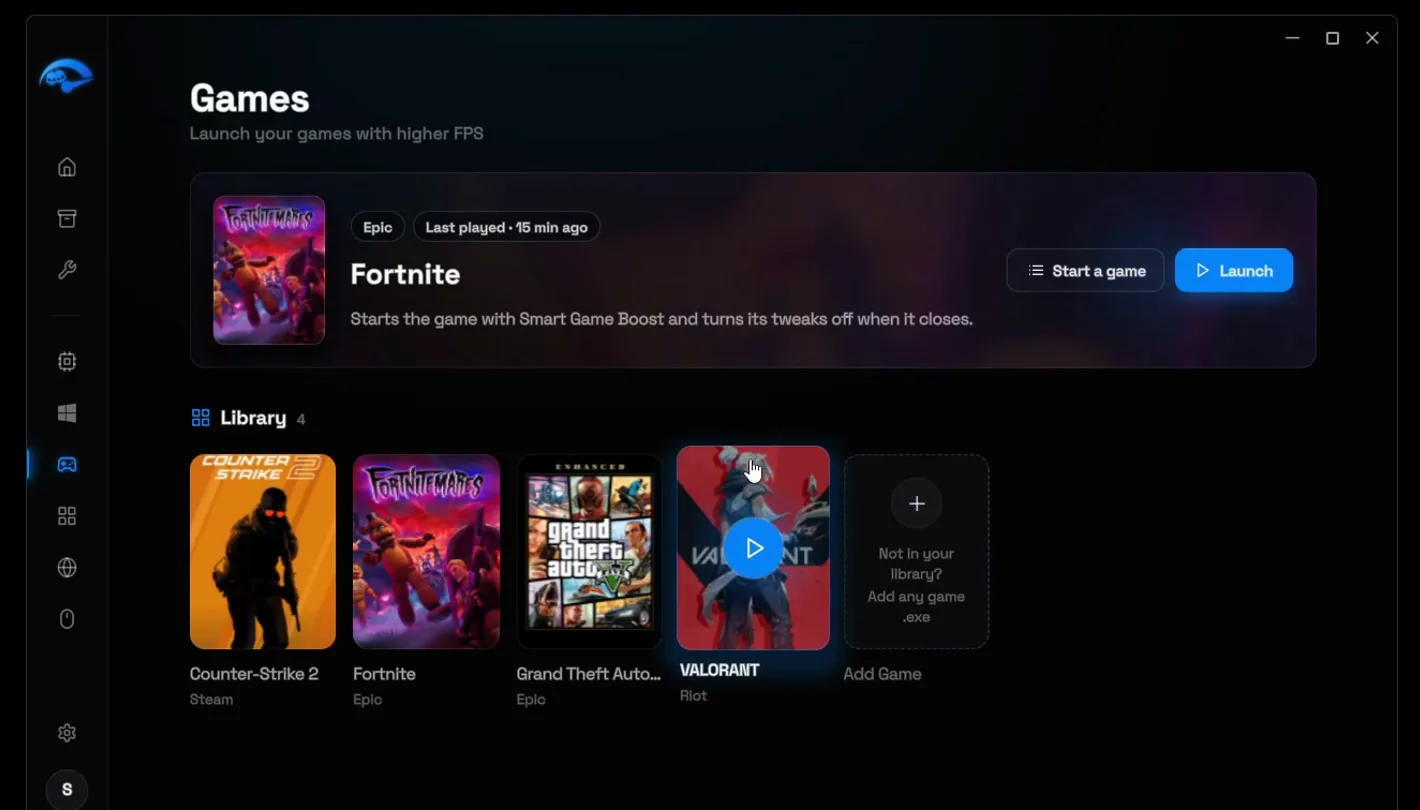
Our NVIDIA settings guide covers the driver side in full.
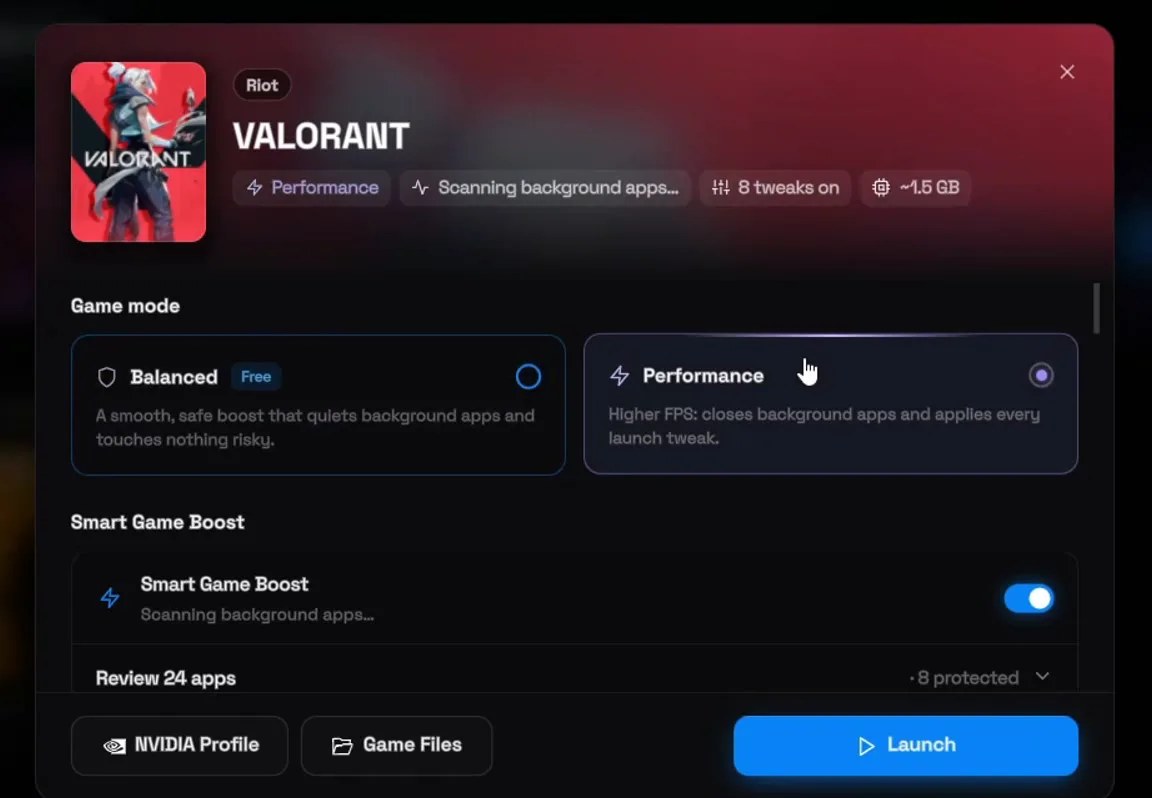
In the same window, choose the Game mode. Balanced is free: it quiets your background apps so Valorant stays on top and gets the most from your PC. Think Epic services, Logitech or TeamViewer helpers: things you don't use while gaming but that still take performance. On the PC in the video it quiets 24 apps and frees about 1.5 GB.
It also applies tweaks to the Valorant process itself: GPU Priority, I/O Priority and Purge RAM Cache. You can turn on Pause Windows Update too, because updates downloading in the background can spike your ping.
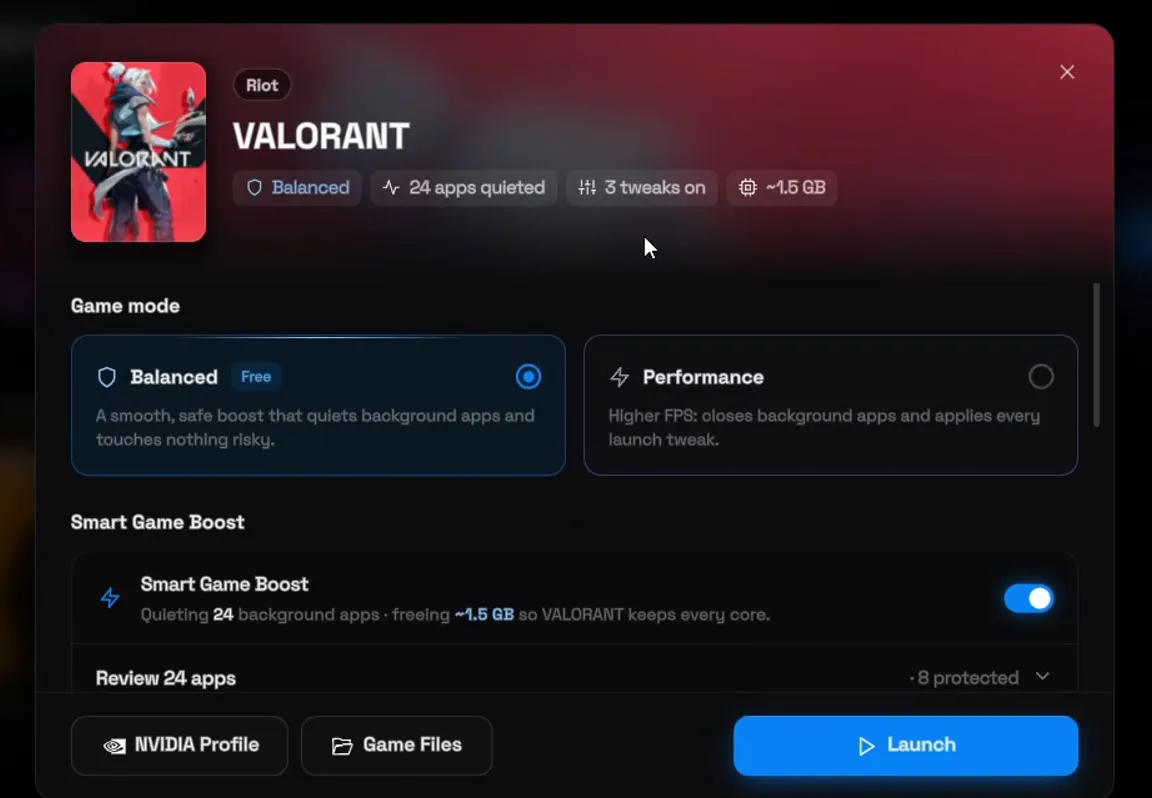
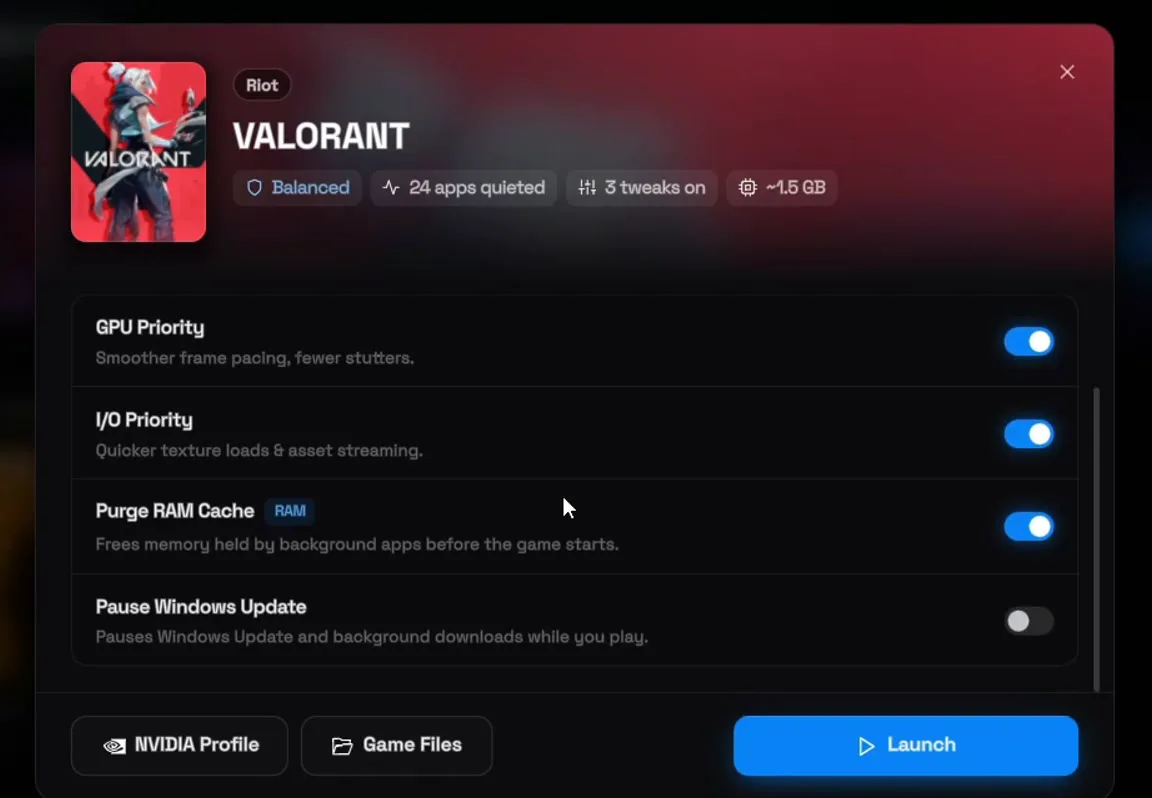
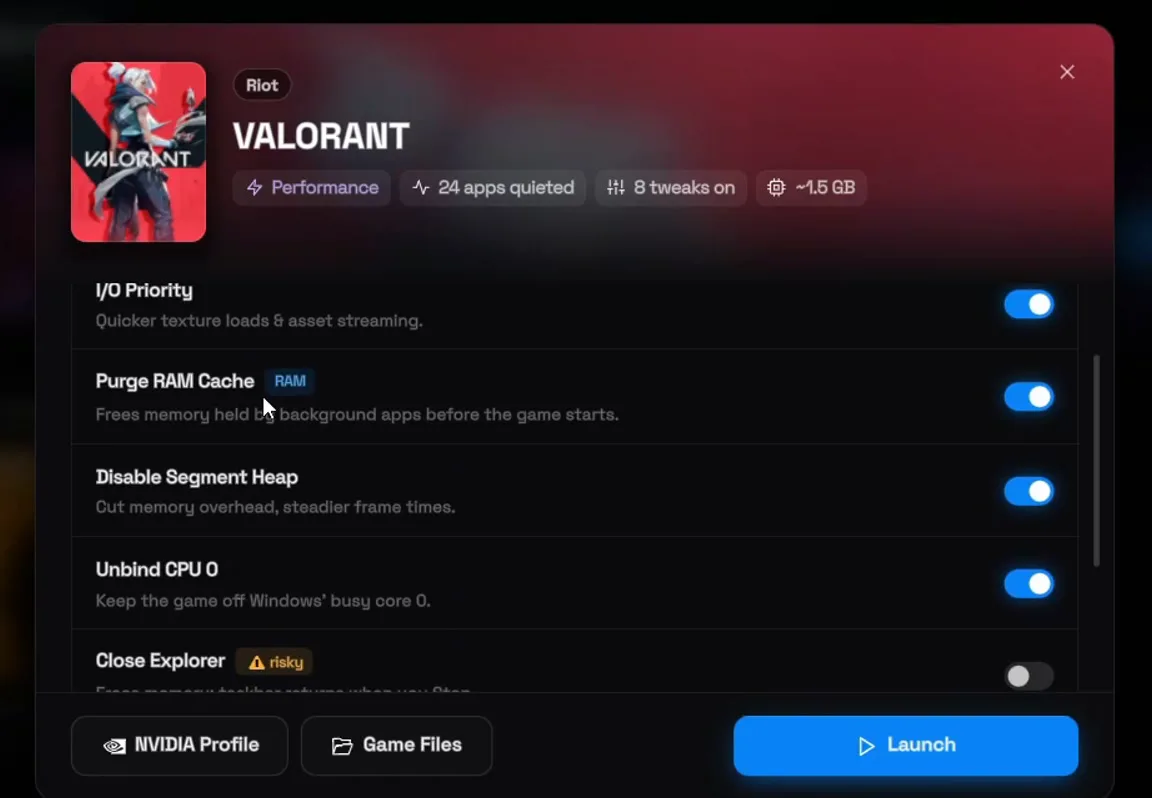
Performance is the Premium mode. It closes background apps and applies every launch tweak, including Unbind CPU 0, which keeps the game off the core Windows is busiest on and which the video rates as one of the strongest FPS tweaks, plus max timer resolution and more freed background apps. In the video it turns on 8 tweaks instead of 3. Pick Balanced or Performance and click Launch.
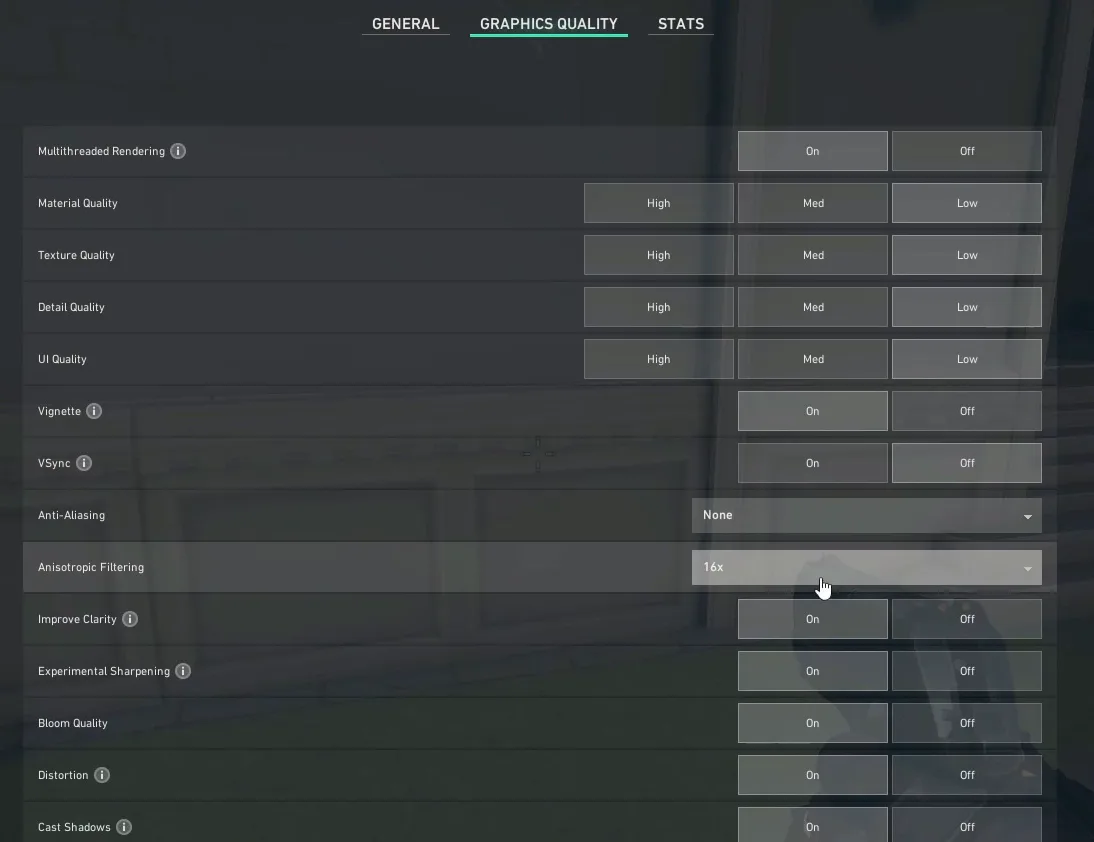
In Valorant, open Settings, then Video, then Graphics Quality. Make sure Multithreaded Rendering is On. Set Material, Texture, Detail and UI Quality to Low: the video says it makes no visible difference and even helps you spot enemies. Turn off Vignette, set Anti-Aliasing to None and Anisotropic Filtering to 1x, and turn off the cosmetic options below them.
Then switch to Video, General. Use Fullscreen, turn off Limit FPS on Battery, Limit FPS in Menus, Limit FPS in Background and Limit Framerate Always, and set NVIDIA Reflex Low Latency to On + Boost.
SettingsVideoGeneralNVIDIA Reflex Low LatencyOn + Boost
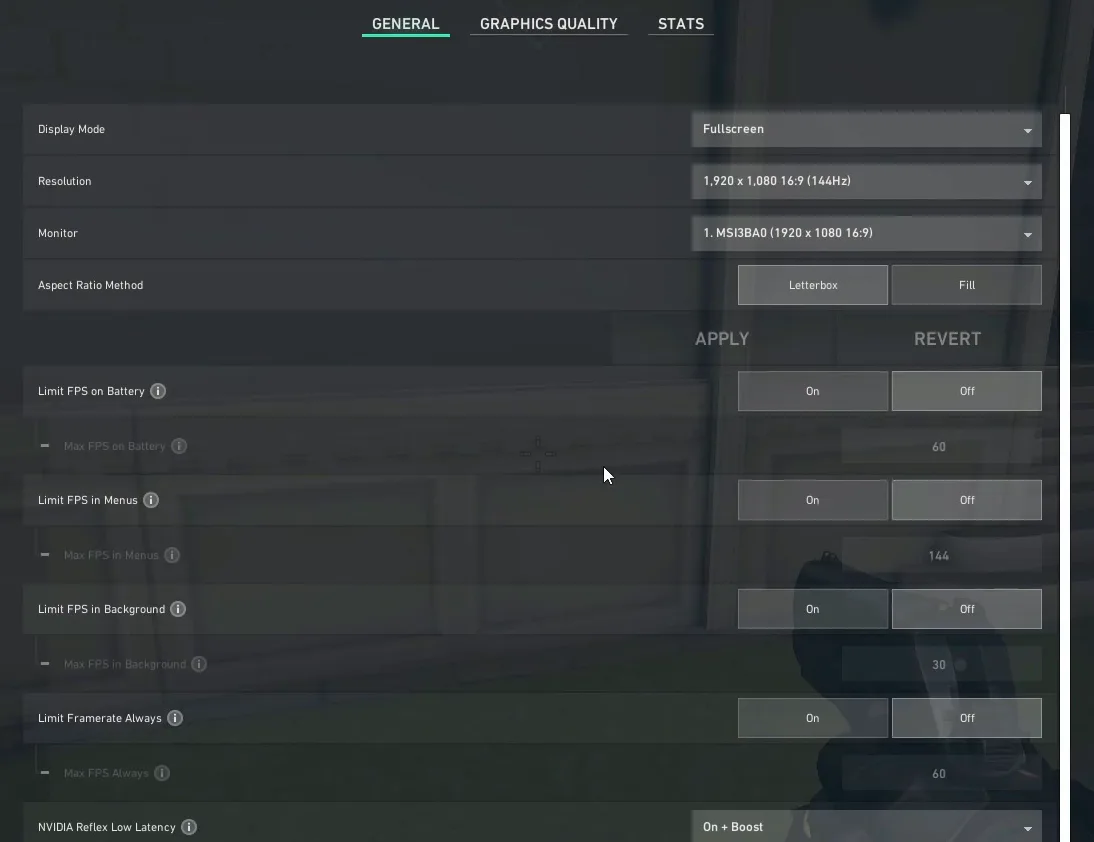
Want the reasoning behind each in-game option? Our best Valorant settings for FPS page goes through them one by one.
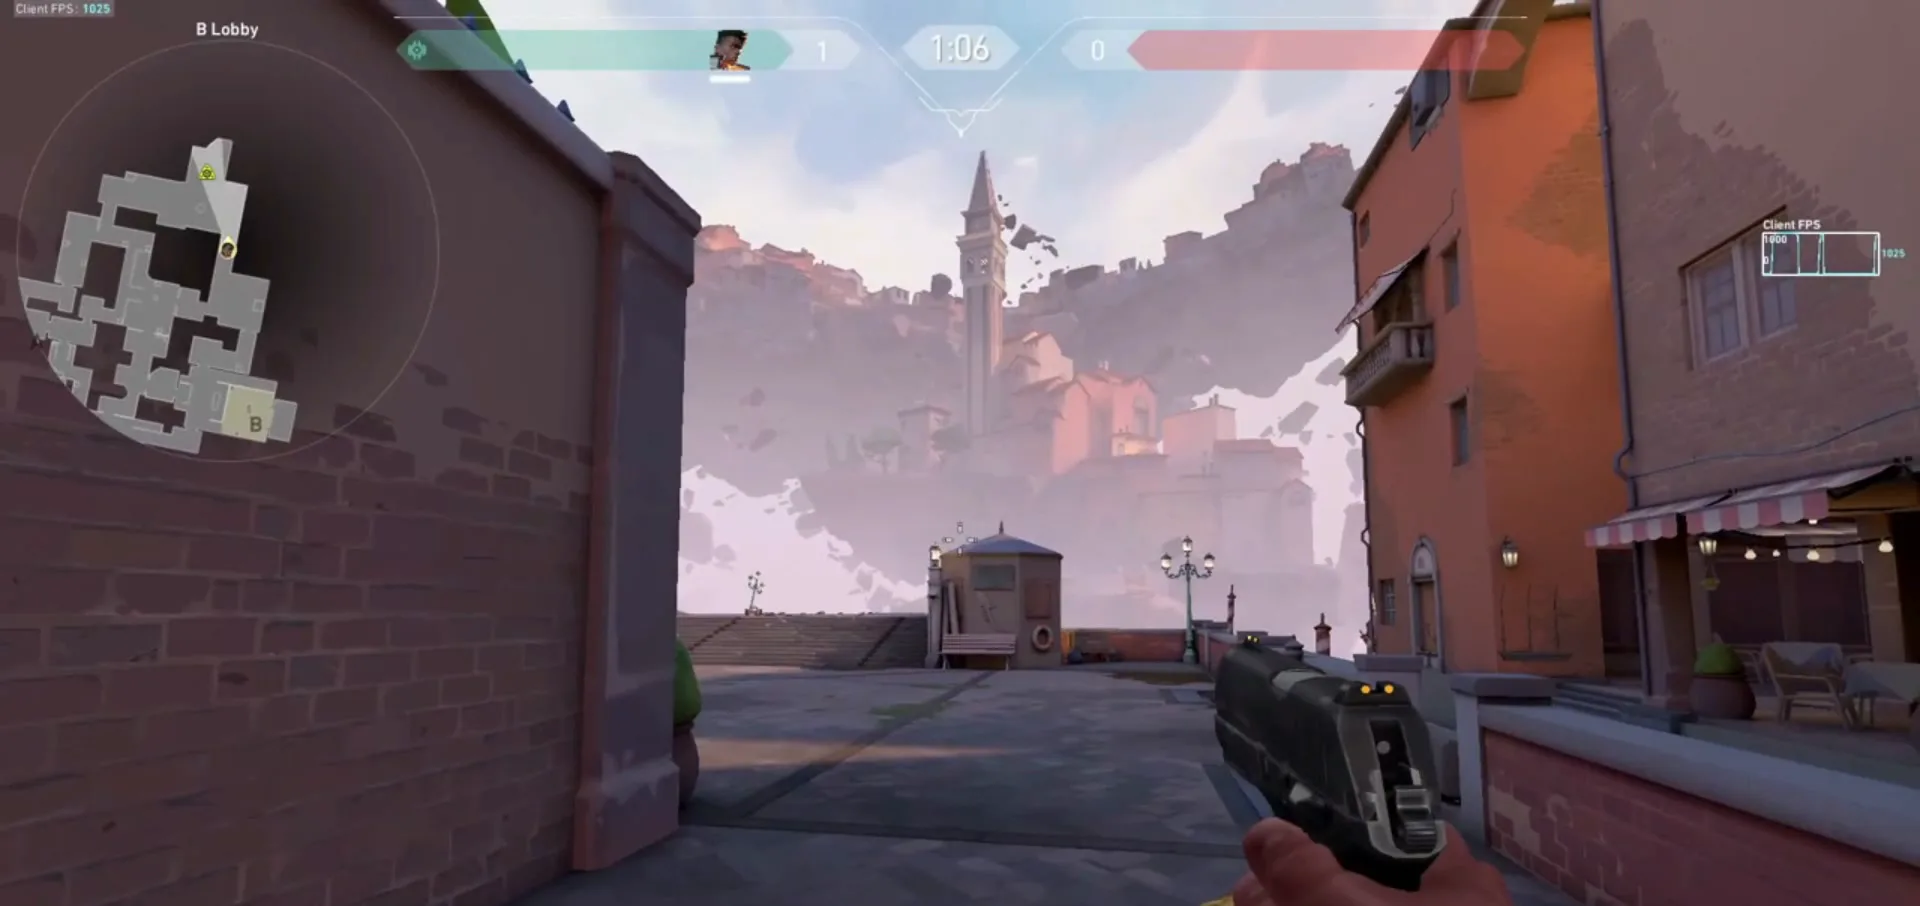
Restart your PC so every tweak is active, then load into Valorant. On the PC in the video, the FPS counter sits at 900 to 1000 FPS, which the video calls double the FPS it had before RIP Tweaks. Your number depends on your hardware, but the order of the steps stays the same.
How to check it worked
- Turn on Valorant's FPS counter (Settings, Video, Stats, Client FPS) and play the same map before and after, so you compare like with like.
- Run the Bufferbloat Test again: your ping while uploading should stay close to your normal ping.
- Open the Valorant window in Games: the top shows your mode, how many apps were quieted and how many tweaks are on.
- In Task Manager, the process count should be well below what you had before the debloat.
How to undo it
Every tweak has its own switch: turn any of them off again with one click. To go back to how your PC was before, restore the "Before RIP Tweaks" backup from the Backups page.
Key settings at a glance
FAQ
How do I boost FPS in Valorant?
Do it in two parts, as in the video. First the PC: hardware and Windows tweaks, Win32 Priority Separation at 26 hex, the RIP Gaming Power Plan and a debloat. Then the game: Multithreaded Rendering On, every quality setting Low, no FPS limits and NVIDIA Reflex On + Boost. The PC in the video reached 900 to 1000 FPS after a restart.
What are the best Valorant settings for FPS?
The video uses Multithreaded Rendering On; Material, Texture, Detail and UI Quality Low; Vignette Off; Anti-Aliasing None; Anisotropic Filtering 1x; the cosmetic options off; Fullscreen; every Limit FPS option Off; and NVIDIA Reflex Low Latency On + Boost.
Should I use NVIDIA Reflex On or On + Boost?
The video sets On + Boost and says to keep it there at all times. Reflex is about input lag: it keeps the delay between your click and the frame on screen as low as possible.
Should Multithreaded Rendering be on in Valorant?
Yes. It is the first thing the video checks in the Graphics Quality tab, and it stays On while almost everything else goes to Low or Off.
How do I lower my ping in Valorant?
In the video: activate Optimize Network Performance, set Cloudflare as custom DNS, disable the Network Throttling Index, apply the adapter tweaks, then run the Bufferbloat Test. With a C to F grade, turn on Ultra-Low Bufferbloat and set the Upload Limiter just above your measured upload speed. Pausing Windows Update in the game window also stops downloads from spiking your ping mid-match.
Which parts are free and which need Premium?
Everything in this guide is free except two choices the video points out: the Advanced debloat (down to about 50 processes) and the Performance game mode with Unbind CPU 0. Basic debloat and the Balanced game mode are free.
Can I undo the tweaks?
Yes. Each tweak has its own switch, so you can turn any one off again. The backup you make in step 2 brings your Windows settings and drivers back to how they were before.
Does this work on Windows 10?
Yes. RIP Tweaks officially supports Windows 10 and 11, as its sign-up screen says, and the app only shows the tweaks that fit your PC. The video was made on Windows 11.
 RIP Tweaks
Do it in a few minutes with RIP Tweaks
- Free plan for Windows 10 and 11
- A backup first, and every tweak can be switched off again
- Made for higher FPS, lower input lag and steadier ping
Free · Windows 10 and 11
