VALORANT Act 6 Best Settings and PC Tweaks for More FPS (2026)

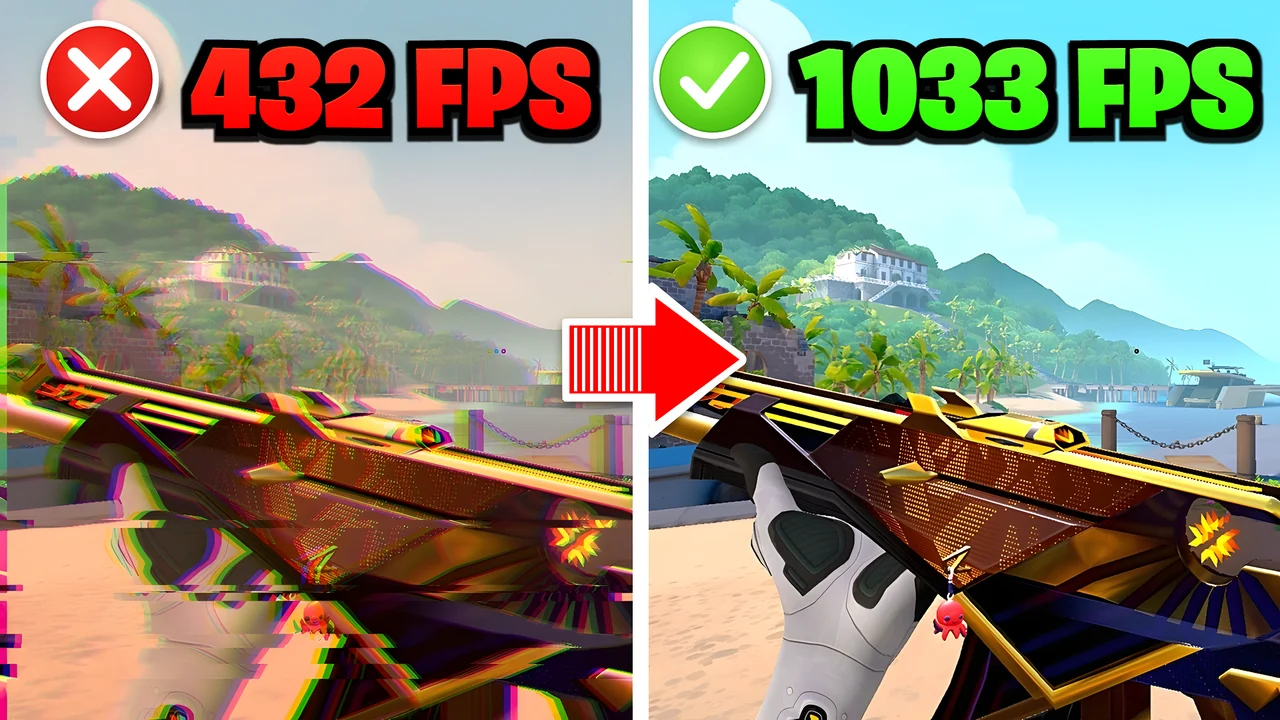
Written version of our video, every step checked against it.
Quick answer
- Make a backup in RIP Tweaks first (the video names it "Before RIP Tweaks"), so every change can be undone.
- Tune the PC: Hardware (CPU, GPU, RAM, BIOS, SSD), Win32 Priority Separation, the RIP Power Plan, Basic Debloat, Cloudflare DNS and Input Lag.
- Start VALORANT from the Games page with a game mode (Balanced is free).
- In VALORANT: Multithreaded Rendering On, every quality setting Low, Anti-Aliasing None, Anisotropic Filtering 1x, Fullscreen, every FPS limit Off, NVIDIA Reflex On + Boost.
- Restart the PC. On the PC in the video, FPS went from about 400-500 to 900-1000.
This guide is for VALORANT players on Windows 10 or 11 who want more FPS and less input lag in Act 6. It follows our video click by click: first the PC (hardware, Windows, power, debloat, network, input lag), then the game mode launch, then the exact VALORANT video settings shown on screen. For Vanguard, raw input and server background, see our full VALORANT FPS boost and input lag guide.
In this video
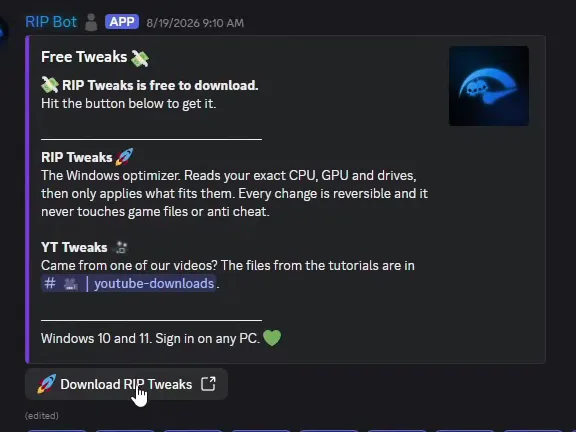
The video gets the app from our Discord: type discord.gg/riptweaks into your browser, join the server, open the free-tweaks channel and click Download RIP Tweaks. You can also get it straight from the download page. Run the installer, create your account with a username, email and password, then go through the short questionnaire.
discord.gg/riptweaksfree-tweaksDownload RIP Tweaks
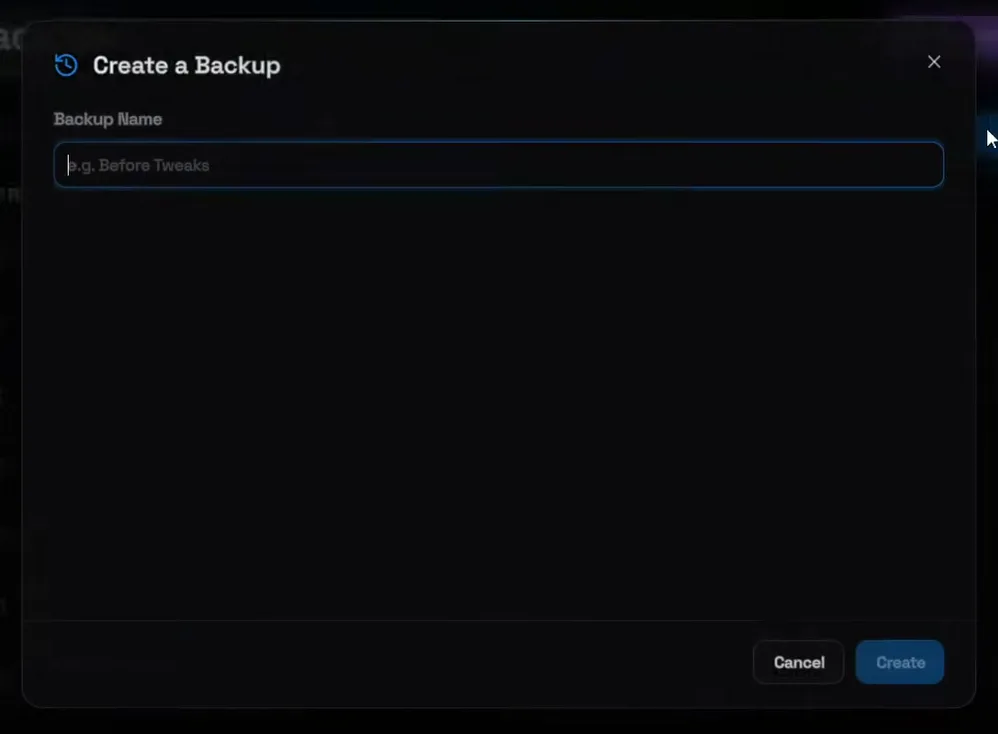
Before you touch any tweak, open Backups, click Create New, type a name such as "Before RIP Tweaks" and click Create. Wait until the restore point is finished, then close the window.
BackupsCreate NewBefore RIP TweaksCreate
Good to know
Every tweak can also be switched off on its own later. The backup is the safety net that brings the whole PC back in one step. More in restore points and undoing changes.
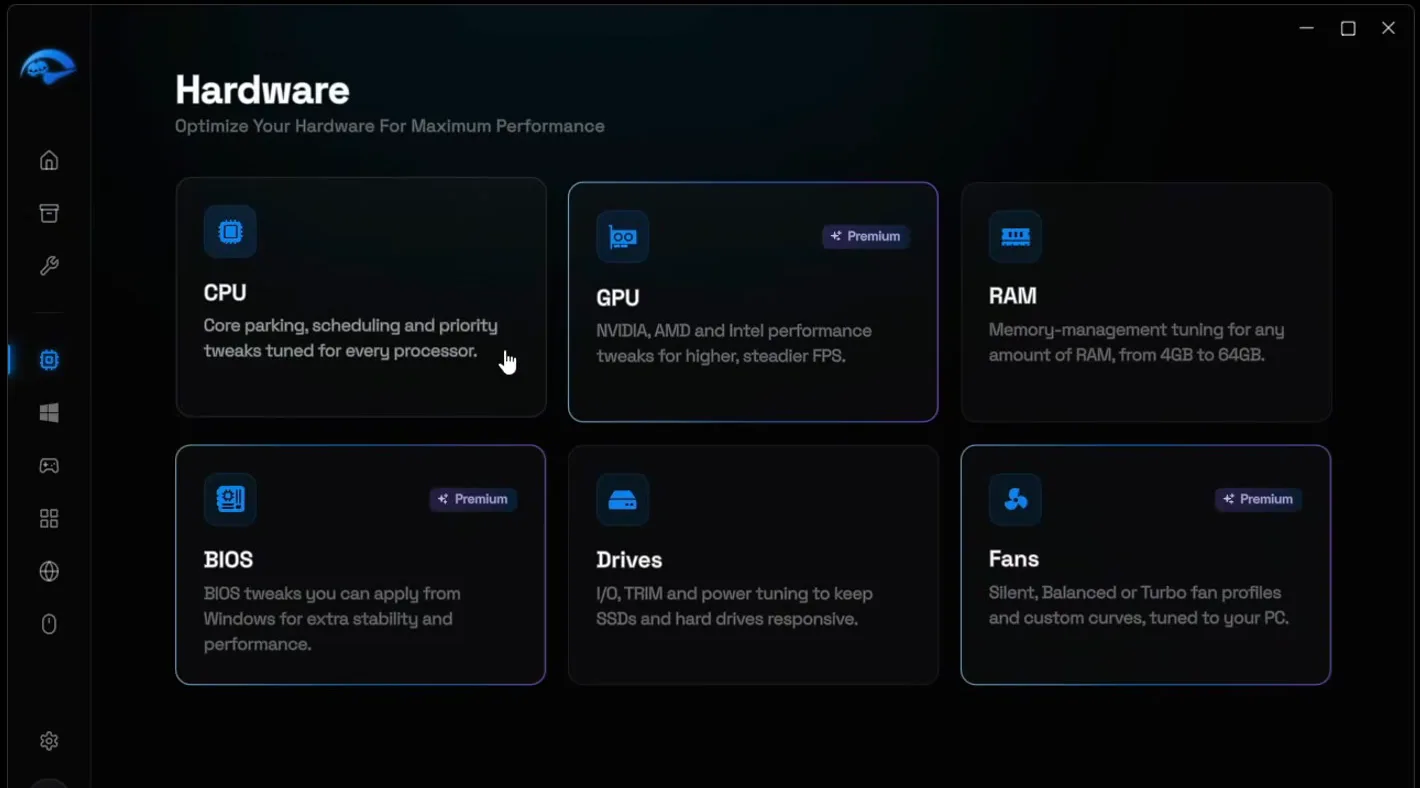
Open Hardware. The video goes through every card in order:
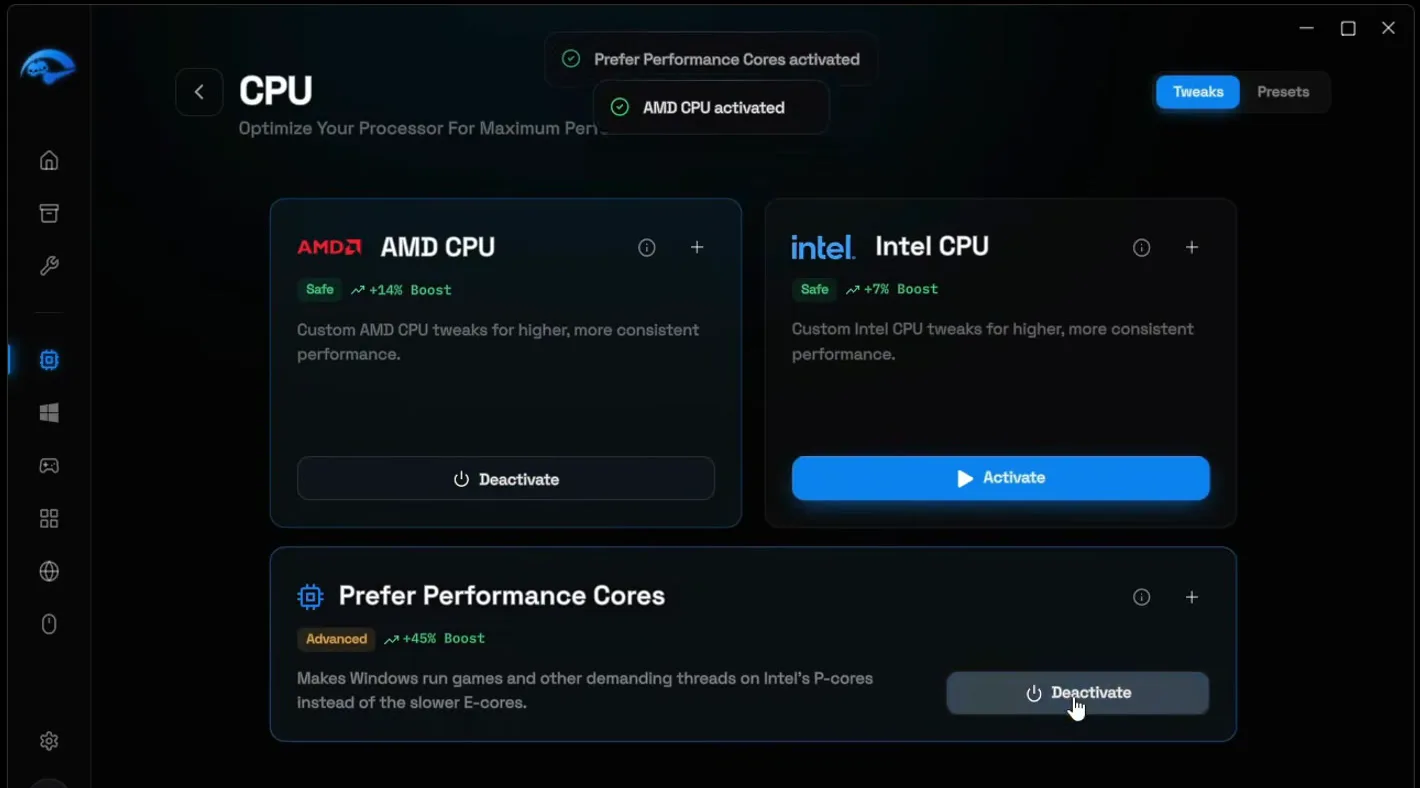
- CPU: activate the card for your brand (AMD CPU in the video), then activate Prefer Performance Cores too.
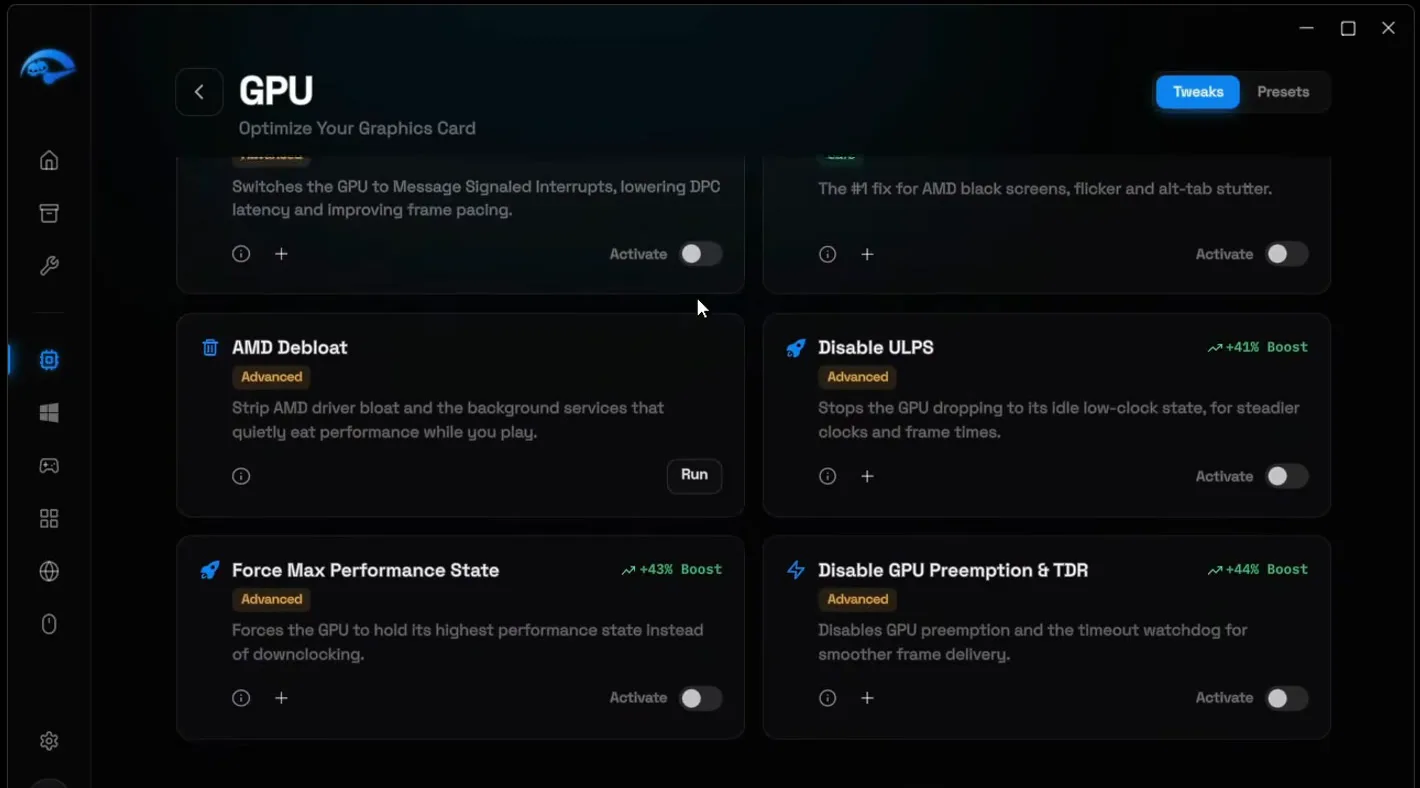
- GPU: the video has an NVIDIA card and enables all of the NVIDIA tweaks. With an AMD or Intel card, pick their tweaks instead.
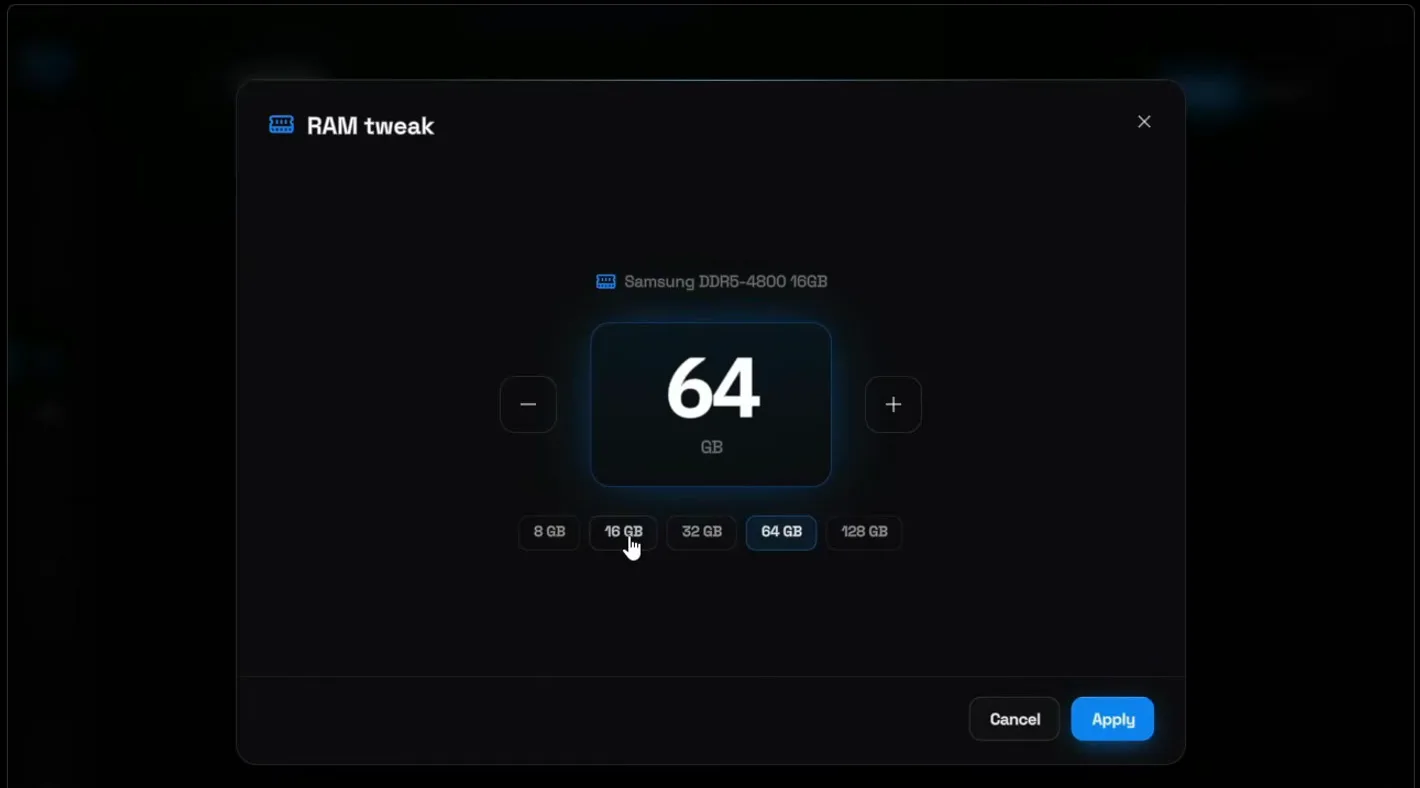
- RAM: open the RAM tweak, pick your amount (8, 16, 32, 64 or 128 GB) and click Apply. The video uses 16 GB.
- BIOS: apply the BIOS tweaks.
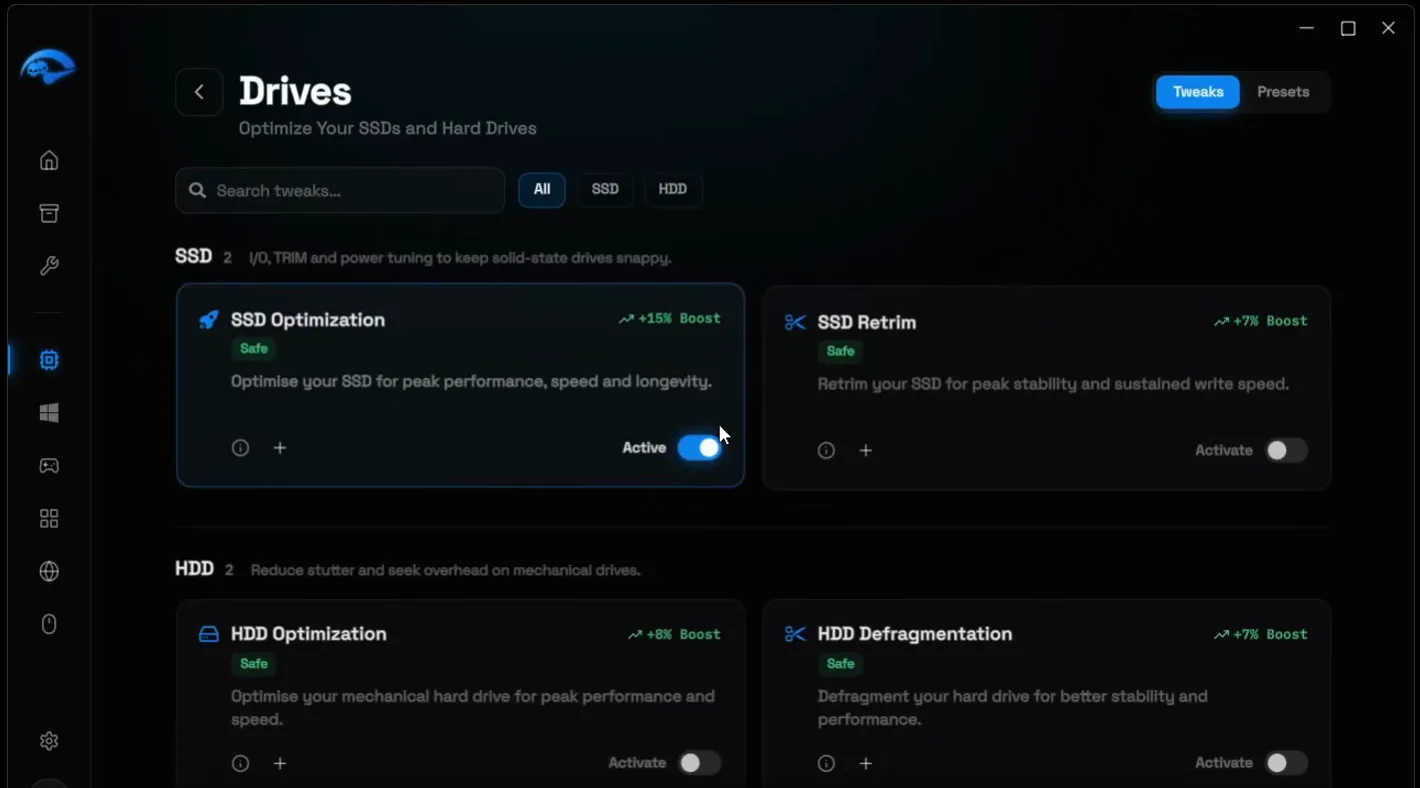
- Drives: activate SSD Optimization. On a hard drive, use HDD Optimization instead.
Tip
Only pick the CPU and GPU tweaks for the hardware you really have. Not sure what is inside your PC? See checking your system specs.
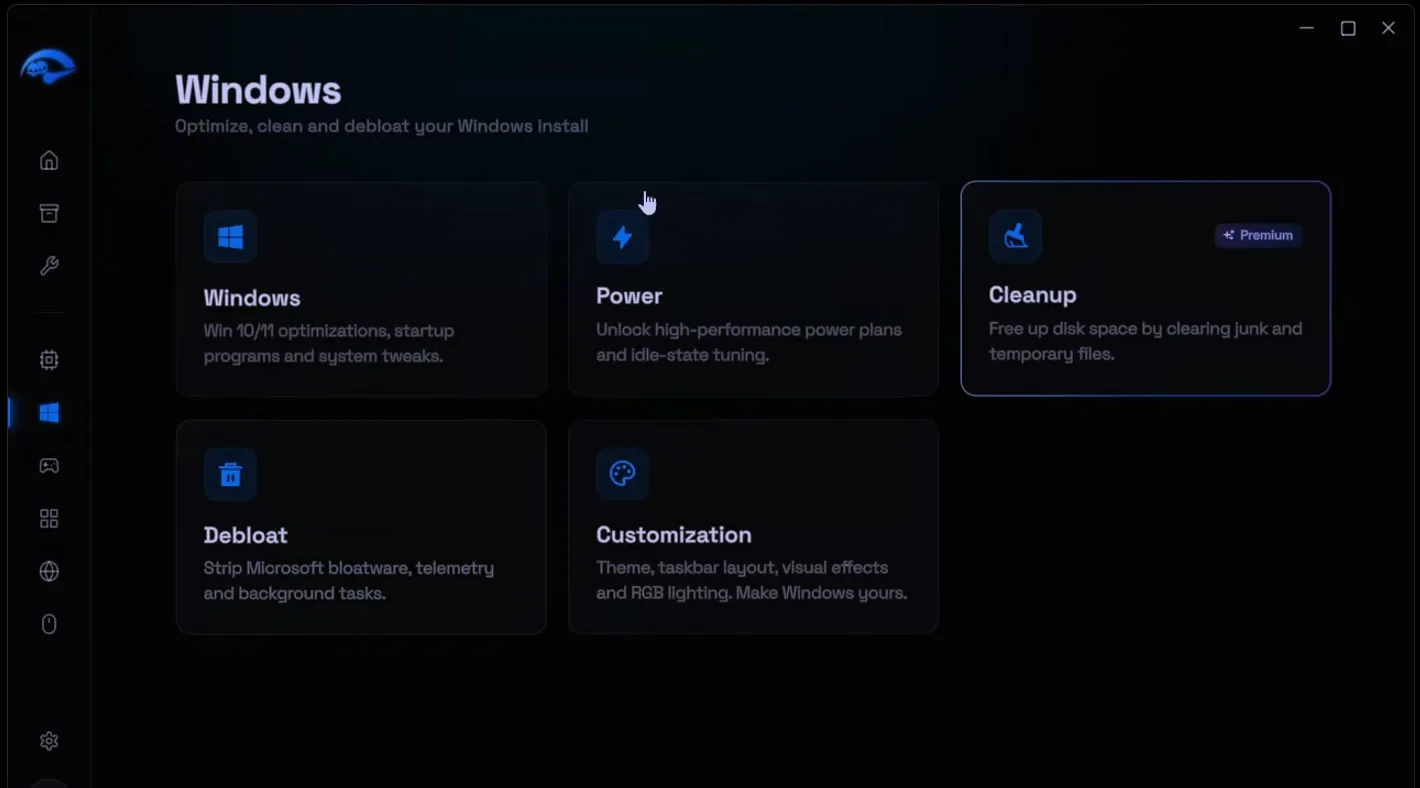
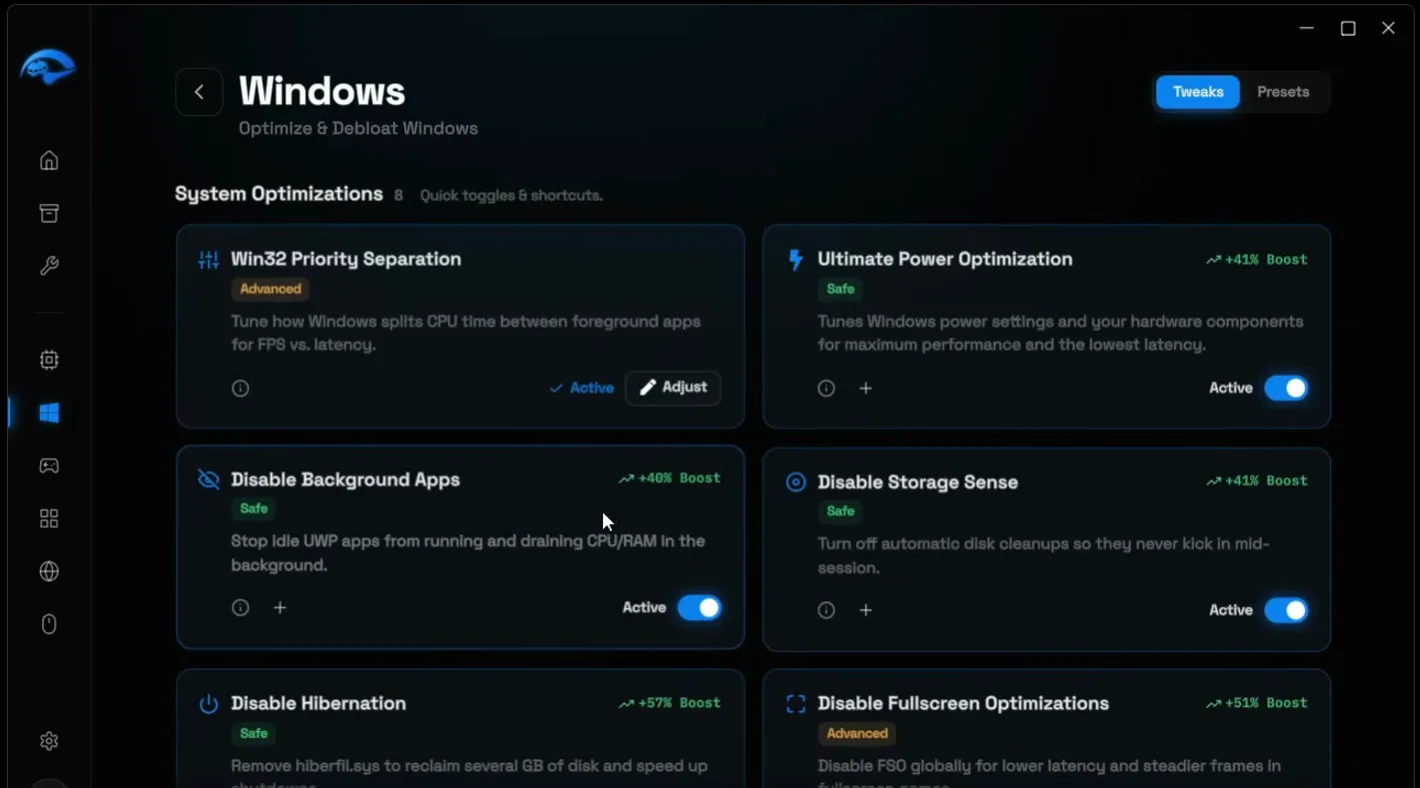
Go to Windows and click the Windows card. Find Win32 Priority Separation and click Adjust. The video clicks 18 hex, then 26 hex, and clicks Apply. This setting decides how Windows splits processor time between the game in front and everything behind it.
Then switch on the other system options on the page, such as Ultimate Power Optimization, Disable Background Apps and Disable Storage Sense, so background apps stop running while you play.
WindowsWindowsWin32 Priority SeparationAdjust26 hexApply
More on these switches: hidden Windows tweaks for gaming.
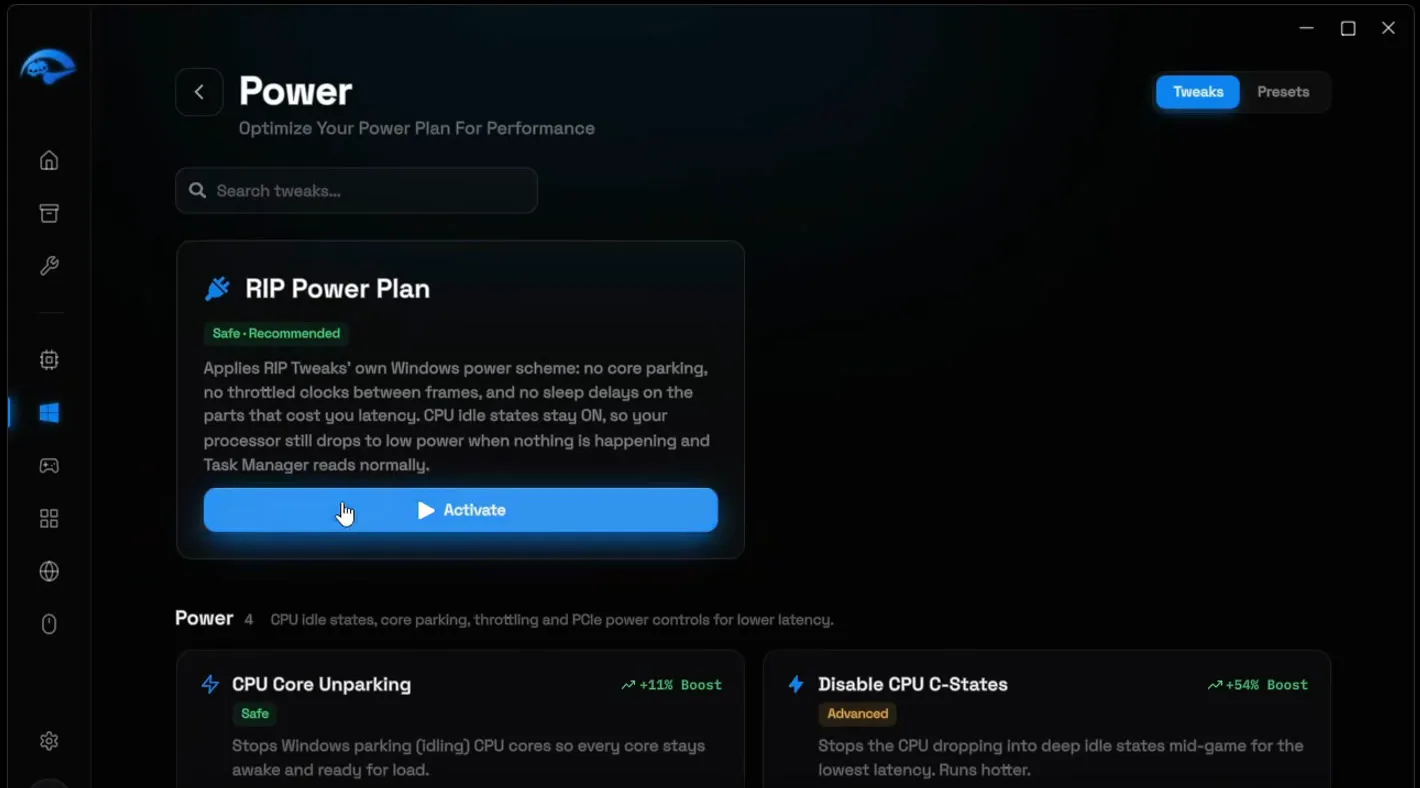
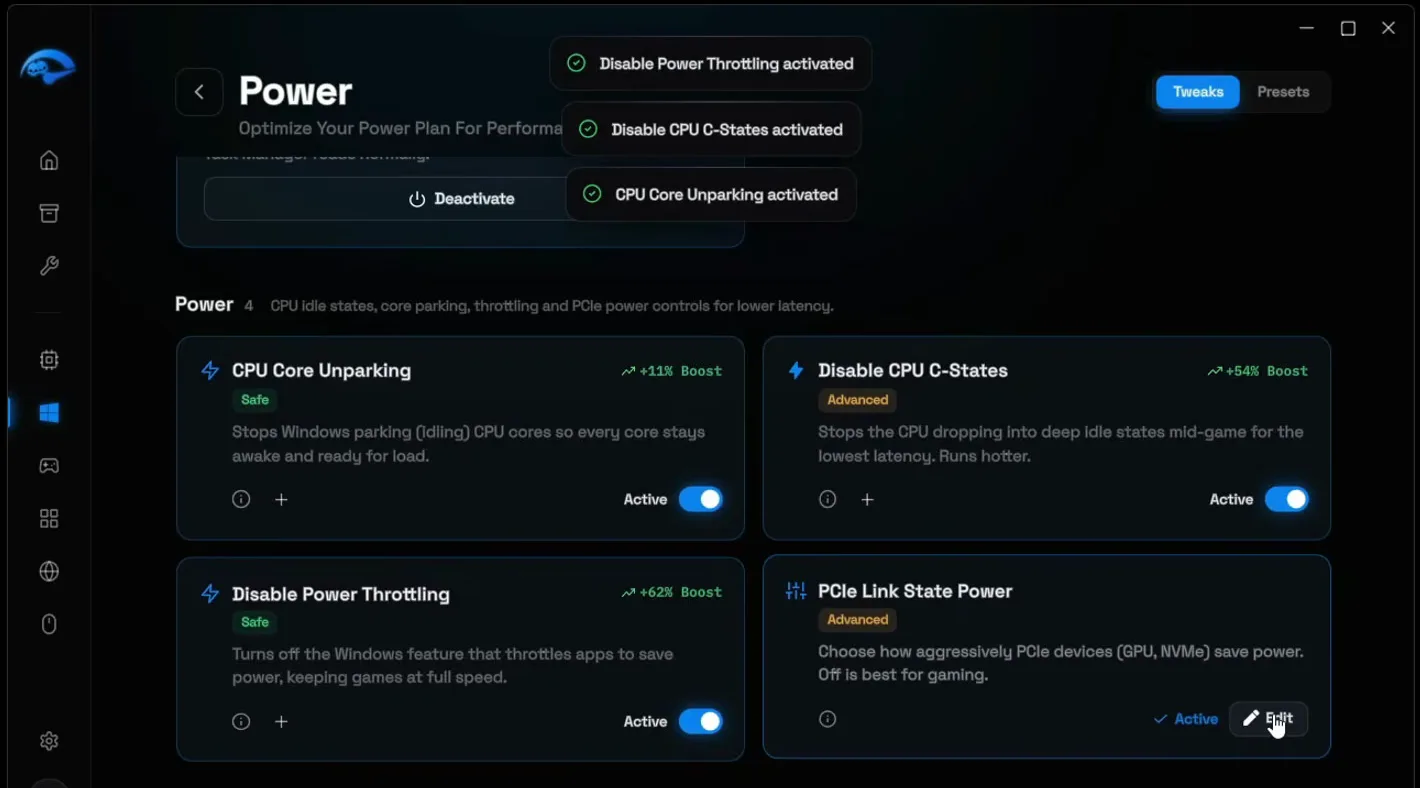
Go back and open Power. Most PCs run the Windows default, Balanced. Click Activate on the RIP Power Plan, our own plan made for gaming. Then turn on the power tweaks below it (CPU Core Unparking, Disable CPU C-States, Disable Power Throttling). For PCIe Link State Power, click Edit, choose Off and click Apply.
WindowsPowerRIP Power PlanActivate
What each plan does: power plans explained.
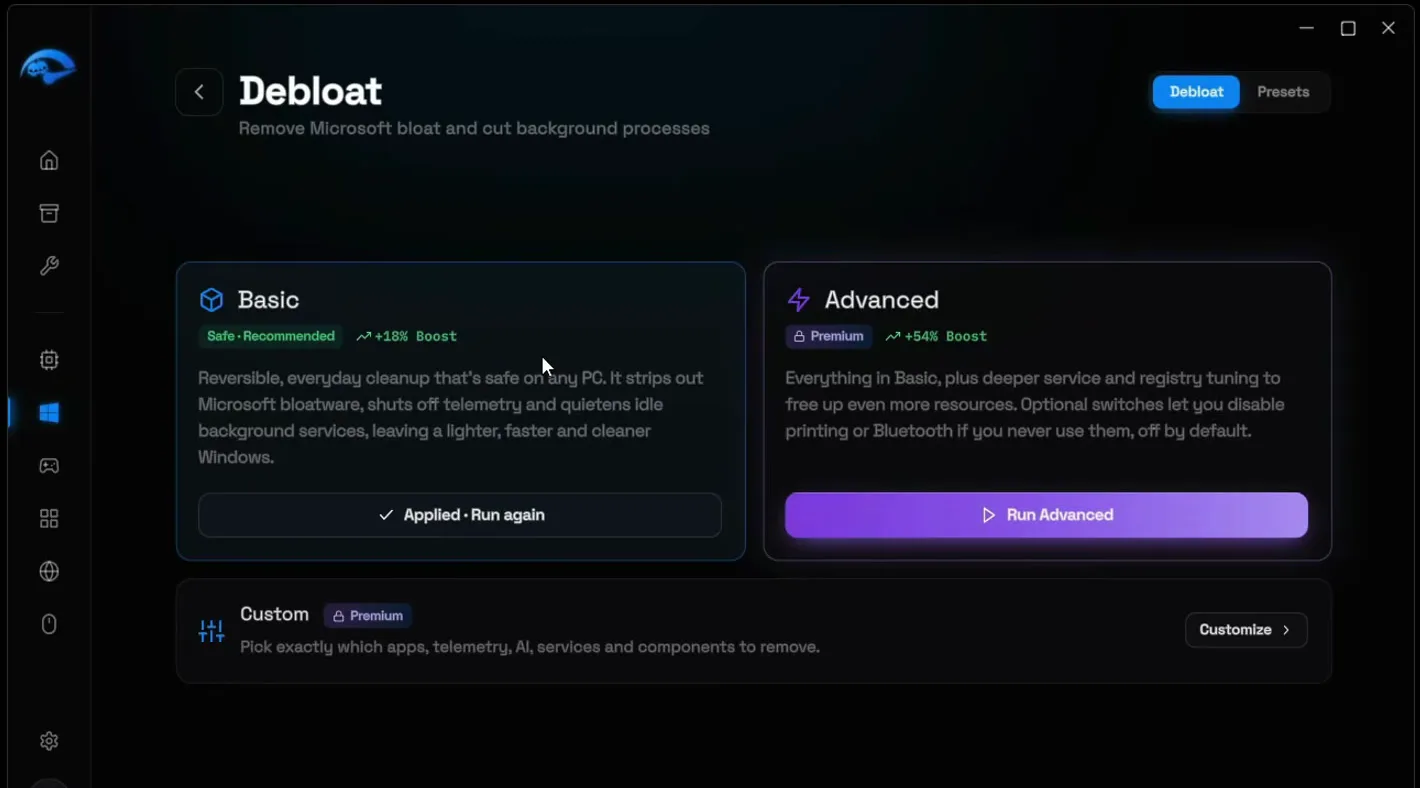
Open Debloat. The video recommends Basic: it removes preinstalled apps such as Weather, News, Maps and Feedback Hub, telemetry and tracking, the AI features and services that run in the background all the time. Pick what you want gone and click Debloat. On the PC in the video, 18 items were removed.
WindowsDebloatBasicDebloat
Careful
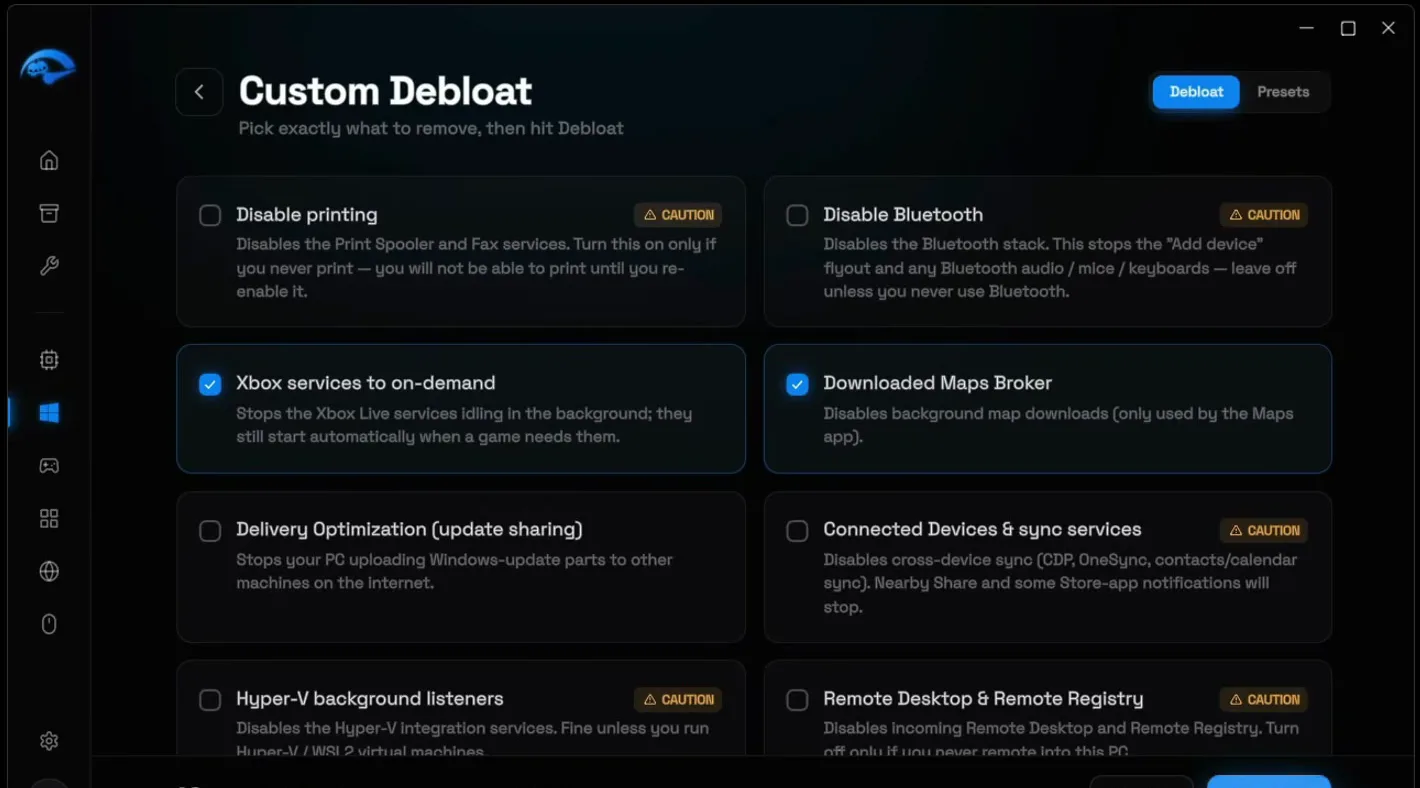
Items marked CAUTION (printing, Bluetooth, Xbox apps, Snipping Tool) stay off in the video. Only remove a feature you know you never use.
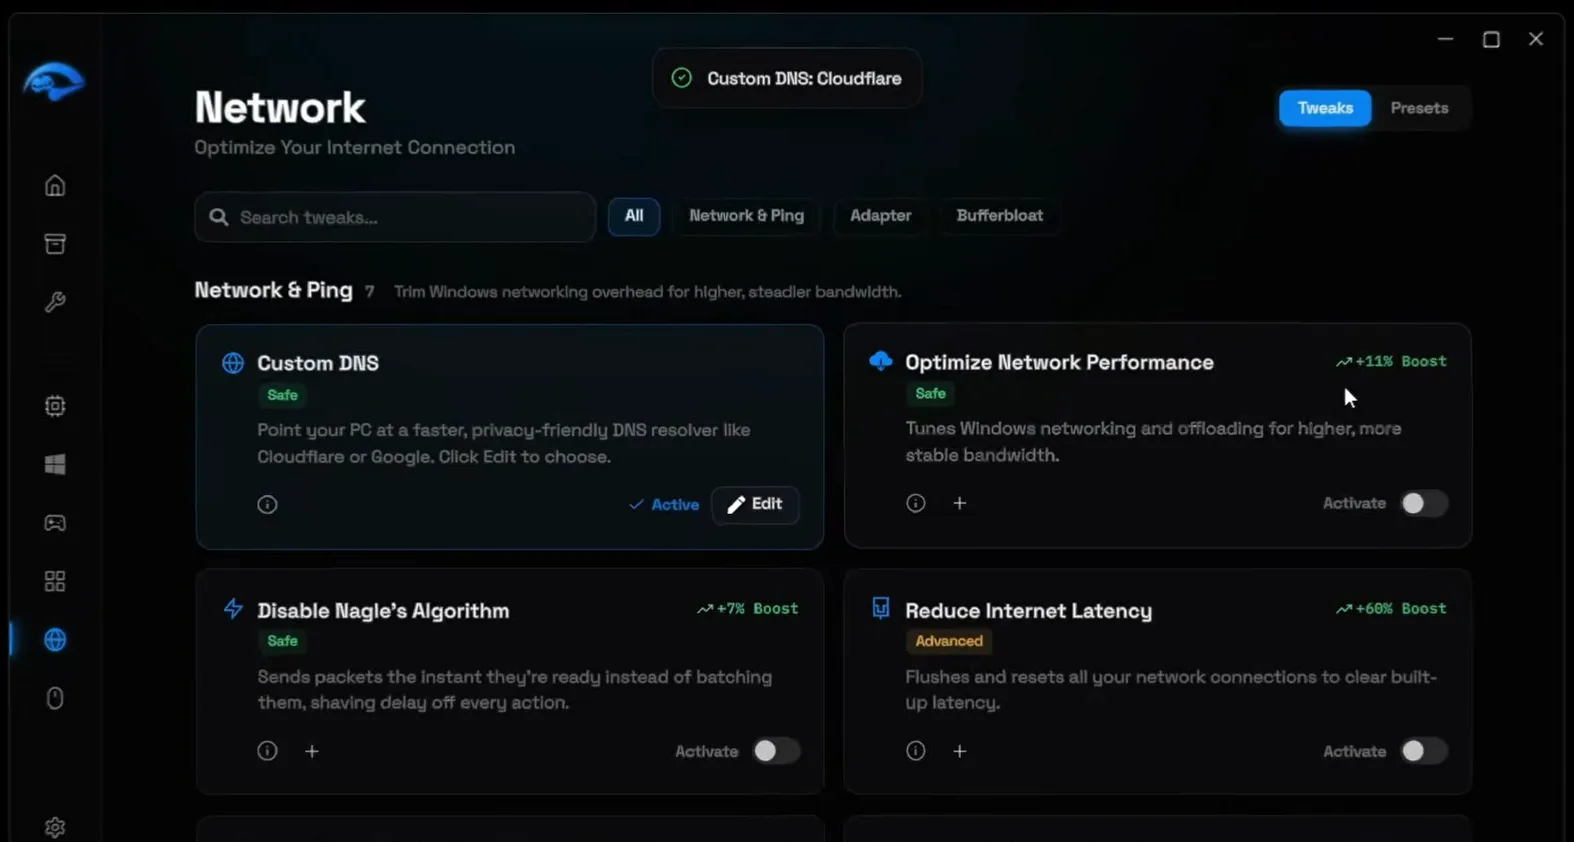
Open Network. On Custom DNS, click Edit, choose Cloudflare and click Apply. Then turn on the other options on the page and the Adapter tweaks, and apply them. The aim is the most stable ping the line can give.
NetworkCustom DNSEditCloudflareApply
Still getting ping spikes in VALORANT? Read fix ping spikes and packet loss.
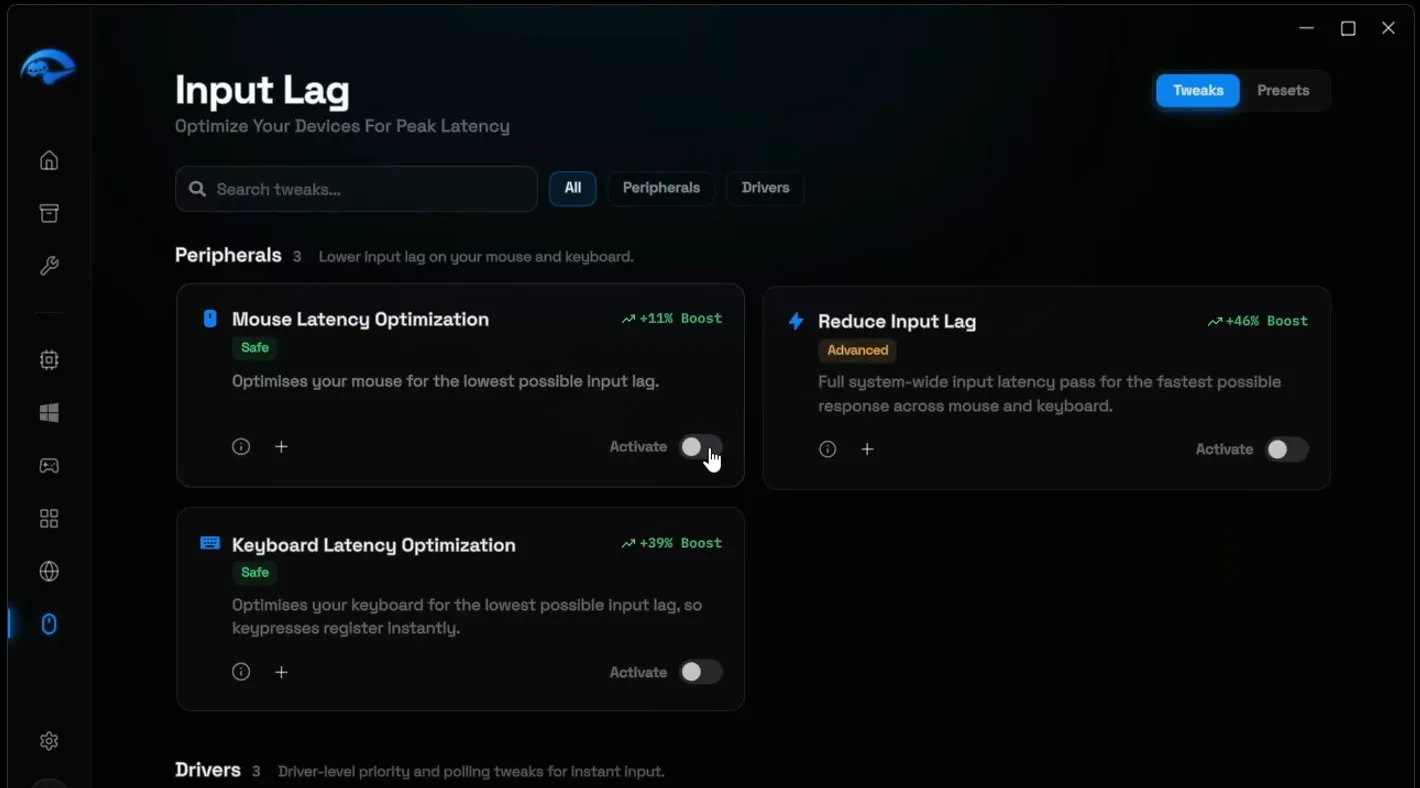
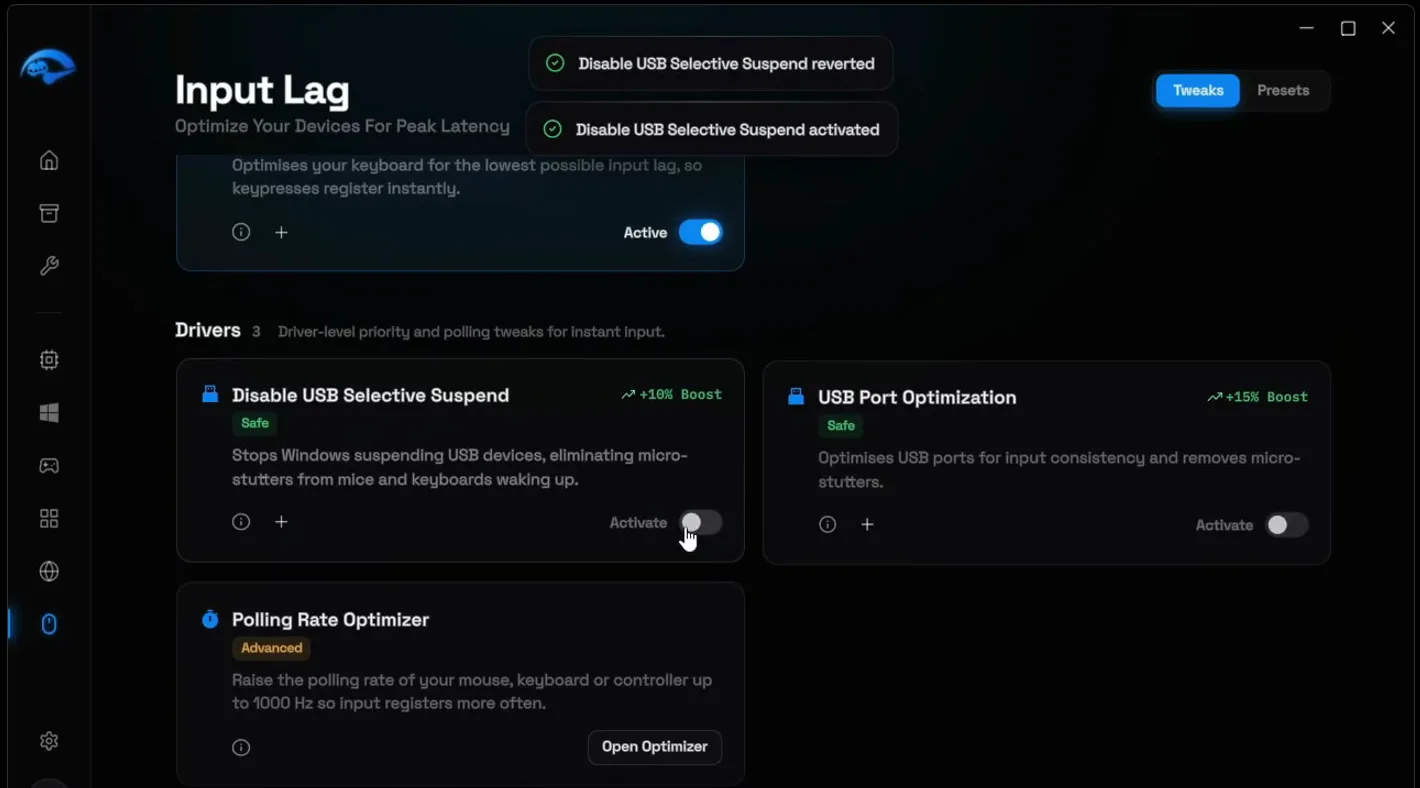
In Input Lag, turn on the peripheral tweaks (Mouse Latency Optimization, Keyboard Latency Optimization) and the USB driver tweaks (Disable USB Selective Suspend, USB Port Optimization).
Polling rate in detail: input lag and mouse polling.
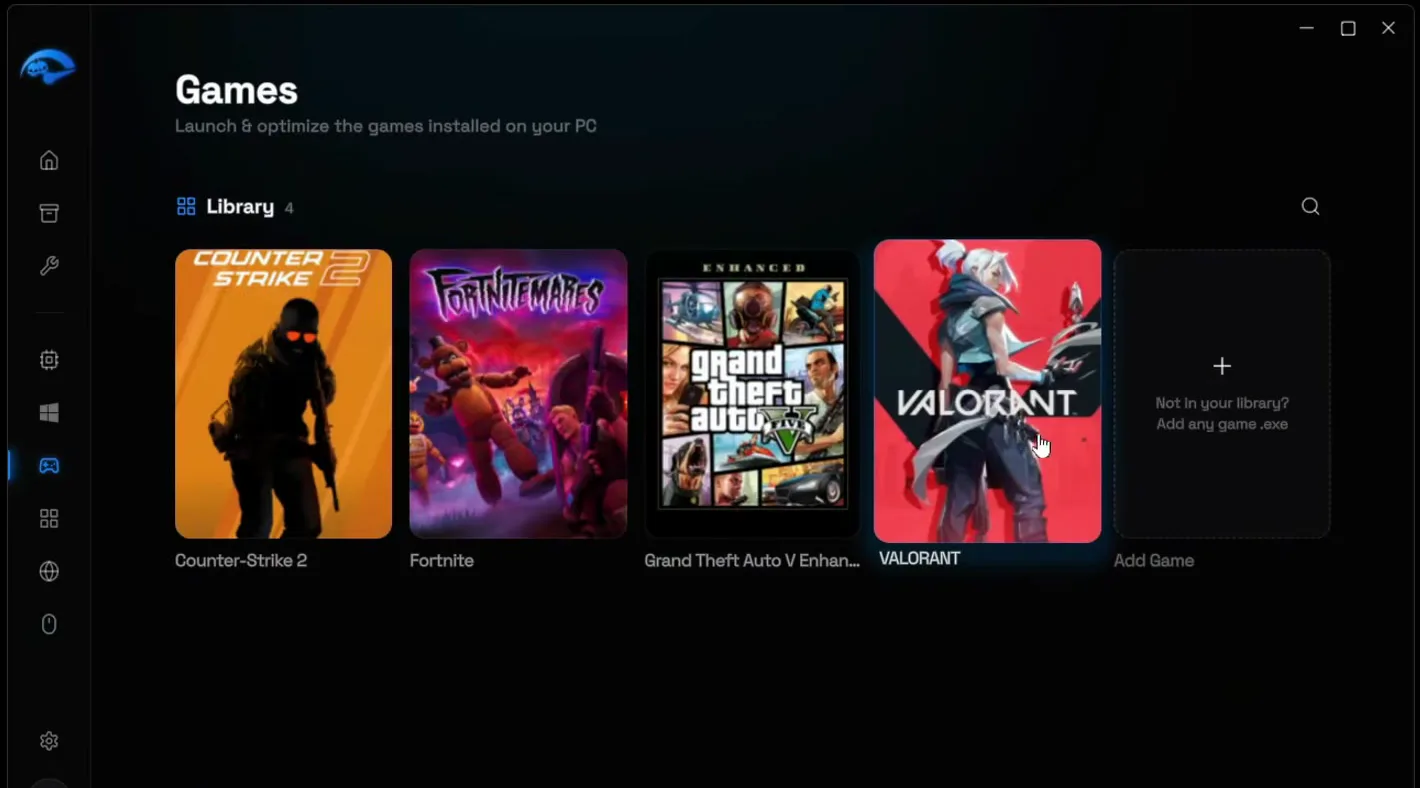
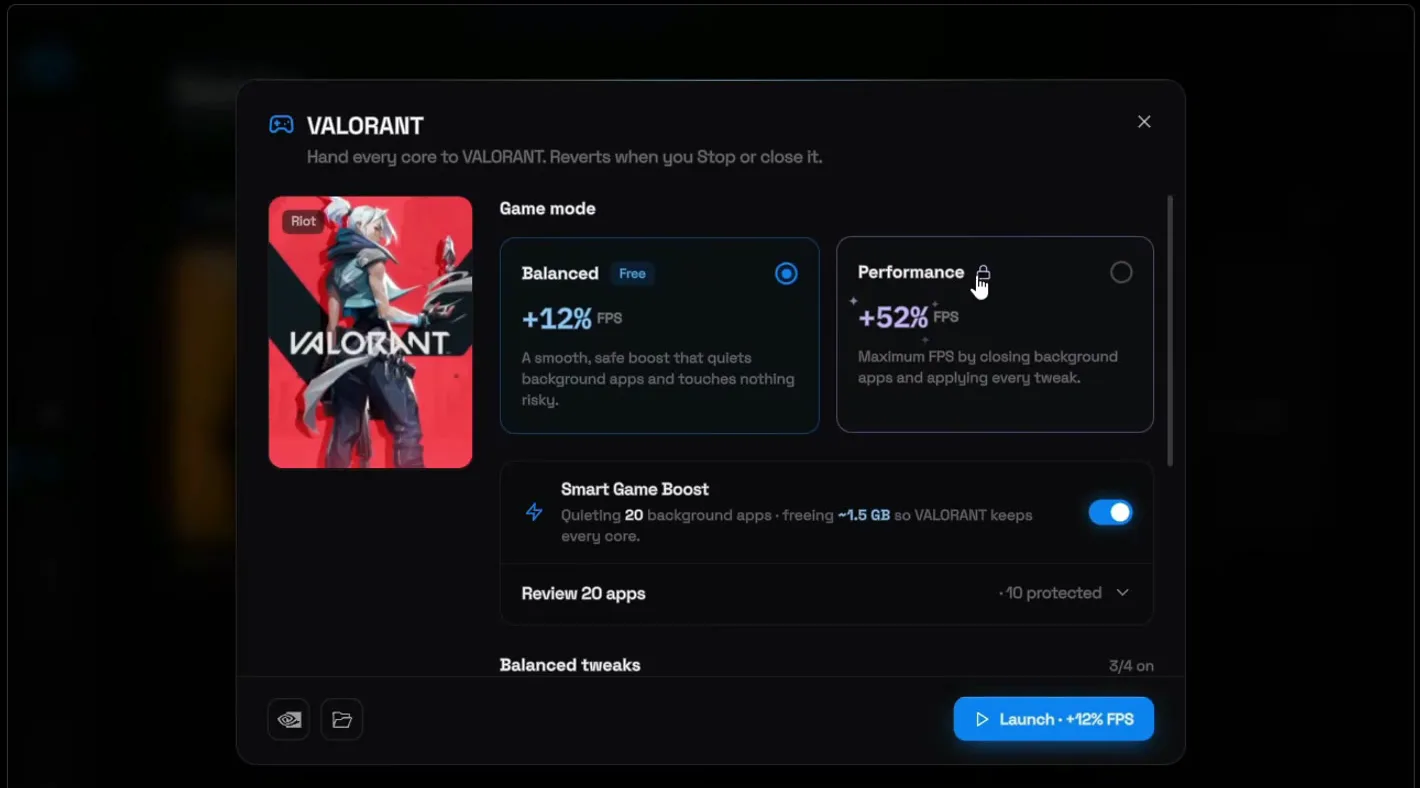
Go to Games and click the VALORANT tile. Pick a game mode and click Launch. While the game runs, the mode quiets the apps in the background, frees RAM and raises VALORANT's GPU and disk priority. The window says it reverts when you stop it or close the game.
Balanced is free. Performance closes more background apps and applies every tweak; it needs Premium.
GamesVALORANTBalancedLaunch
How the modes differ: games presets and RIP mode.
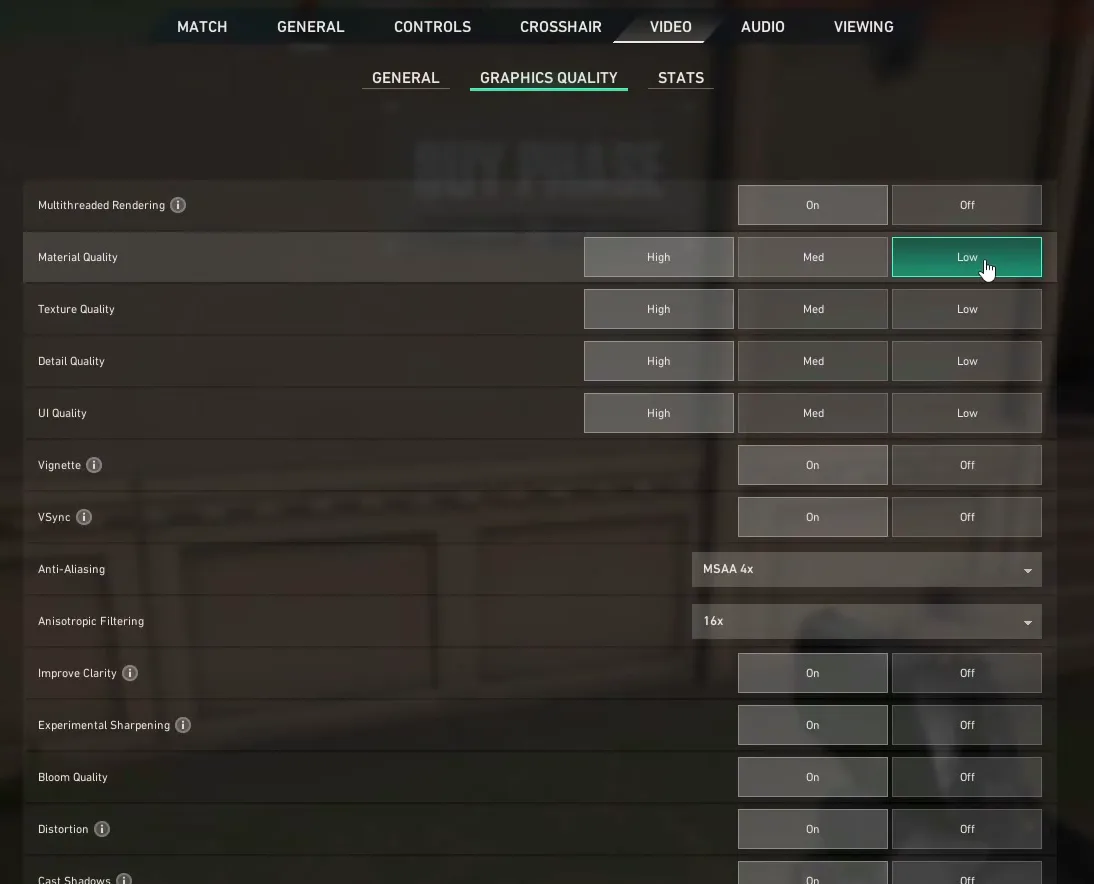
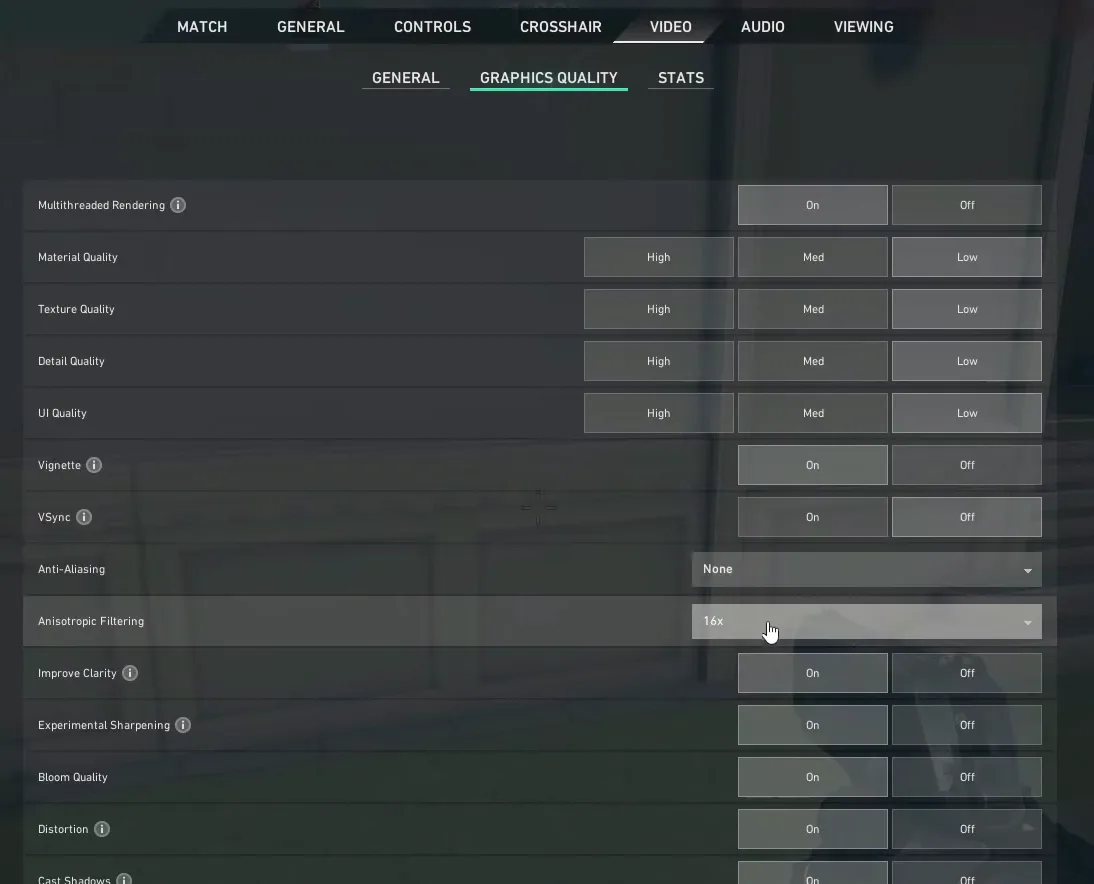
In VALORANT, open Settings, then Video, then Graphics Quality. Set Multithreaded Rendering to On. Then set Material, Texture, Detail and UI Quality to Low: the video says it makes no real difference to how you play and can help you spot enemies better.
Turn Vignette Off, set Anti-Aliasing to None and Anisotropic Filtering to 1x. All three are cosmetic. In the video, VSync and the other On/Off rows below (Improve Clarity, Experimental Sharpening, Bloom, Distortion, Cast Shadows) sit on Off.
SettingsVideoGraphics Quality
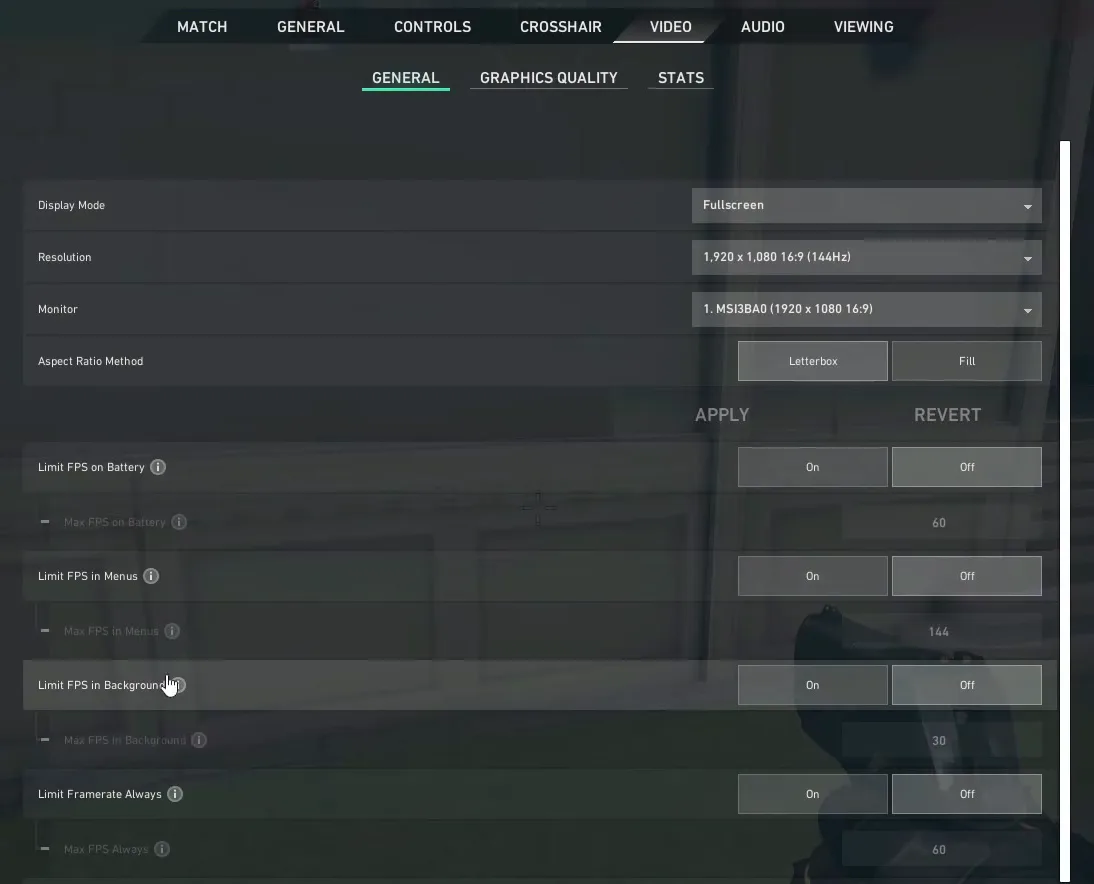
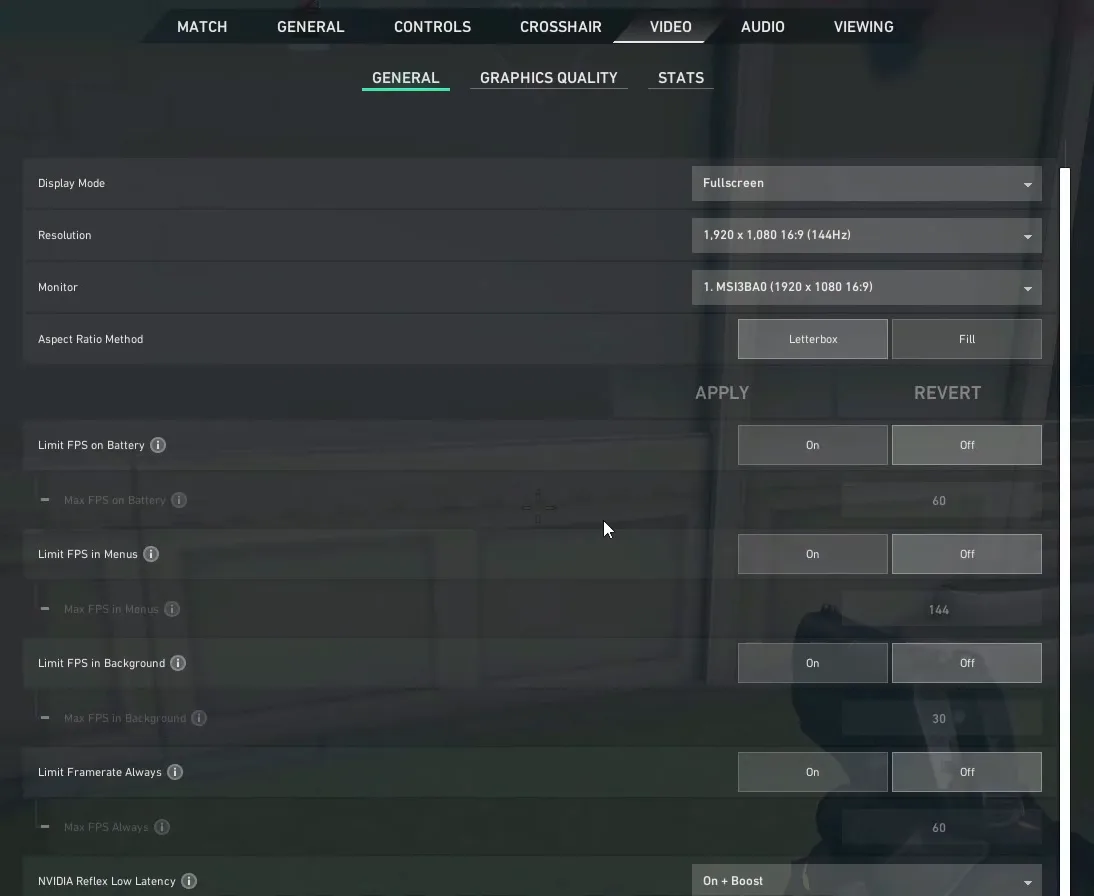
Switch to the General tab under Video. Set Display Mode to Fullscreen. Turn Limit FPS on Battery, Limit FPS in Menus and Limit FPS in Background Off, and turn Limit Framerate Always Off so no cap holds the game back. Last, set NVIDIA Reflex Low Latency to On + Boost.
SettingsVideoGeneralNVIDIA Reflex Low LatencyOn + Boost
Tip
Reflex only appears with a supported NVIDIA graphics card. On AMD or Intel graphics, skip that row and keep the rest. For the NVIDIA side, see our NVIDIA settings for gaming.
How to check it worked
- Test in the same place as before (the range or a custom game), with the same agent and view. FPS changes a lot between maps and spots.
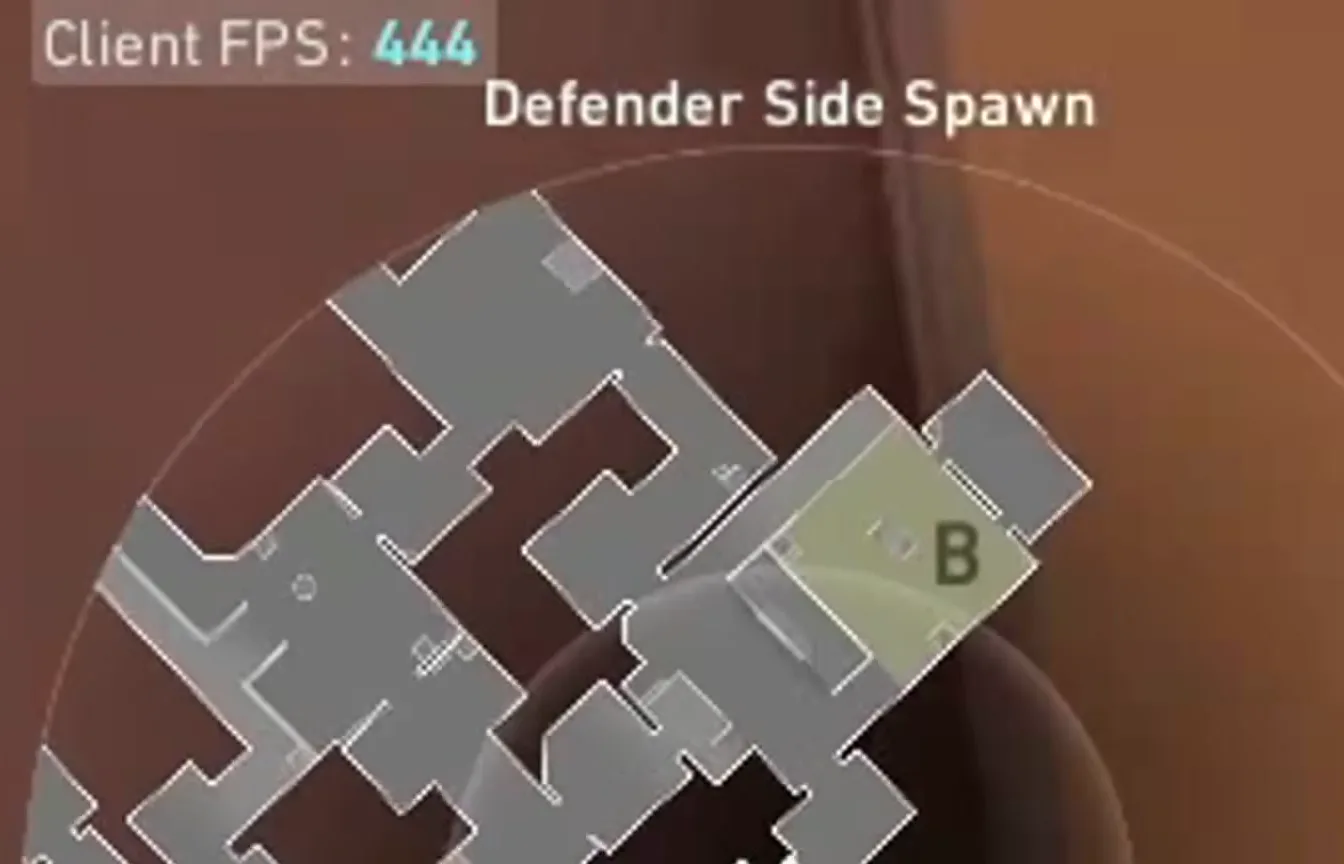
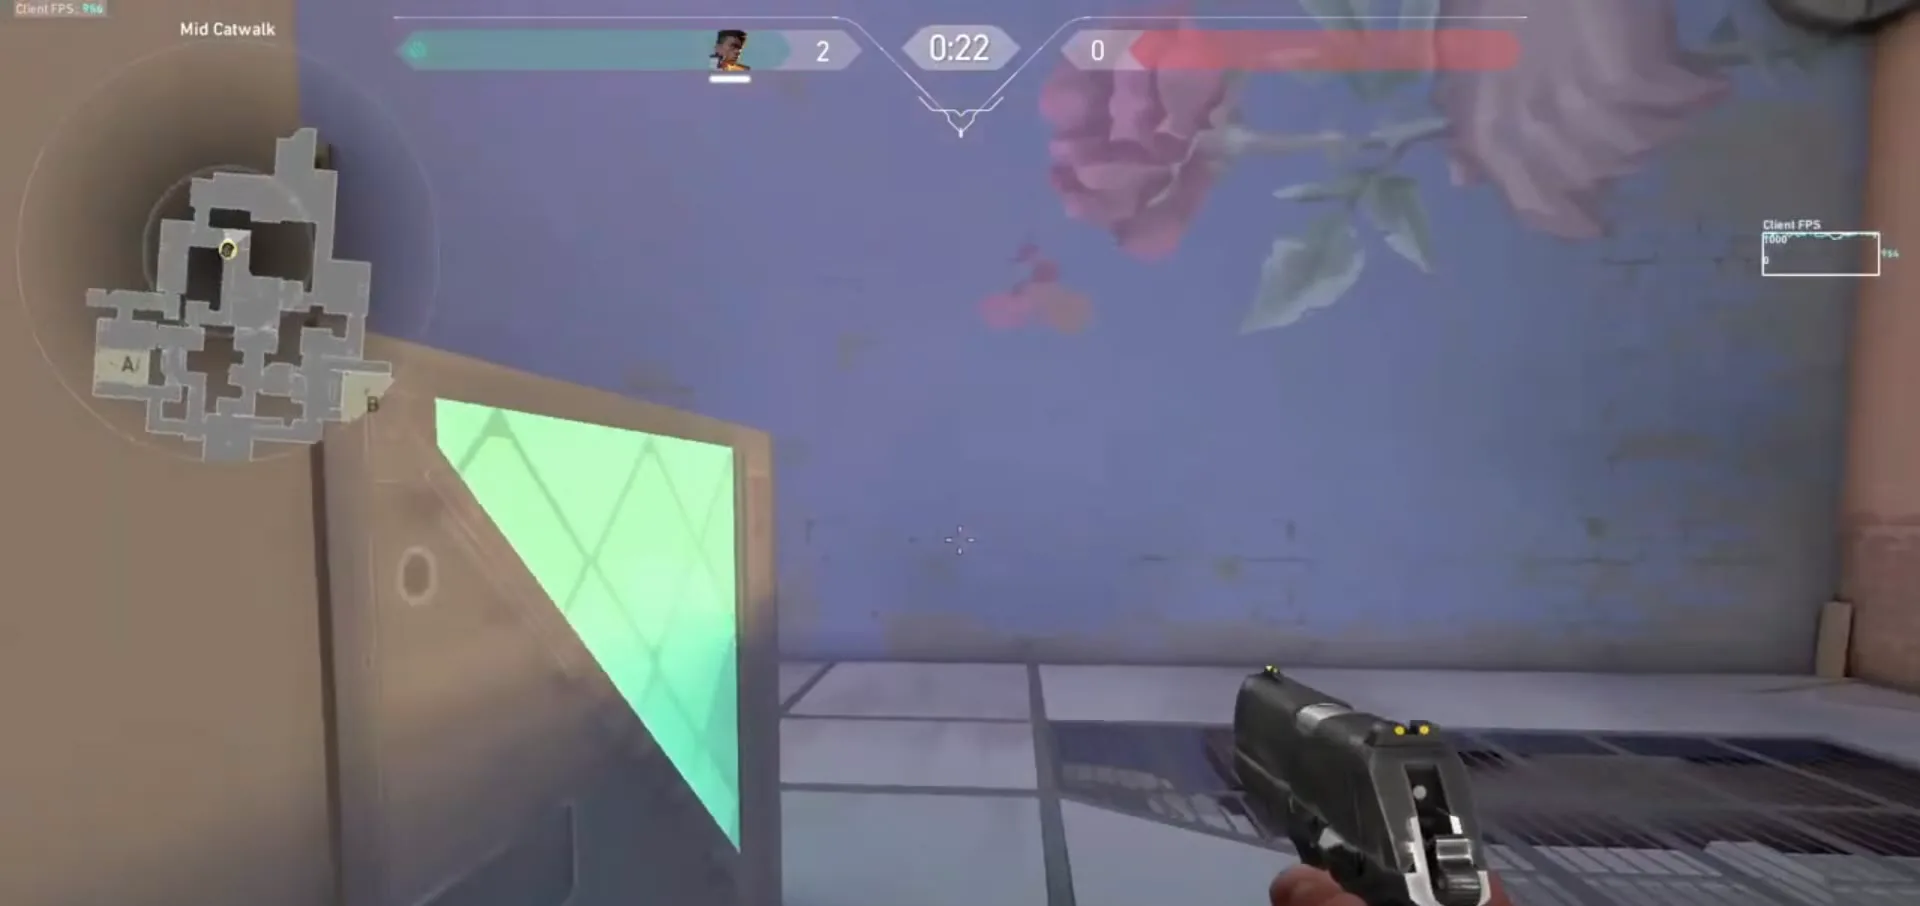
- In VALORANT, open Settings, Video, Stats and show Client FPS as text or a graph. Watch it in busy moments, not only standing still: dips are what you feel in a fight.
- In RIP Tweaks, the cards you turned on show Active. If a tweak shows off again after the restart, see tweaks revert after restart.
- No gain at all? Our why did my FPS not increase page walks through the usual causes, such as a GPU-limited PC or a capped monitor.
How to undo it
To go back, switch any tweak off on its own card, or open Backups and click Restore next to "Before RIP Tweaks". In VALORANT, each settings tab has a Revert option.
Key settings at a glance
FAQ
What are the best VALORANT Act 6 settings for FPS?
The ones in the video: Multithreaded Rendering On, Material, Texture, Detail and UI Quality Low, Vignette Off, Anti-Aliasing None, Anisotropic Filtering 1x, Fullscreen, every FPS limit Off and NVIDIA Reflex Low Latency On + Boost.
Should Multithreaded Rendering be on or off in VALORANT?
The video turns it On, so the game can use more processor cores. On most modern CPUs that typically raises FPS. If you see stutter on an older CPU, test On and Off in the same spot and keep the one with steadier FPS.
Is NVIDIA Reflex On or On + Boost better?
The video uses On + Boost. Boost keeps the graphics card clocks up for the lowest latency, at the cost of a bit more power. The option only shows with a supported NVIDIA card.
Do low graphics settings make it easier to see enemies?
The video says so: with every quality setting Low there is less visual clutter, so agents stand out more. Vignette, Anti-Aliasing and Anisotropic Filtering are cosmetic, so turning them down loses nothing that matters in a match.
How much FPS will I gain?
It depends on your PC. On the PC in the video, FPS went from about 400-500 to 900-1000 after the tweaks, the settings and a restart. A PC that is held back by its graphics card typically gains less than one held back by Windows and background apps.
Is RIP Tweaks safe to use with Vanguard?
RIP Tweaks changes Windows and hardware settings. It does not touch VALORANT's files or memory, and the in-game settings above are ones you set yourself in the VALORANT menu. Read more in is it safe and will I get banned.
Which tweaks in the video are free?
The backup, the Basic debloat and the Balanced game mode are marked free. Some cards, such as GPU and BIOS in Hardware and the Performance game mode, carry a Premium badge in the app. See free and premium.
Can I undo everything?
Yes. Switch any tweak off on its card, or restore the "Before RIP Tweaks" backup you made at the start. Your VALORANT settings can be changed back in the menu at any time.
 RIP Tweaks
Do it in a few minutes with RIP Tweaks
- Free plan for Windows 10 and 11
- A backup first, and every tweak can be switched off again
- Made for higher FPS, lower input lag and steadier ping
Free · Windows 10 and 11
