How to Fix Ping Spikes and Packet Loss in Any Game (2026)

Written version of our video, every step checked against it.
Quick answer
- Create a restore point first, so every change below can be undone.
- Run DNS Jumper, click Start DNS Test and apply the fastest DNS servers it finds.
- Make sure QoS Packet Scheduler is ticked on your Wi-Fi or Ethernet adapter, then in gpedit set DSCP Marking Override to Ignored.
- Create a Policy-based QoS policy for your game's .exe with DSCP value 46 and protocol TCP and UDP.
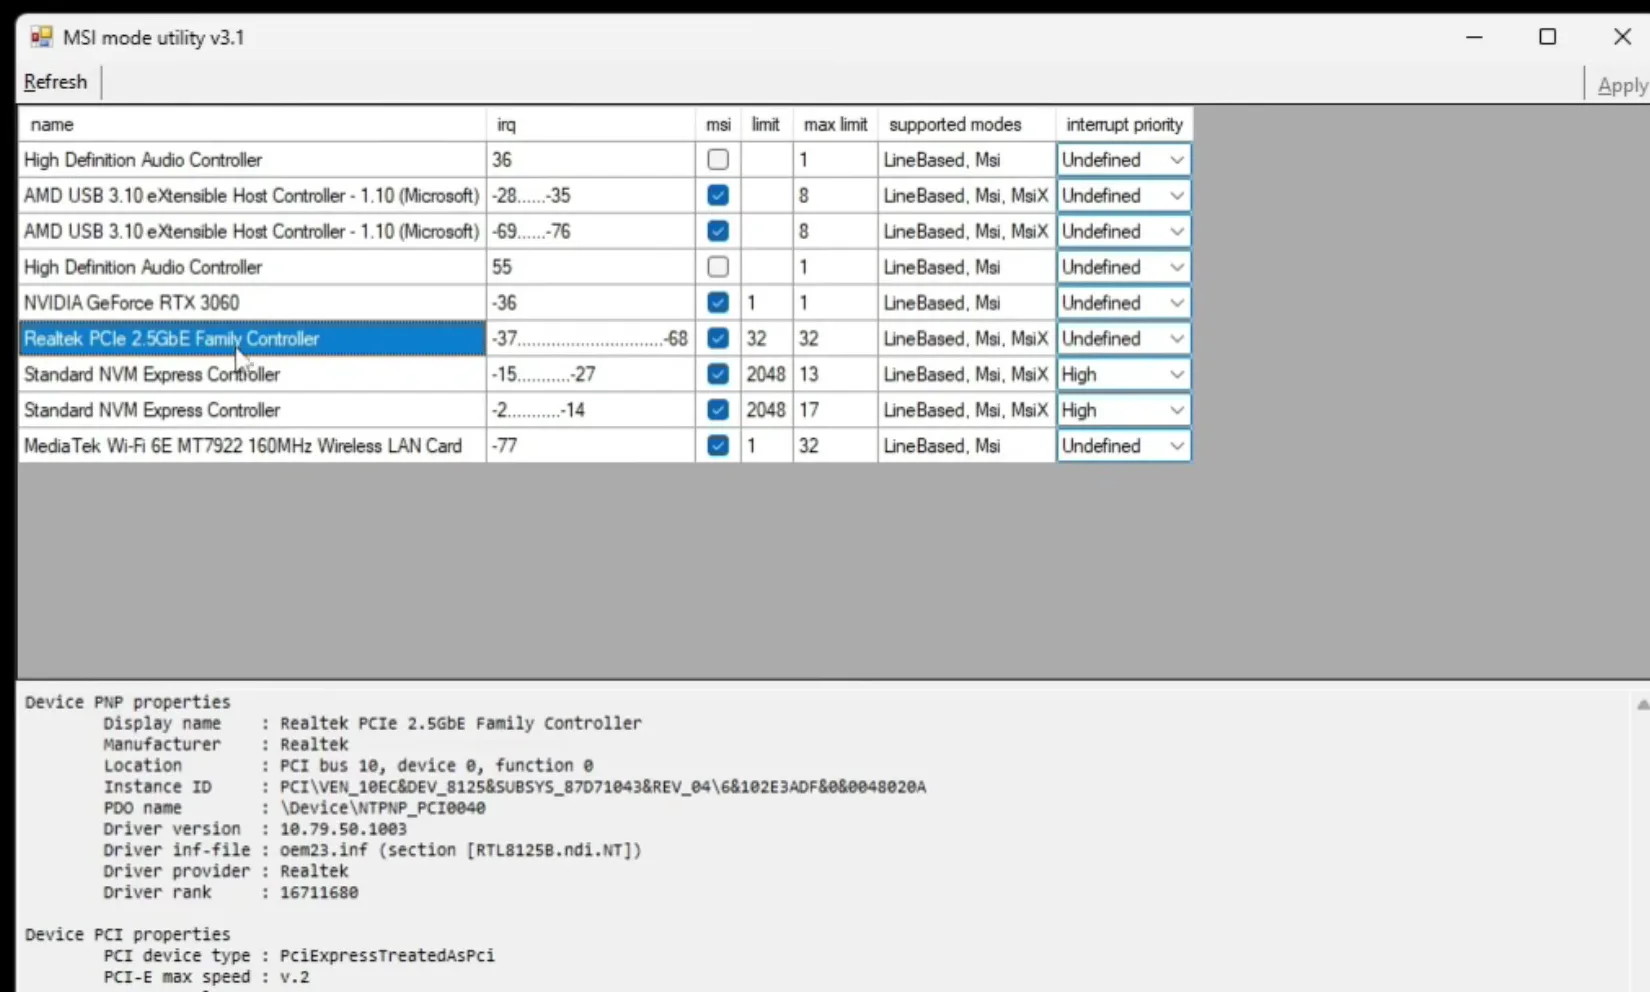
- Set your network adapter in MSI Utility to limit
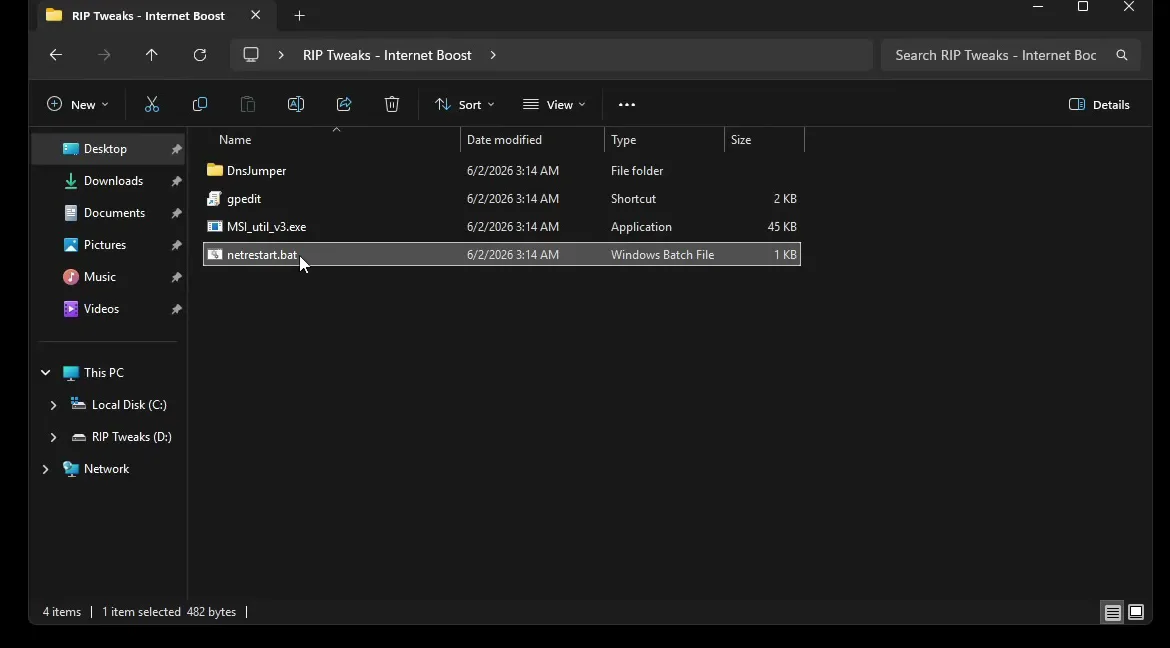
256and priority High, then run netrestart.bat as administrator.
This guide is for anyone on Windows 10 or 11 who gets rubber-banding, laggy hits or random ping jumps in Fortnite or any other online game. It follows our video click by click, using the free RIP Tweaks Internet Boost pack, and shows what each tool does so you know what you are changing.
Every step below edits network settings, so the video starts with a safety net. Type restore into the Windows search bar and open Create a restore point. In System Properties, select the system disk (the one with (System) next to it), click Configure and make sure Turn on system protection is selected.
Search "restore"System ProtectionLocal Disk (C:) (System)ConfigureTurn on system protection
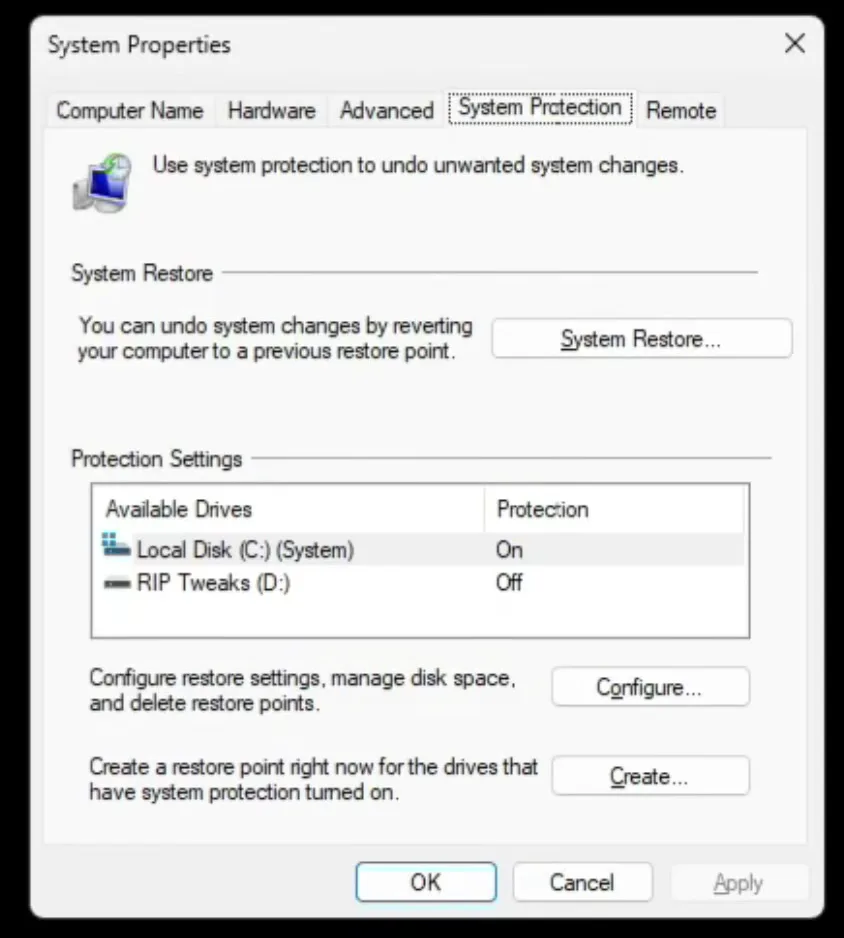
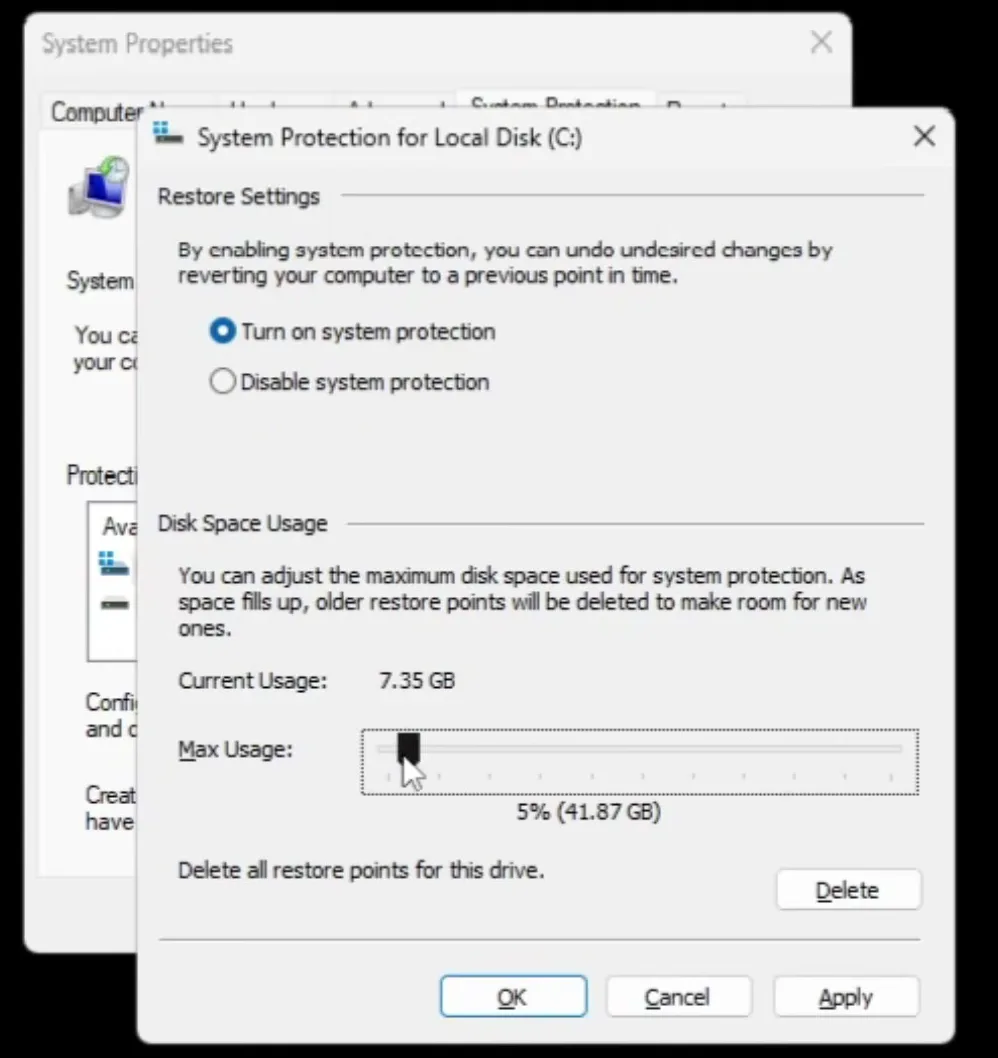
Set Max Usage to at least 5% (41.87 GB on the disk in the video) and click Apply. Back on the first window click Create, type any name for the restore point and click Create again. When Windows says it is done, close the window.
Tip
Name the restore point something you will recognise later, such as "before network tweaks". If anything feels worse, System Restore takes you back to exactly this point.
The tools in this guide come in one pack. Open the RIP Tweaks Discord (the video types discord.gg/riptweaks into the browser), scroll to the youtube-downloads channel and find RIP Tweaks - Internet Boost. Click Download, then Visit site and Join us, subscribe, click Continue and finally Download optimization pack. Put the file anywhere on your desktop and extract it.
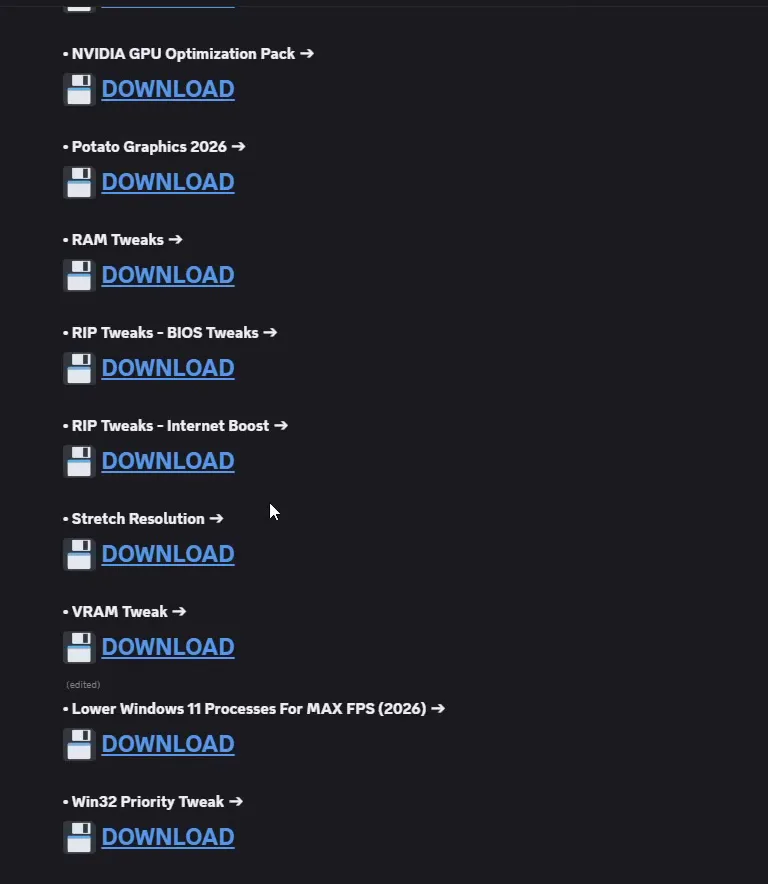
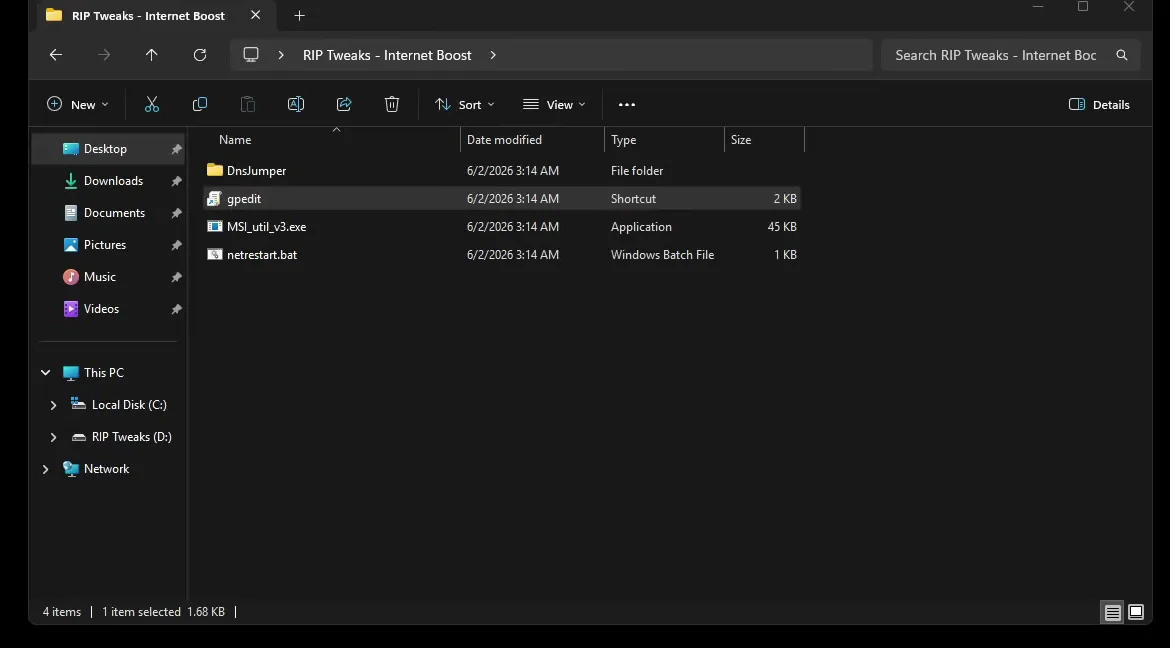
After extracting you get four items: a DnsJumper folder, a gpedit shortcut, MSI_util_v3.exe and netrestart.bat. The rest of the video uses them in exactly this order.
Open the DnsJumper folder, double-click DNS Jumper.exe and click Run. Choose Fastest DNS, then click Start DNS Test and wait until the Result columns fill in. The list sorts itself with the quickest server first.
DnsJumperDNS Jumper.exeFastest DNSStart DNS TestApply DNS Server
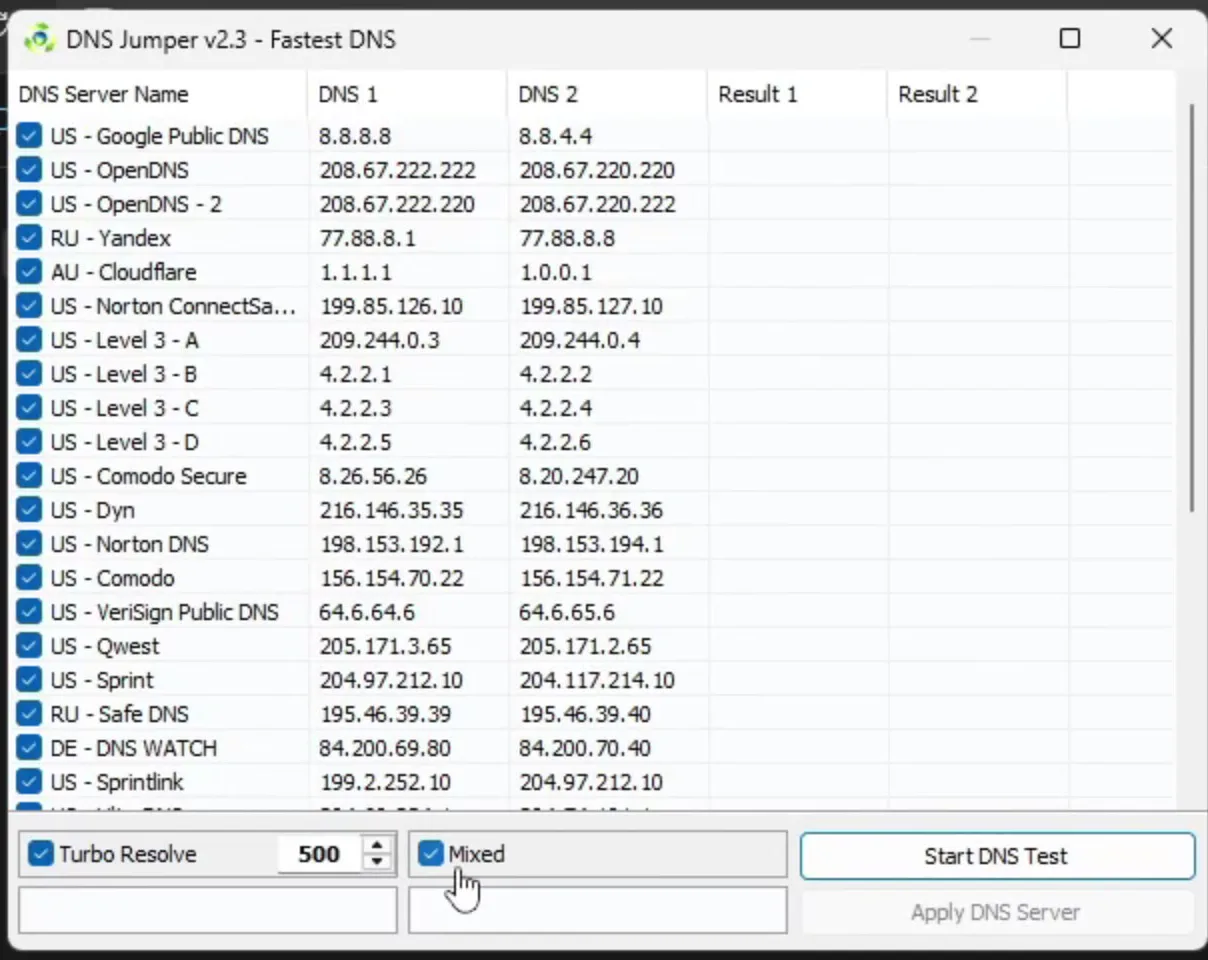
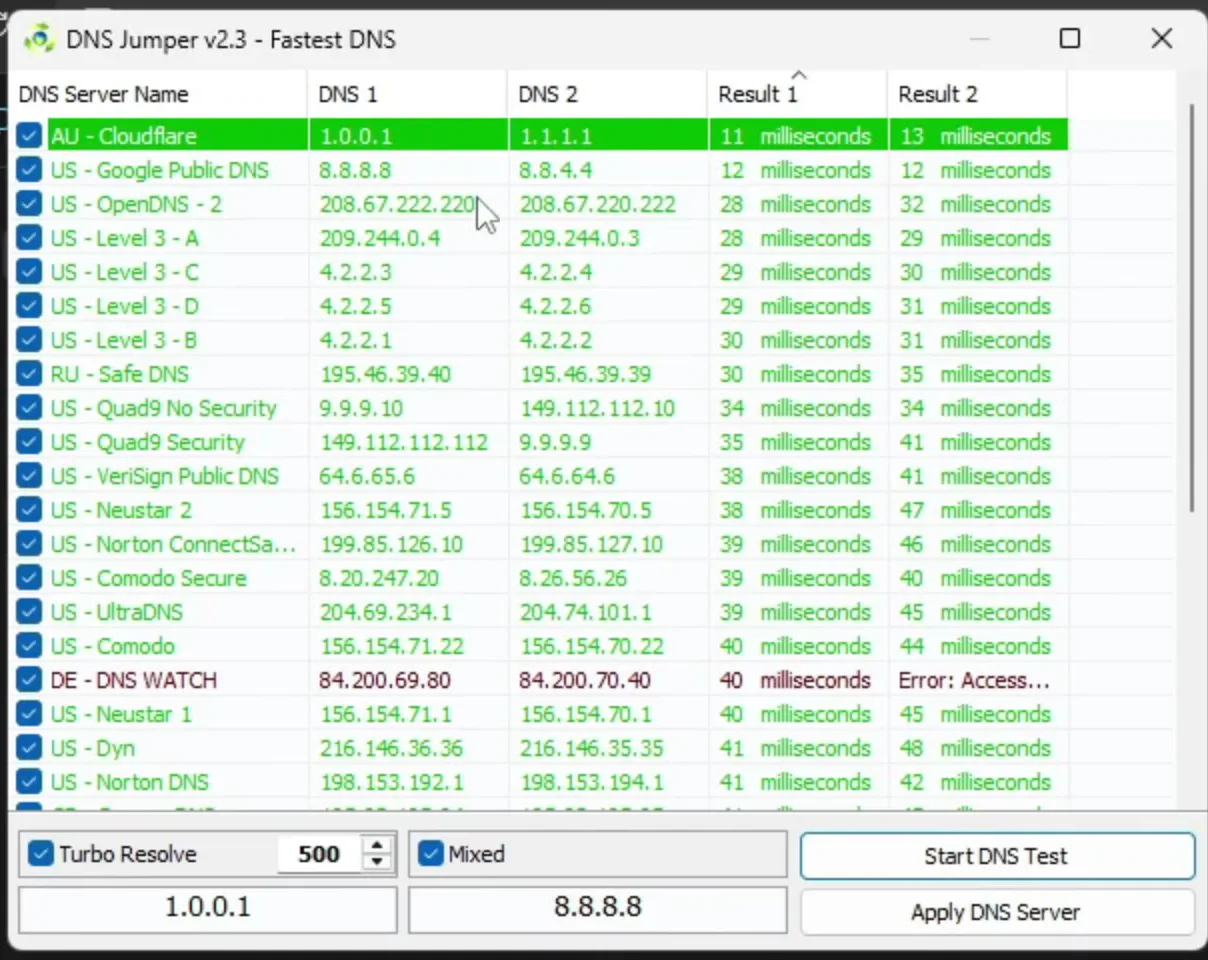
On the PC in the video the test put Cloudflare (11 ms) and Google Public DNS (12 ms) on top, and the two boxes at the bottom filled with 1.0.0.1 and 8.8.8.8. Your own list will look different, because the fastest server depends on where you live and on your provider. Close the results window, click Apply DNS Server and the tool confirms it applied the DNS.
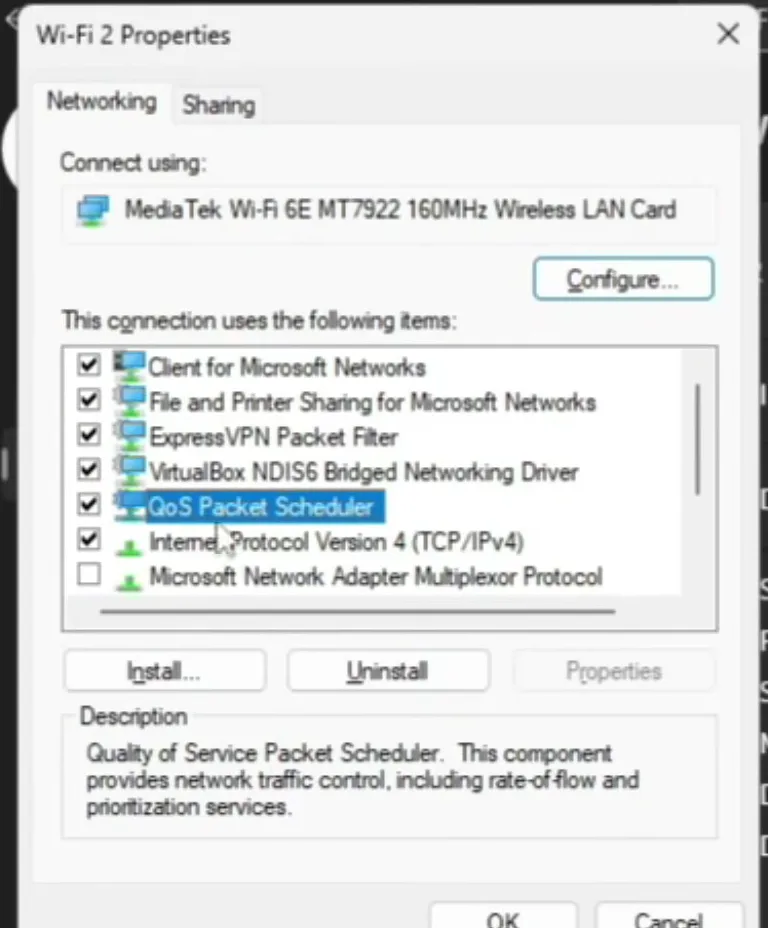
Right-click the network icon, open Network and Internet settings, click your Wi-Fi or Ethernet connection, then Hardware properties and More adapter options, and open the adapter's Properties. In the list, QoS Packet Scheduler must be ticked. Click OK and close everything.
Network and Internet settingsWi-Fi or EthernetHardware propertiesMore adapter optionsQoS Packet Scheduler
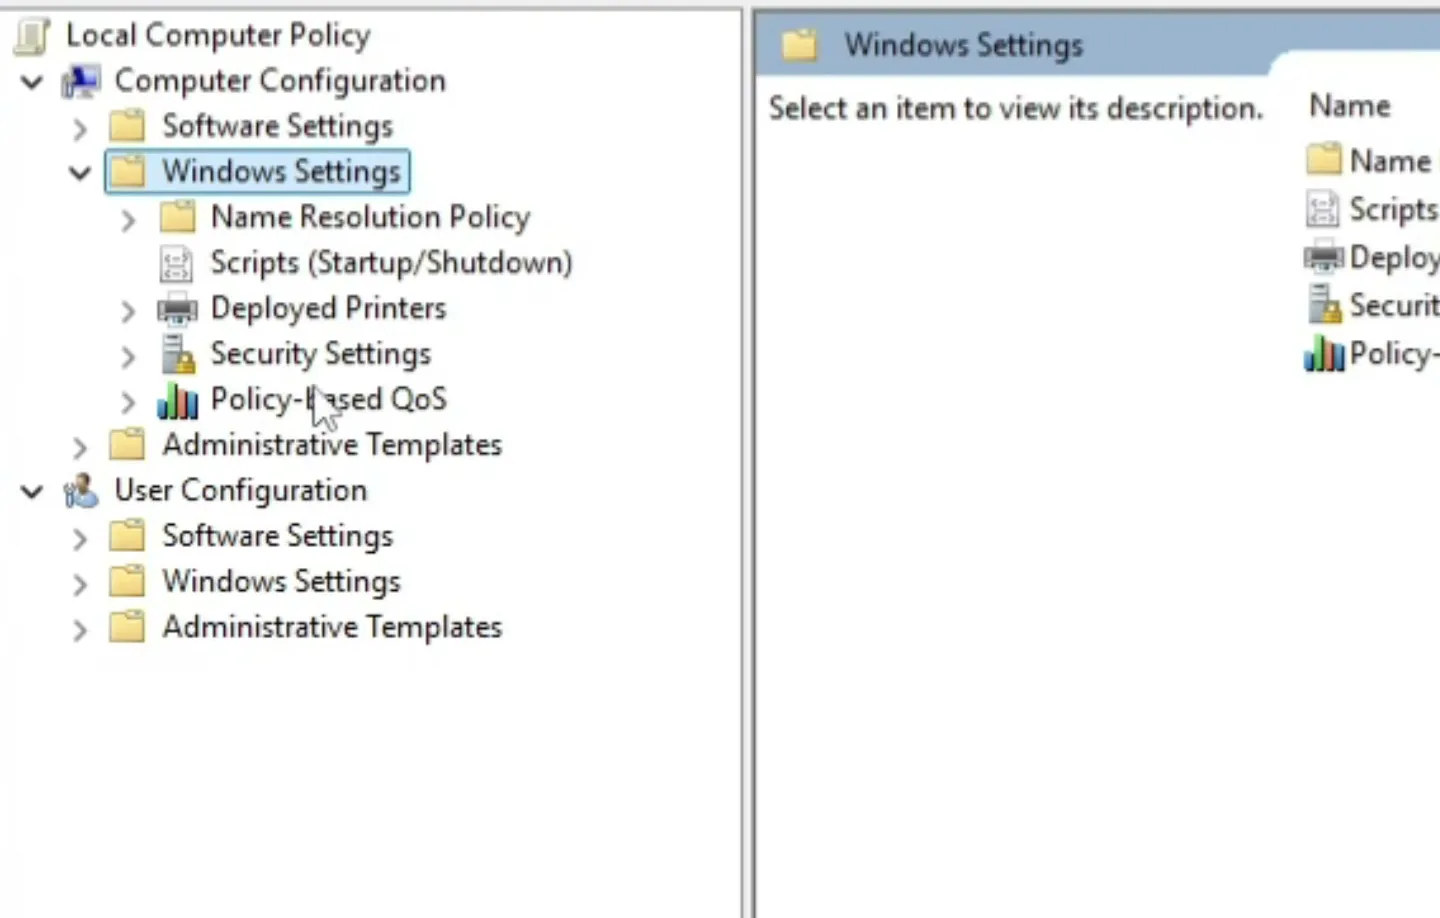
Double-click the gpedit shortcut from the pack to open the Local Group Policy Editor. Under Computer Configuration expand Windows Settings and find Policy-based QoS. Right-click it, open Advanced QoS settings, go to the DSCP Marking Override tab, tick the override option, click Ignored and then OK.
gpeditComputer ConfigurationWindows SettingsPolicy-based QoSAdvanced QoS settingsDSCP Marking OverrideIgnored
Good to know
gpedit ships with Windows Pro, Enterprise and Education. If your PC runs Windows Home, the shortcut may not open anything, and this step and the next two cannot be done the same way.
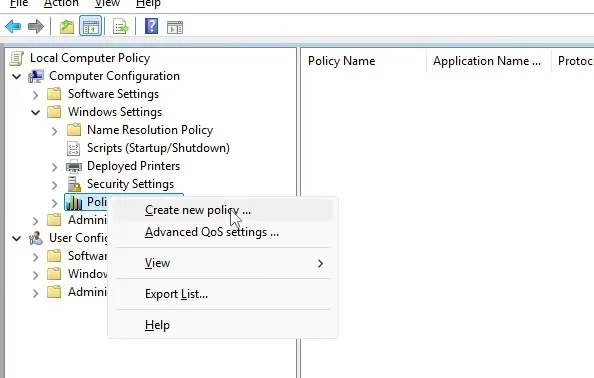
Go back to Policy-based QoS, right-click it and choose Create new policy. Name it after your game; the video uses Fortnite. Tick the DSCP value box and type 46, then click Next.
Policy-based QoS (right-click)Create new policyName: FortniteDSCP value: 46Next
Careful
DSCP 46 only marks your game's packets as high priority. Your router or provider decides whether to honour the mark, so treat this as something that may help, not a guarantee.
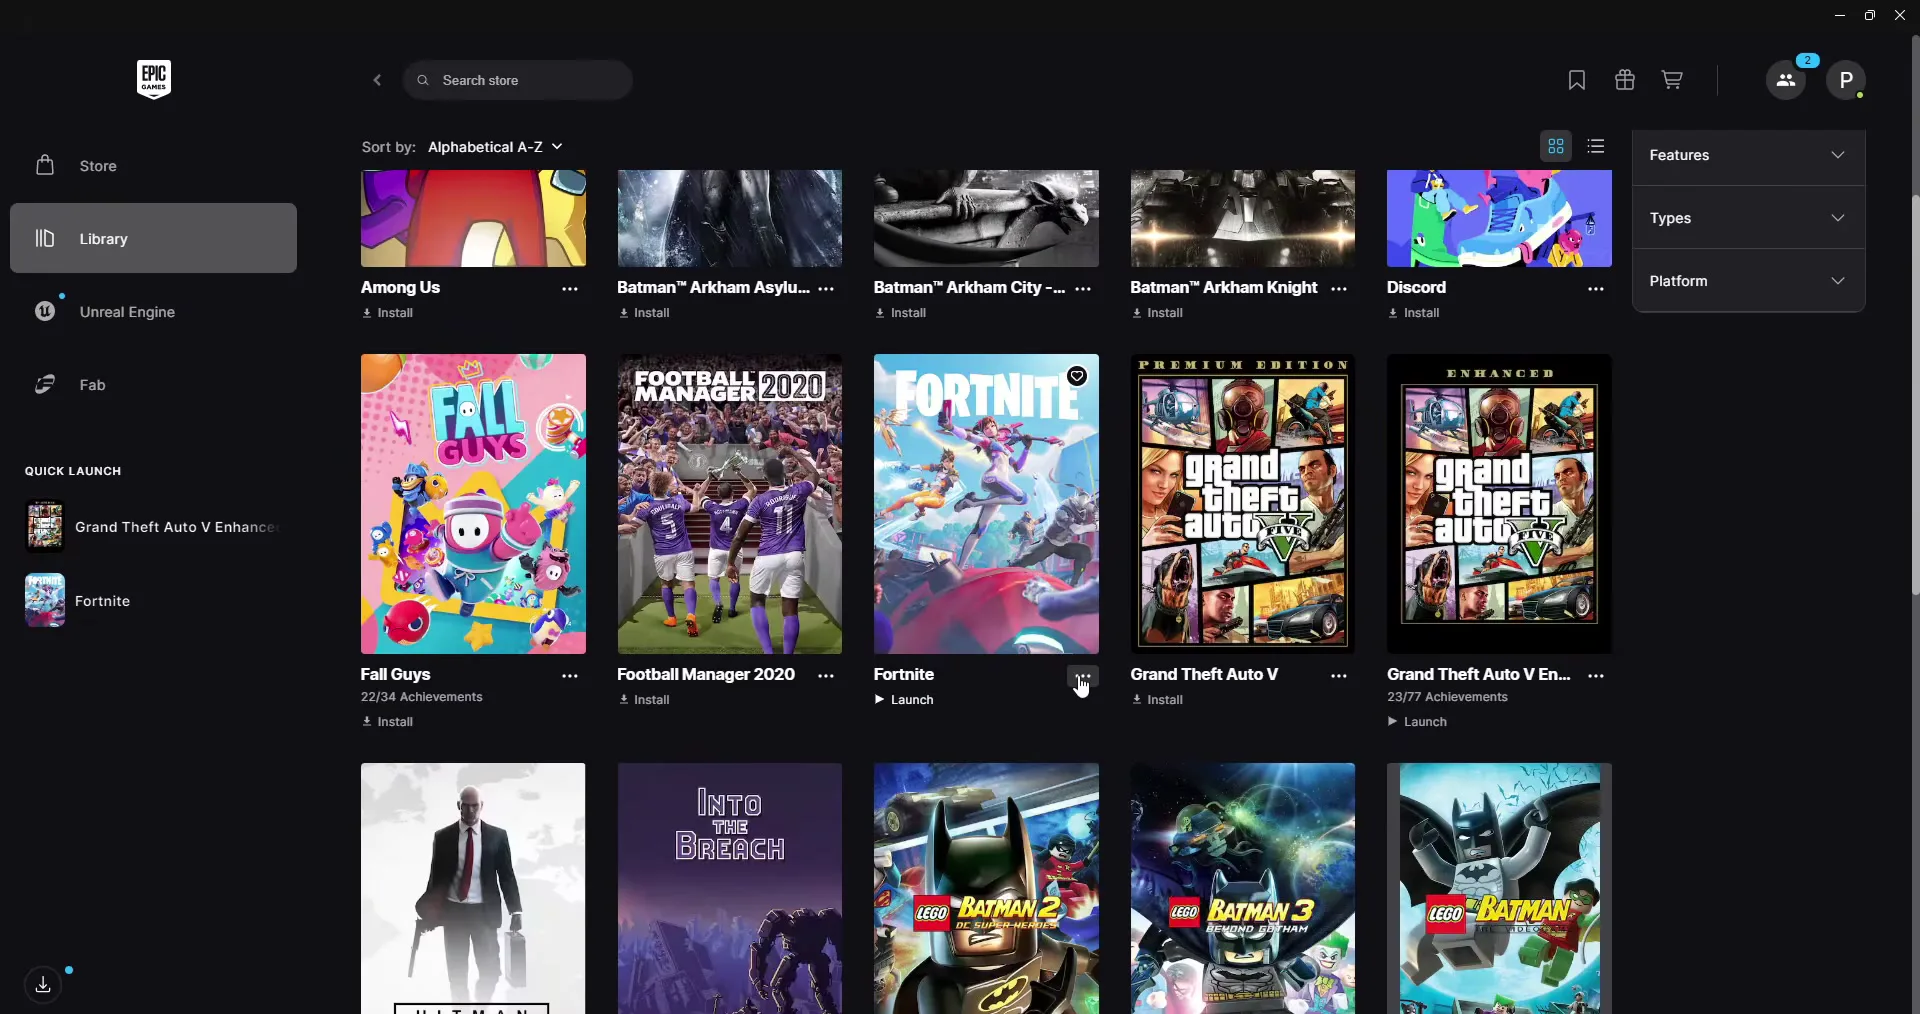
The policy needs the exact name of the game's program. Open the Epic Games Launcher, go to your library, click the three dots on Fortnite and choose Manage, then click the folder button to open the install folder. Go to FortniteGame, Binaries, Win64 and find FortniteClient-Win64-Shipping.exe.
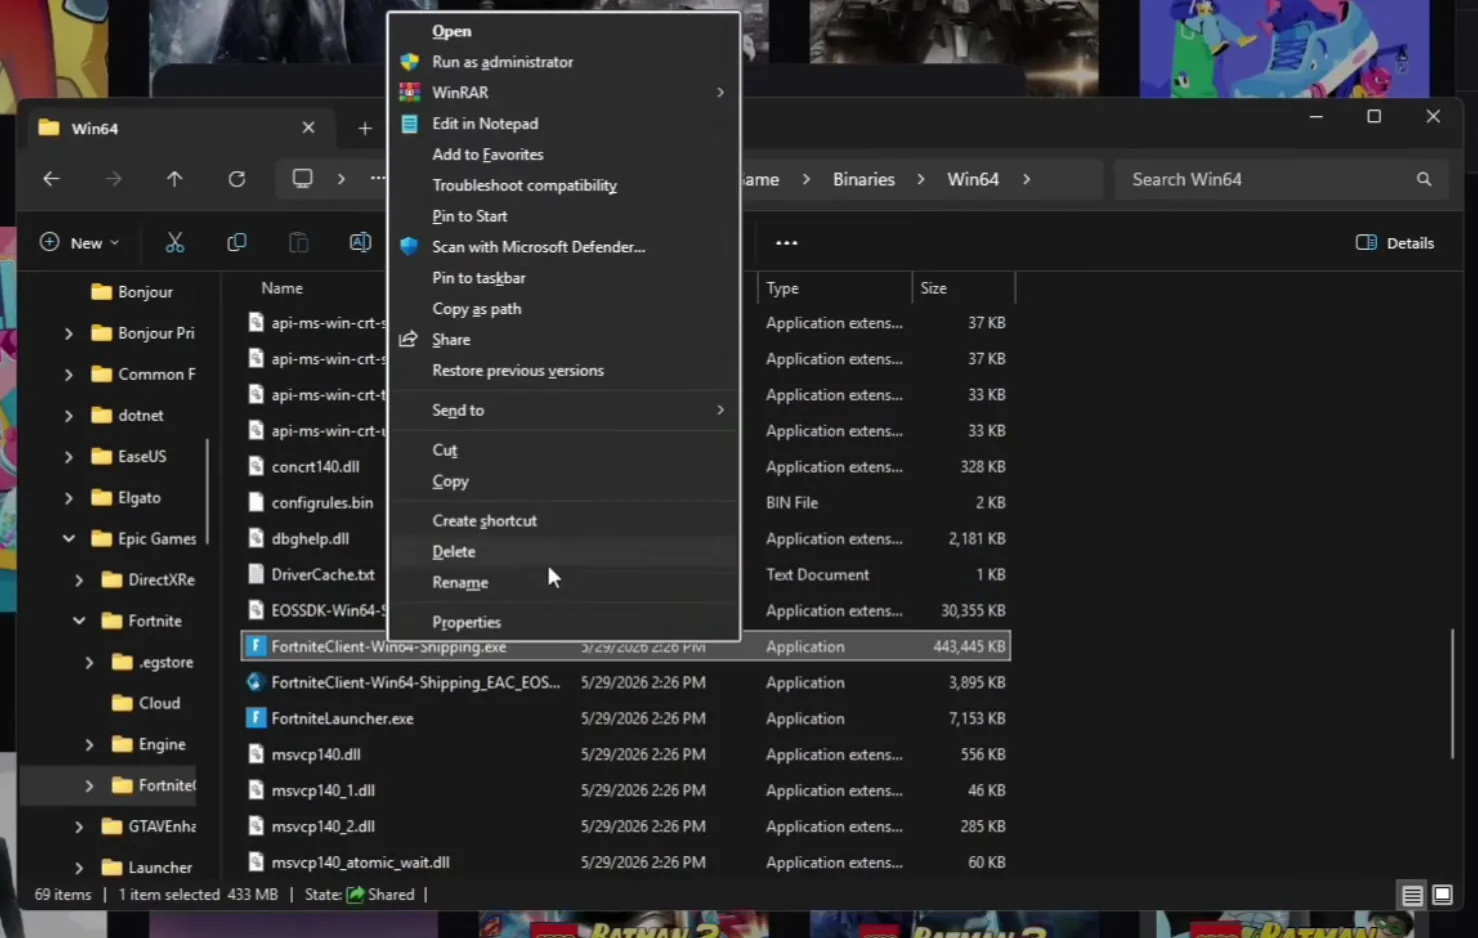
Right-click the file, click Rename, press Ctrl+A and then Ctrl+C to copy the whole name, and close the folder. In the wizard pick Only applications with this executable name, paste the name and click Next. Click Next once more, make sure the protocol is TCP and UDP and click Finish.
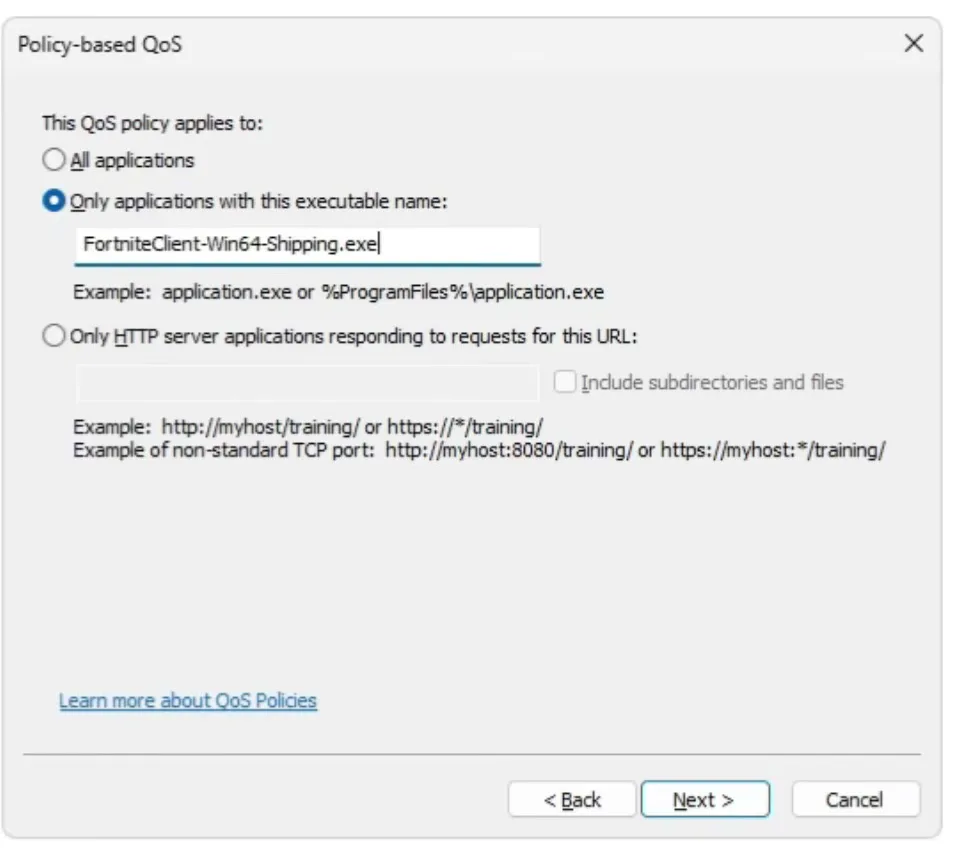
For another game, repeat the same policy with that game's own .exe name.
Double-click MSI_util_v3.exe and click Run. Find your network adapter in the list. On the PC in the video it is the Realtek PCIe 2.5GbE Family Controller; if you use Wi-Fi, look for your wireless card. Type 256 into its limit field, set the interrupt priority to High and click Apply. Then close everything.
Careful
Change only your network adapter row. The same list holds your graphics card, storage and USB controllers, and the video does not touch them.
How to check it worked
Open your game and look at the live network stats instead of guessing:
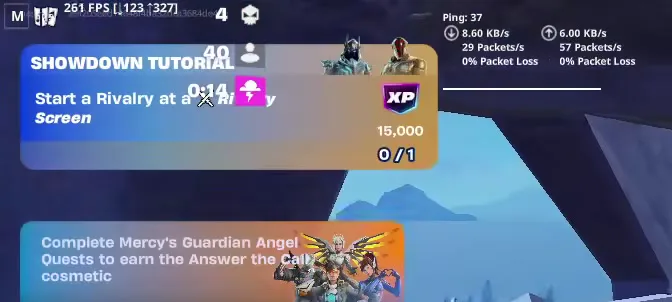
- In Fortnite the video ends on the in-game stats at the top left: Ping 37 and 0% Packet Loss on the PC in the video. Turn the same stats on in your game's settings and watch them for a few matches.
- In DNS Jumper, the server you applied should be the one at the top of the test list. Run the test again later if your provider changes.
- Open the adapter's Properties again: QoS Packet Scheduler must still be ticked. In gpedit, Policy-based QoS should now list your game's policy with DSCP value 46.
How to undo it
To undo everything, open System Restore and pick the restore point from the start of this guide. To undo only DNS, set the DNS server assignment on your adapter back to Automatic.
Key settings at a glance
FAQ
Does changing DNS lower my in-game ping?
Not by itself. DNS decides how fast names like a game's login server are looked up, so connecting and matchmaking can start quicker. Once you are in a match, your ping depends on the route to the game server. Our guide to lowering ping covers the rest.
Can these steps fix packet loss caused by bad Wi-Fi or my provider?
No. Settings on your PC cannot repair a weak signal, a damaged cable or a fault at your provider. If packet loss stays above 0% after the steps, test with an Ethernet cable and restart the router.
What is DSCP 46 and is it safe?
DSCP is a priority mark added to network packets, and 46 is the value usually used for the fastest class. Setting it only creates a Windows policy for your game's .exe, and you can delete that policy in gpedit at any time. Routers may ignore the mark.
gpedit does not open on my PC. What now?
The Local Group Policy Editor is not part of Windows Home. DNS Jumper, the QoS Packet Scheduler check, MSI Utility and netrestart.bat still work on Home. For spikes caused by uploads and downloads on your own connection, see our bufferbloat guide.
Do I need to do this for every game?
Only the QoS policy is per game: make one policy for each game's .exe name. DNS, the scheduler, the gpedit override, MSI Utility and the restart are system-wide and you do them once.
Is it safe to change settings in MSI Utility?
The video changes one row, the network adapter, and creates a restore point first. Do not apply changes to other devices on the list, and use the restore point if the PC behaves differently after a restart.
Will this also help my FPS?
This guide is about ping spikes and packet loss, not FPS. For Fortnite settings that also cut input delay, see our Fortnite FPS, input delay and ping guide and the network tweaks and your ping explainer.
 RIP Tweaks
Do it in a few minutes with RIP Tweaks
- Free plan for Windows 10 and 11
- A backup first, and every tweak can be switched off again
- Made for higher FPS, lower input lag and steadier ping
Free · Windows 10 and 11
