How to Fix Bufferbloat and Reduce High Ping on PC (2026)

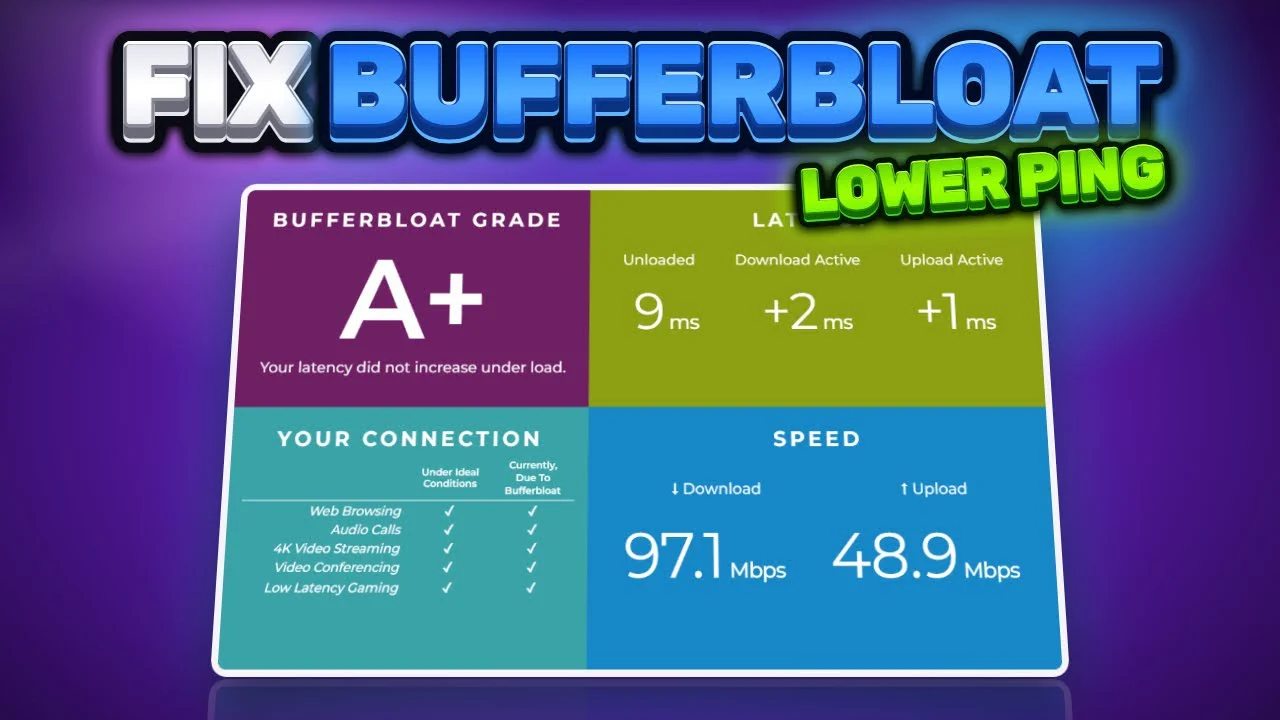
Written version of our video, every step checked against it.
Quick answer
- Bufferbloat is when your ping jumps while something uploads or downloads, even on fast internet.
- In RIP Tweaks, open Network and run the Bufferbloat Test: A+ or A is fine, B to F means bufferbloat raises your ping.
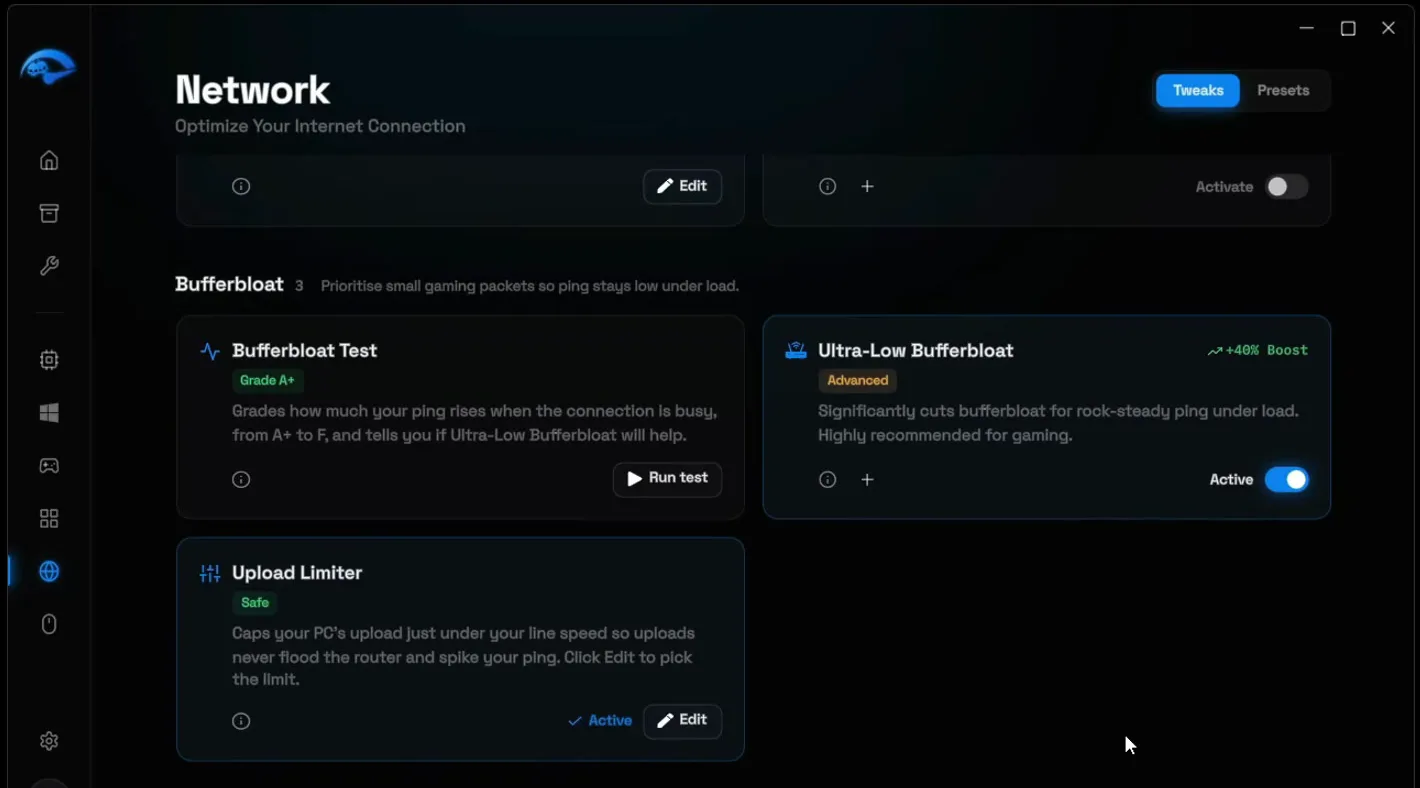
- Turn on Ultra-Low Bufferbloat, then set the Upload Limiter to the preset nearest your measured upload speed (50 Mbps for 48.9 in the video).
- Set Custom DNS to Cloudflare, apply the other network tweaks and switch off background apps and startup programs.
- Launch your game from the Games tab with Smart Game Boost and Pause Windows Update on. Fortnite ping went from around 70 to 35-36 on the PC in the video.
This guide is for anyone whose ping sits steady and then suddenly spikes up and down in Fortnite or any other online game on Windows 10 or 11. It follows our video click by click: how to test for bufferbloat, what each grade means, how the Upload Limiter stops uploads from flooding your router, and the network, Windows and game tweaks that took the ping in the video from around 70 to 35.
In this video
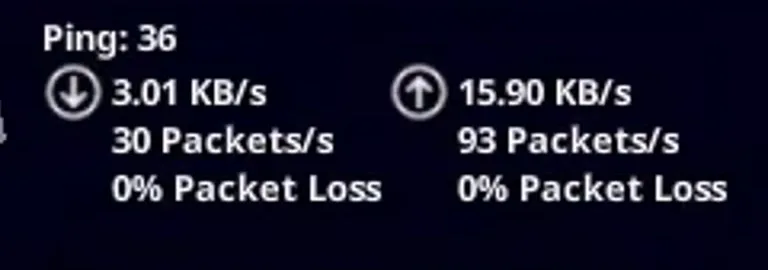
Start with a number you can compare against later. The video opens Fortnite with the network stats on screen: before any tweaks, the ping sits at around 70 (72 in this frame), with 0% packet loss in both directions.
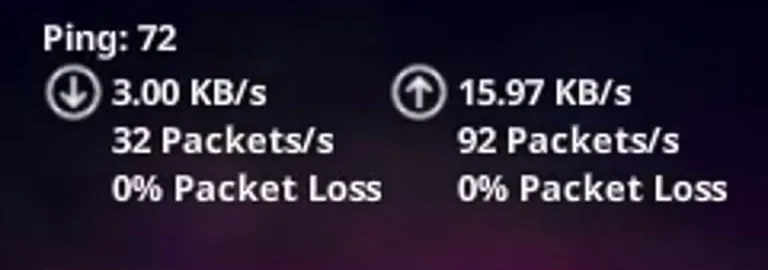
Note your own ping in the same game and the same server region. That way, the result at the end tells you what the changes did and not what a different server did.
The video goes through the RIP Tweaks Discord (discord.gg/riptweaks, the free tweaks channel), which leads to the download page. You can also open riptweaks.com/download directly. Click Download, run the installer and wait for it to finish.
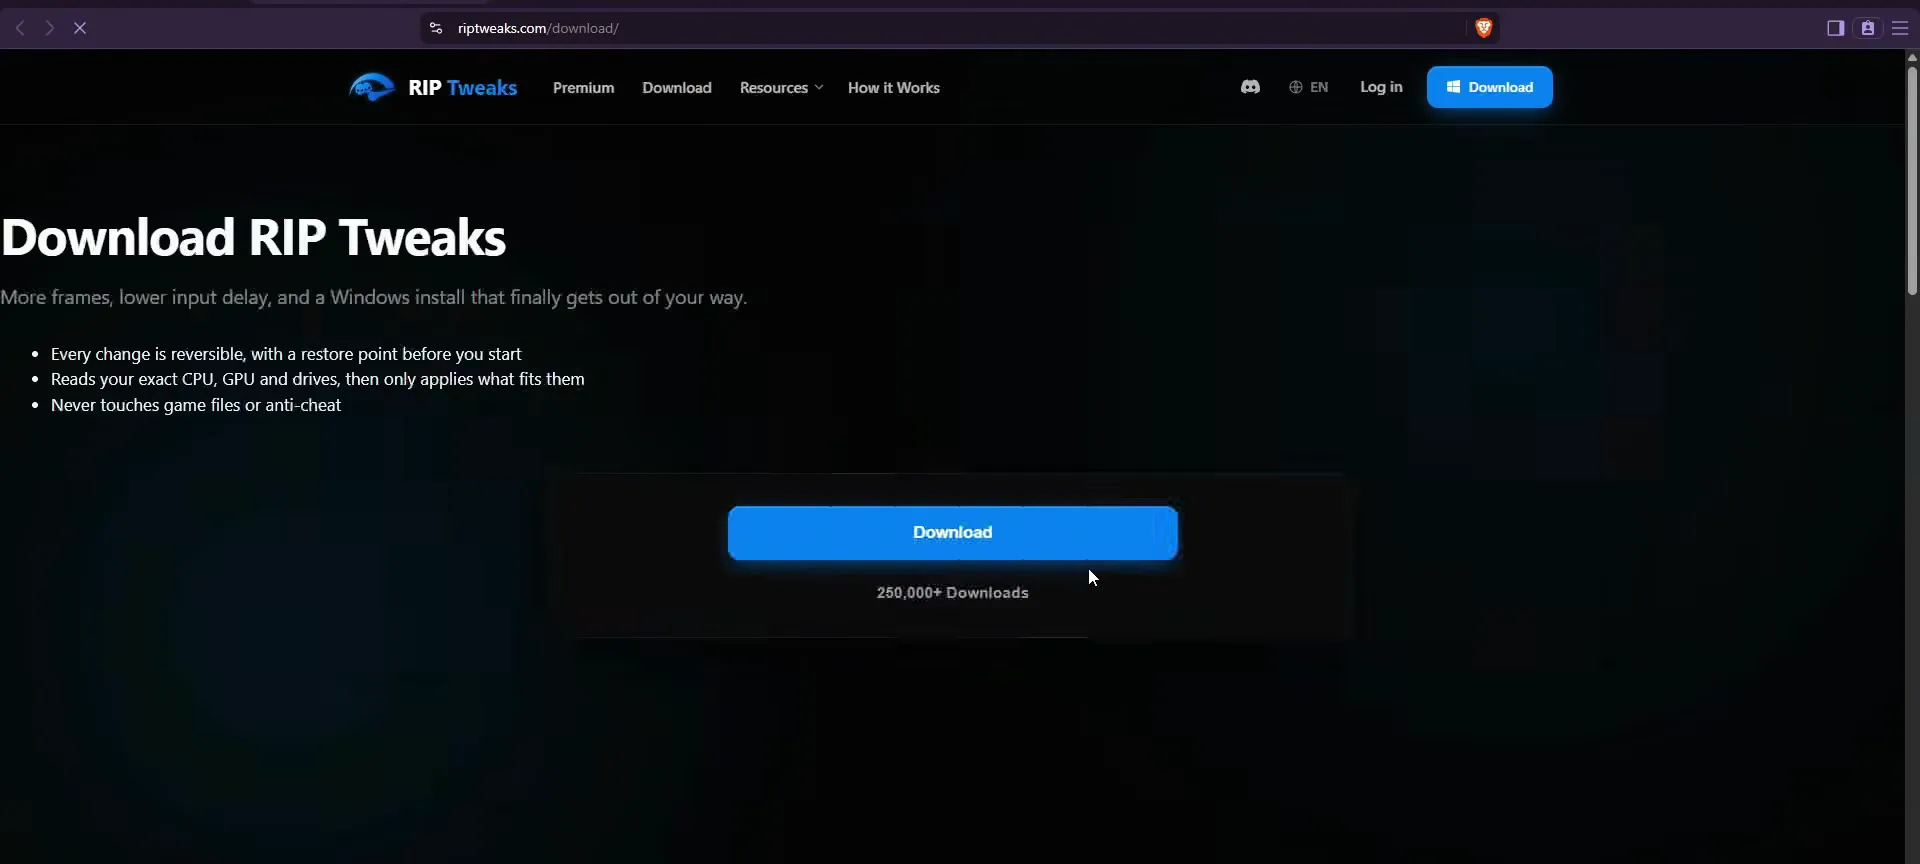
When the app opens, create an account with a username, email and password, then fill out the short questionnaire.

Open Network in the sidebar and scroll to the bottom, to the Bufferbloat section. Click Run test on the Bufferbloat Test card. The test measures three things: your normal ping, your ping while downloading and your ping while uploading. It also shows your download and upload speed.
NetworkBufferbloatBufferbloat TestRun test
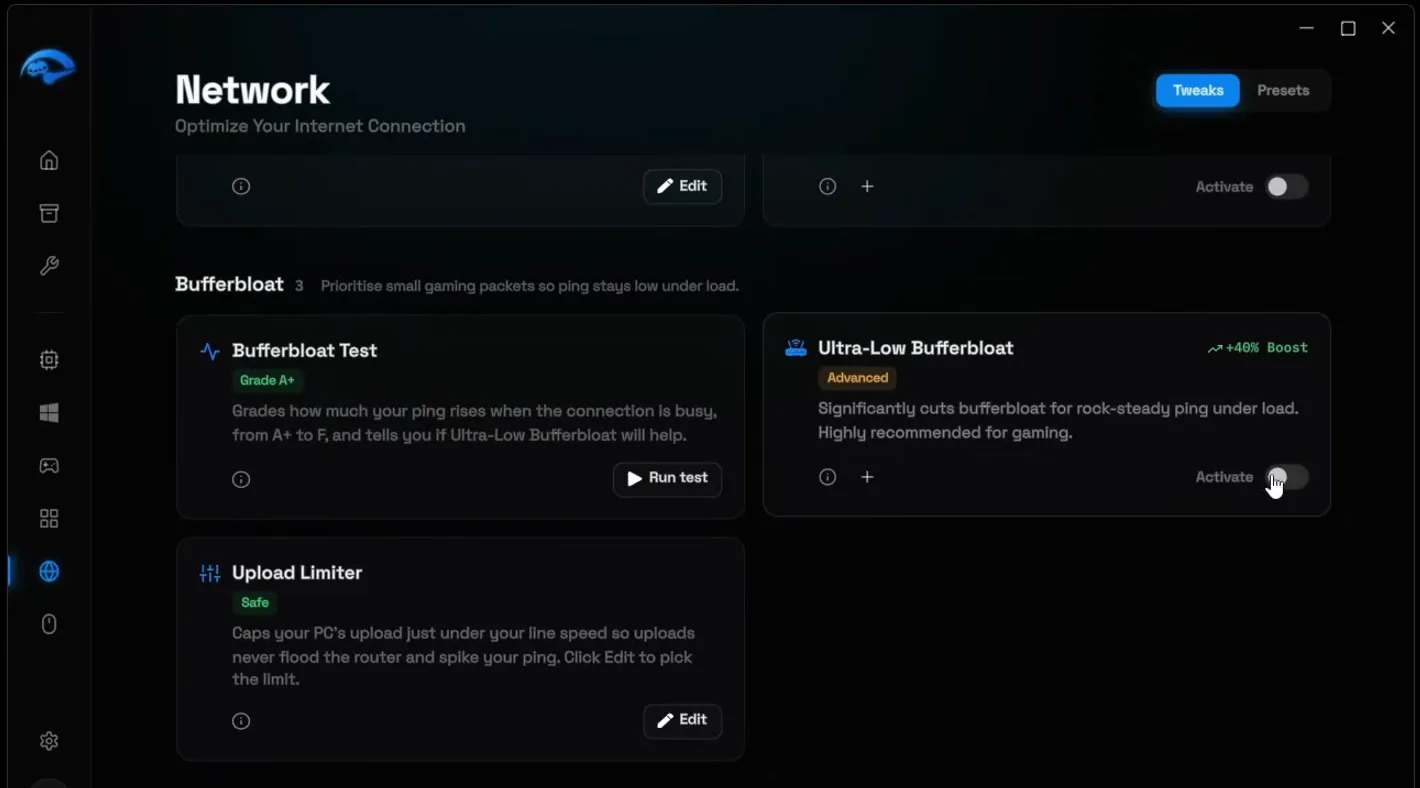
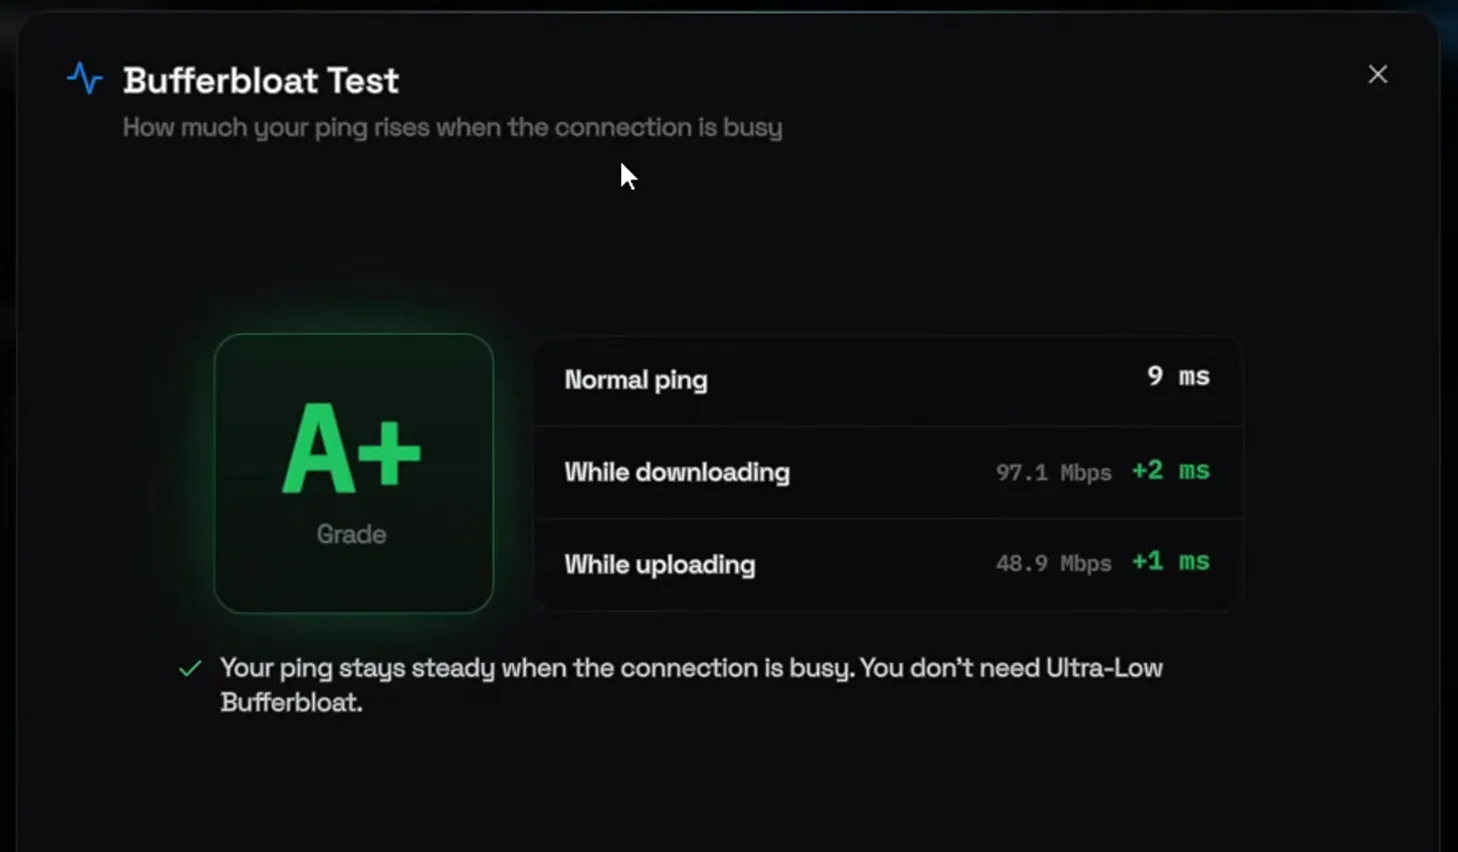
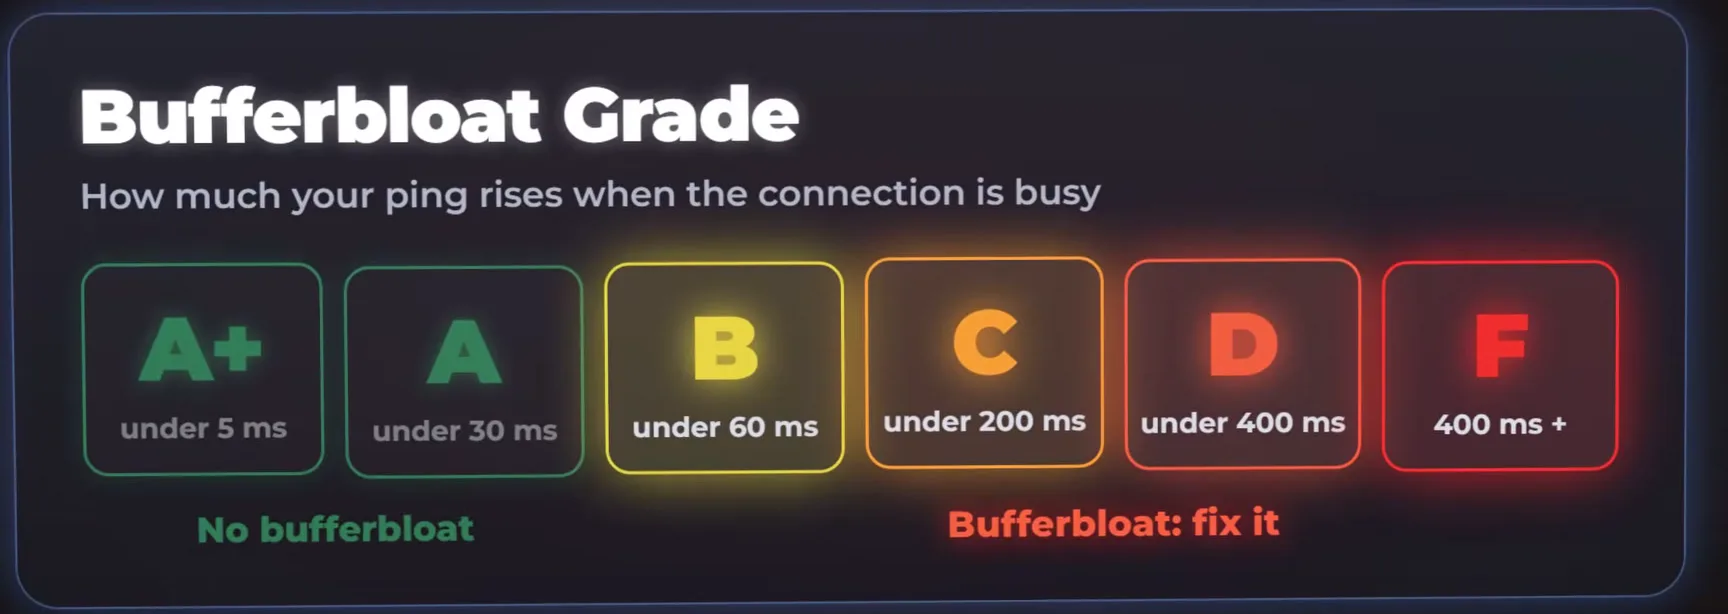
The grade shows how much your ping rises when the connection is busy. If you get A+ or A, bufferbloat is not what raises your ping. If you get anything from B to F, it most likely is, and the next step is your fix.
Good to know
The PC in the video already scored A+, so the app said Ultra-Low Bufferbloat was not needed. The video turns it on anyway to show the steps. With a B to F grade, these steps matter most.
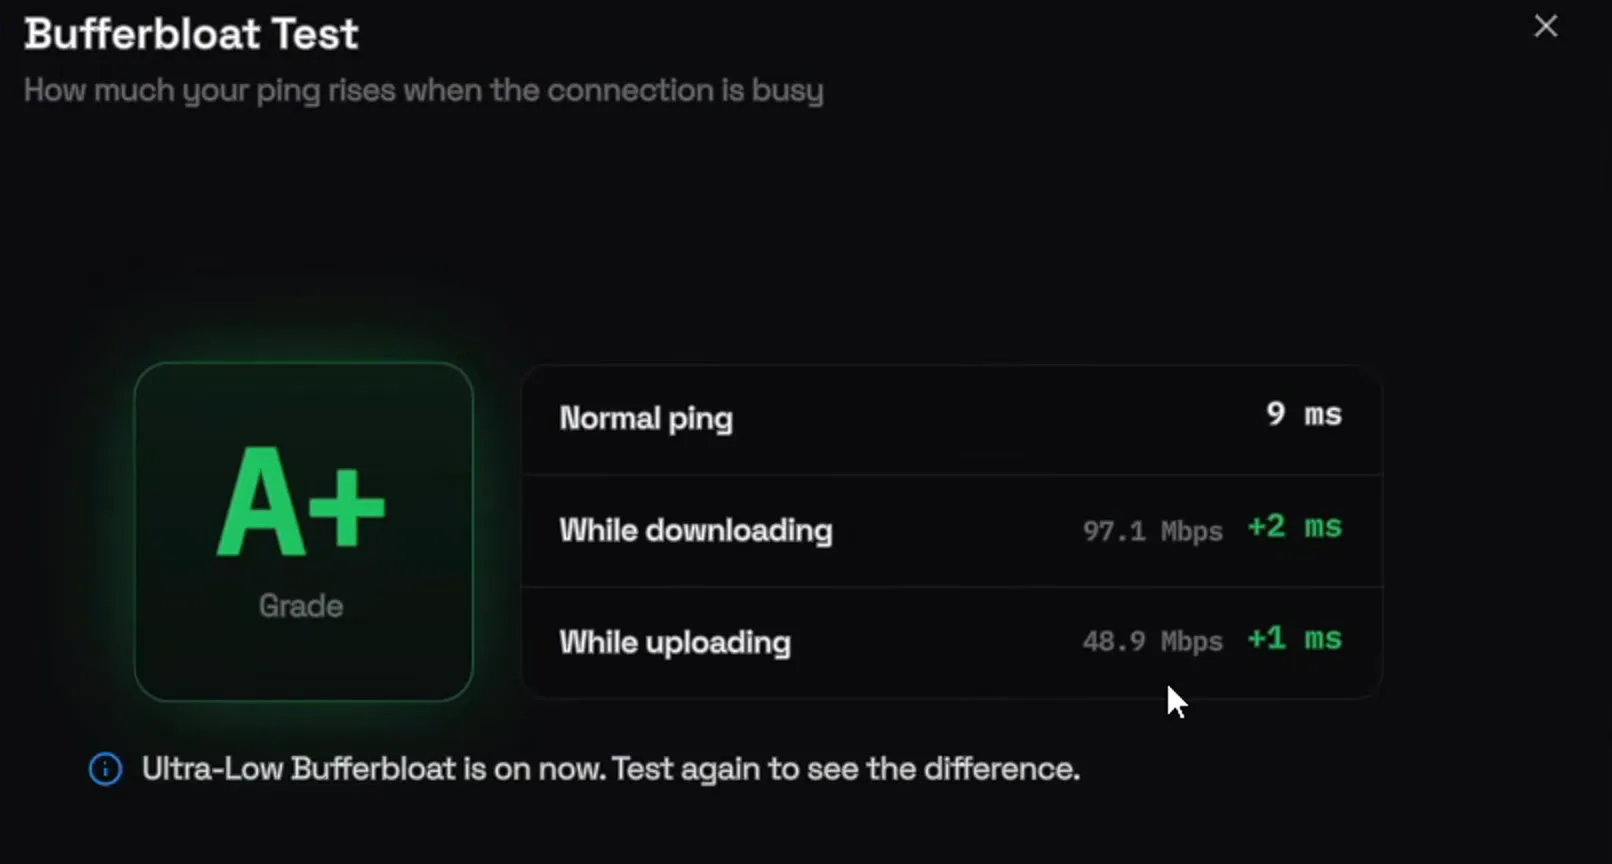
Close the test and switch on Ultra-Low Bufferbloat in the same section. Then open the test again and look at your upload speed: 48.9 Mbps in the video. You need that number for the next setting.
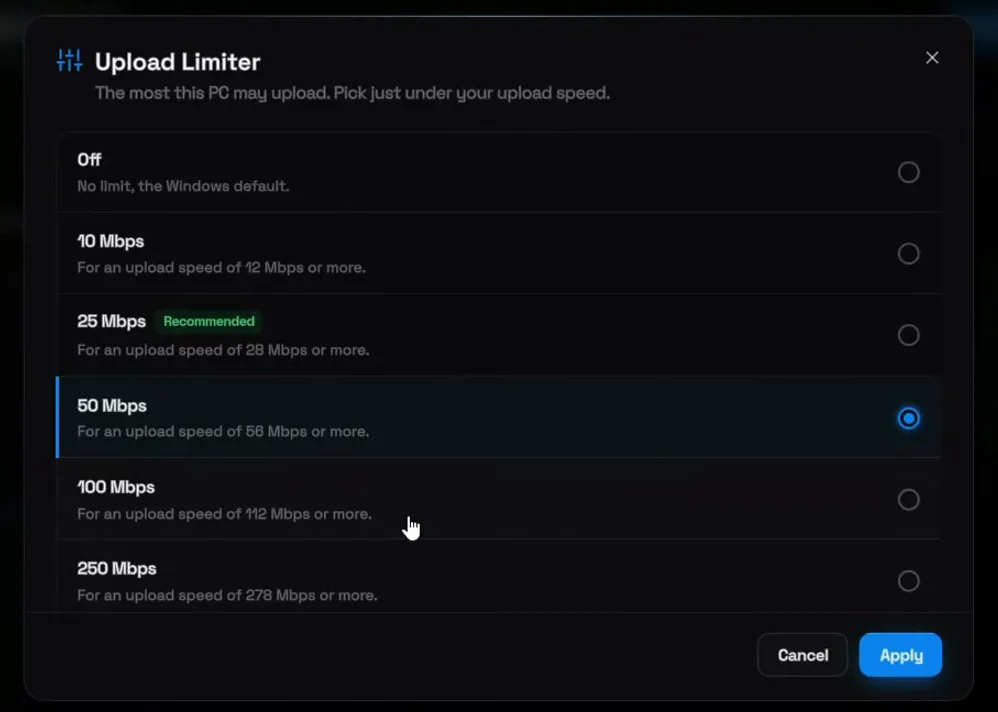
The Upload Limiter caps how fast this PC may upload, so uploads never flood the router and spike your ping. Click Edit on its card and choose from the presets: Off, 10, 25, 50, 100 or 250 Mbps. The video picks 50 Mbps because it is the nearest to 48.9, then clicks Apply. With an upload speed of 94, you would pick 100.
NetworkUpload LimiterEdit50 MbpsApply
Tip
Each preset names the upload speed it is meant for (50 Mbps: for 56 Mbps or more), and the window says to pick just under your upload speed. If your ping still jumps while you upload, step down one preset. If you upgrade your internet later, pick a higher one, or set it to Off and click Apply to undo it.
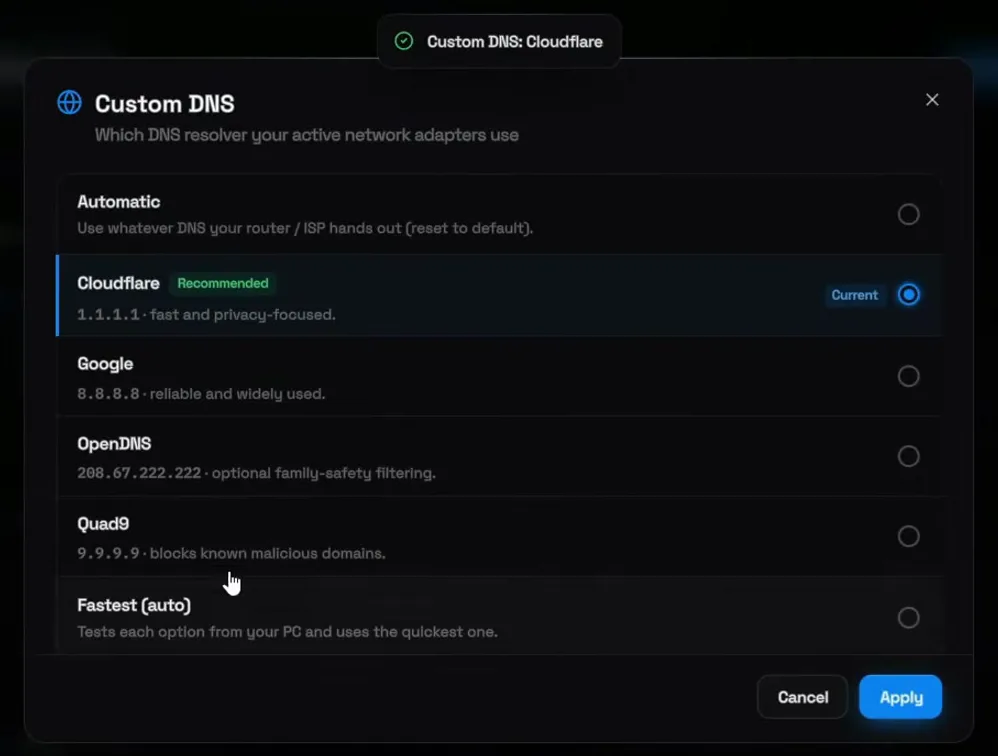
The next tweaks help everyone, whatever your grade. On the Custom DNS card, click Edit. You are most likely on Automatic, the DNS your router or internet provider hands out. The video picks Cloudflare (1.1.1.1) and clicks Apply. If you would rather let the app decide, Fastest (auto) tests every option from your PC and uses the quickest one.
NetworkCustom DNSEditCloudflareApply
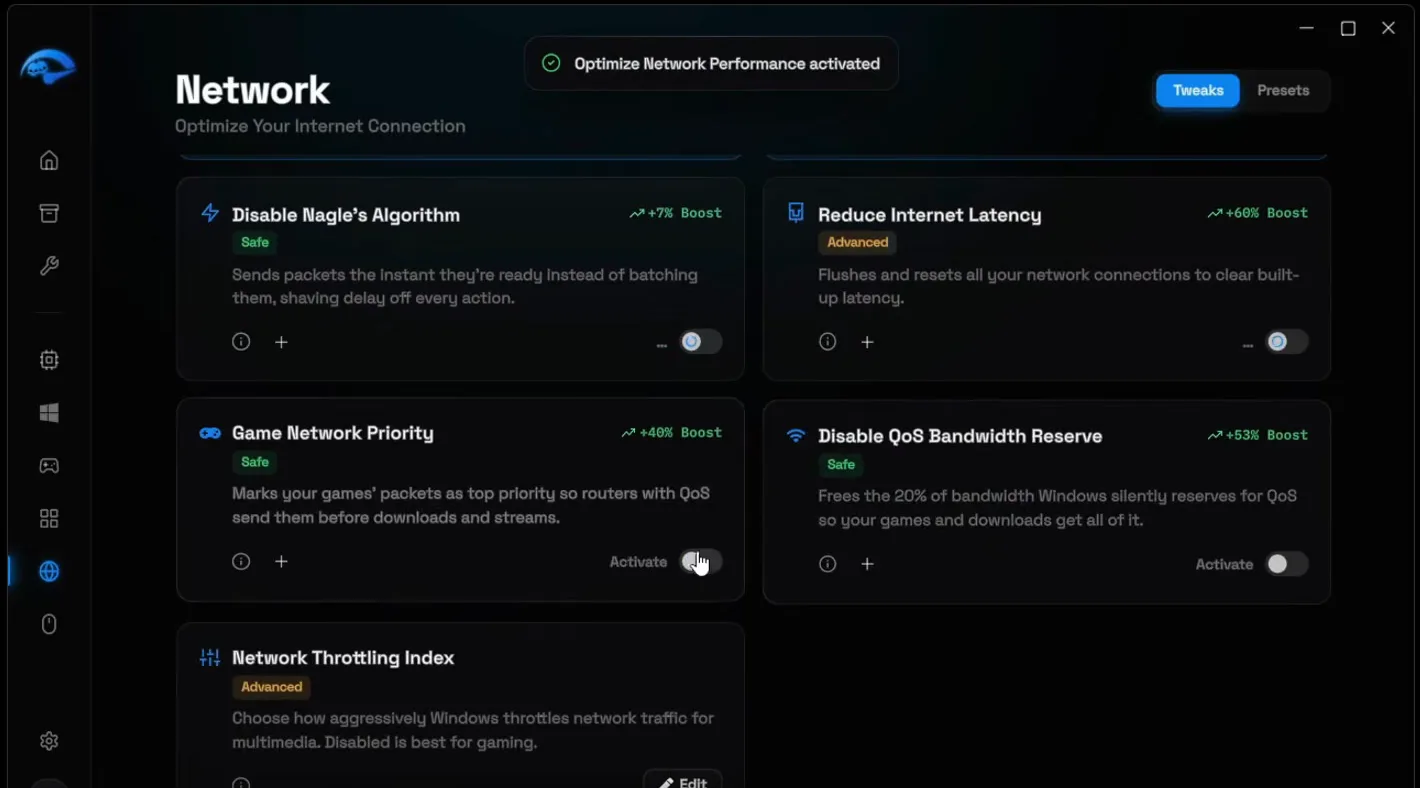
Go down the Network page and switch on the rest: every one of them is there for ping and packet loss. In Network & Ping that is Optimize Network Performance, Disable Nagle's Algorithm, Reduce Internet Latency, Game Network Priority and Disable QoS Bandwidth Reserve. On Network Throttling Index, click Edit, select Disabled (recommended) and click Apply.
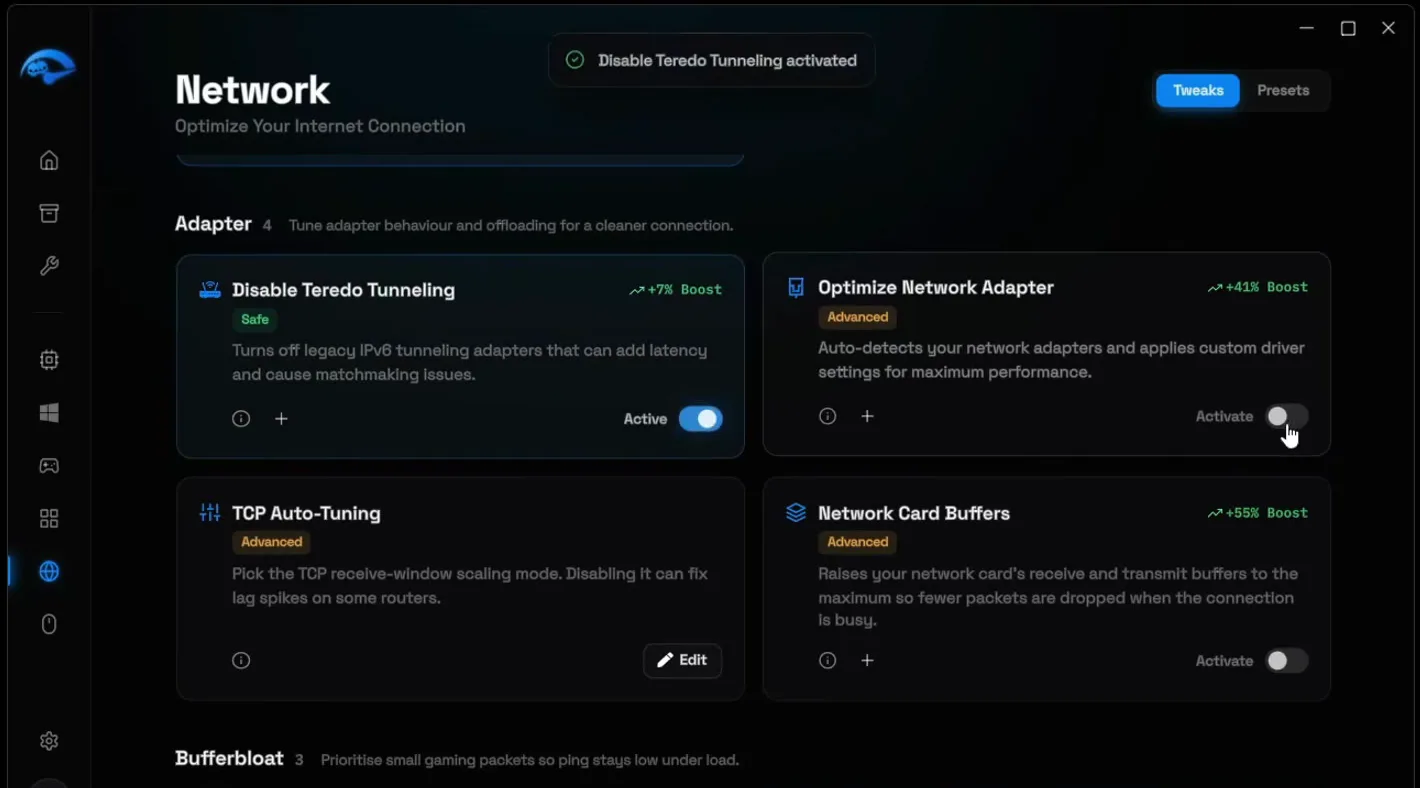
In the Adapter group, switch on Disable Teredo Tunneling, Optimize Network Adapter and Network Card Buffers. On TCP Auto-Tuning, click Edit, choose Normal and click Apply.
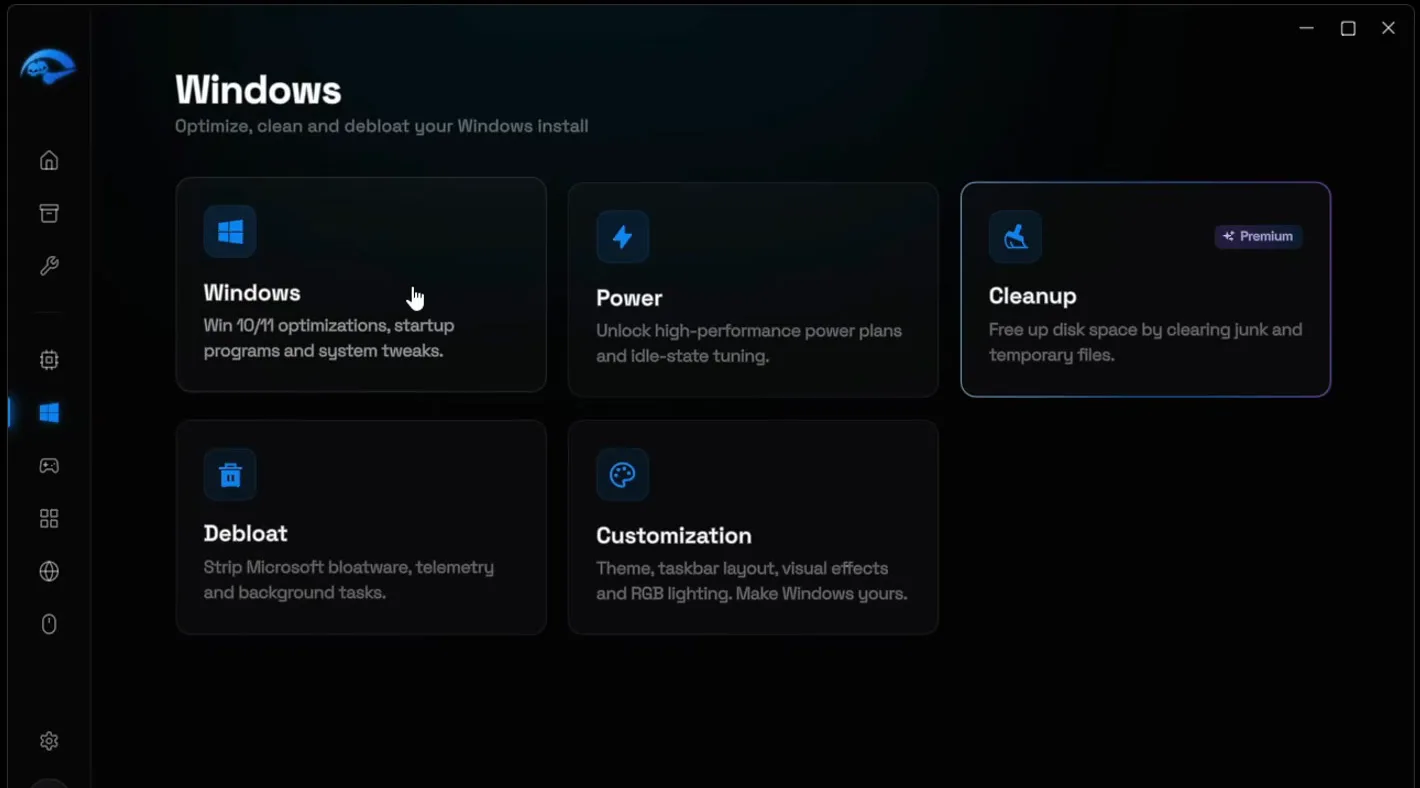
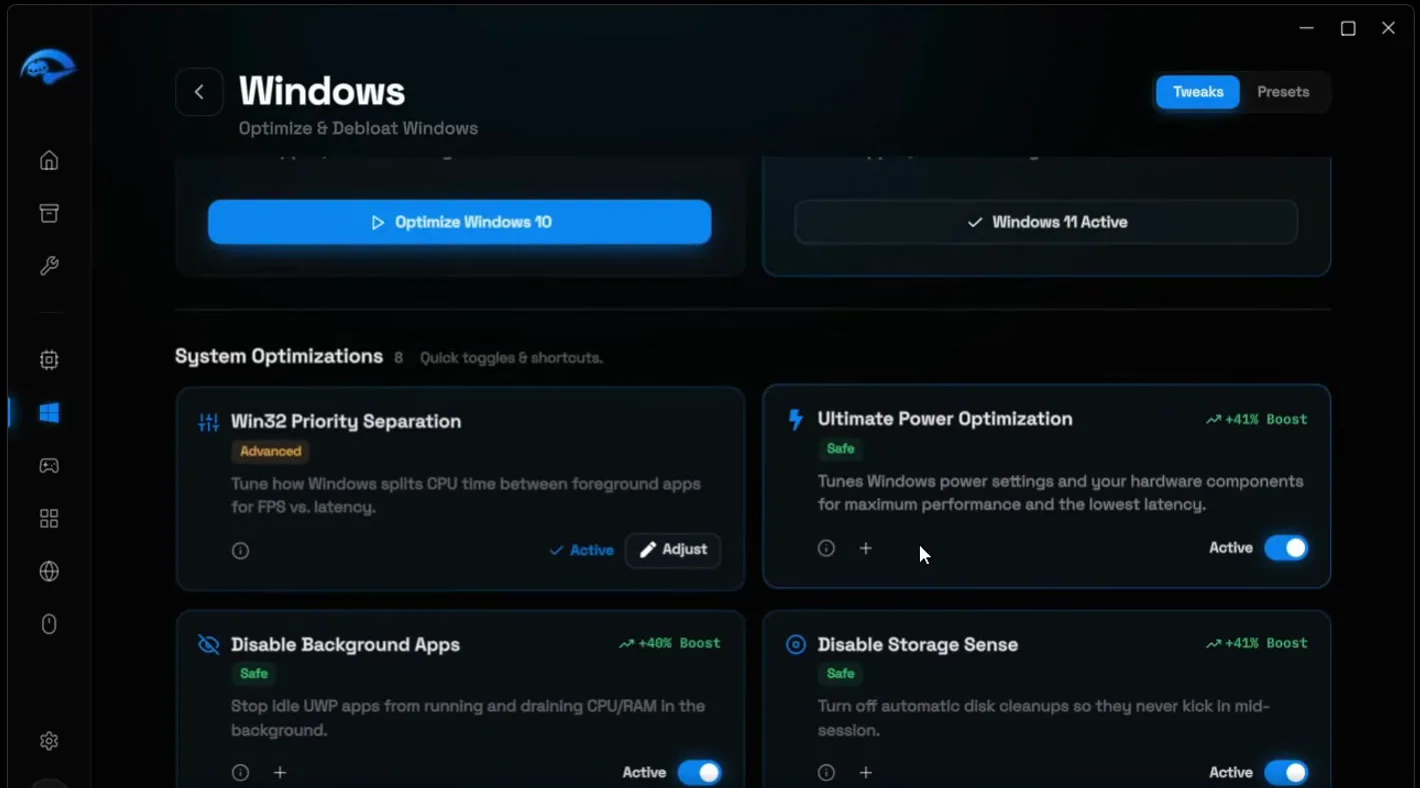
Open Windows in the sidebar and click the Windows card. Switch on Disable Background Apps, Disable Storage Sense and the other options in the list, and disable all your startup programs. Apps you don't know are running can use your internet and push your ping up, so it is better to stop everything you don't need in the background.
For better FPS, the video also switches on Ultimate Power Optimization in the same list.
WindowsWindowsSystem Optimizations
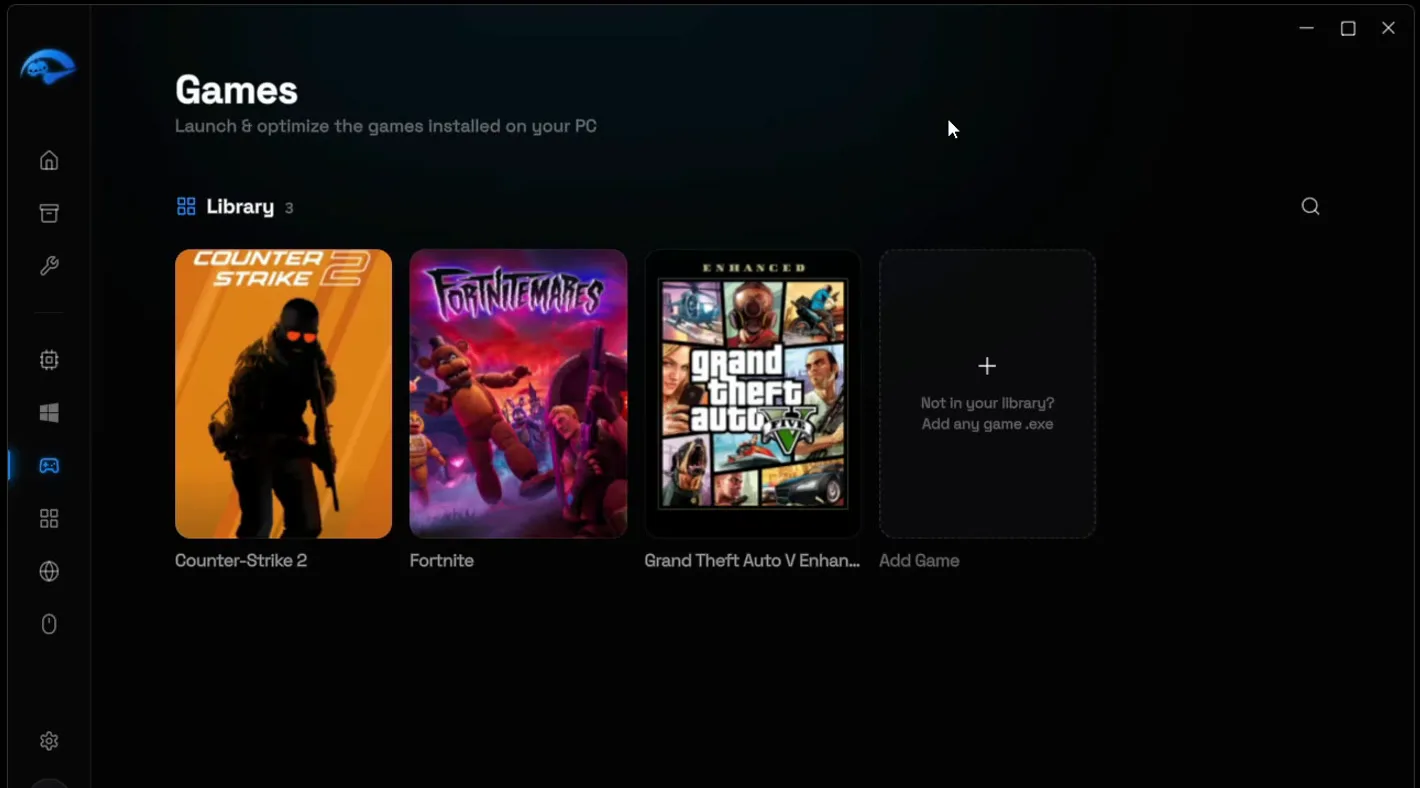
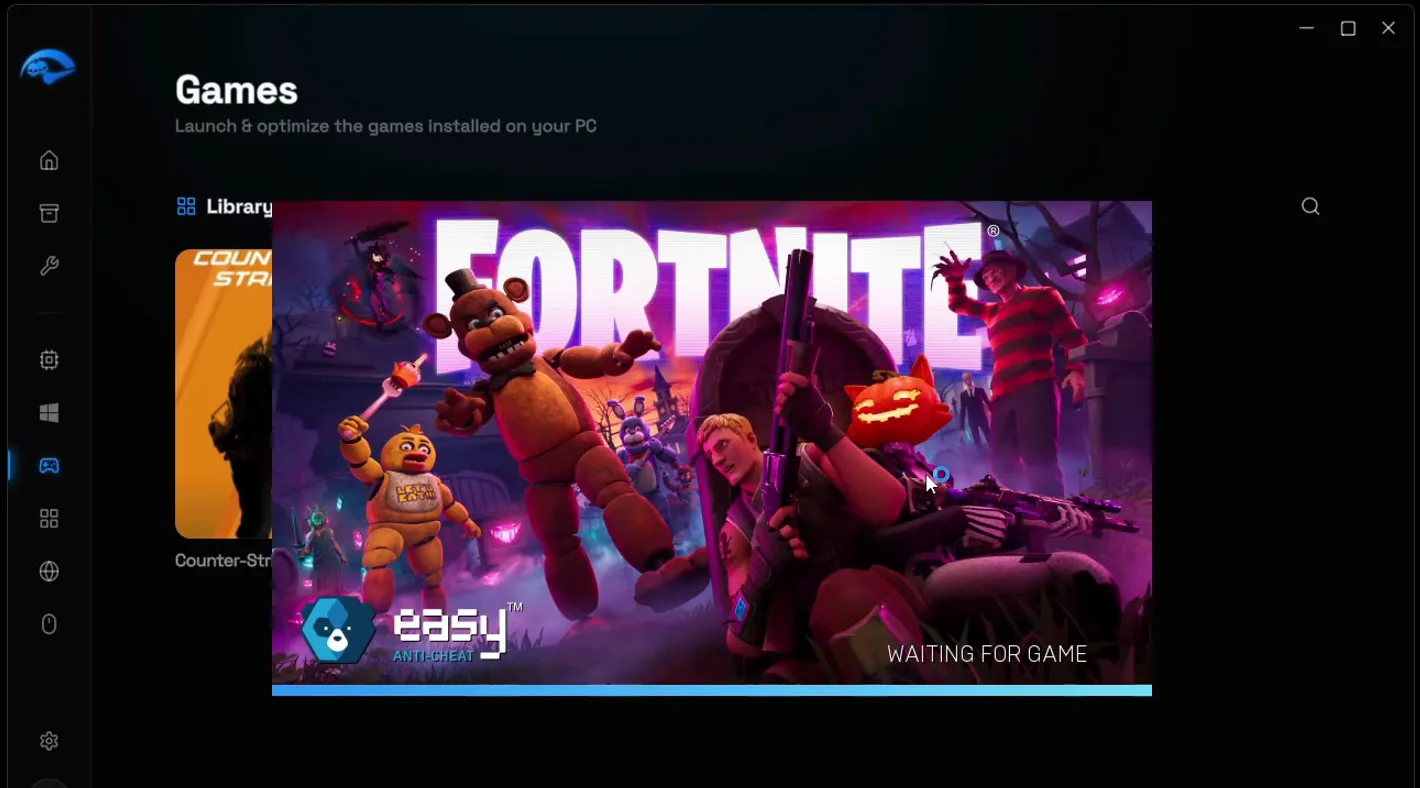
Open Games. Your installed games show up on their own, Fortnite and GTA V in the video, and Add Game takes any other game's .exe. Click the game you are going to play.
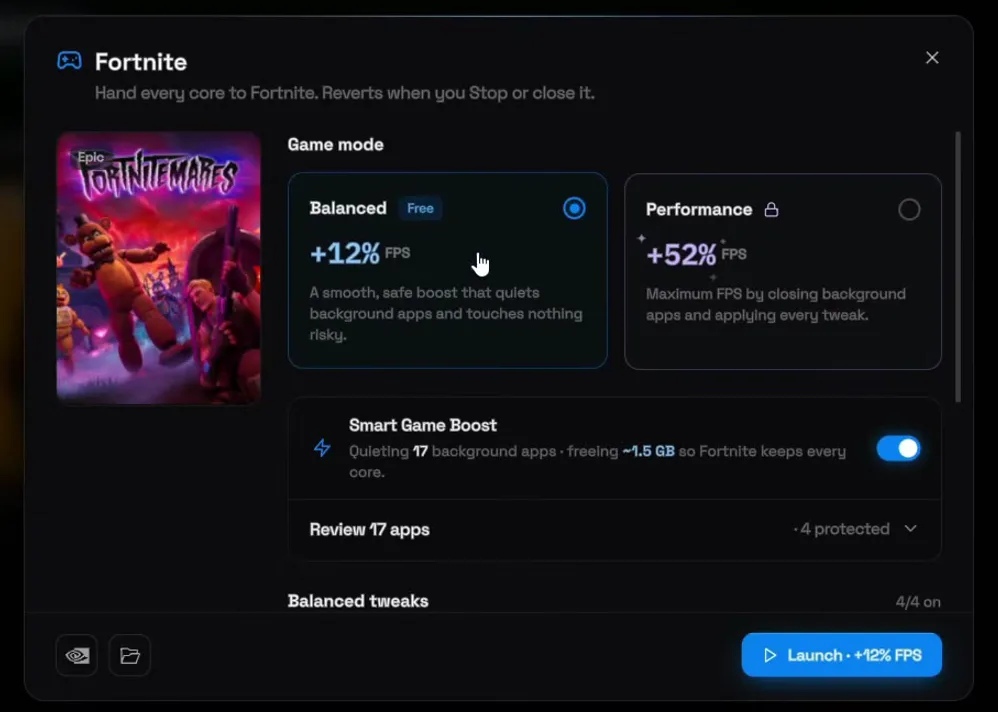
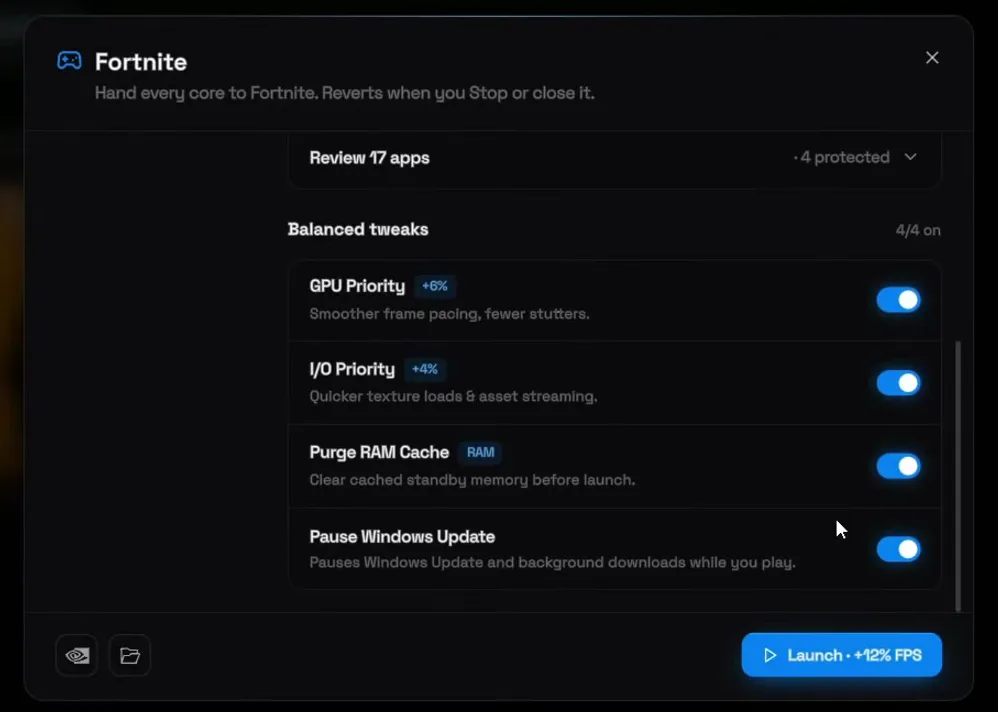
In the game's window, keep Balanced mode (free) selected and Smart Game Boost on: it quiets background apps while you play. Leave all the Balanced tweaks on, especially Pause Windows Update. Windows Update downloading in the background is a common reason for ping spikes in the middle of a match. Performance mode is part of Premium.
How to check it worked
- Run the Bufferbloat Test again. The "While downloading" and "While uploading" values should now stay close to your normal ping, and the grade should move toward A or A+.
- Check that Ultra-Low Bufferbloat and the Upload Limiter both show Active on the Network page.
- Join a match from the Games tab and watch your ping while something uploads, such as a cloud backup or a Discord stream. It should no longer jump the way it did.
- Compare the ping against the number you noted at the start, on the same server region.
How to undo it
To undo the Upload Limiter, open it with Edit, choose Off and click Apply. Every other tweak switches off with its own toggle, and the backup from the start restores everything in one go from Backups.
Key settings at a glance
FAQ
What is bufferbloat?
When something on your network uploads or downloads, such as Windows Update, a cloud backup, Discord or a stream, your router's buffer fills up and your game's packets wait in line behind that traffic. Your ping jumps, even on fast internet. A faster plan does not fix it; keeping the queue from filling does.
How do I test for bufferbloat?
In RIP Tweaks, open Network, scroll to Bufferbloat and click Run test on the Bufferbloat Test card. It measures your normal ping, your ping while downloading and your ping while uploading, and gives you a grade from A+ to F.
What is a good bufferbloat grade?
A+ (ping rises under 5 ms under load) and A (under 30 ms) mean no bufferbloat. B (under 60 ms), C (under 200 ms), D (under 400 ms) and F (400 ms or more) mean bufferbloat is raising your ping and is worth fixing.
Which Upload Limiter preset should I pick?
The one nearest your measured upload speed, as in the video: 50 Mbps for an upload of 48.9 Mbps, 100 for 94. The window itself suggests picking just under your upload speed, so if your ping still spikes while you upload, try the next preset down.
Will the Upload Limiter slow my internet down?
It caps only this PC's uploads, at about your line speed, so day to day you will hardly notice it. Downloads are not capped. If you upgrade your internet, pick a higher preset, or set it to Off and click Apply.
Does fixing bufferbloat lower ping in Fortnite?
It stops the spikes that come from a busy connection. On the PC in the video, the full set of tweaks took Fortnite ping from around 70 to 35-36. Your result depends on your connection and server region. For more Fortnite tweaks, see our Fortnite FPS, input delay and ping guide.
My bufferbloat grade is A+ but my ping still spikes. What now?
Then the spikes have another cause, such as Wi-Fi, packet loss or background downloads. The rest of this guide still helps: the DNS, network and Windows tweaks and Pause Windows Update. Our ping spikes and packet loss guide covers the other causes.
Do other devices on my network still cause bufferbloat?
They can. The Upload Limiter and the other tweaks work on this PC, so a console downloading a game or a phone backing up photos on the same network can still fill the router's queue.
 RIP Tweaks
Do it in a few minutes with RIP Tweaks
- Free plan for Windows 10 and 11
- A backup first, and every tweak can be switched off again
- Made for higher FPS, lower input lag and steadier ping
Free · Windows 10 and 11
