How to Fix Fortnite Stutters and FPS Drops (2026)

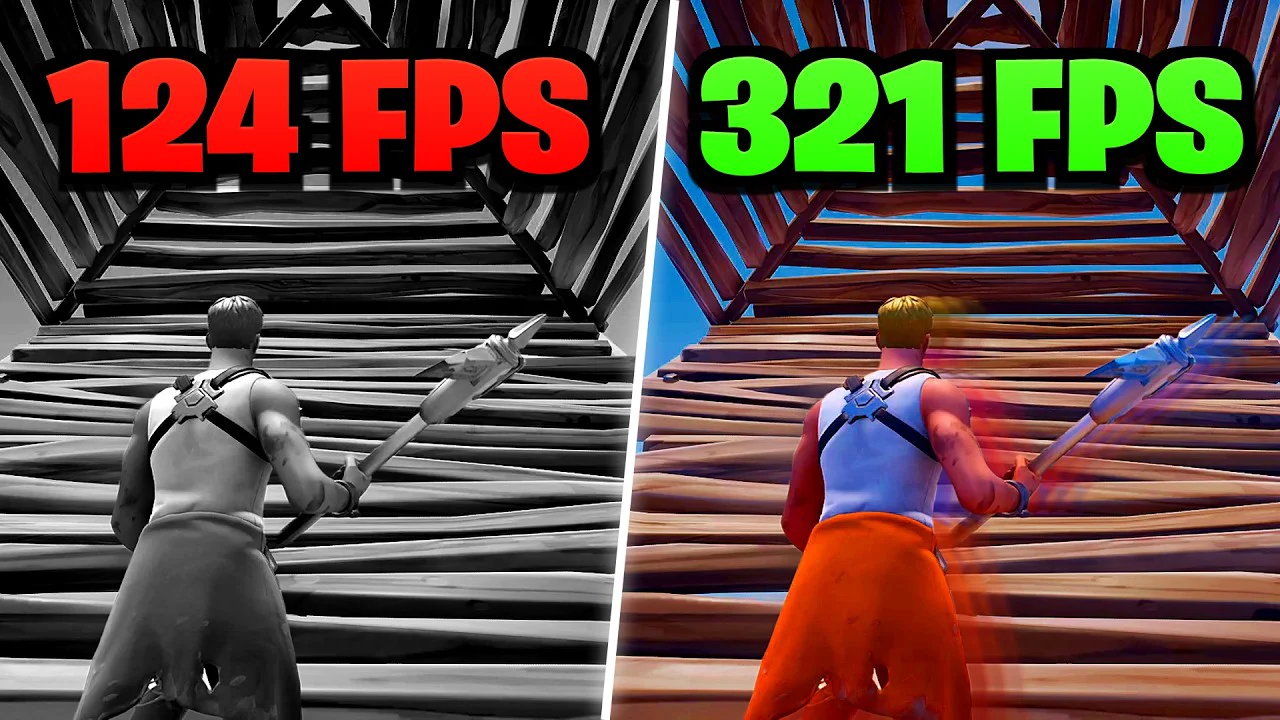
Written version of our video, every step checked against it.
Quick answer
- Create a backup in RIP Tweaks first, so every change can be undone.
- Activate the CPU, GPU, RAM, BIOS, drive and Windows tweaks and set Win32 Priority Separation to
26 Hex. - Turn off startup apps you don't need, apply the RIP Gaming Power Plan and set PCIe Link State Power to Off.
- Clean the DirectX Shader Cache: the video's main fix when Fortnite suddenly stutters and drops FPS.
- Debloat Windows, add the Fortnite NVIDIA profile (Force Resizable BAR) and launch Fortnite in Balanced or Performance mode.
Your FPS is stable, then out of nowhere it drops and Fortnite starts stuttering. Most of the time the cause is the shader cache. This guide follows our video step by step with the free RIP Tweaks app: the hardware and Windows tweaks, the shader cache cleanup, fewer background processes, a Fortnite NVIDIA profile and the game launcher that got 300 FPS stable on the laptop in the video.
In this video
Type discord.gg/riptweaks into your browser and join the server. Open the free-tweaks channel, click Download RIP Tweaks, then Visit site and Download, and wait for the installer to finish. You can also download it straight from riptweaks.com.
discord.gg/riptweaks#free-tweaksDownload RIP TweaksVisit siteDownload
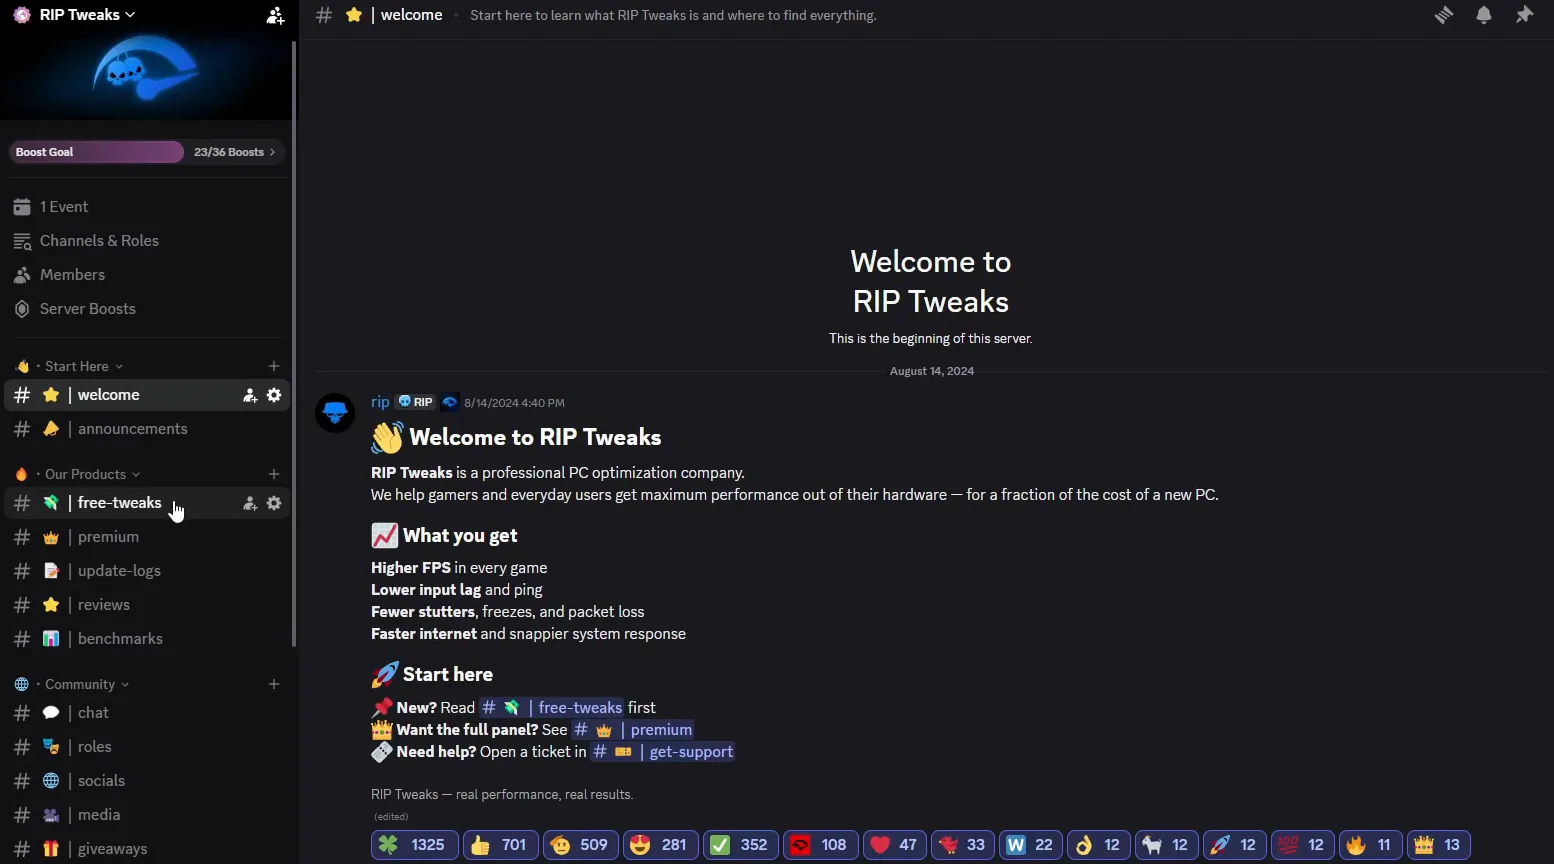
When the app opens, type a username, your email and a password, click Create Account and fill out the short questionnaire.
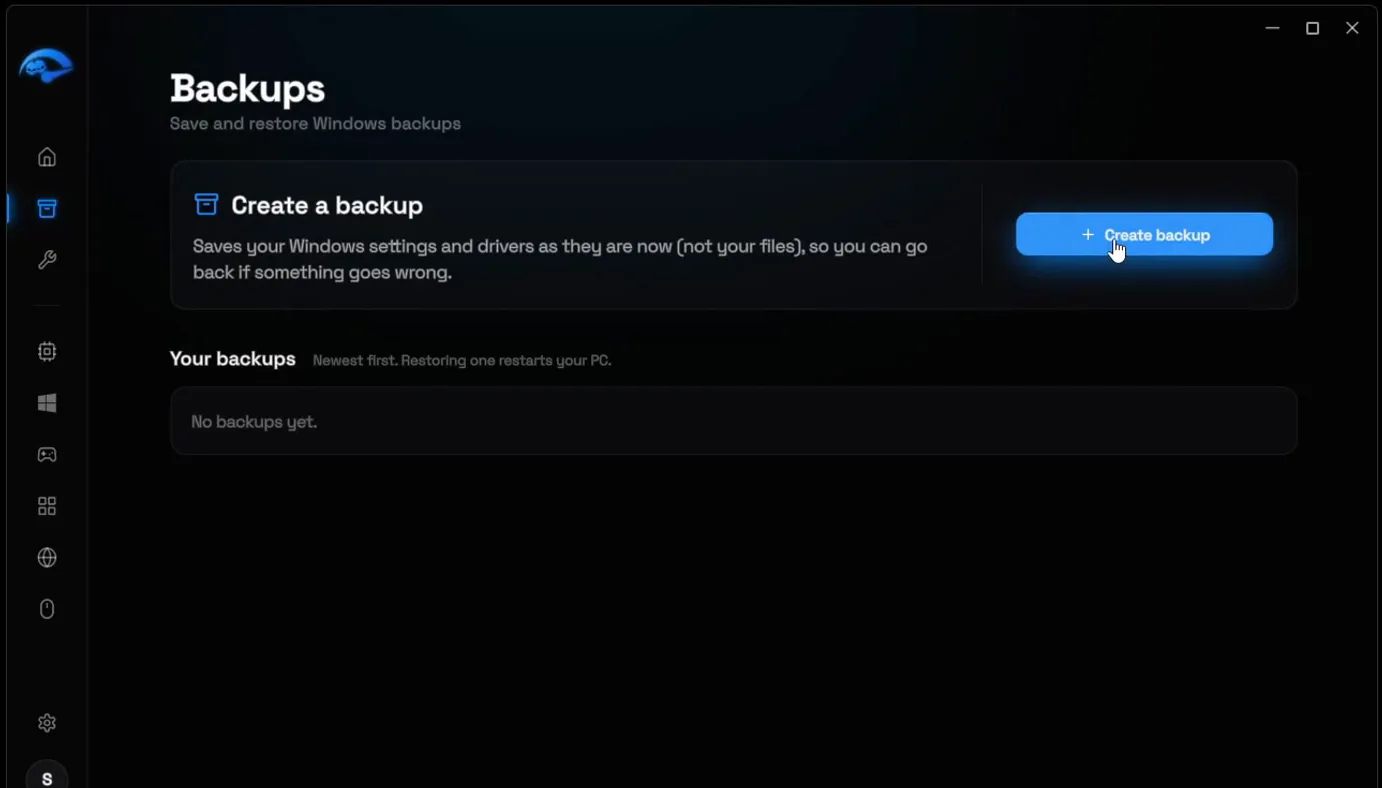
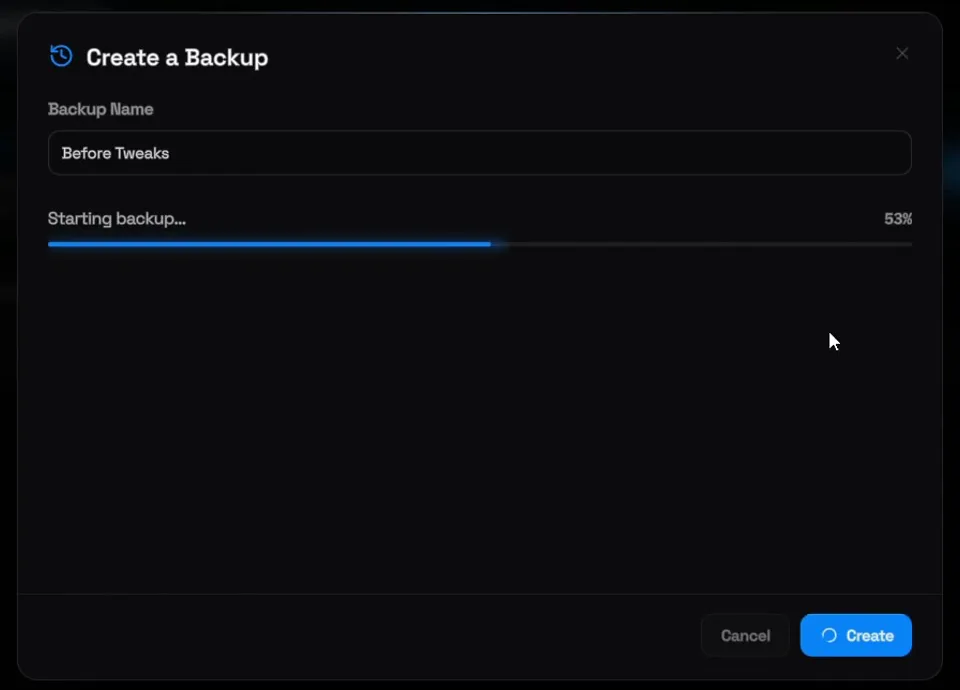
Click Backups in the sidebar, then Create backup. Give it a name you will recognise, such as Before Tweaks, and wait until it finishes. The page itself explains what it does: it saves your Windows settings and drivers as they are now (not your files), so you can go back if something goes wrong.
BackupsCreate backupBefore TweaksCreate
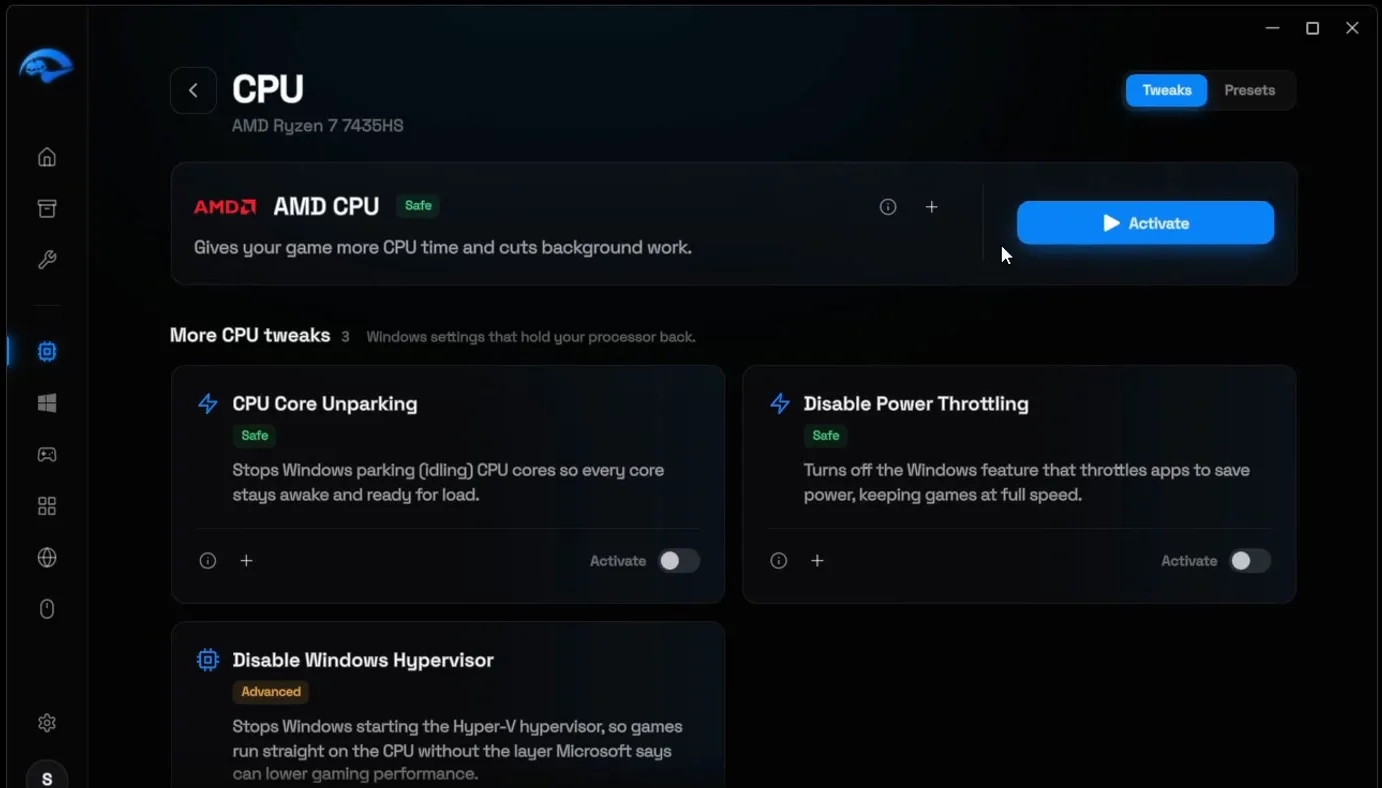
Go to Hardware and open CPU. The app detects your processor and shows the matching card: AMD CPU for AMD, the Intel options for Intel. Click Activate, then switch on the other tweaks on the page: CPU Core Unparking, Disable Power Throttling and Disable Windows Hypervisor.
HardwareCPUActivate
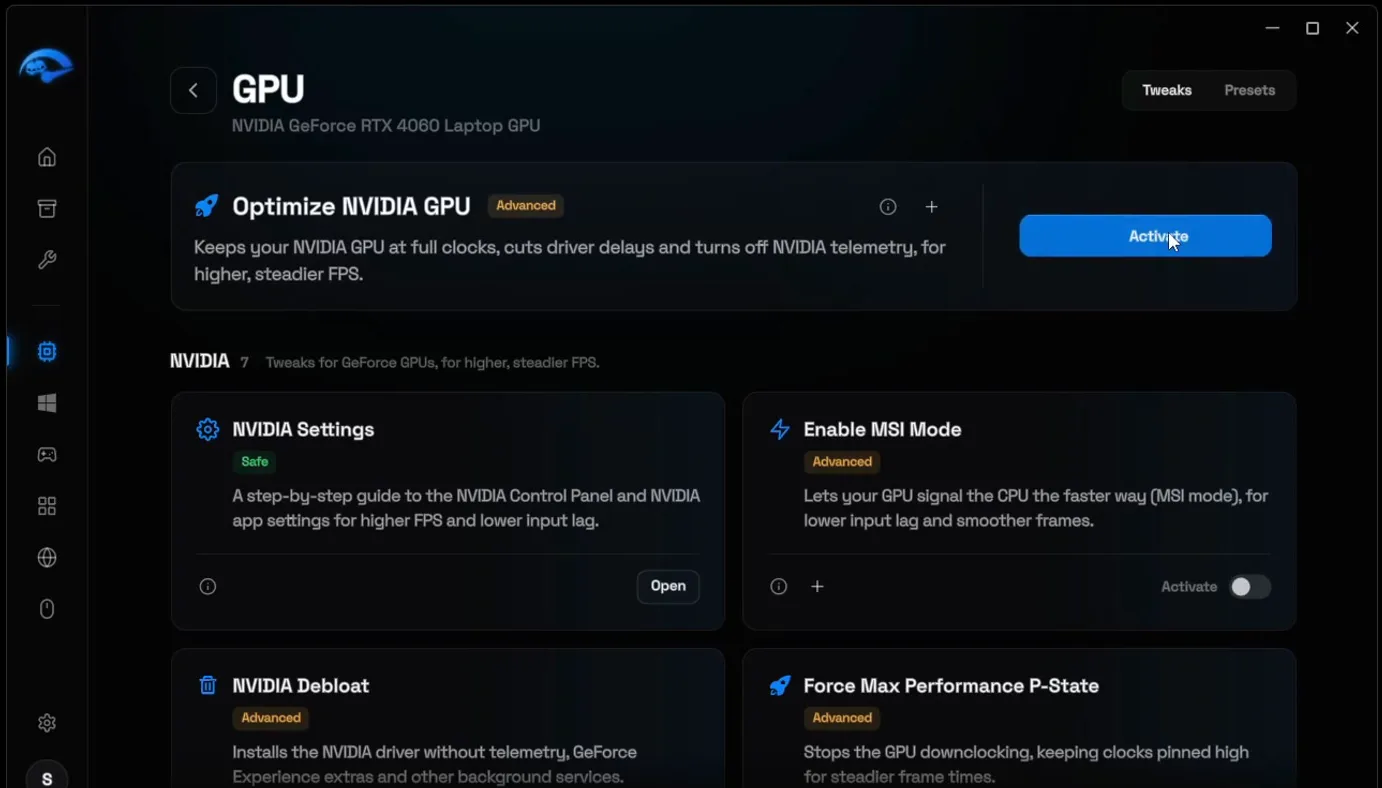
Go back and open GPU. Click Activate on the main card (Optimize NVIDIA GPU on the video's RTX 4060 Laptop GPU), then enable all the other optimizations on the page, including the windowed game optimization.
HardwareGPUActivate
For the NVIDIA Control Panel side, see our NVIDIA settings for gaming guide.
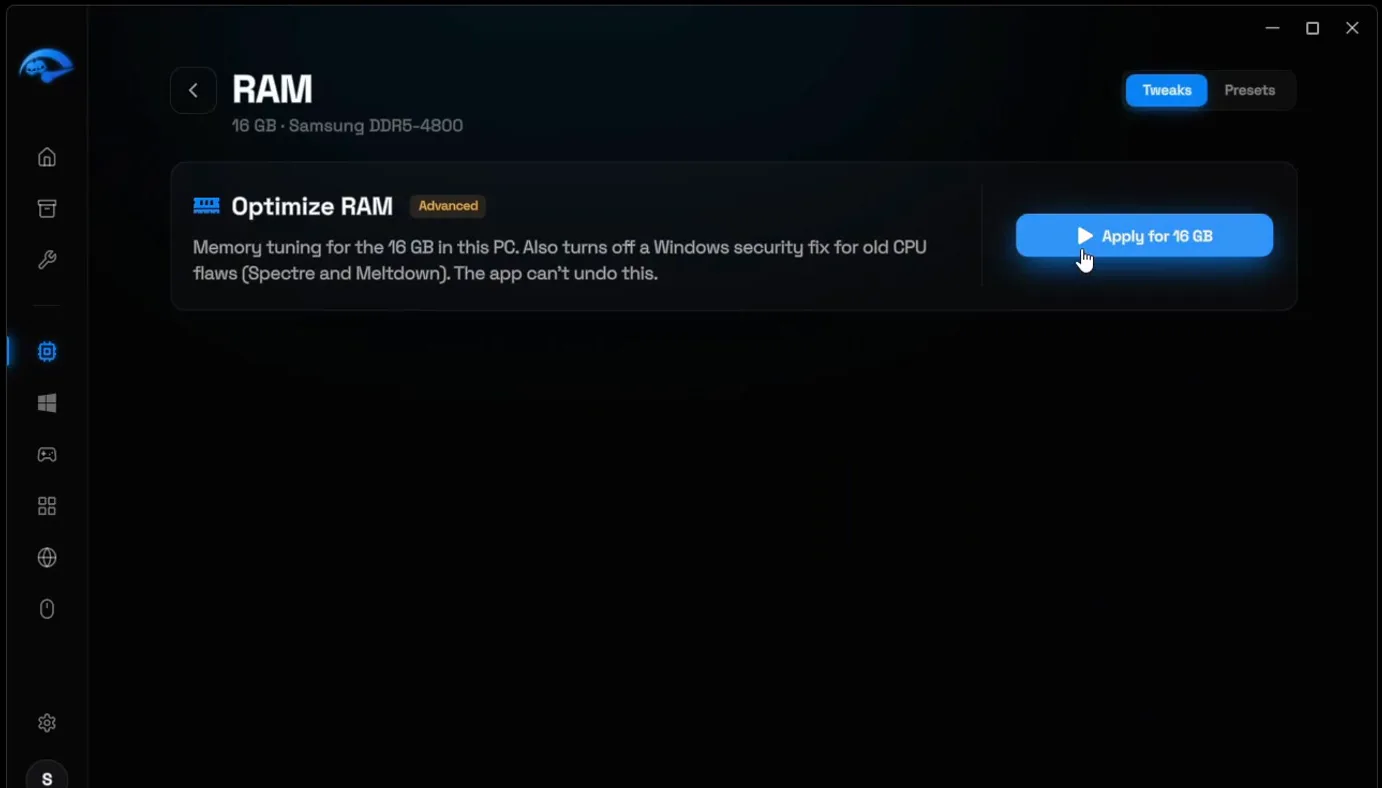
Open RAM. The app detects how much memory you have (16 GB of DDR5-4800 on the PC in the video) and offers one button for it: click Apply for 16 GB, or whatever amount your PC shows. That is the whole step.
HardwareRAMApply for 16 GB
Good to know
Read each card before you apply it. The Optimize RAM card says it also turns off a Windows security fix for old CPU flaws (Spectre and Meltdown) and that the app can't undo that part.
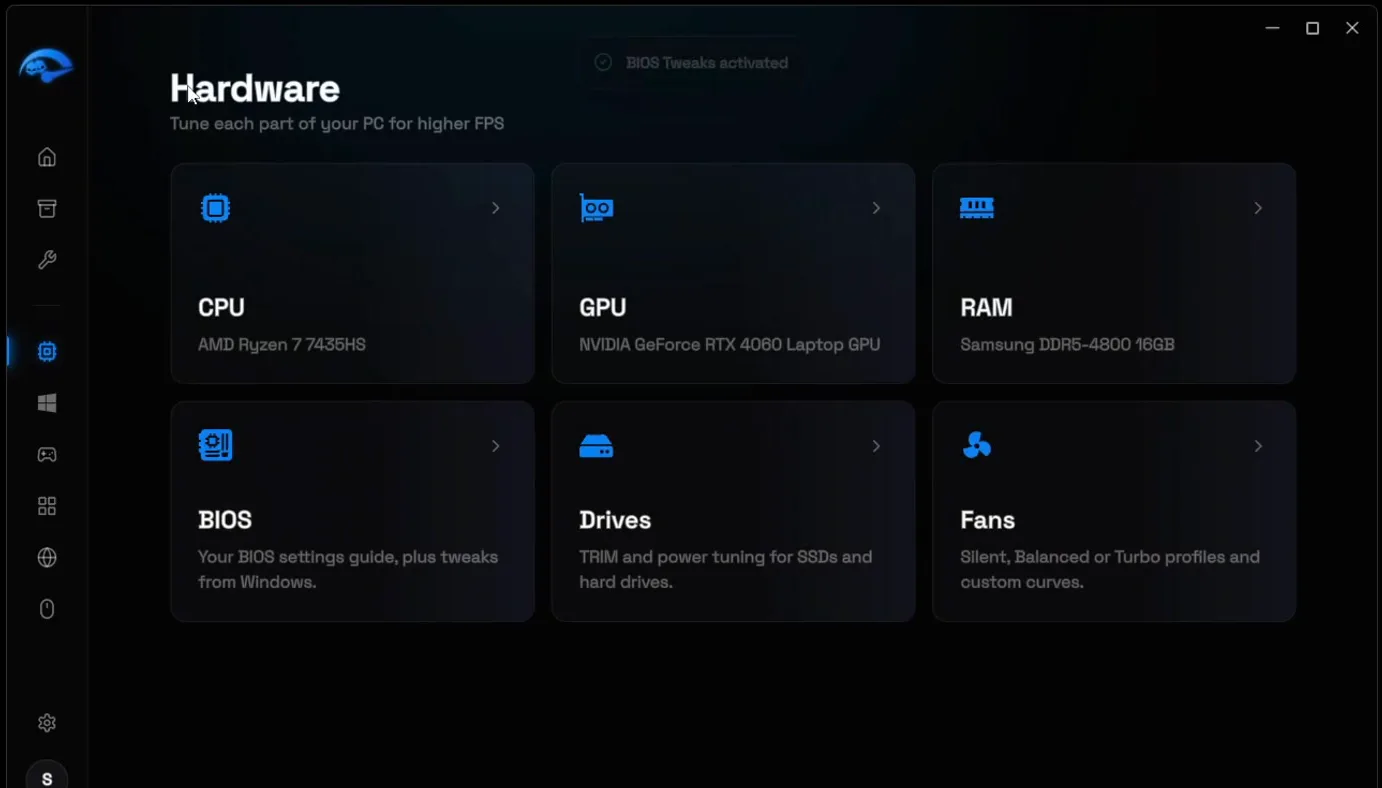
Open BIOS and apply the BIOS tweaks; a "BIOS Tweaks activated" message confirms it. Then open Drives. For an SSD, activate SSD Optimization and NVMe Power Saving Off; with a hard drive the page shows hard drive options instead. Activate the options you see.
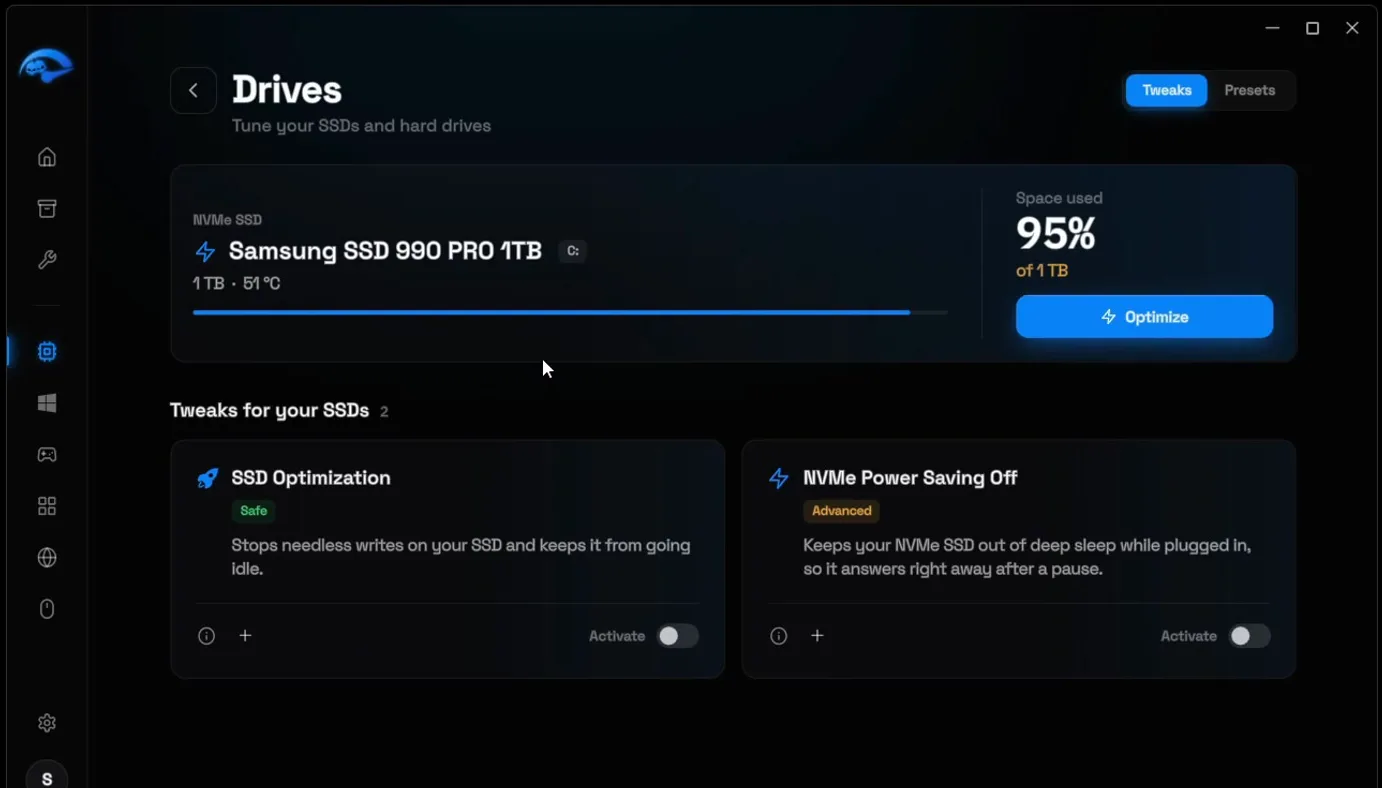
BIOS settings themselves (outside Windows) are a topic of their own: see Intel and AMD BIOS settings for FPS.
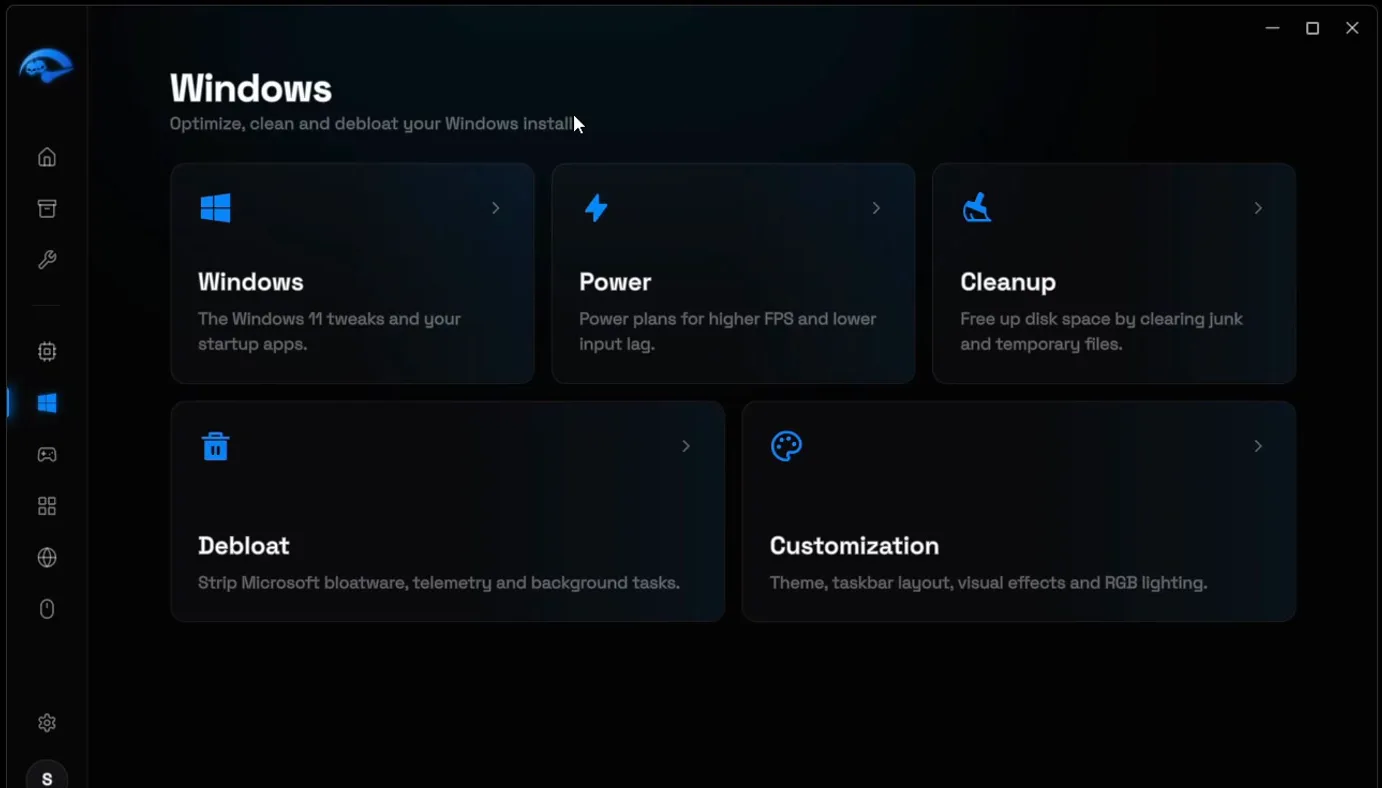
Click Windows in the sidebar, then the Windows card. Your Windows version is detected: the video shows Windows 11 Optimization, and on Windows 10 you get the Windows 10 tweaks instead. Click Activate.
WindowsWindowsWindows 11 OptimizationActivate
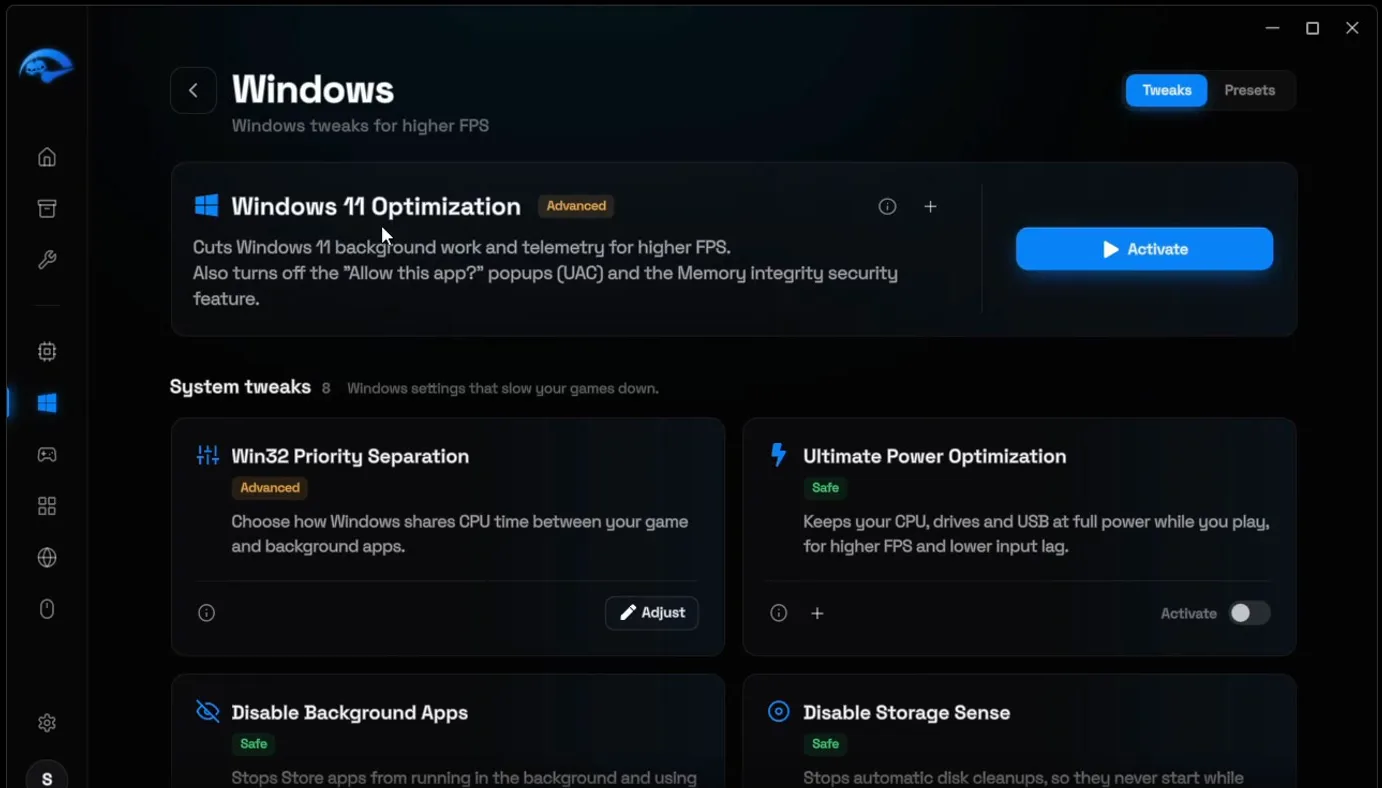
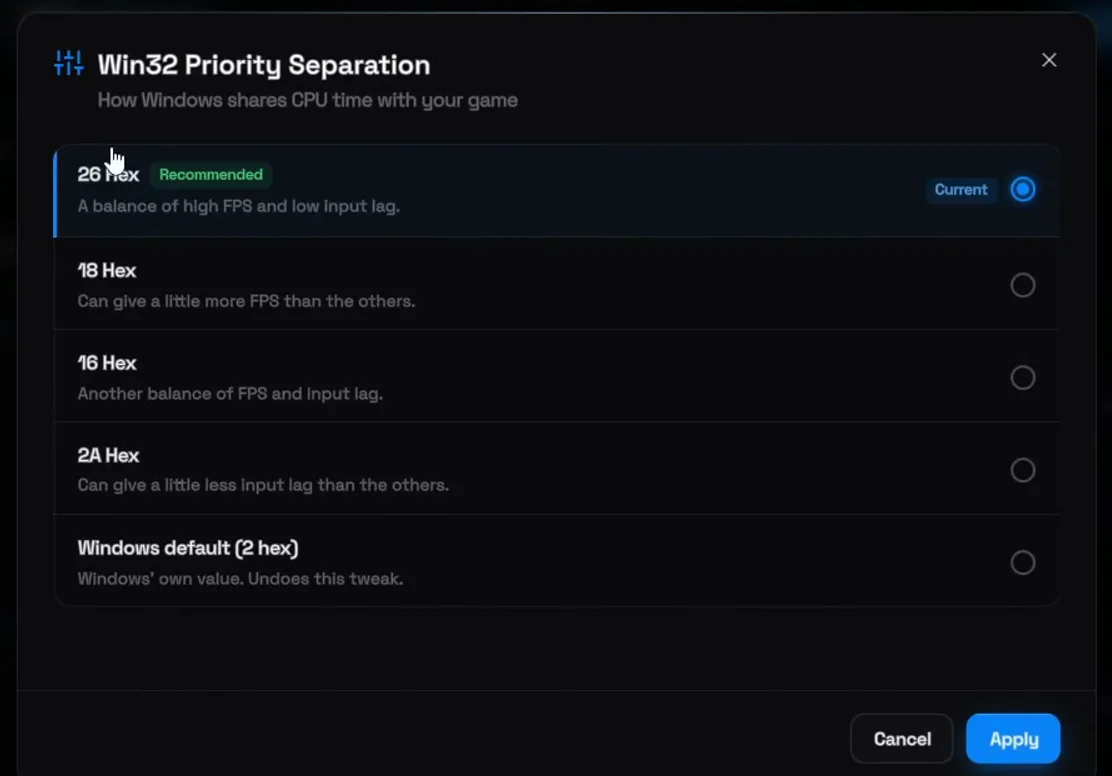
On the same page, click Adjust on Win32 Priority Separation. It decides how Windows shares CPU time between your game and background apps. Select 26 Hex (marked Recommended: a balance of high FPS and low input lag) and click Apply.
Win32 Priority SeparationAdjust26 HexApply
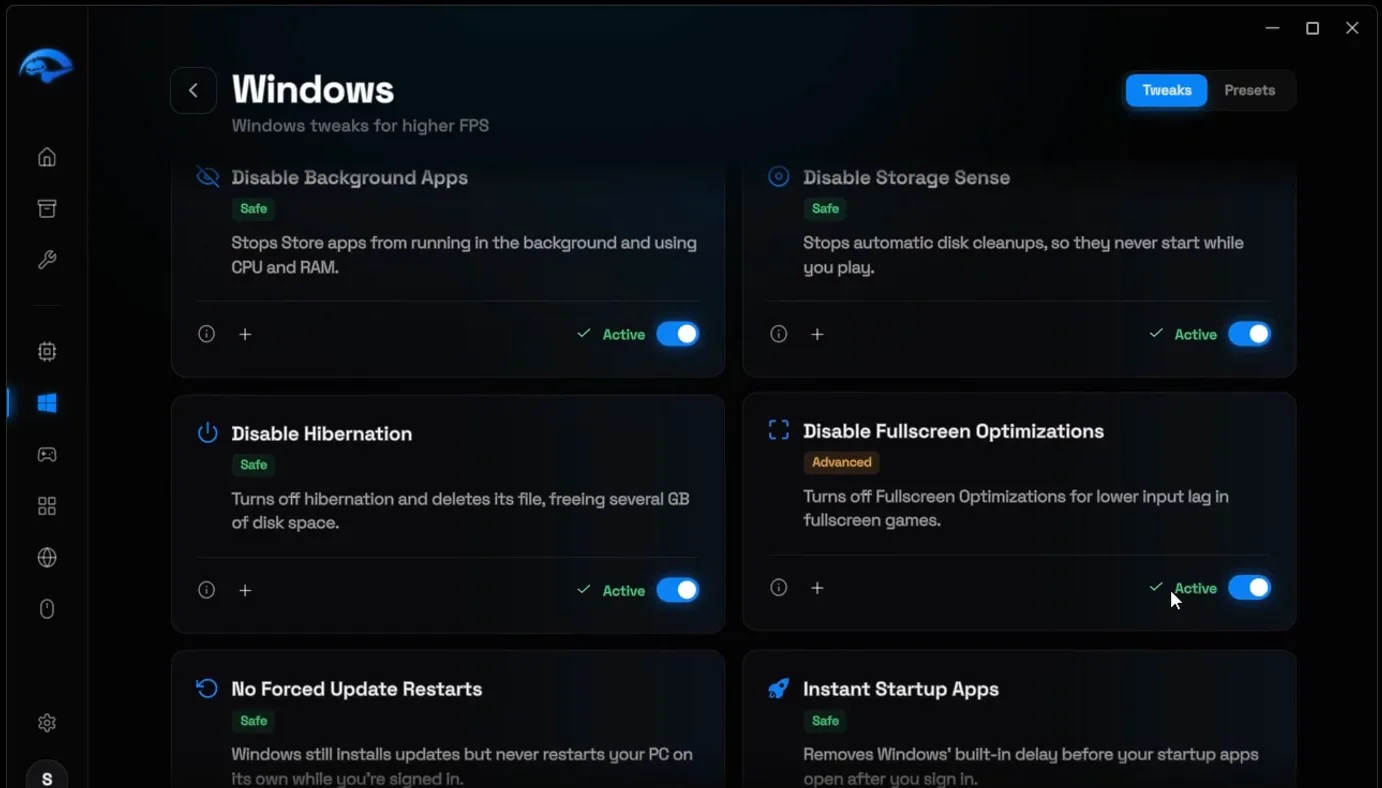
Then turn on the other system tweaks: Disable Background Apps, Disable Storage Sense, Disable Hibernation, Disable Fullscreen Optimizations, No Forced Update Restarts and Instant Startup Apps.
Tip
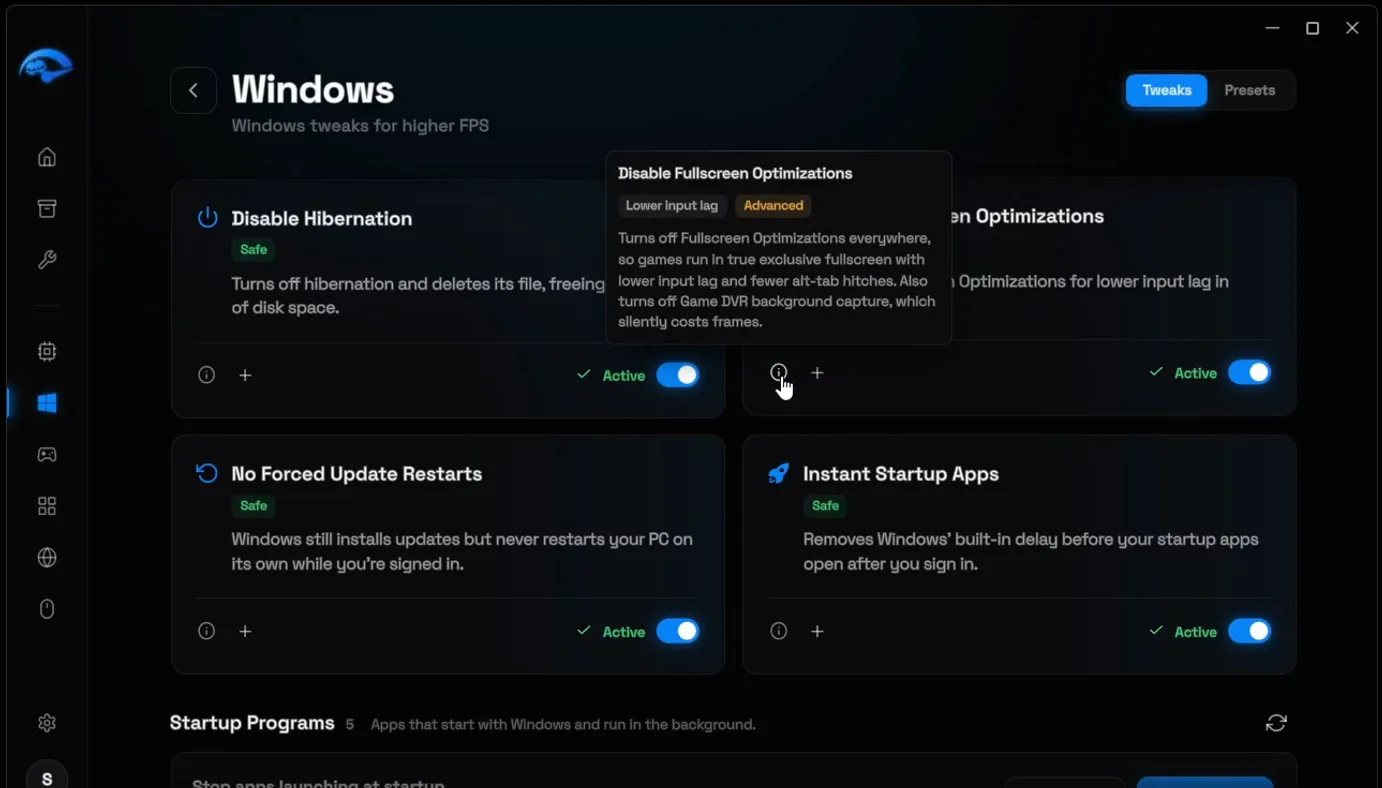
Not sure what a tweak does? Click its i button. The popup says what it changes and why, for example that Disable Fullscreen Optimizations lowers input lag and also turns off Game DVR background capture.
Scroll down to Startup Programs. Every app that starts with Windows keeps running in the background while you play. Switch off the ones you don't need. In the video that is LGHUB, the Logitech G HUB service, next to Tailscale, Discord and a few others.
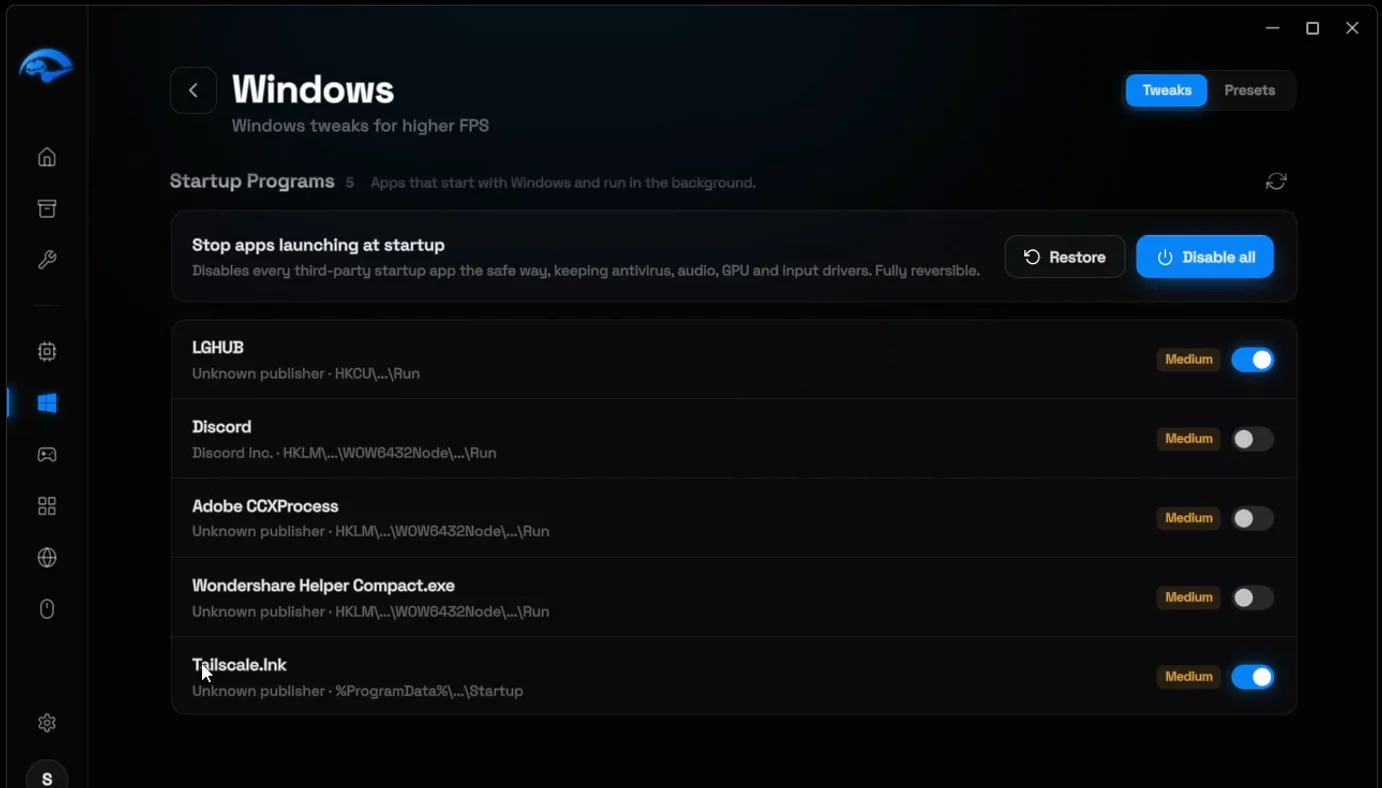
The Disable all button stops every third-party startup app but keeps antivirus, audio, GPU and input drivers, and Restore brings them back.
Go back to the Windows section and open Power. Click Activate on the RIP Gaming Power Plan: higher FPS and lower input lag at normal temperatures, as the card puts it. Then click Edit on PCIe Link State Power, set it to Off (not Maximum savings) and click Apply.
WindowsPowerRIP Gaming Power PlanActivate
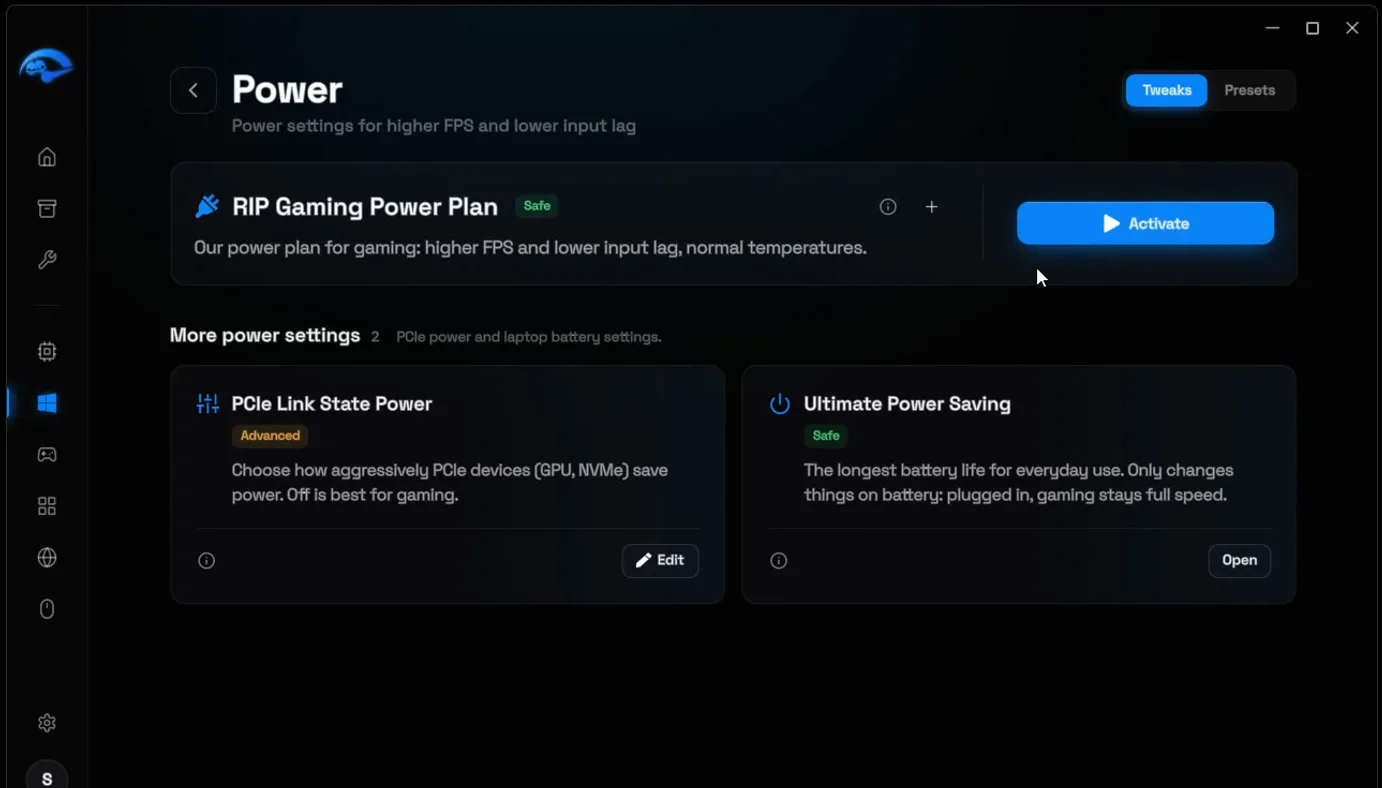
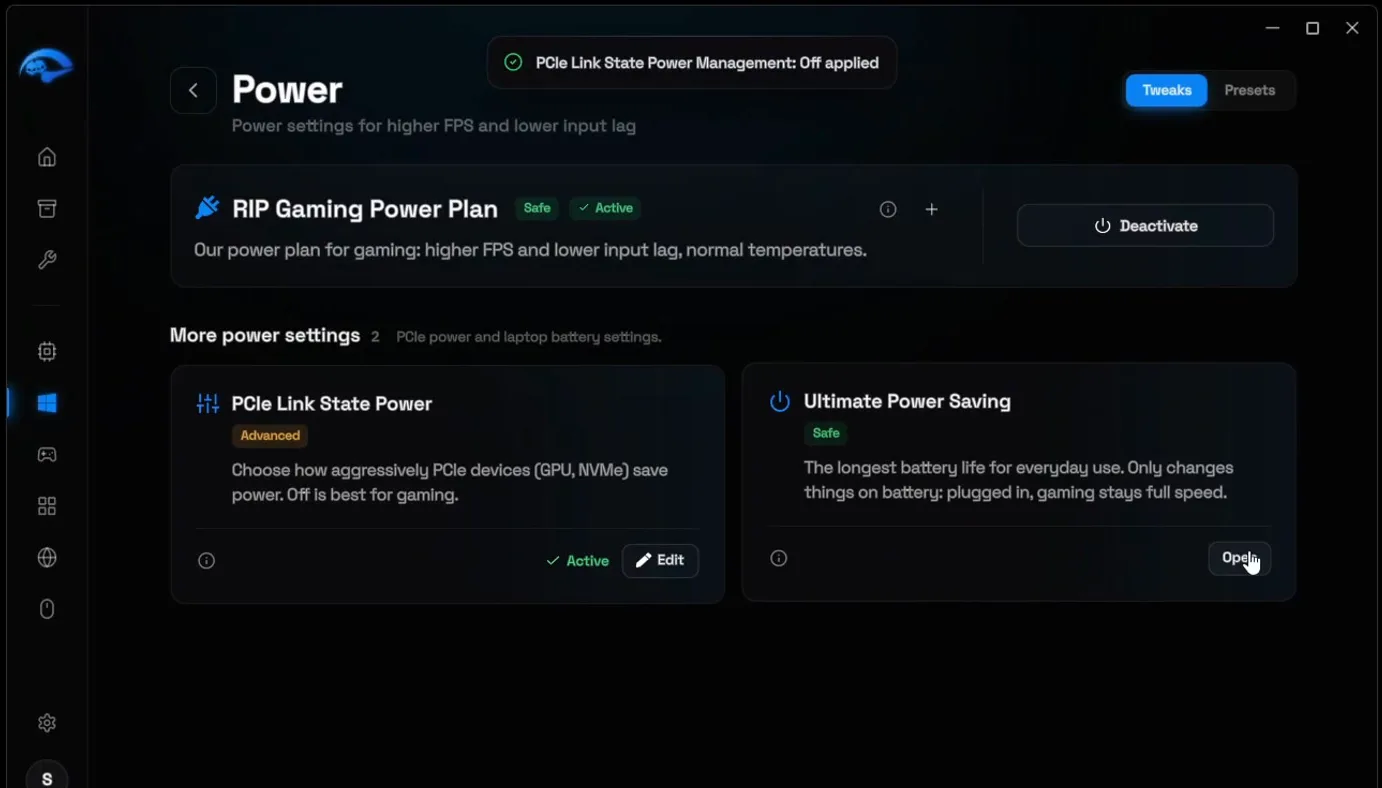
On a laptop, Ultimate Power Saving is there too. It only changes things on battery, so plugged in, gaming stays at full speed.
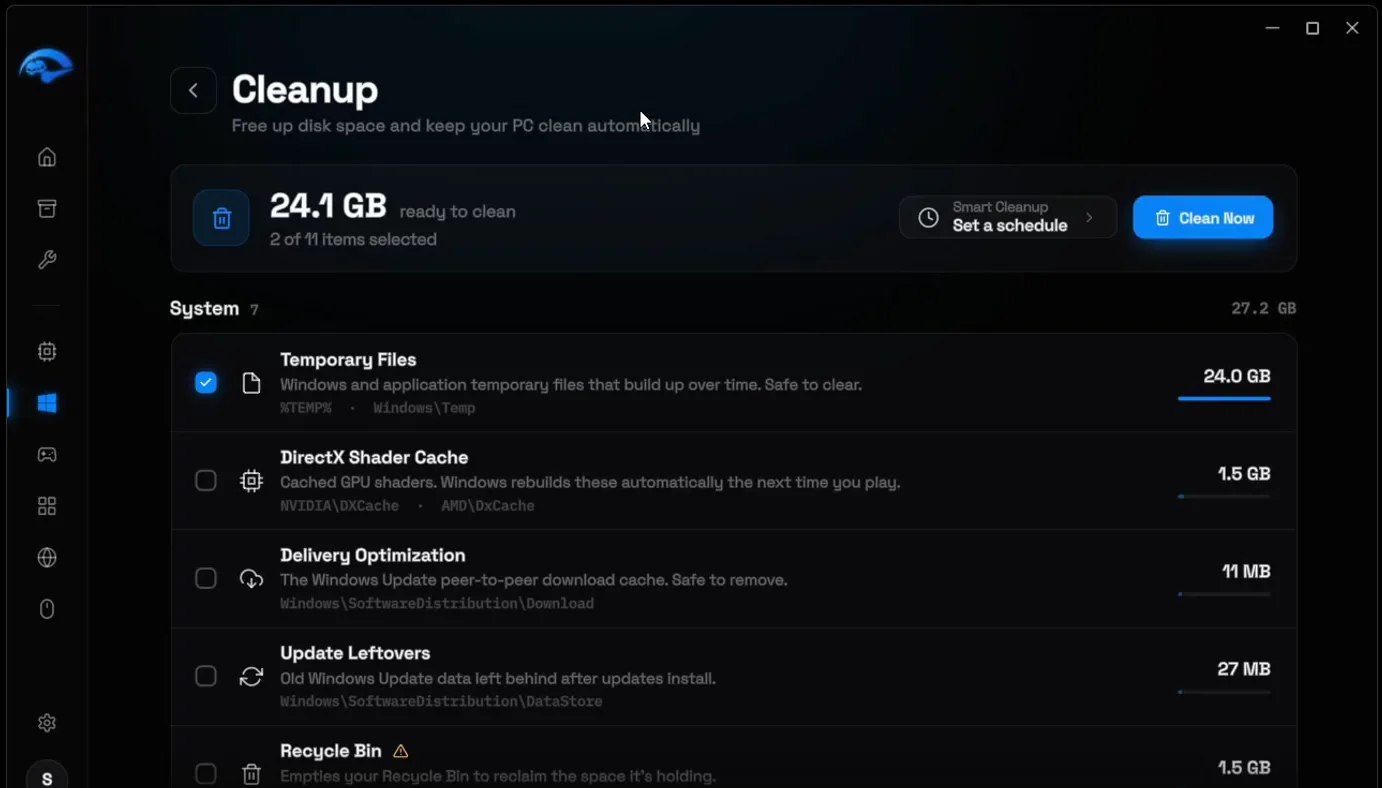
This is the fix for the sudden drops. Go back and open Cleanup. It can clear temporary files, the shader cache and more, but for Fortnite stutters the video cleans only the shader cache, because that is the problem.
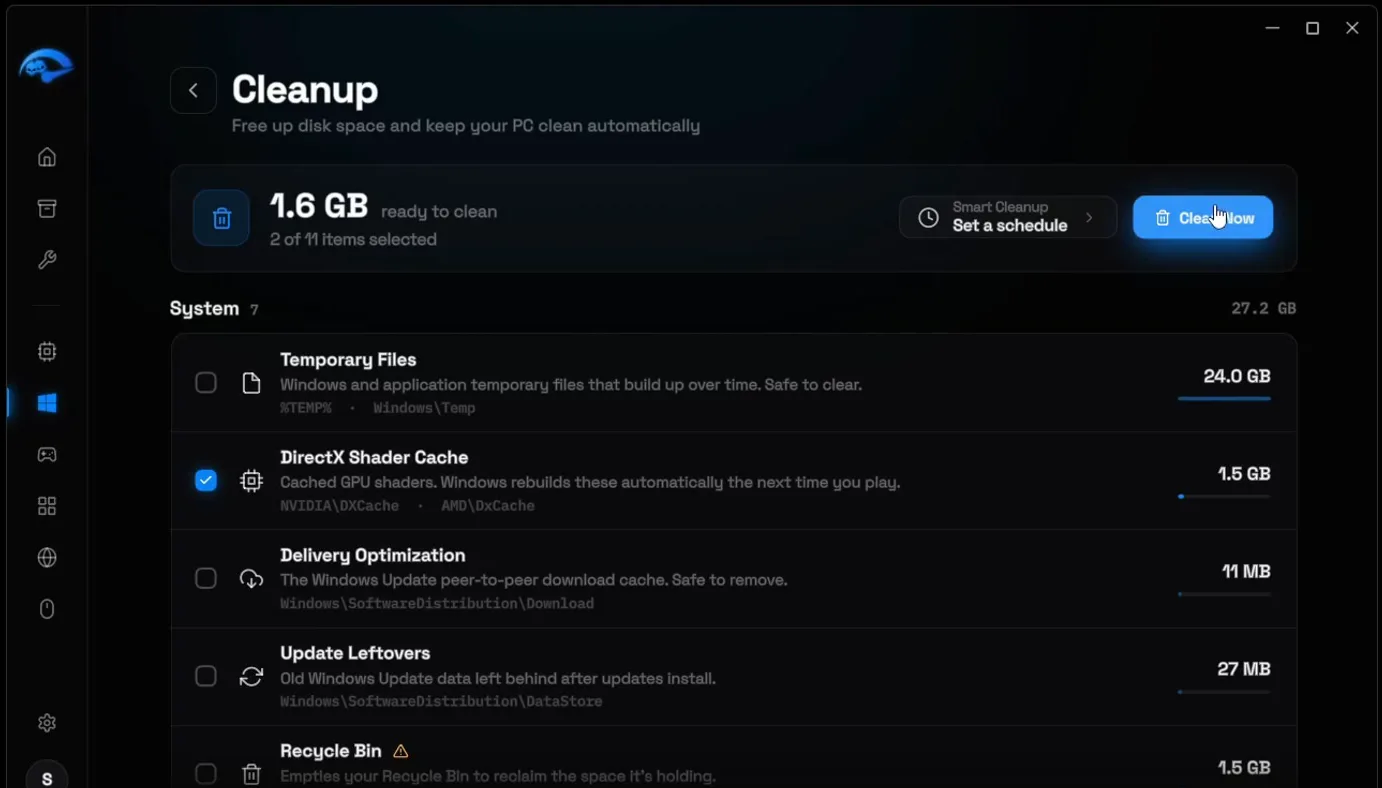
WindowsCleanupDirectX Shader CacheClean Now
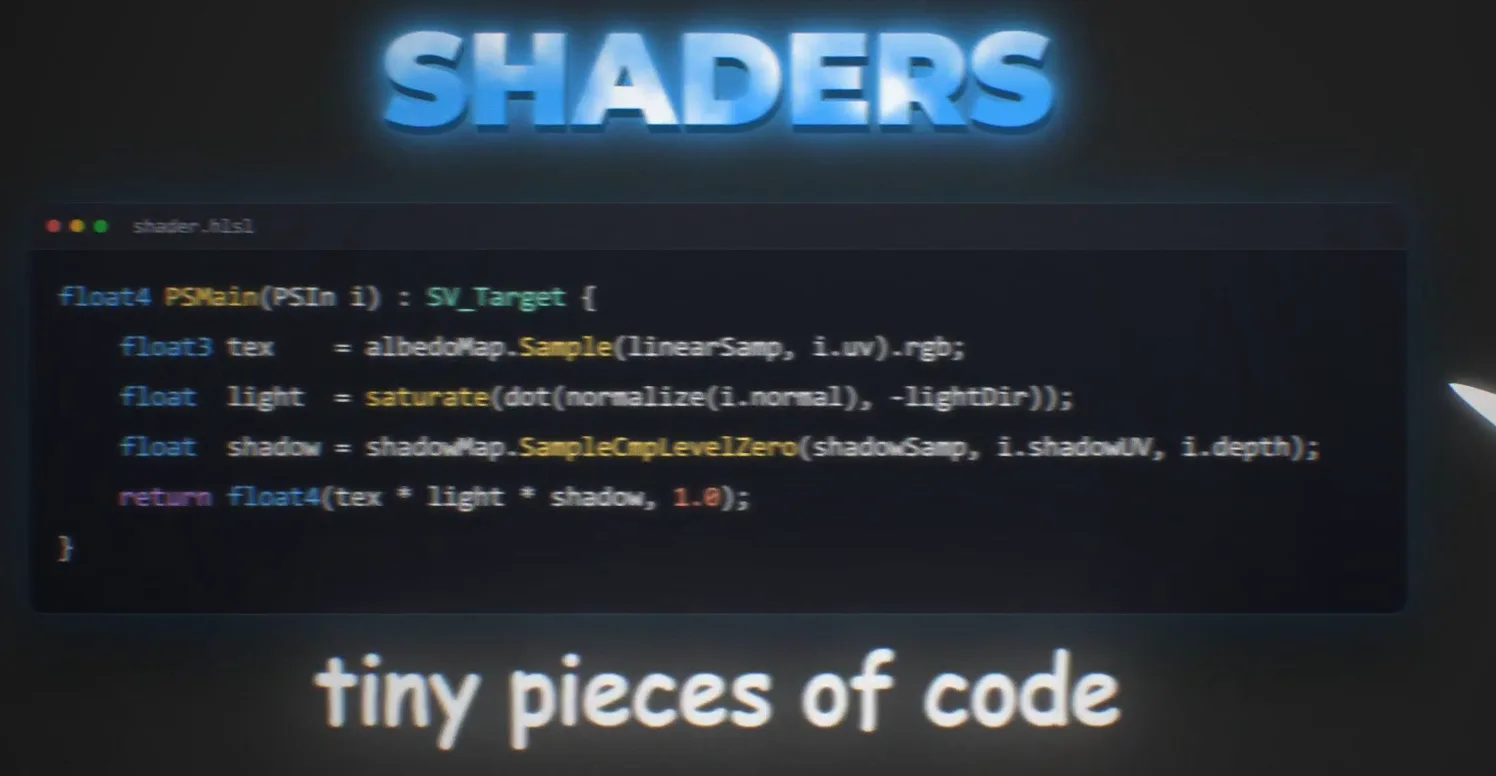
Shaders are tiny pieces of code that tell your GPU how to render light, shadows, textures and effects. The shader cache keeps them saved so the game doesn't have to build them again. When that cache causes stuttering or lag, you clean it so it rebuilds. The app notes that Windows rebuilds these files automatically the next time you play.
Tick DirectX Shader Cache and click Clean Now. On the PC in the video, 1.6 GB was freed and the cache was clean.
Tip
Clean the shader cache when you have the problem, after a game or driver update for example, not before every match. Each clean makes the cache build again while you play.
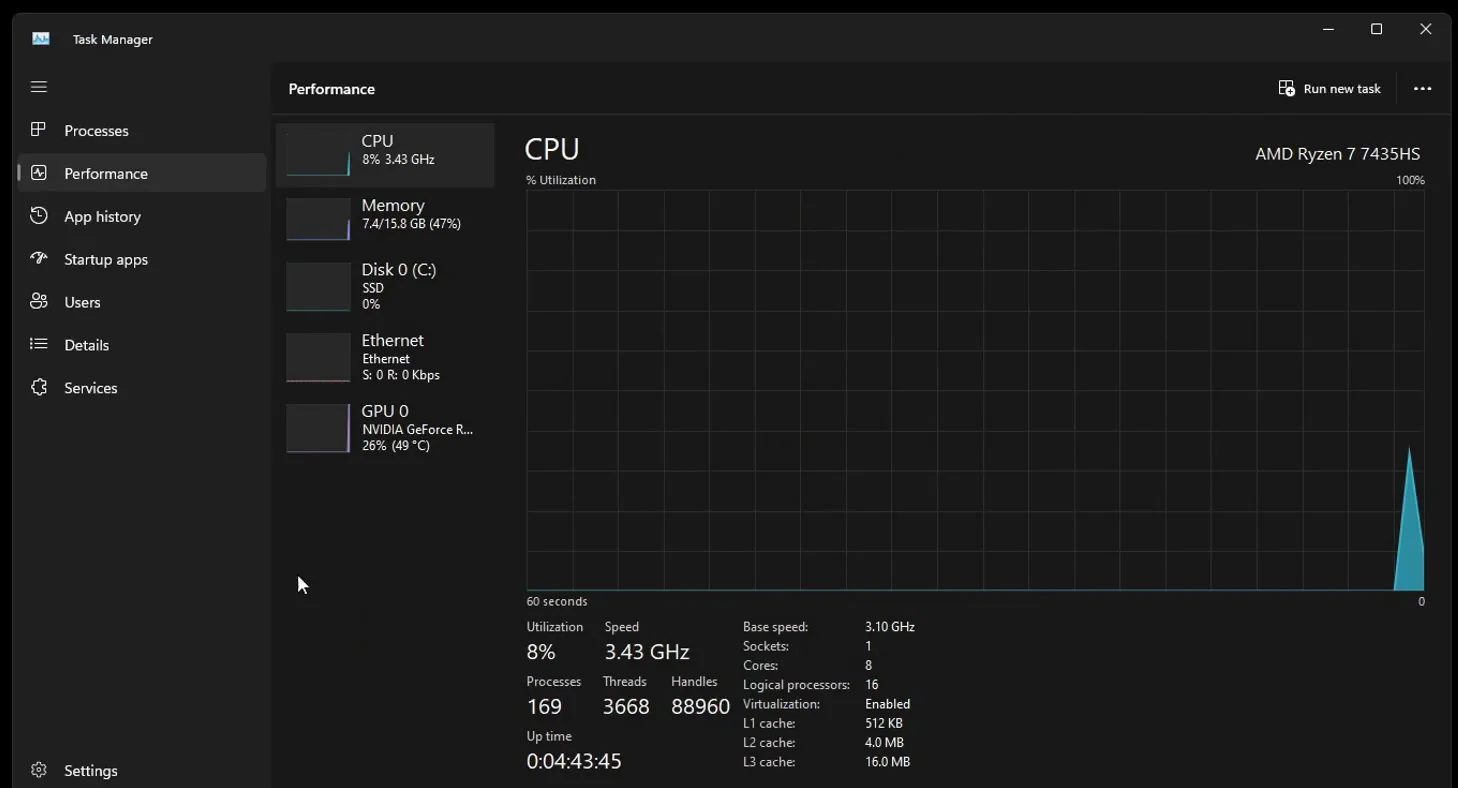
Open Debloat. There are two presets: Basic (free, Safe and Recommended) takes you down to around 80 background processes, and Advanced (Premium) down to around 50. On the PC in the video, Task Manager showed 169 processes before the tweaks.
WindowsDebloatRun Basic
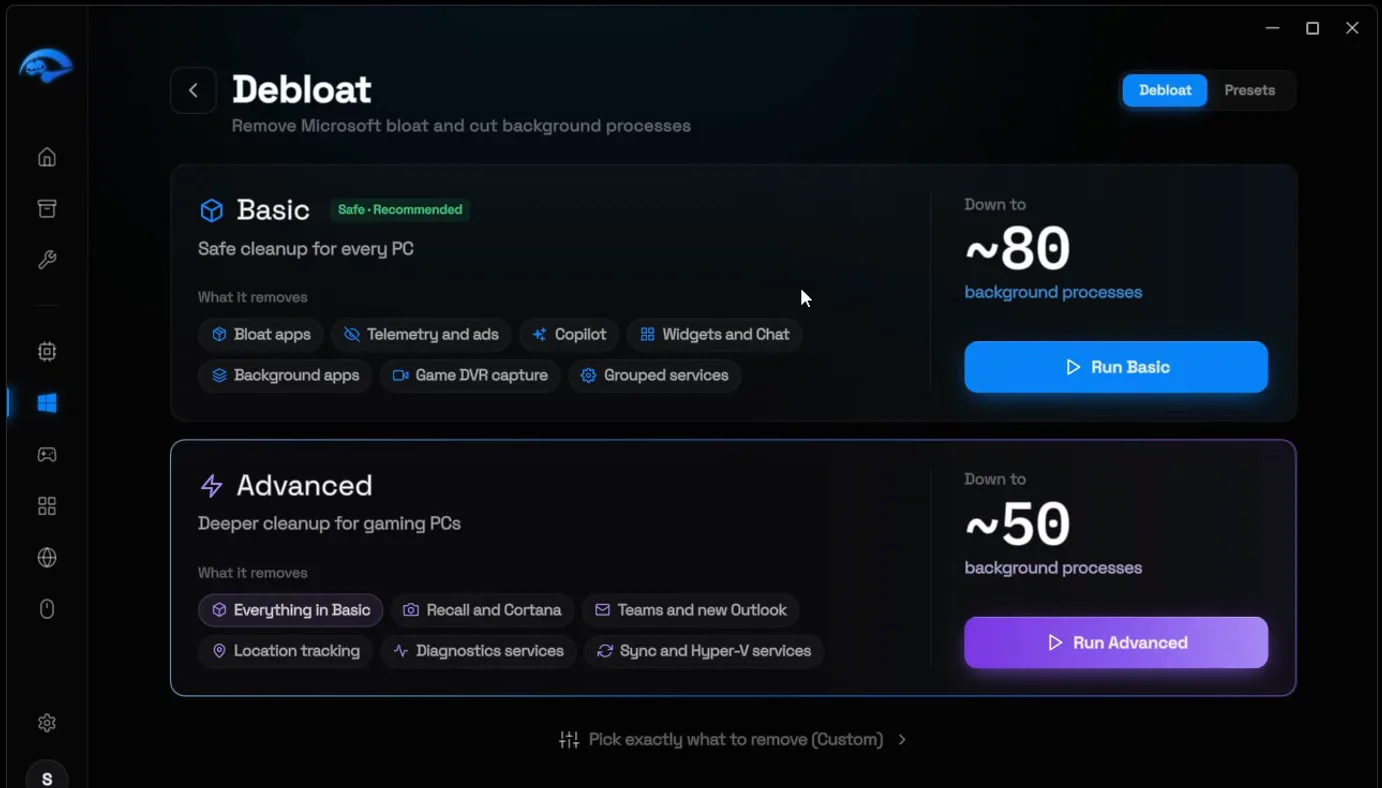
You can also pick Custom to choose every item yourself: Store apps, pre-installed apps, telemetry such as Cortana and Copilot, Xbox services and other services you never use. Tick what you want gone and click Debloat. In the video, 40 items were cleaned. Our guide to reducing background processes goes deeper.
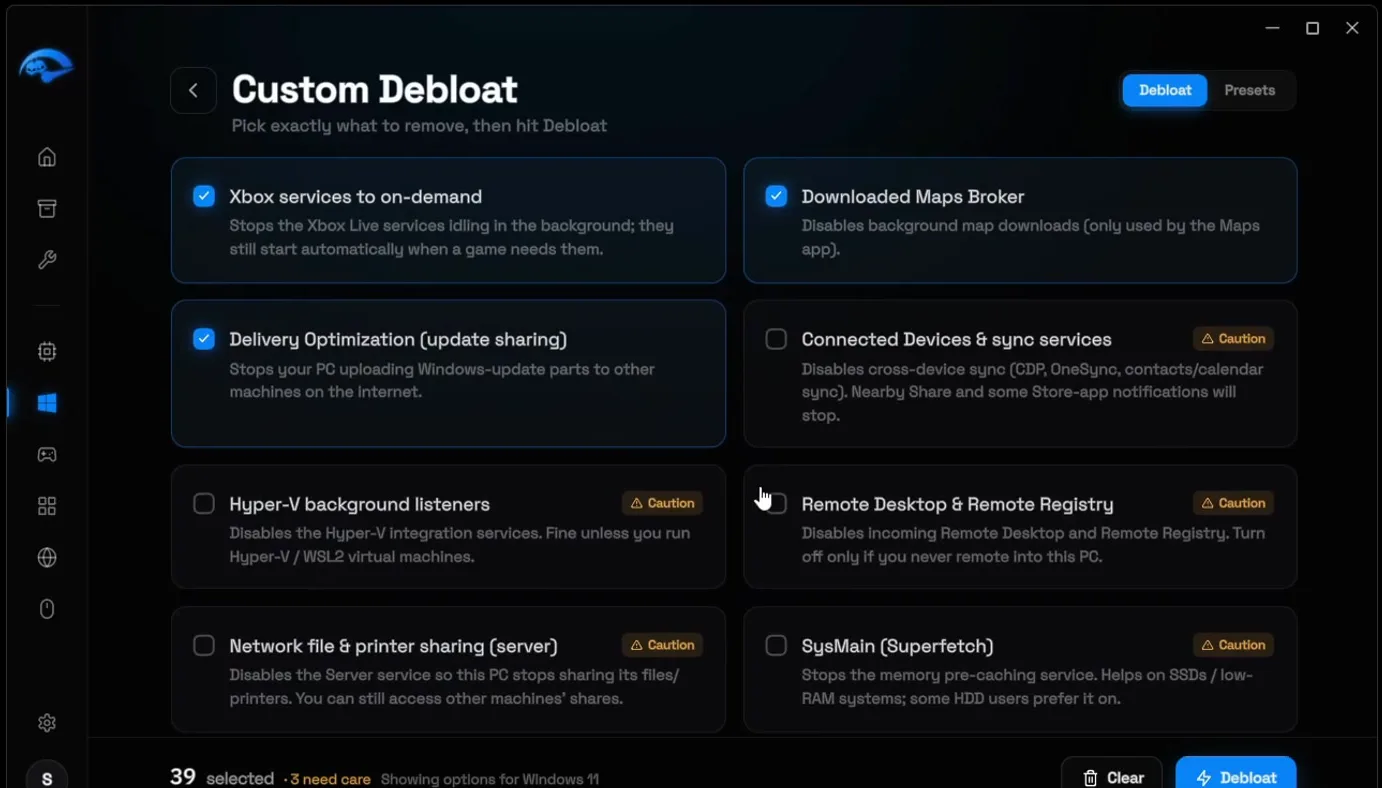
Careful
Read the items marked Caution before you tick them. Remote Desktop, network file sharing and OneDrive, for example, are only safe to remove if you never use them.
Open Games and click Fortnite. Besides a clean shader cache, a clean NVIDIA profile is the other key to fewer stutters on an NVIDIA GPU. Click NVIDIA Profile, choose the Profile Inspector profile and click Next. Enable Force Resizable BAR and the FPS boost profile for Fortnite, then click Finish.
GamesFortniteNVIDIA ProfileNextForce Resizable BARFinish
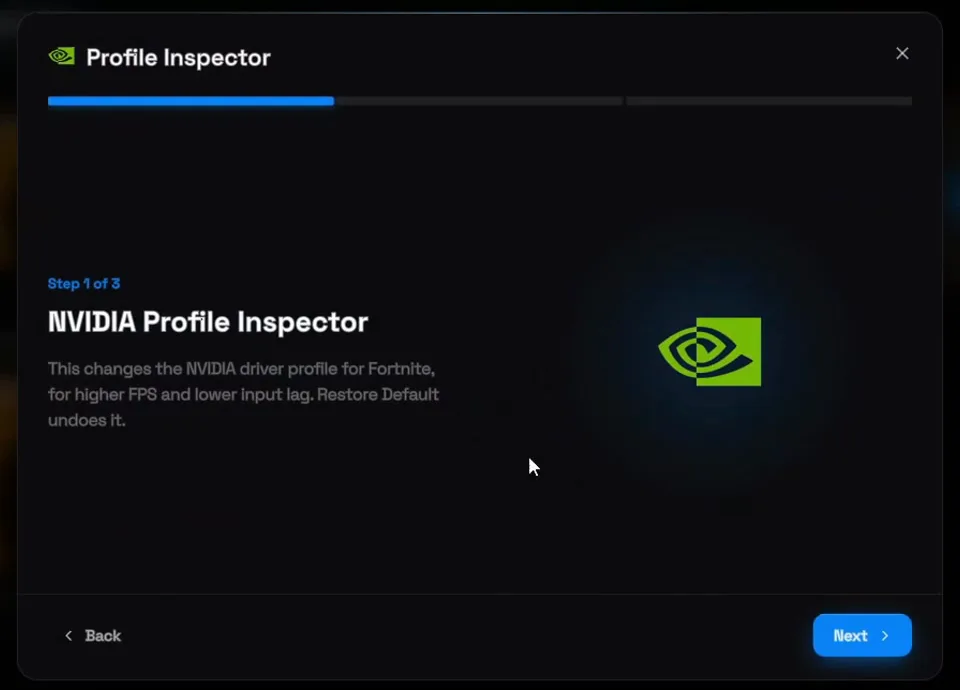
For more on Profile Inspector in Fortnite, see Fortnite potato textures with Profile Inspector.
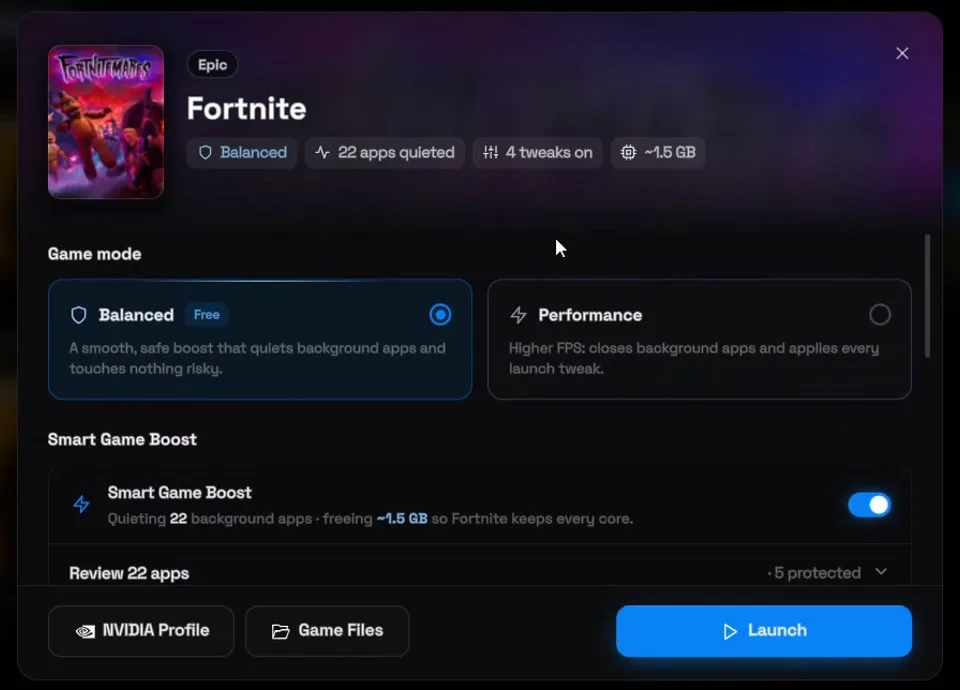
Start Fortnite from the same window. It has two game modes. Balanced is free: it quiets your background apps, frees RAM and applies GPU, RAM and network tweaks in the background. Performance (Premium) adds more tweaks and quiets even more background apps. With Smart Game Boost on, the video's PC quieted 22 background apps and freed about 1.5 GB.
GamesFortnitePerformanceLaunch
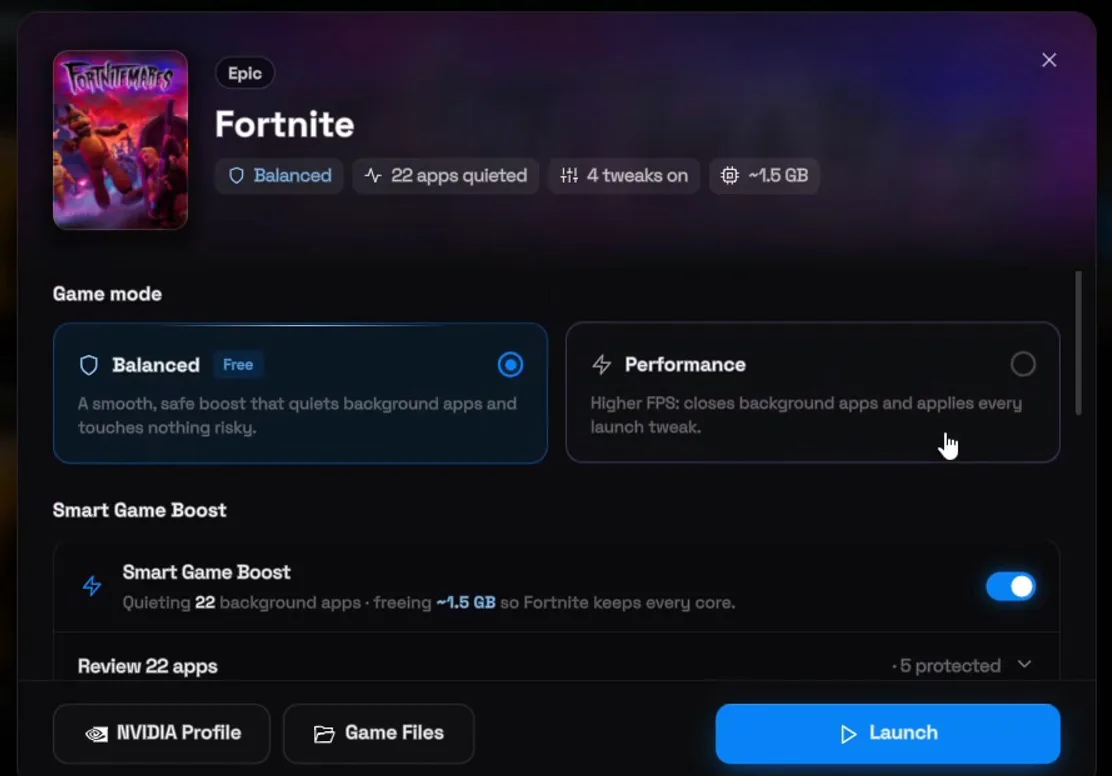
Choose a mode and click Launch. The tweaks of the mode turn off again when the game closes.
How to check it worked
Test the same way each time so you compare like with like:
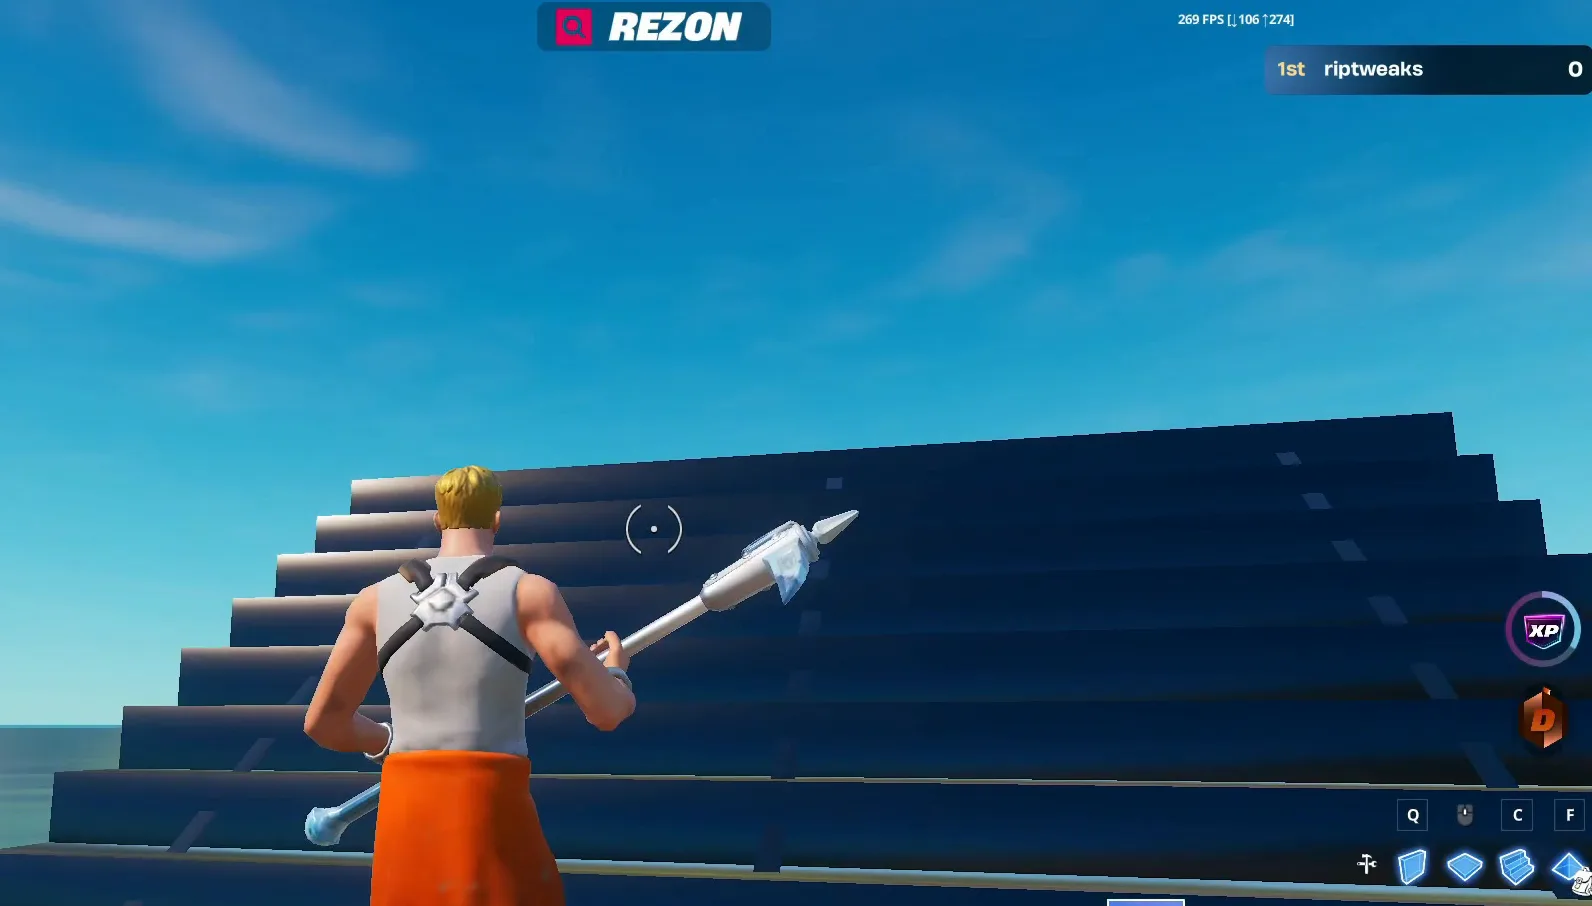
- Turn on Fortnite's FPS counter and play the same map or mode you played when the drops happened. The number should stay steady instead of dipping in fights and when you build.
- Open Task Manager, Performance tab, and look at Processes. After Debloat it should be well below the number you started with.
- Give the shader cache a match or two to build again before you judge it, since it rebuilds while you play.
How to undo it
To undo a single tweak, switch it off or click Deactivate on its card. Win32 Priority Separation goes back with Windows default (2 hex), the NVIDIA profile with Restore Default. To undo the tweaks all at once, restore your Before Tweaks backup under Backups (restoring restarts your PC).
Key settings at a glance
FAQ
Why does Fortnite suddenly stutter and drop FPS?
When your FPS is stable and then suddenly drops, the shader cache is most of the time the cause, according to the video. That is why cleaning the DirectX shader cache is the center of this fix. The other steps keep background apps and power saving out of the way, so Fortnite gets the CPU, GPU and RAM to itself.
Is it safe to delete the DirectX shader cache?
Yes. The shader cache holds compiled GPU shaders, not your game files or settings, and the Cleanup page says Windows rebuilds them automatically the next time you play. The video cleans it only because Fortnite was stuttering, and that is the right time to do it.
Which Win32 Priority Separation value is best for Fortnite?
26 Hex, the value the app marks Recommended and the one the video uses: a balance of high FPS and low input lag. The same window lists 18 Hex (can give a little more FPS), 16 Hex, 2A Hex (can give a little less input lag) and Windows default (2 hex). Our 16 hex vs 32 hex guide compares the values.
Does this fix work on Windows 10 and AMD graphics cards?
Yes for Windows 10: the app detects your version and activates the Windows 10 tweaks instead. The shader cache cleanup covers both the NVIDIA and AMD cache folders. The Fortnite NVIDIA profile and the Optimize NVIDIA GPU card are for NVIDIA GPUs only.
Is RIP Tweaks free?
The download is free, and so are the steps here except two: the Advanced debloat preset (down to around 50 processes) and the Performance game mode are Premium. Basic debloat and the Balanced game mode are free.
Do I need to do every step to stop the stutters?
The shader cache cleanup is the step aimed at the sudden drops, so start there if you are short on time. The other steps cut background work and power saving, which keeps FPS steadier and input lag lower. For more Fortnite settings, see our Fortnite FPS boost, input delay and ping guide.
How do I undo the tweaks?
Switch a tweak off or click Deactivate on its card, use Restore Default for the NVIDIA profile, or restore the backup you made at the start under Backups. Restoring a backup restarts your PC.
 RIP Tweaks
Do it in a few minutes with RIP Tweaks
- Free plan for Windows 10 and 11
- A backup first, and every tweak can be switched off again
- Made for higher FPS, lower input lag and steadier ping
Free · Windows 10 and 11
