How to Lower Your Ping in Any Game (2026)

Written version of our video, every step checked against it.
Quick answer
- Download RIP Tweaks (free), create your account and make a backup named "Before Tweaks" before anything else.
- Activate the Hardware, Windows and Power tweaks: Win32 Priority Separation at
26 Hex, the RIP Gaming Power Plan and PCIe Link State Power set toOff. - Run Debloat to cut background processes: on the PC in the video from around 190 down to about 50.
- In Network, activate Optimize Network Performance, set Network Throttling Index to Disabled and Custom DNS to the fastest server.
- Run the Bufferbloat Test. With a grade from C to F, set the Upload Limiter. Then use an Ethernet cable and restart your router and PC.
This guide is for anyone whose ping jumps up and down in Fortnite, Valorant, CS2, Warzone or any other online game on a Windows 10 or 11 PC. As the video puts it, the cause is often not your internet but your internet settings. It follows our video click by click: the PC tweaks that free up your system, the network tweaks and DNS, the bufferbloat test and upload limiter that stop ping spikes, and the two habits that finish the job.
In this video
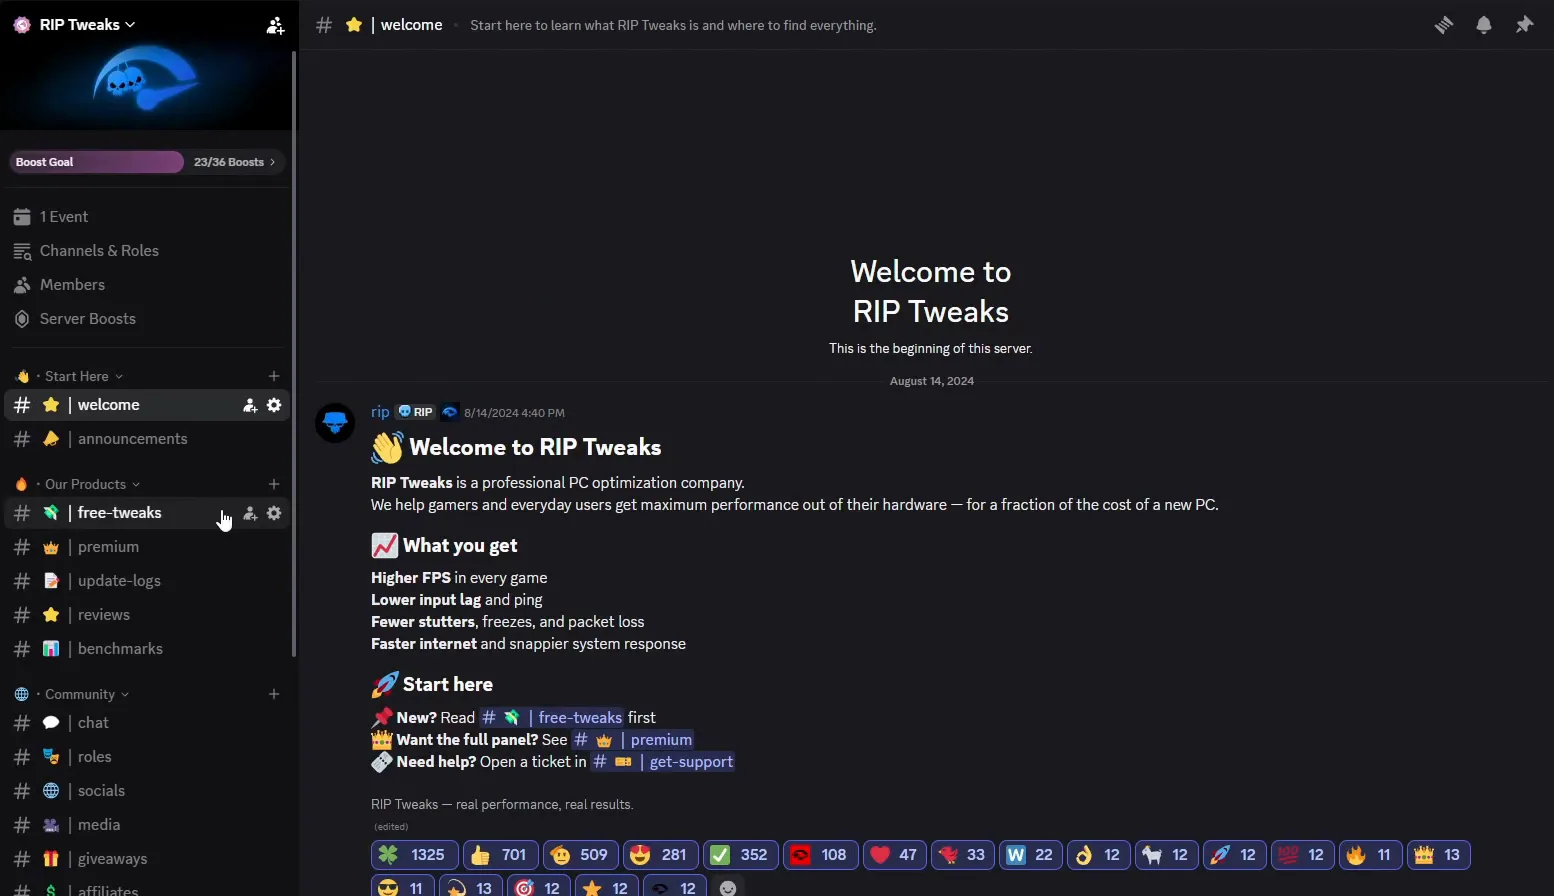
In your browser, type discord.gg/riptweaks, press Enter and join the server. Open the free-tweaks channel, click the Download RIP Tweaks button, click Download again and wait for the installer to finish. The same free download is on our download page.
discord.gg/riptweaksfree-tweaksDownload RIP TweaksDownload
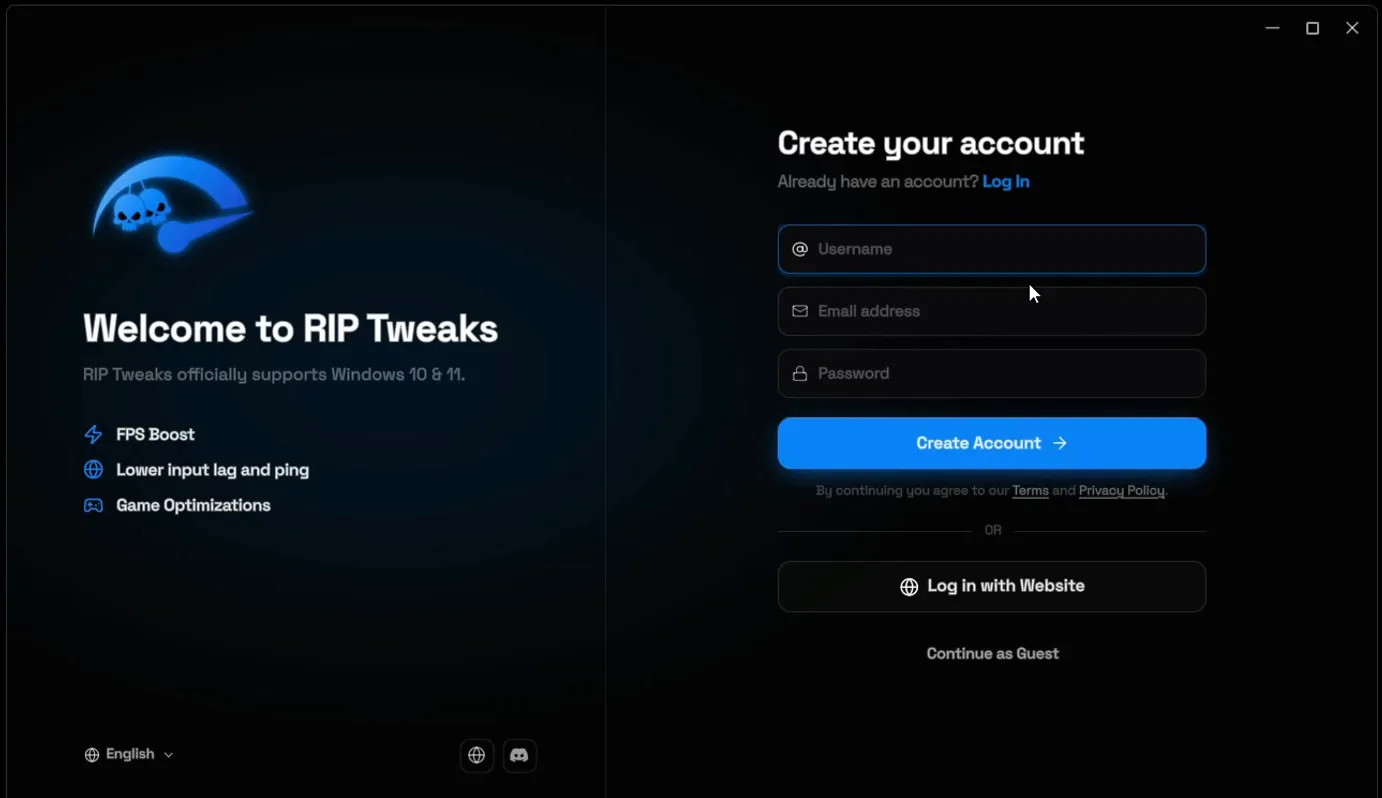
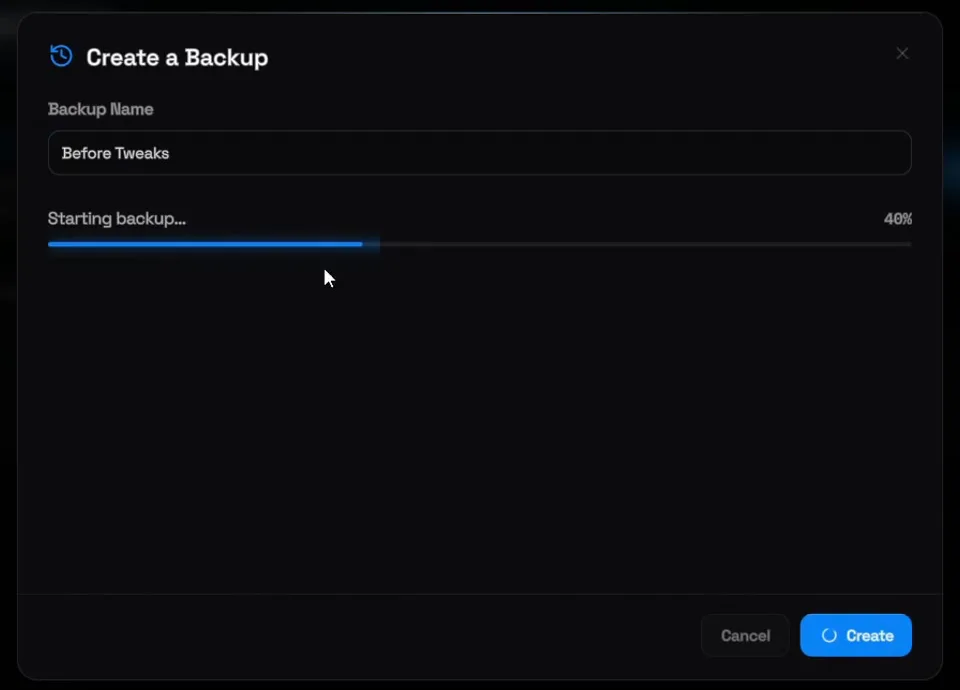
When the app opens, type your username, email and password and click Create Account. Next, open the Backups section and create a backup: type Before Tweaks as the name, click Create and wait until it fully finishes.
BackupsCreate a BackupBefore TweaksCreate
Good to know
The backup is your way back. If a change doesn't suit your PC, restore Before Tweaks in Backups and the settings the app changed go back to how they were. More in our guide to backups and restore points.
Open Hardware. RIP Tweaks detects your parts by itself: on the PC in the video an AMD Ryzen 7 7435HS, an NVIDIA GeForce RTX 4060 Laptop GPU and 16 GB of Samsung DDR5-4800.
- CPU: click the card for your exact CPU, click Activate on the main tweak, then activate the rest of the tweaks on the page.
- GPU: go back, open GPU and click Activate on Optimize NVIDIA GPU. Then activate the others too, including the P-State tweak and Windowed Game Optimizations.
- RAM: also detected. Pick the option for your amount (16 GB in the video) and click Apply.
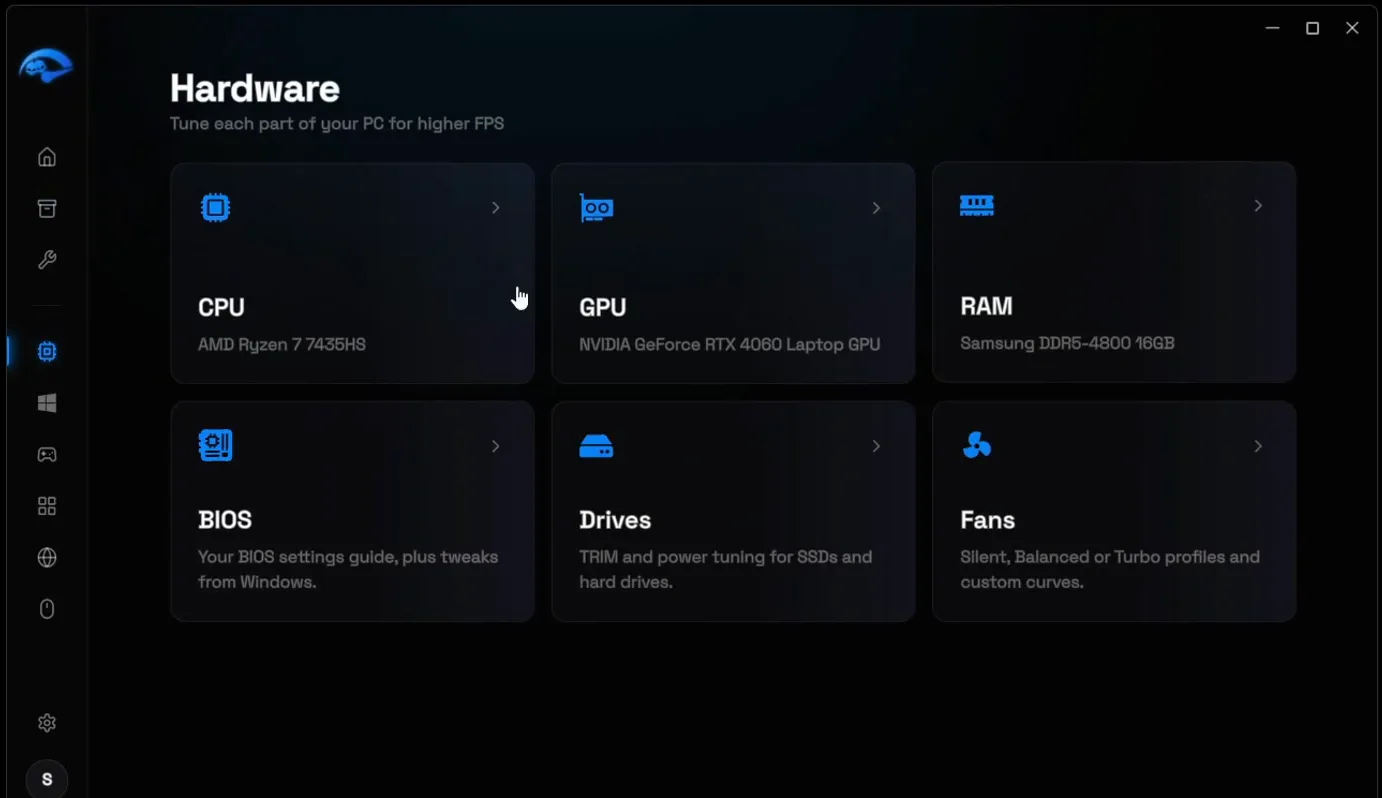
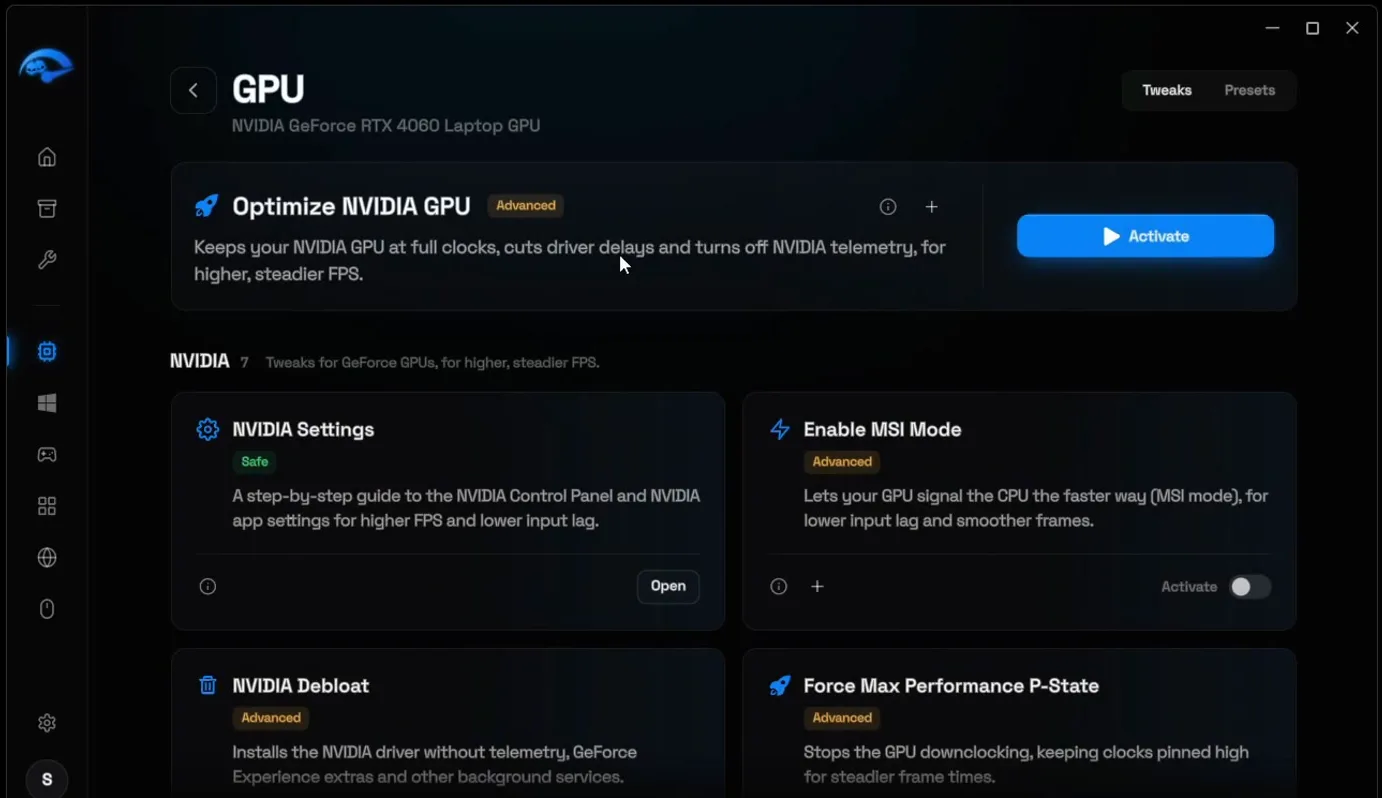
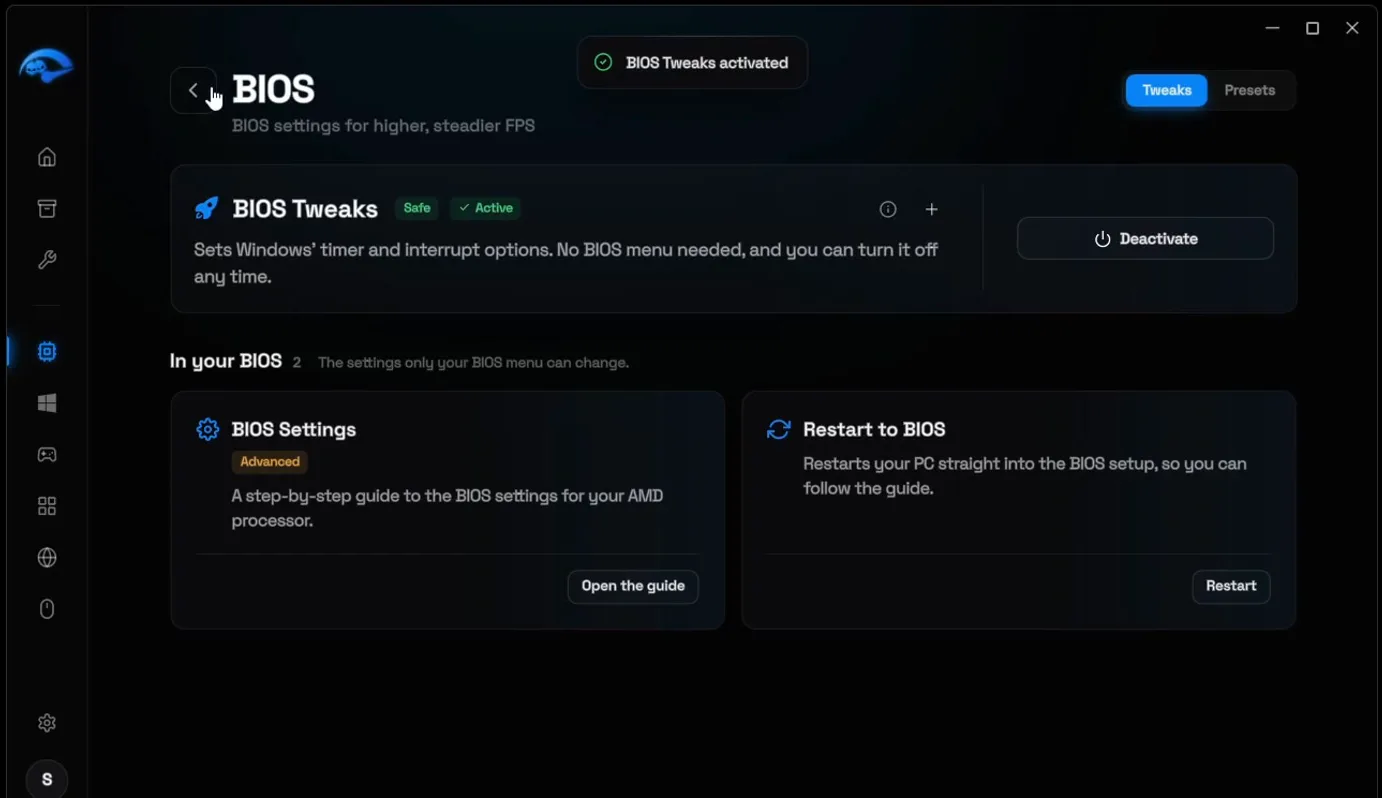
Go back and open BIOS. Click Activate on BIOS Tweaks: the app says it sets Windows' timer and interrupt options, needs no BIOS menu and can be turned off any time. Then open Drives and optimize your SSD, or your hard drive if that is what you have. For the settings only the BIOS menu can change, see our BIOS settings for gaming.
HardwareBIOSBIOS TweaksActivate
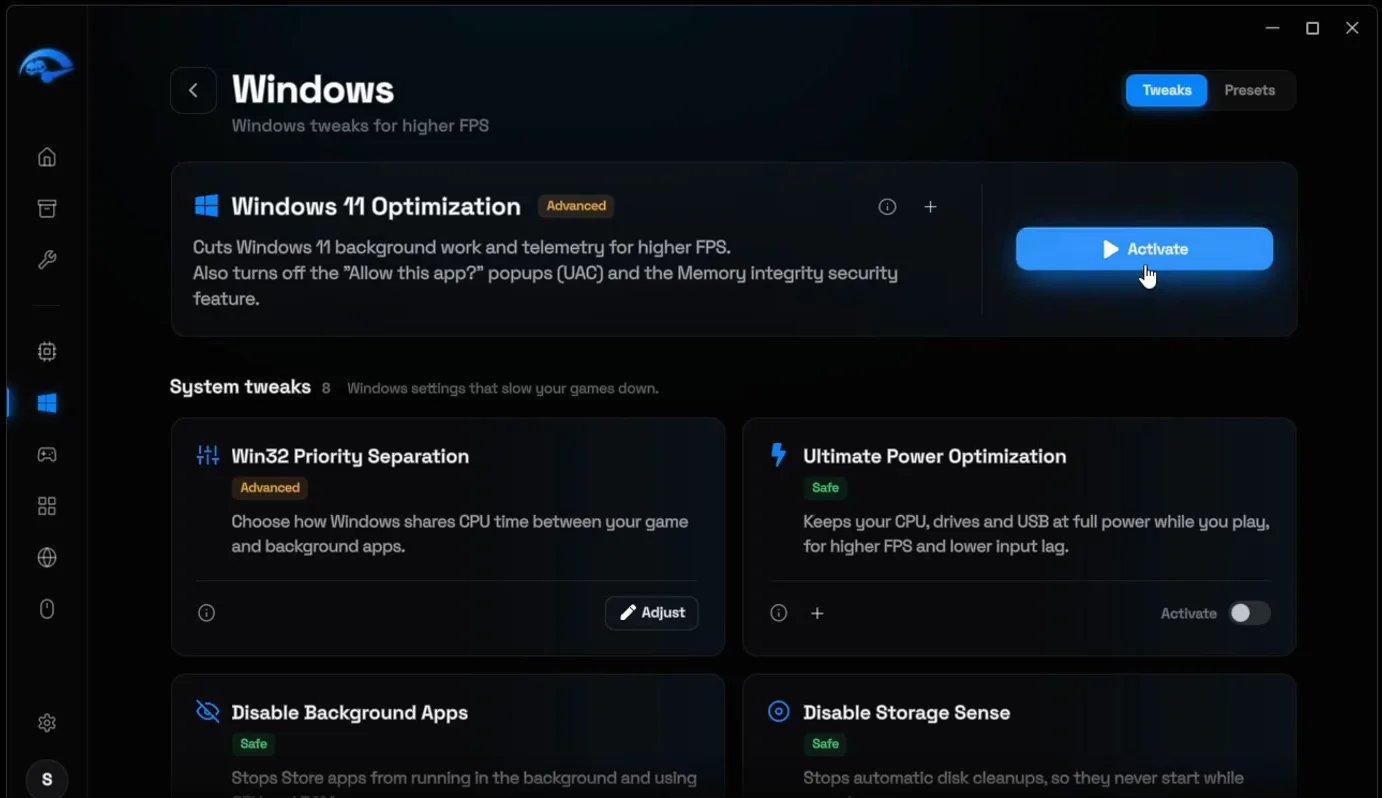
Open Windows from the sidebar, then the Windows card. The top tweak matches your version: Windows 11 Optimization on the PC in the video, the Windows 10 one on Windows 10. Click Activate, then activate the other optimizations on the page.
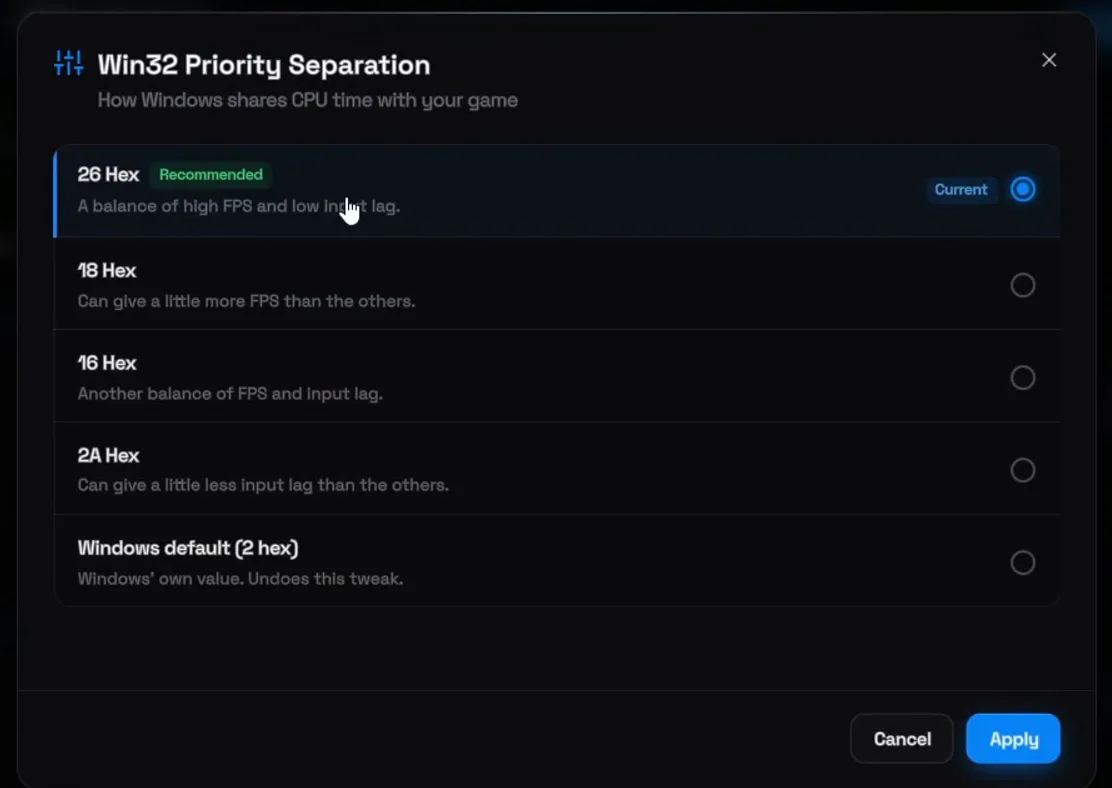
On Win32 Priority Separation, click Adjust, pick 26 Hex (marked Recommended: a balance of high FPS and low input lag) and click Apply.
WindowsWin32 Priority SeparationAdjust26 HexApply
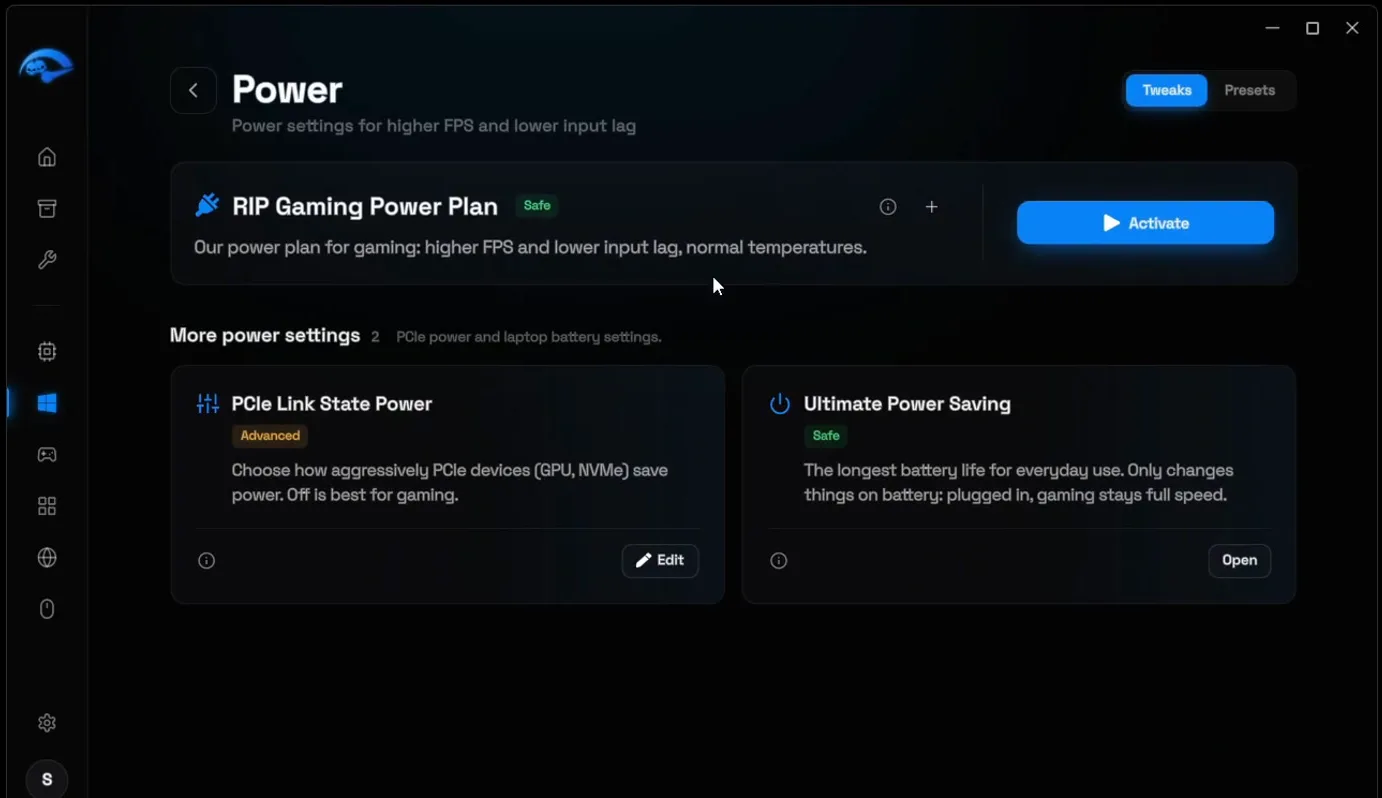
Go back and open Power. Click Activate on the RIP Gaming Power Plan, which the app describes as higher FPS and lower input lag at normal temperatures. Then click Edit on PCIe Link State Power, set it to Off and apply. The card itself says Off is best for gaming: your GPU and NVMe drive stop dropping into power saving. Our power plans guide explains the plans in detail.
WindowsPowerPCIe Link State PowerEditOff
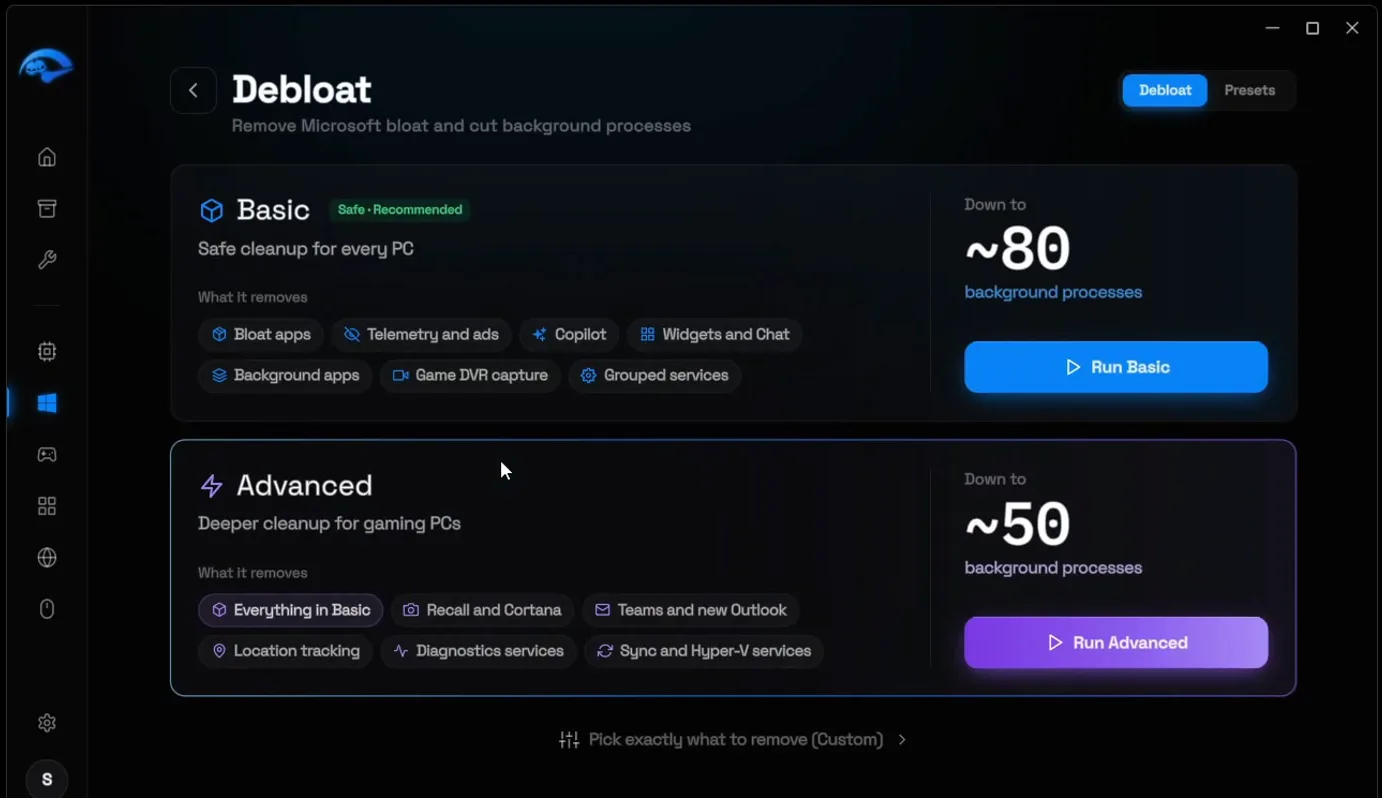
Close the window and open Debloat, which the video calls probably the most important section. It removes preinstalled apps you don't use, such as Weather, News and Get Help, AI features like Copilot and Cortana, and background parts like the Xbox services that keep reaching out to servers. On the PC in the video, all of these come to around 190 background processes.
There are two presets. Basic (Safe, Recommended) brings you down to about 80 background processes. Advanced, the deeper cleanup for gaming PCs, goes down to about 50: the ones Windows needs to run, and nothing else.
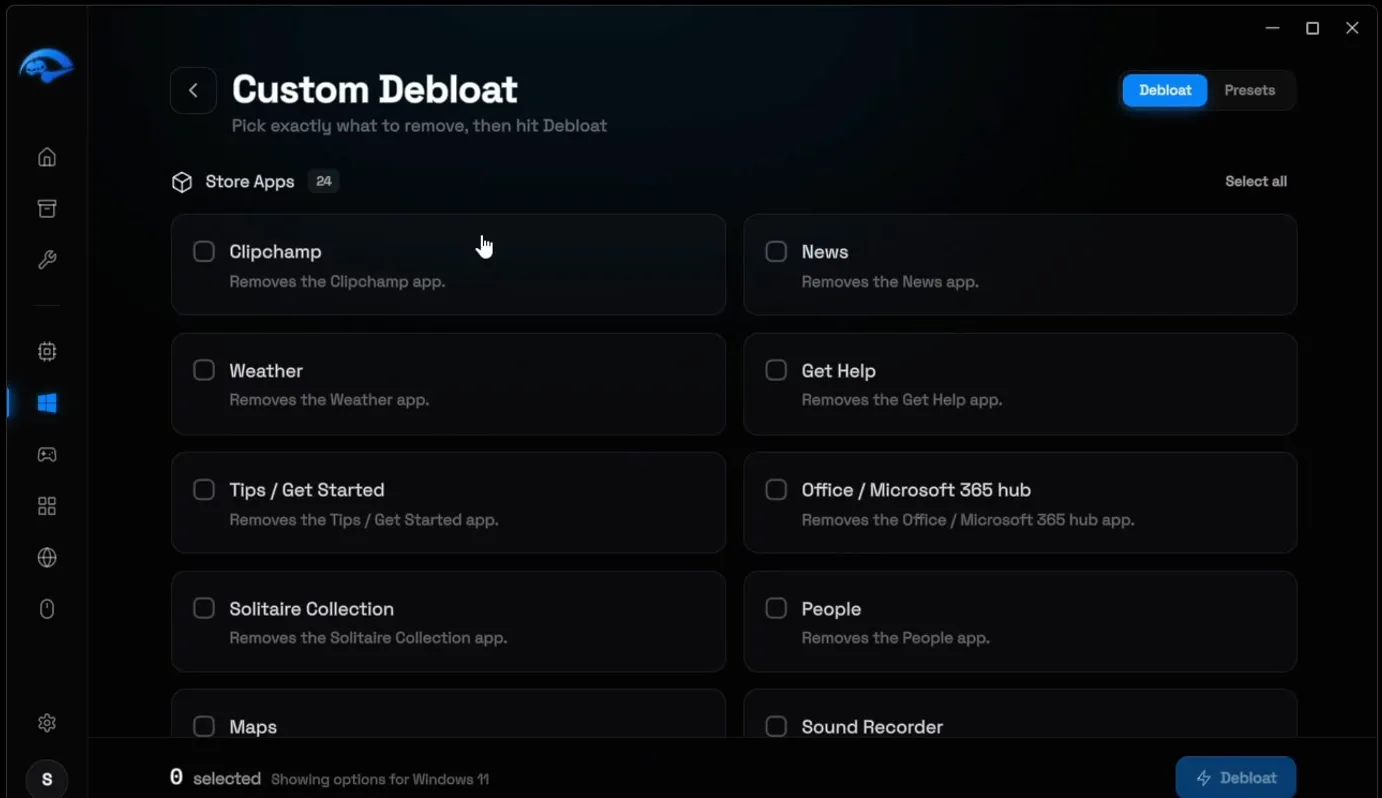
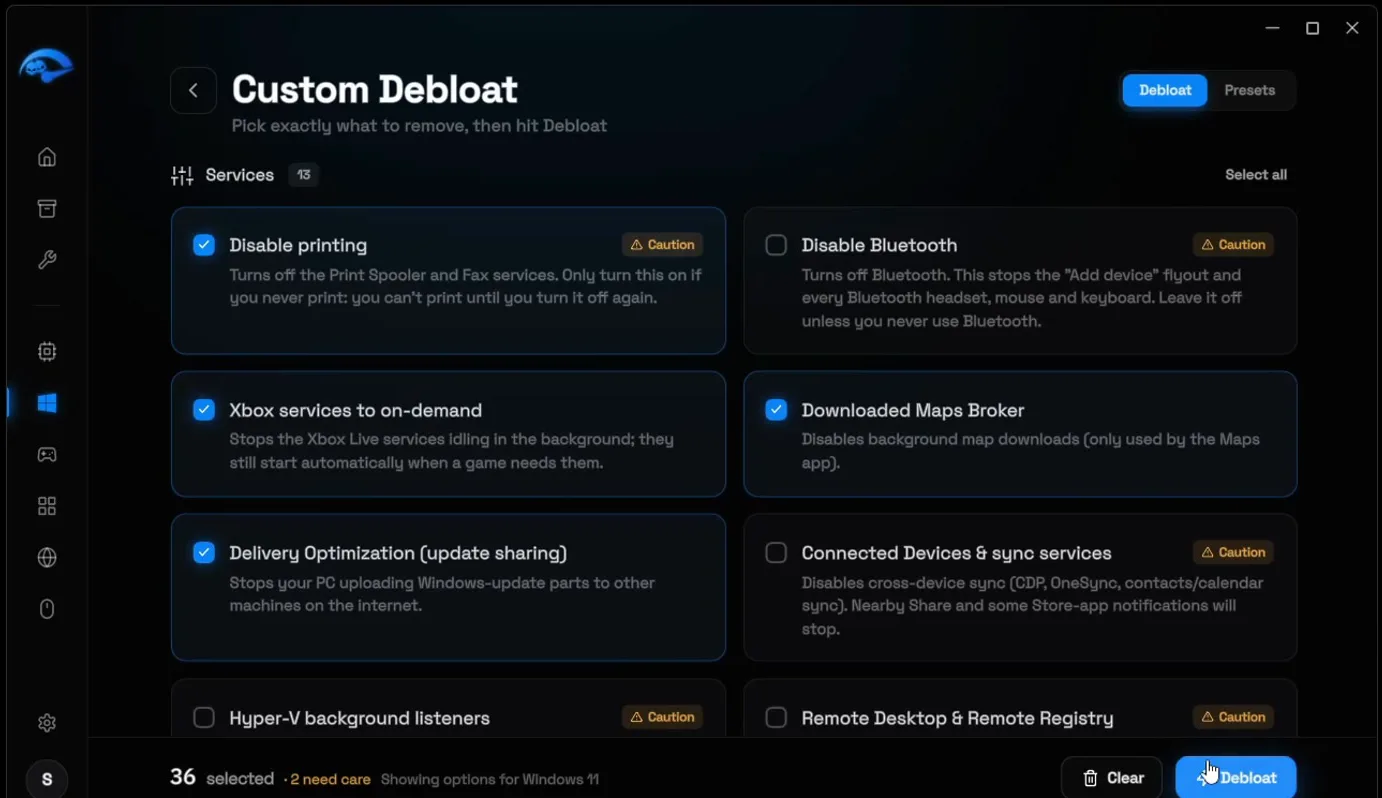
With the premium plan you can click Pick exactly what to remove (Custom) and choose every item yourself. The video clicks Select all, then unselects what it still uses, such as Maps, Sound Recorder, Snipping Tool or the Xbox Game Bar. That removes the telemetry and tracking, the AI features and services you don't use, like printing and Delivery Optimization. Click Debloat: on the PC in the video 36 items were removed, and the rest finishes at your next restart. With fewer processes reaching out in the background, in theory your ping can improve too.
Careful
Items with a Caution tag, like Disable printing, Disable Bluetooth, Snipping Tool or Xbox apps & Game Bar, switch off something you might still use. Leave them unchecked if you print, use a Bluetooth headset or record clips with the Game Bar. Our guide to reducing background processes goes deeper.
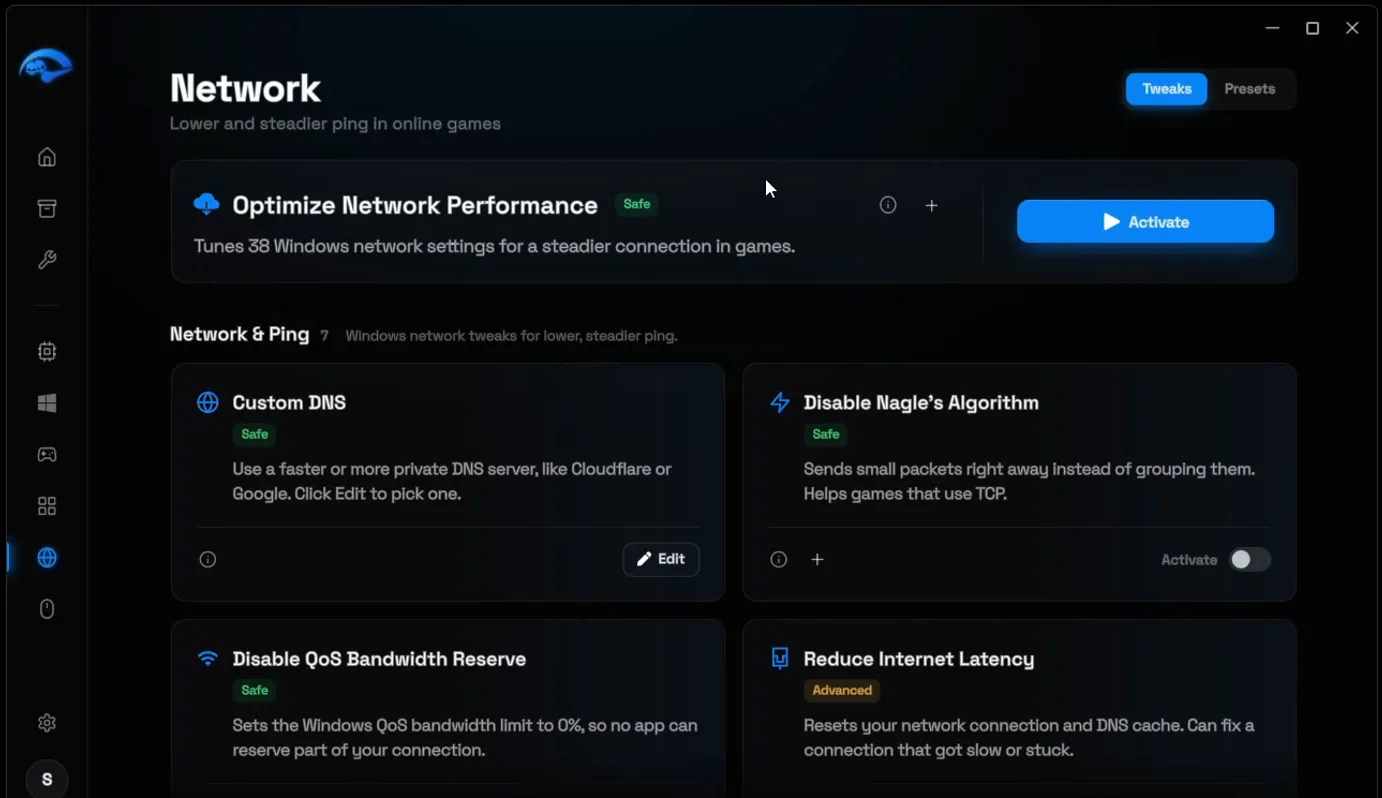
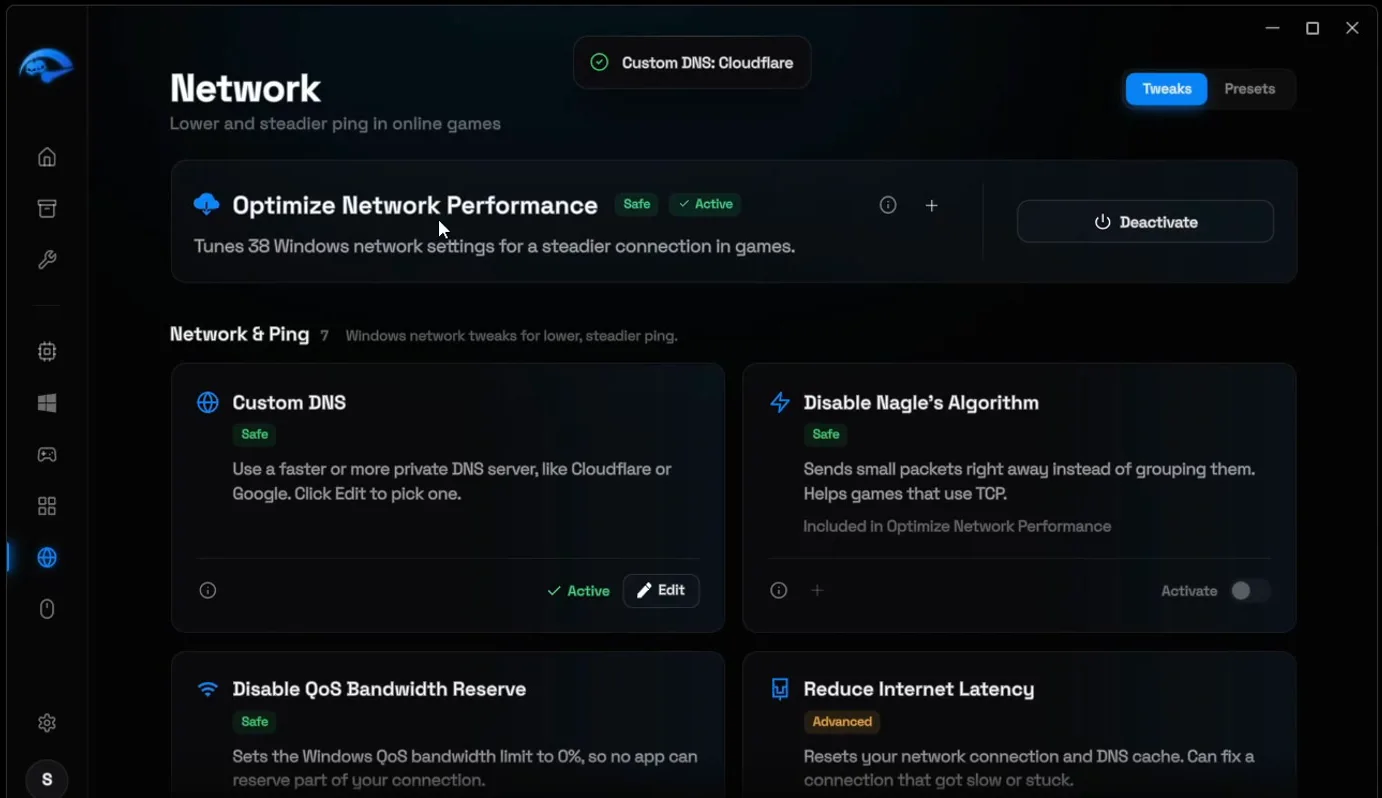
Go back and open Network. Click Activate on Optimize Network Performance, which tunes 38 Windows network settings for a steadier connection in games. Then apply the other tweaks on the page; if you play on Wi-Fi, apply the Wi-Fi gaming tweak as well.
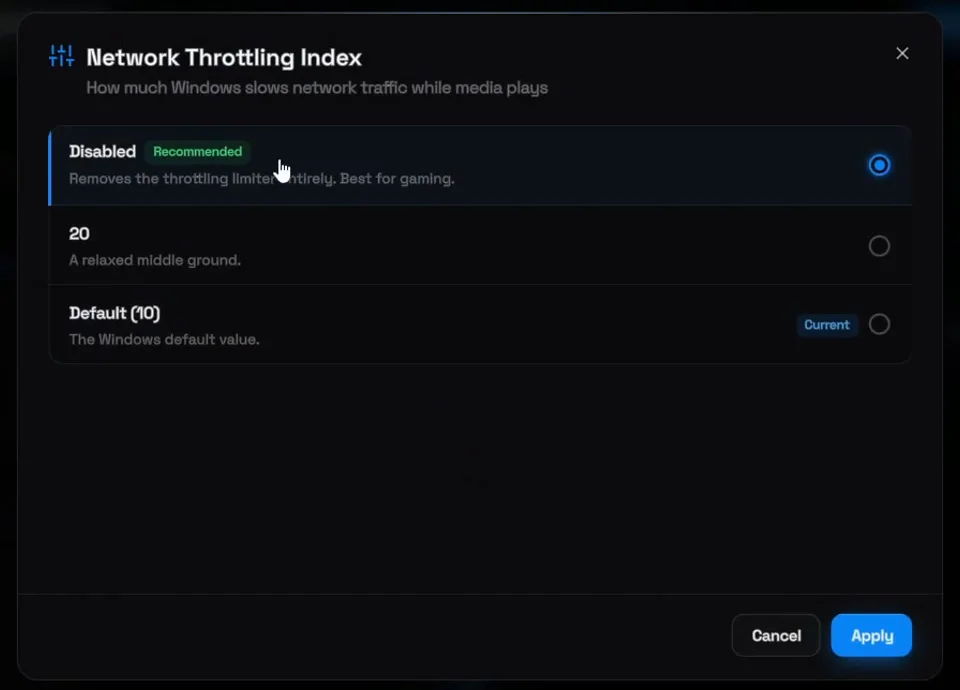
Set Network Throttling Index to Disabled (Recommended: it removes the throttling limit entirely) and click Apply. On Custom DNS, click Edit and choose the fastest option: it tests the DNS servers and applies the quickest one for you. On the PC in the video that was Cloudflare. Every tweak on this page is explained in network tweaks in detail.
NetworkCustom DNSEditFastestApply
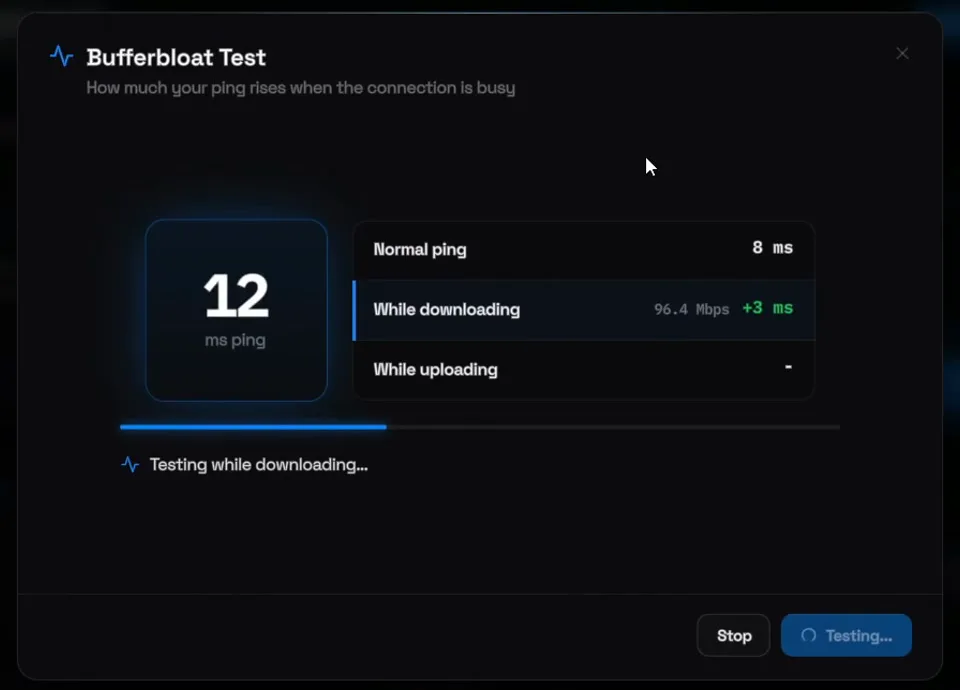
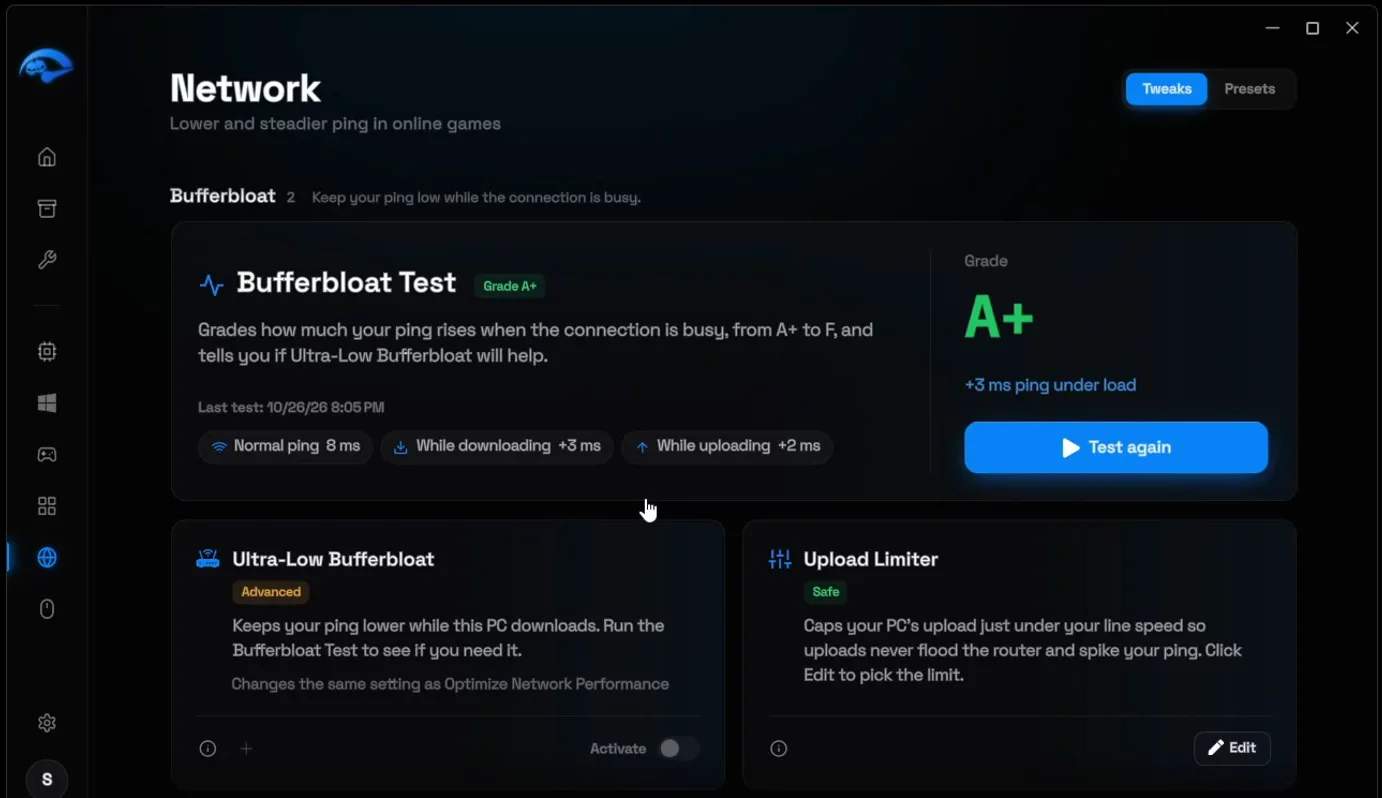
Scroll down to Bufferbloat and click Run test on the Bufferbloat Test. It takes about 20 seconds and measures three things: your normal ping, your ping while downloading and your ping while uploading. Then it grades how much your ping rises when the connection is busy, from A+ to F.
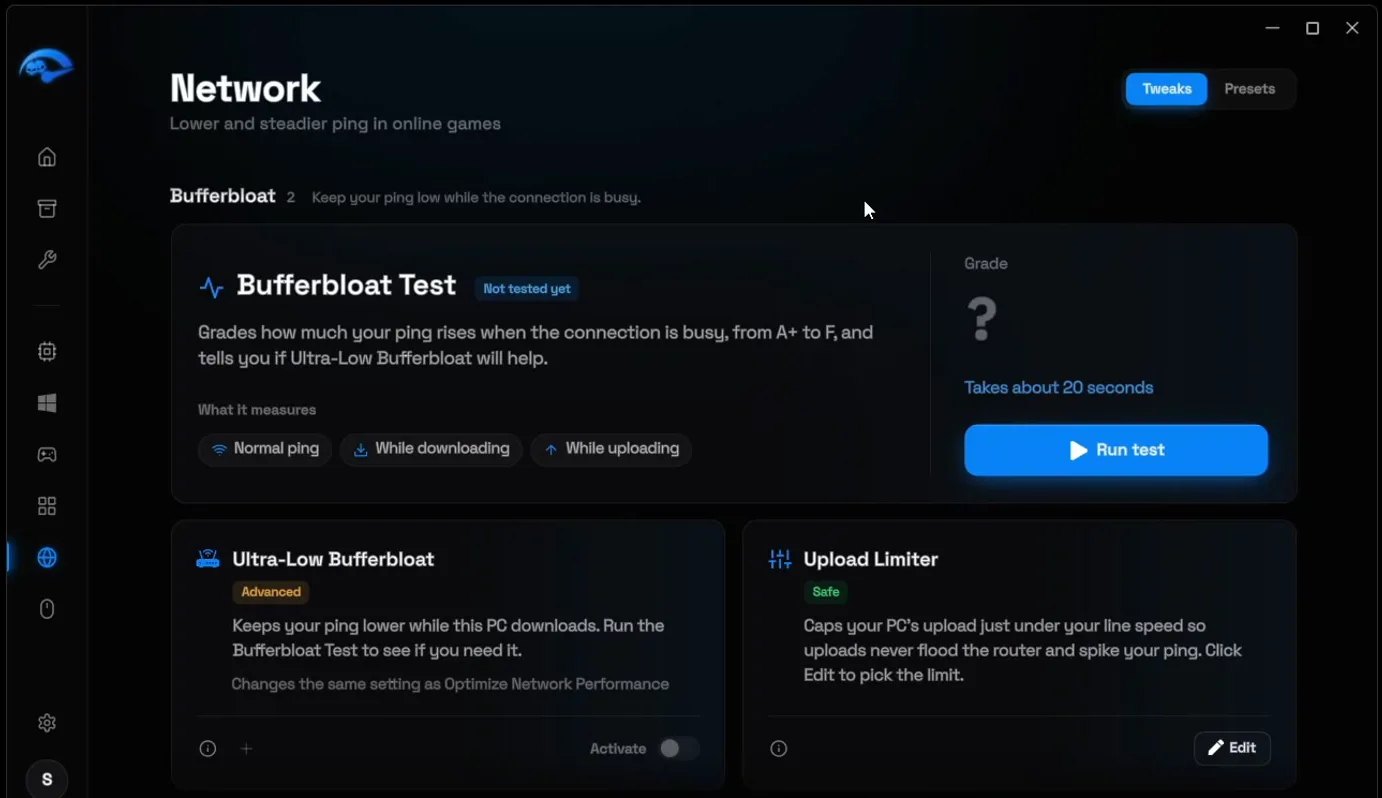
Bufferbloat happens when your internet gets busy, for example when someone downloads something or watches Netflix, and your router starts putting everything in one long line. Your game's data has to wait in that line behind all the downloads and requests. That is why your ping spikes up and down out of nowhere, even when your internet is very fast.
So the fix isn't faster internet: it is making sure your game never waits in that line. The tweaks set a limit a little under your maximum speed, so your connection never gets completely full, no line forms and your game's data goes straight through. Our bufferbloat fix guide covers it in more depth.
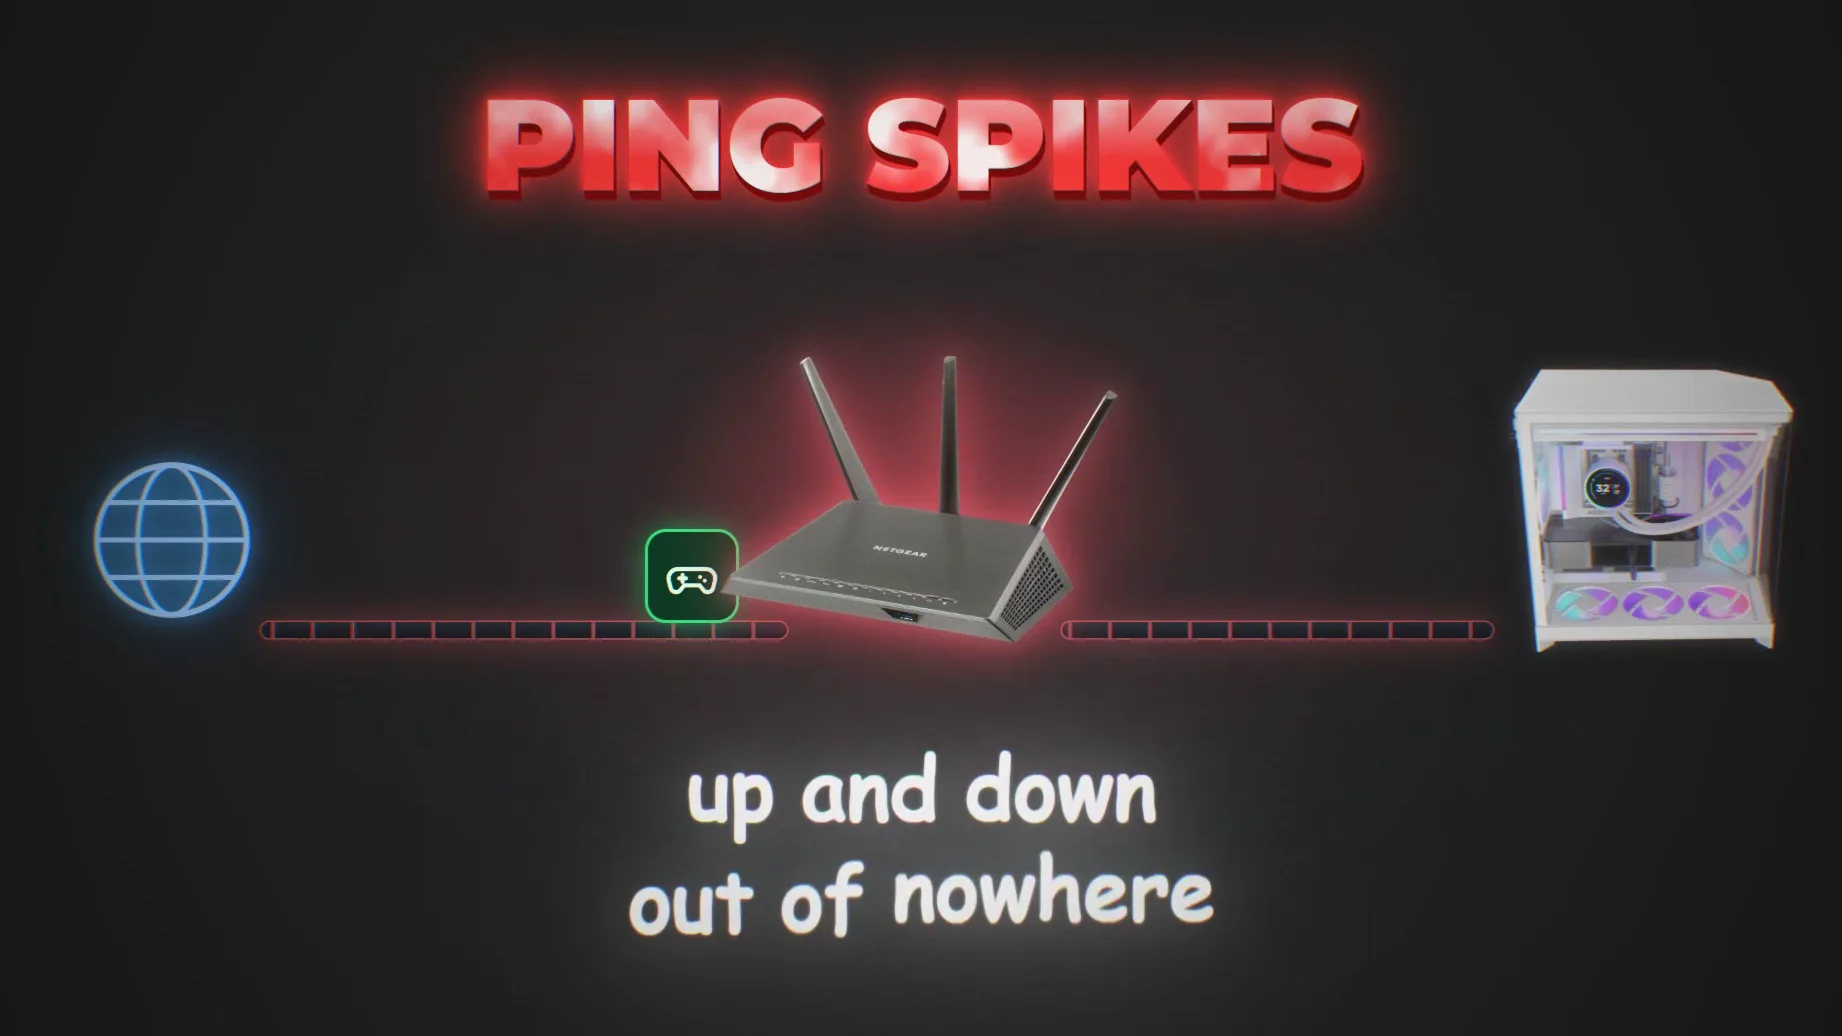
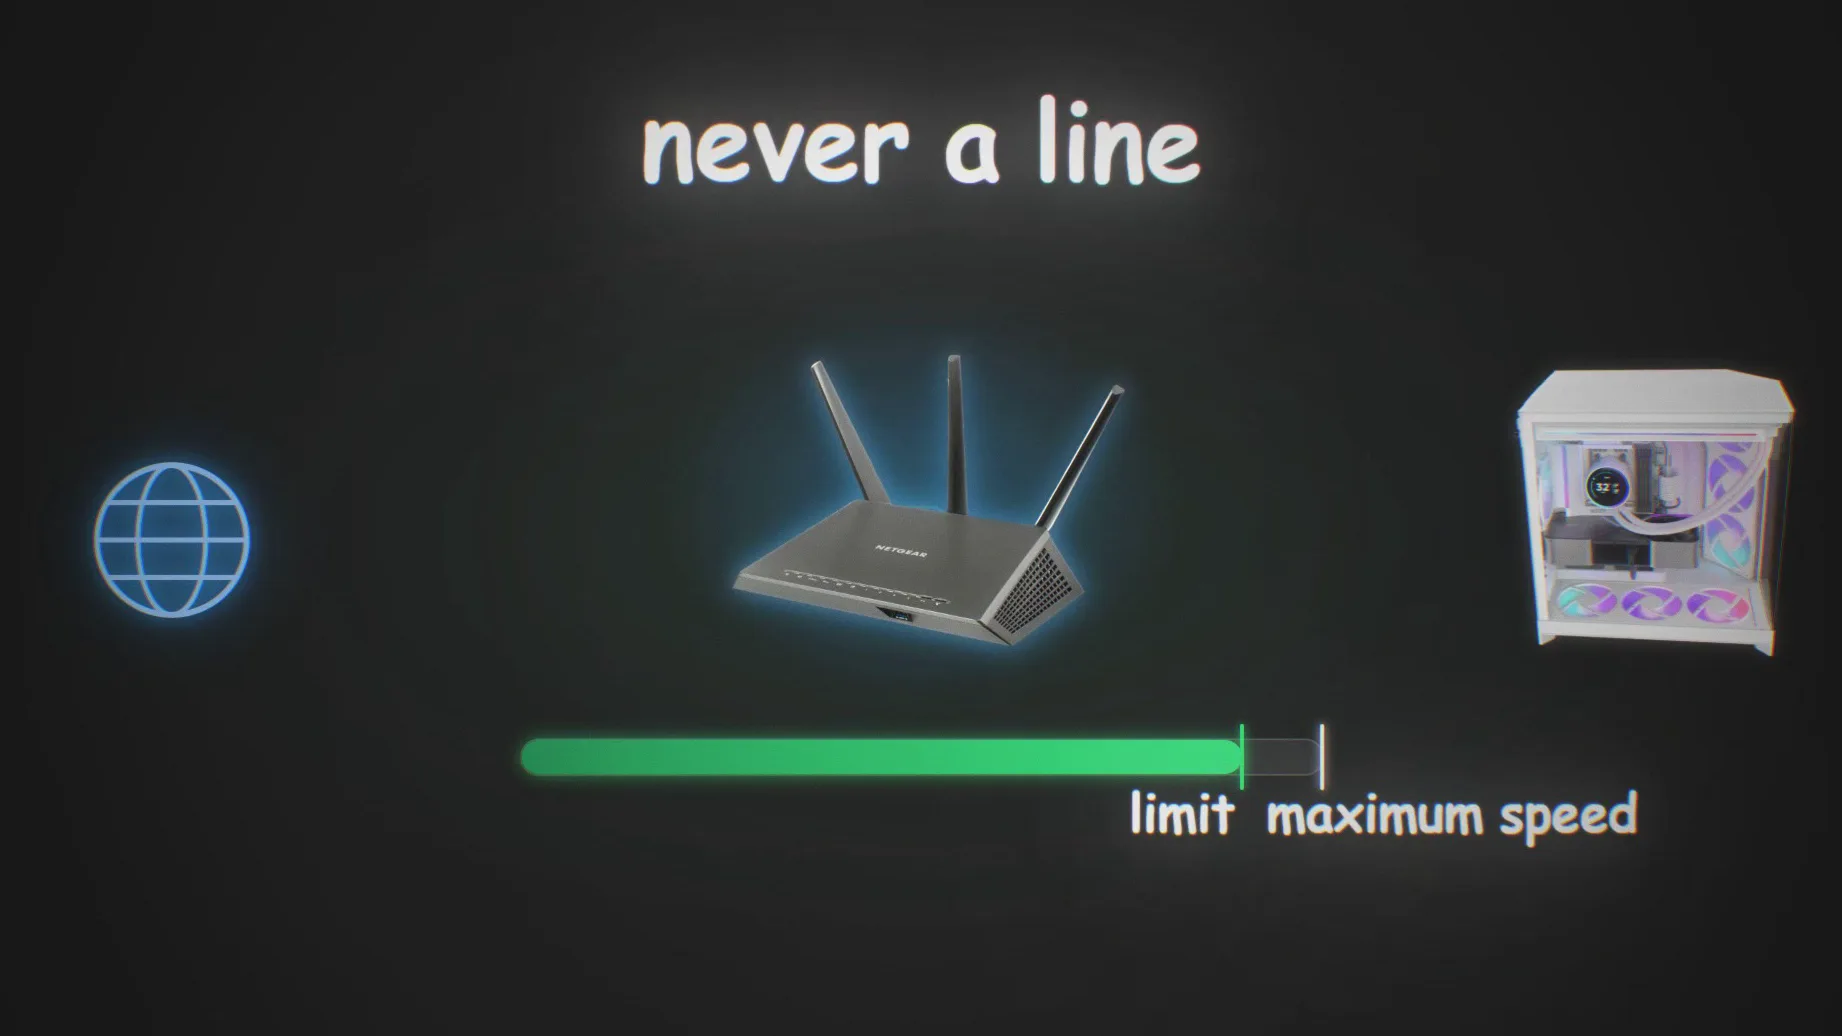
The two cards under the test, Ultra-Low Bufferbloat and Upload Limiter, are the most important tweaks here, and the upload side matters most: your upload is way smaller than your download, fills up way faster, and every move you make in a game goes through it.
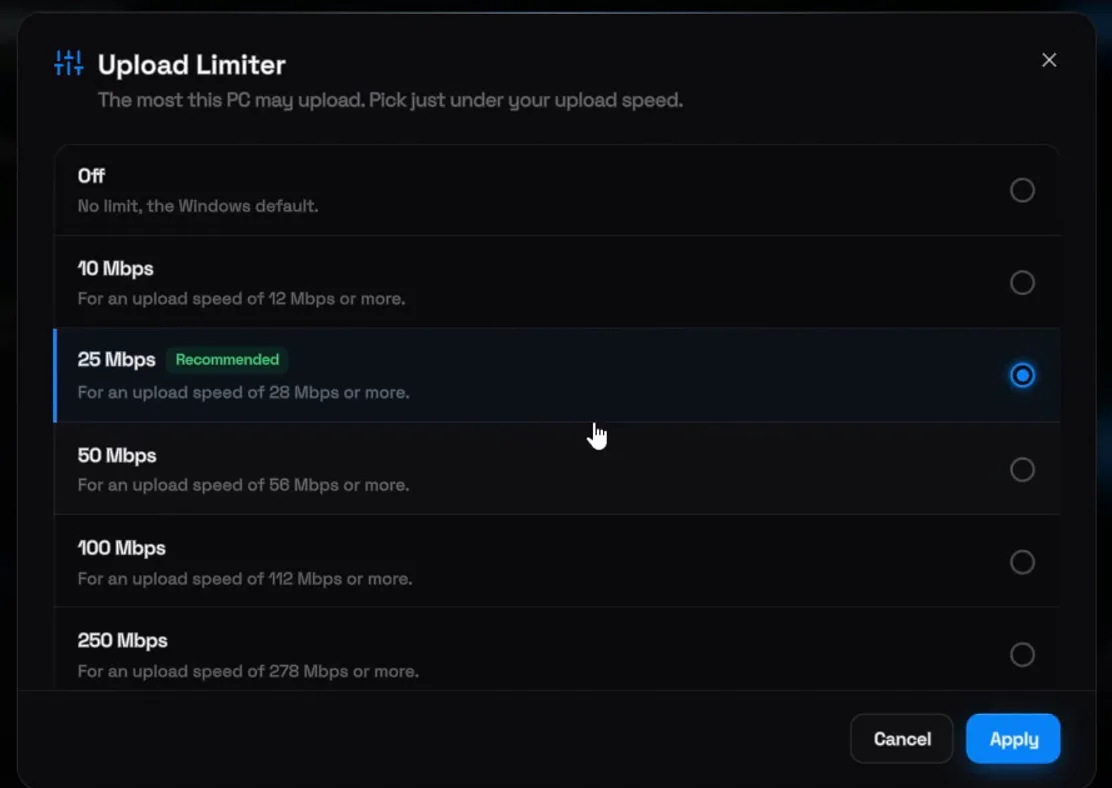
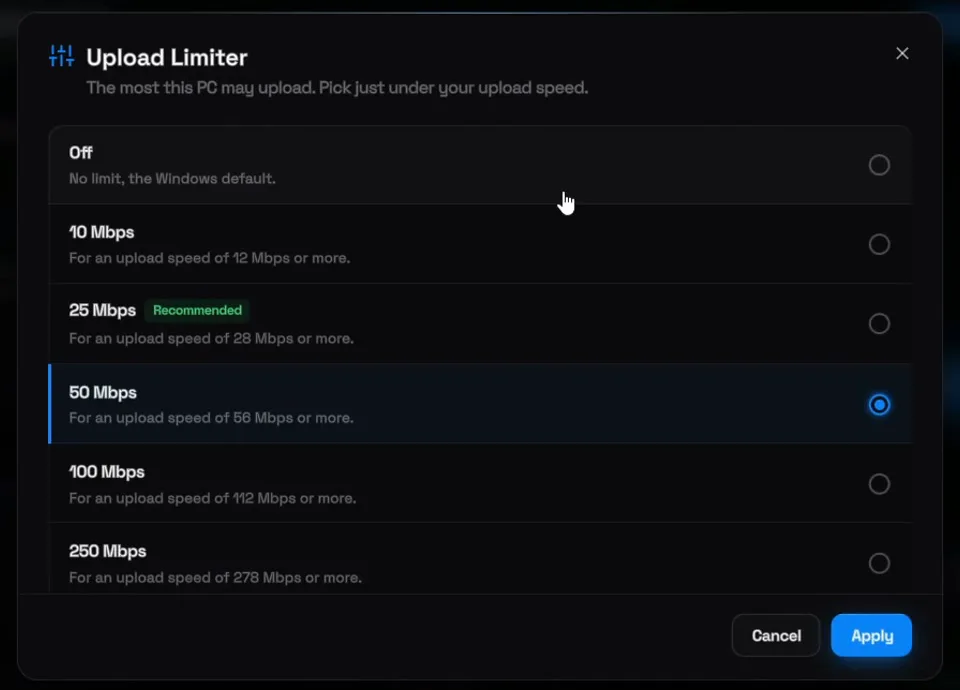
Look at your upload speed. On the PC in the video it is around 43 Mbps, so the video clicks Edit on Upload Limiter, picks 50 Mbps as the nearest option and clicks Apply. If you get a faster internet plan later, pick a new value. If you notice no change, set it back to Off (no limit, the Windows default).
NetworkUpload LimiterEdit50 MbpsApply
Tip
The window's own hint says to pick just under your upload speed, and every option lists the speed it suits: 25 Mbps is for 28 Mbps or more, 50 Mbps for 56 Mbps or more. If your ping still spikes with the nearest option, try the next one down and run the test again.
Your grade tells you whether this step is for you. With a grade from C to F, set the upload limiter: this is where you will probably get the biggest internet boost of the whole guide. With B, A or A+, you don't really need it, and the other steps here fix any ping problems you might have.
On the PC in the video the grade is A+: 8 ms normal ping, 3 ms more while downloading and 2 ms more while uploading.
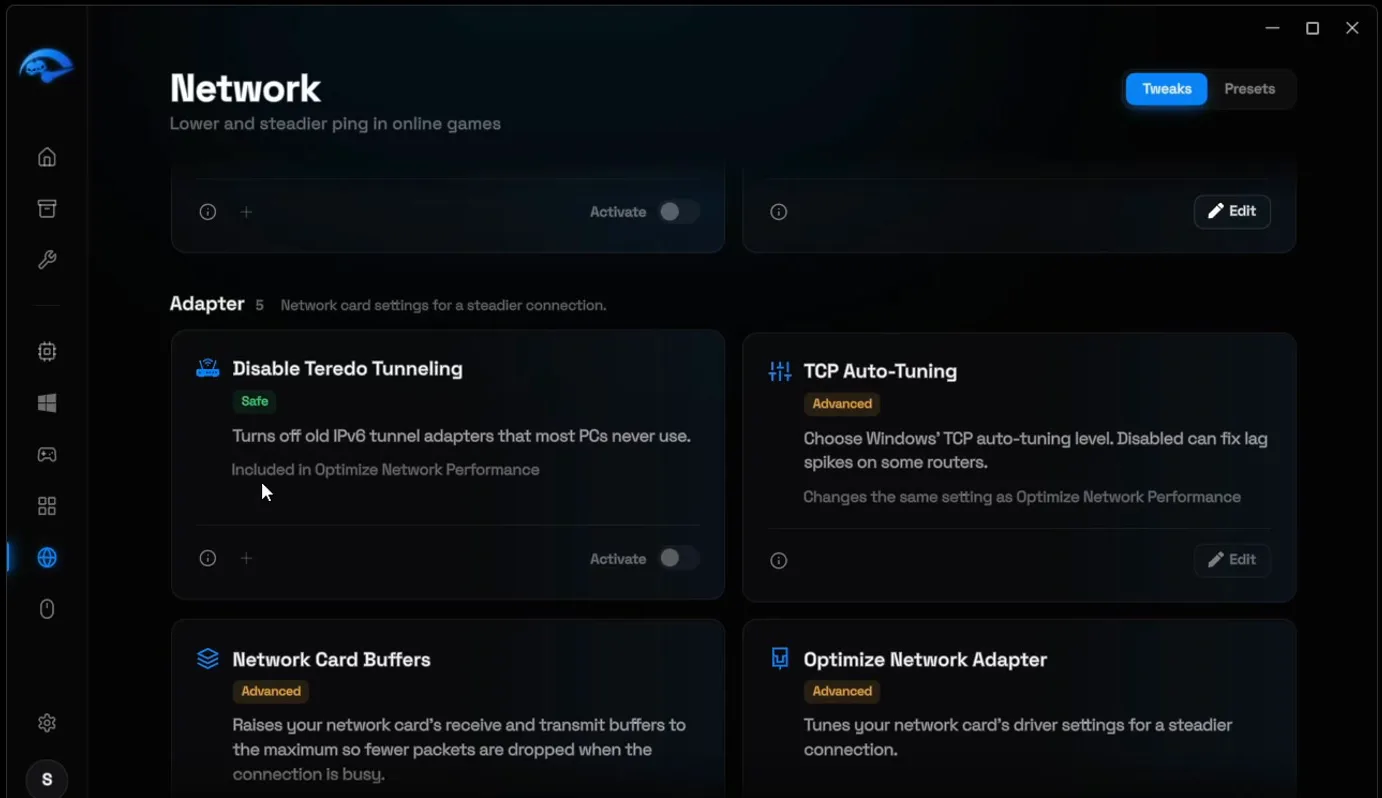
Scroll down to Adapter, the network card settings for a steadier connection. Some of them are already part of Optimize Network Performance, and the cards say so (for example Disable Teredo Tunneling and TCP Auto-Tuning). Apply the rest: Optimize Network Adapter and Prefer IPv4 over IPv6.
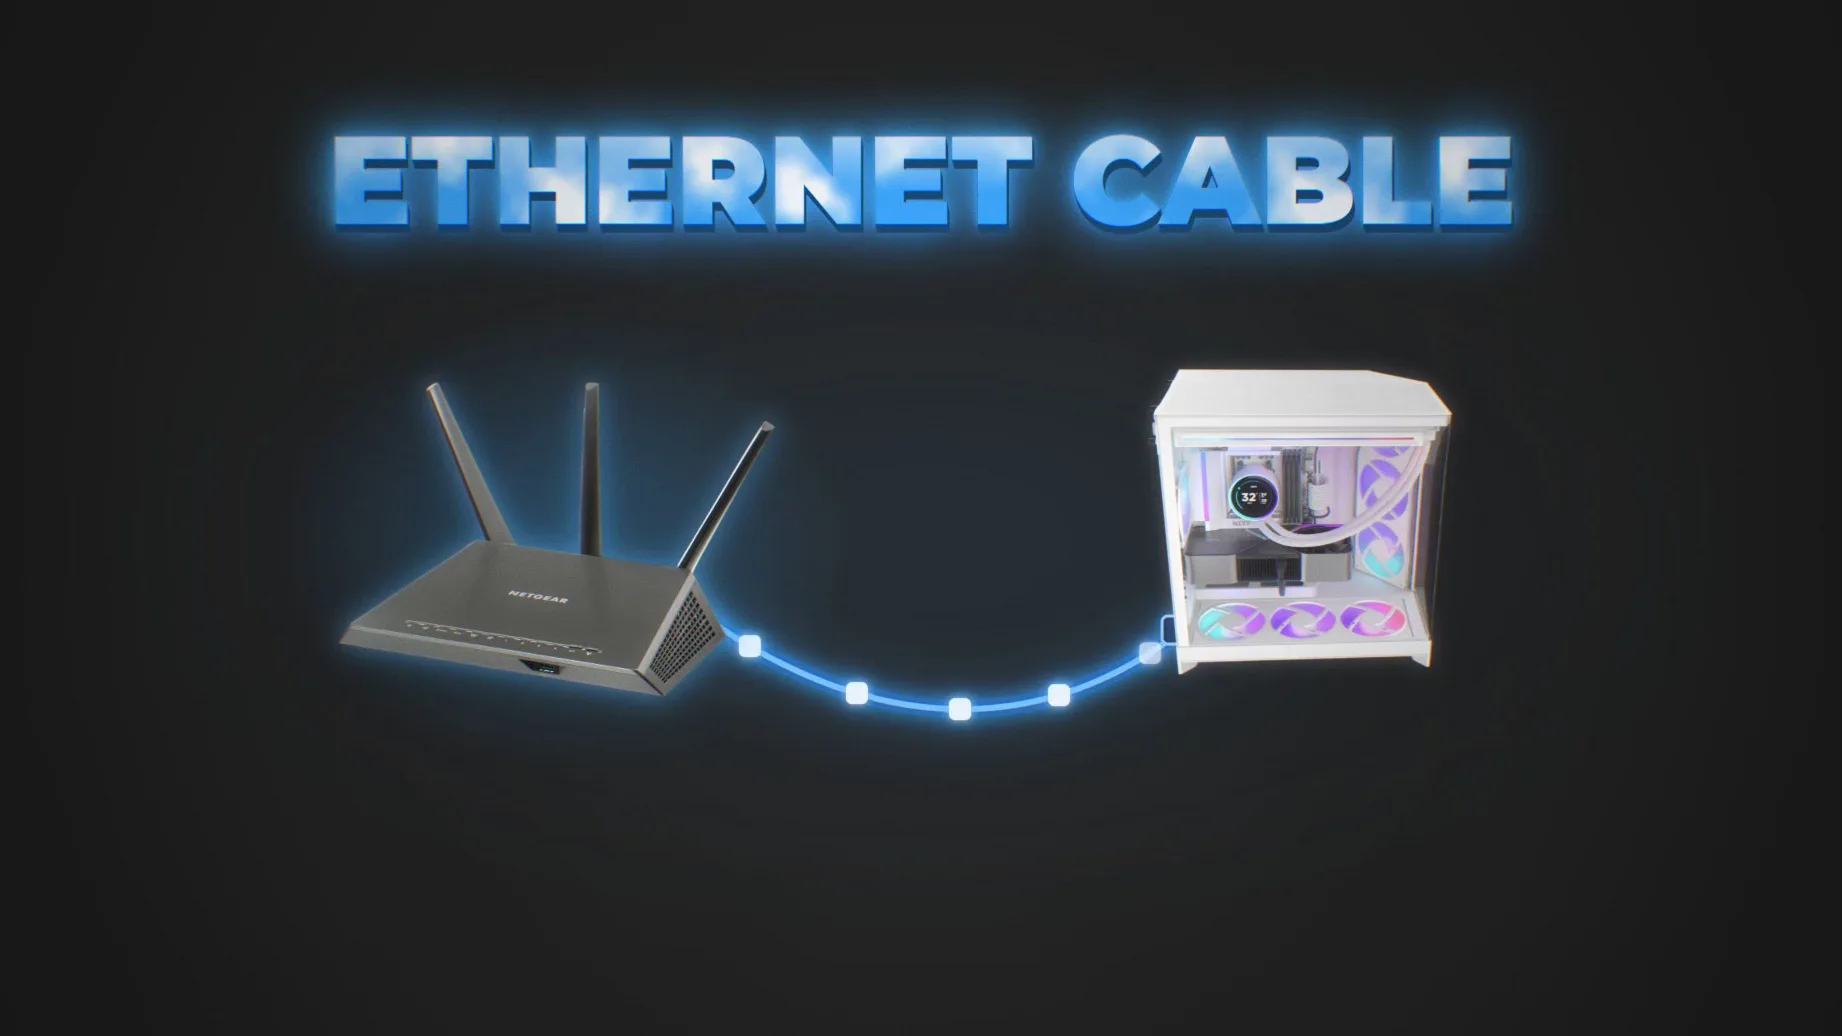
The advice the video gives everyone: play on an Ethernet cable, like the PC in the video does. A cable typically gives a lower and steadier ping than Wi-Fi. Then restart your router: turn it off, wait 30 seconds and turn it back on. In the meantime, restart your PC fully, so every tweak and the debloat take effect.
Tip
If a cable can't reach your room, our test of Ethernet vs a Wi-Fi extender shows what that does to Fortnite ping.
How to check it worked
After the restart, measure before you judge:
- Open Network in RIP Tweaks and click Test again on the Bufferbloat Test. Your grade should be the same or better, and the ping under load should rise only a few ms, like the 3 ms on the PC in the video.
- Turn on your game's ping or network stats and play a match while someone at home streams or downloads. A steady number with no jumps means the line in your router is gone.
- Open Task Manager and look at the Background processes group on the Processes tab. After the debloat and the restart it should be much shorter than before.
Still spiking? Our ping spikes and packet loss guide covers the next fixes.
How to undo it
Every tweak has a Deactivate button or a default value: Windows default (2 hex) for Win32 Priority Separation, Default (10) for Network Throttling Index, Off for the Upload Limiter. To undo everything at once, restore the Before Tweaks backup.
Key settings at a glance
FAQ
Why does my ping keep spiking in games?
Most often it is bufferbloat: when something else uses your connection, your router puts all the data in one long line and your game's data waits behind it. Background apps that use your connection add to it. The Bufferbloat Test in RIP Tweaks shows if this is your problem, and the Upload Limiter stops the line from forming.
Does this work for Fortnite, Valorant and CS2?
Yes. Every step changes Windows, your network card or your router, not one game, so it works for Fortnite, Valorant, CS2, Warzone and every other online game on Windows 10 and 11.
Which bufferbloat grade needs the upload limiter?
A grade from C to F: there the upload limiter is where you will probably see the biggest difference. With B, A or A+ you don't really need it, and the rest of the guide handles your ping.
Which upload limit should I pick?
Check your upload speed and pick the option nearest to it: the video picks 50 Mbps for an upload of around 43 Mbps. The window recommends staying just under your upload speed, so if spikes stay, go one option lower. Set it to Off if you see no change.
Does a custom DNS lower ping?
A faster DNS server answers your PC's address lookups sooner, which helps when you connect to servers and load into games. Your in-match ping depends more on the route to the game server and on bufferbloat, which is why the video pairs the DNS change with the network tweaks and the upload limiter.
Is Ethernet really better than Wi-Fi for ping?
Yes. A cable typically gives a lower and steadier ping than Wi-Fi, which is why the video calls it the advice it gives everyone. If you must stay on Wi-Fi, apply the Wi-Fi gaming tweak in the Network section.
Does restarting the router lower ping?
It gives your router a fresh start, which can fix a connection that got slow over time. The video turns it off, waits 30 seconds and turns it back on, and fully restarts the PC in the meantime so every tweak takes effect.
Is RIP Tweaks free?
The download is free, from the Discord or our download page. In the video, picking each item yourself in Custom Debloat is part of the premium plan. See what free includes for the full list.
 RIP Tweaks
Do it in a few minutes with RIP Tweaks
- Free plan for Windows 10 and 11
- A backup first, and every tweak can be switched off again
- Made for higher FPS, lower input lag and steadier ping
Free · Windows 10 and 11
