How to Optimize Your Mouse for Zero Input Delay (2026)

Written version of our video, every step checked against it.
Quick answer
- Install RIP Tweaks, create your account and make a backup before you change anything.
- Activate the auto-detected CPU, GPU, RAM, BIOS and drive tweaks, then the Windows tweaks and Win32 Priority Separation at
26 hex. - Apply the RIP Gaming Power Plan and set PCIe Link State Power to
Off. - In Input Lag, turn on Reduce Input Lag, Mouse and Keyboard Latency Optimization, then raise your mouse to 1000 Hz with the Polling Rate Optimizer and turn on USB Port Optimization.
- Start your game from Games with Launch, so it runs in game mode with background apps quieted.
If you keep missing shots you know you should have hit, the delay between your hand and the screen may be the problem, not your aim. This guide follows our video click by click: it sets up the hardware and Windows first, then the input lag section, a 1000 Hz polling rate and the USB port, and finally launches Fortnite optimized. It works on Windows 10 and 11 and in any game, from Fortnite to Valorant and CS2.
In this video
In the video the download comes from our Discord: type discord.gg/riptweaks in your browser, join the server, open the free-tweaks channel and click Download RIP Tweaks. You can also download it straight from riptweaks.com. Run the installer and wait until it finishes.
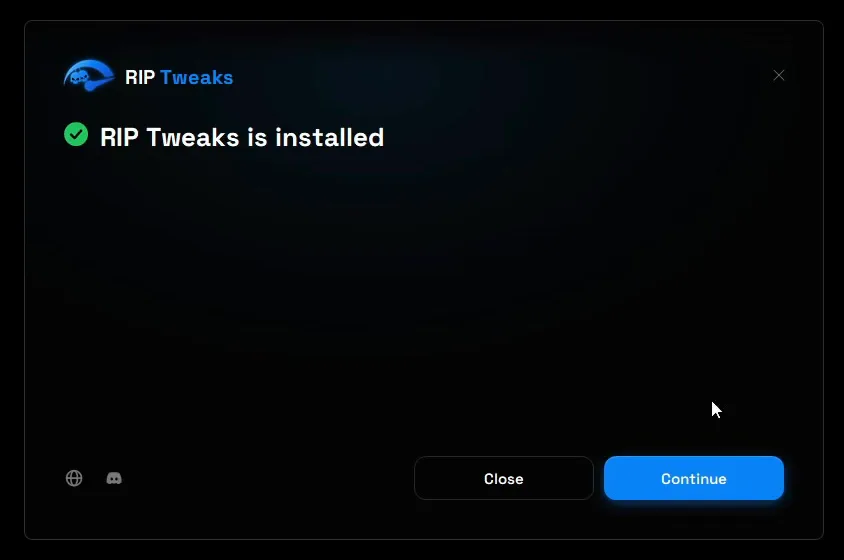
Click Continue. The first screen asks you to create your account: type a username, your email and a password, then click Create account.
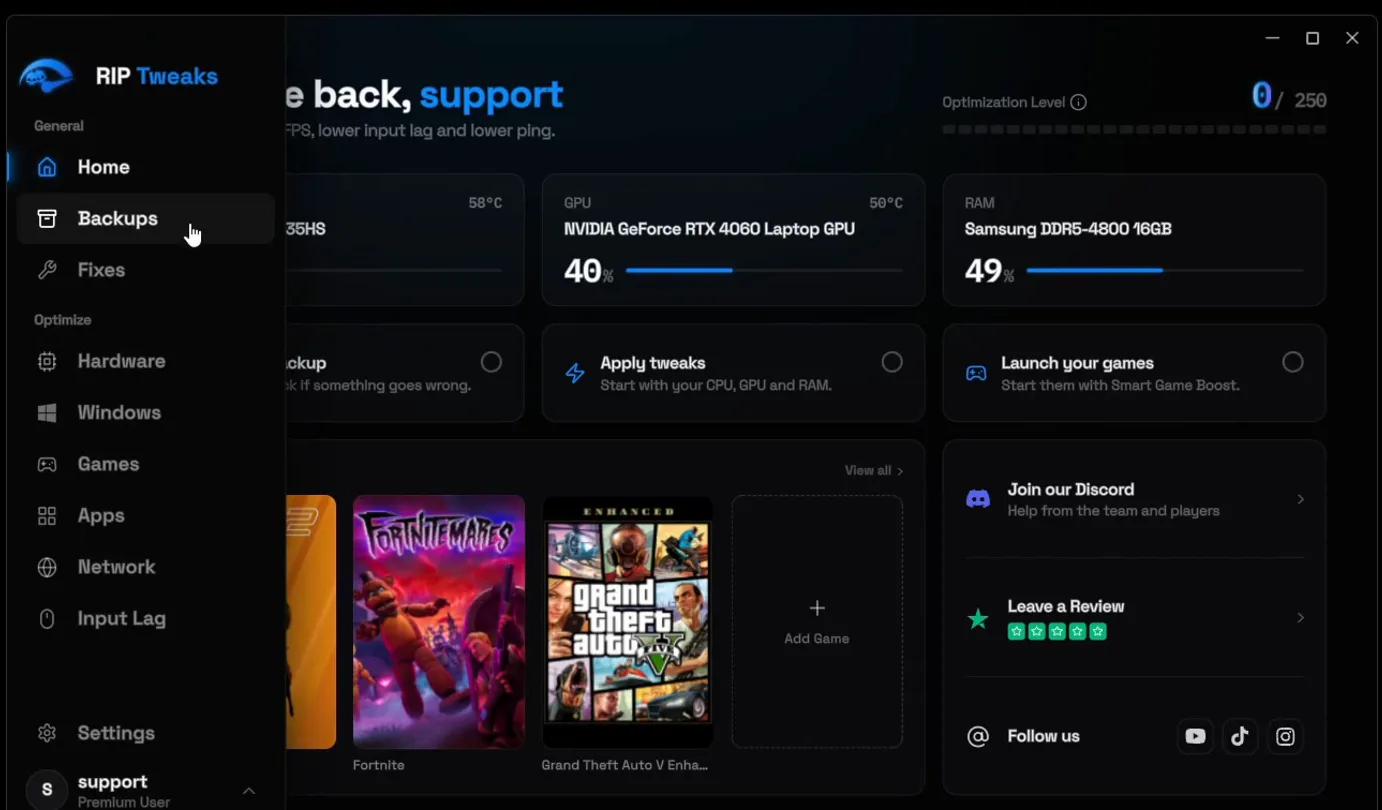
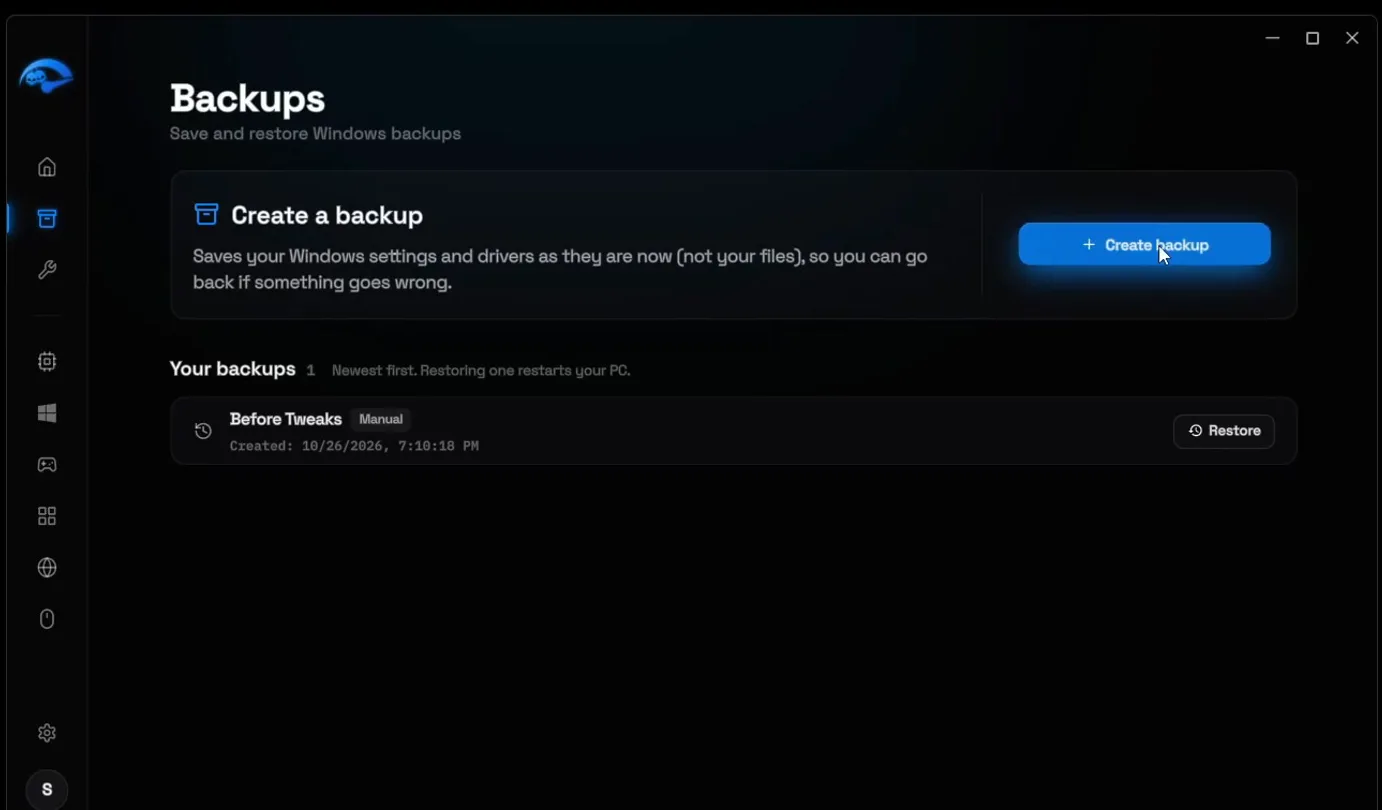
Click Backups in the sidebar, then Create backup. Give it a name you will recognise, such as "Before RIP Tweaks", click Create and wait for it to finish.
BackupsCreate backupBefore RIP TweaksCreate
How to undo it
Every tweak in this guide can be switched off again in one click. To go back to how your PC was before, open Backups and click Restore next to this backup. The app notes that restoring one restarts your PC.
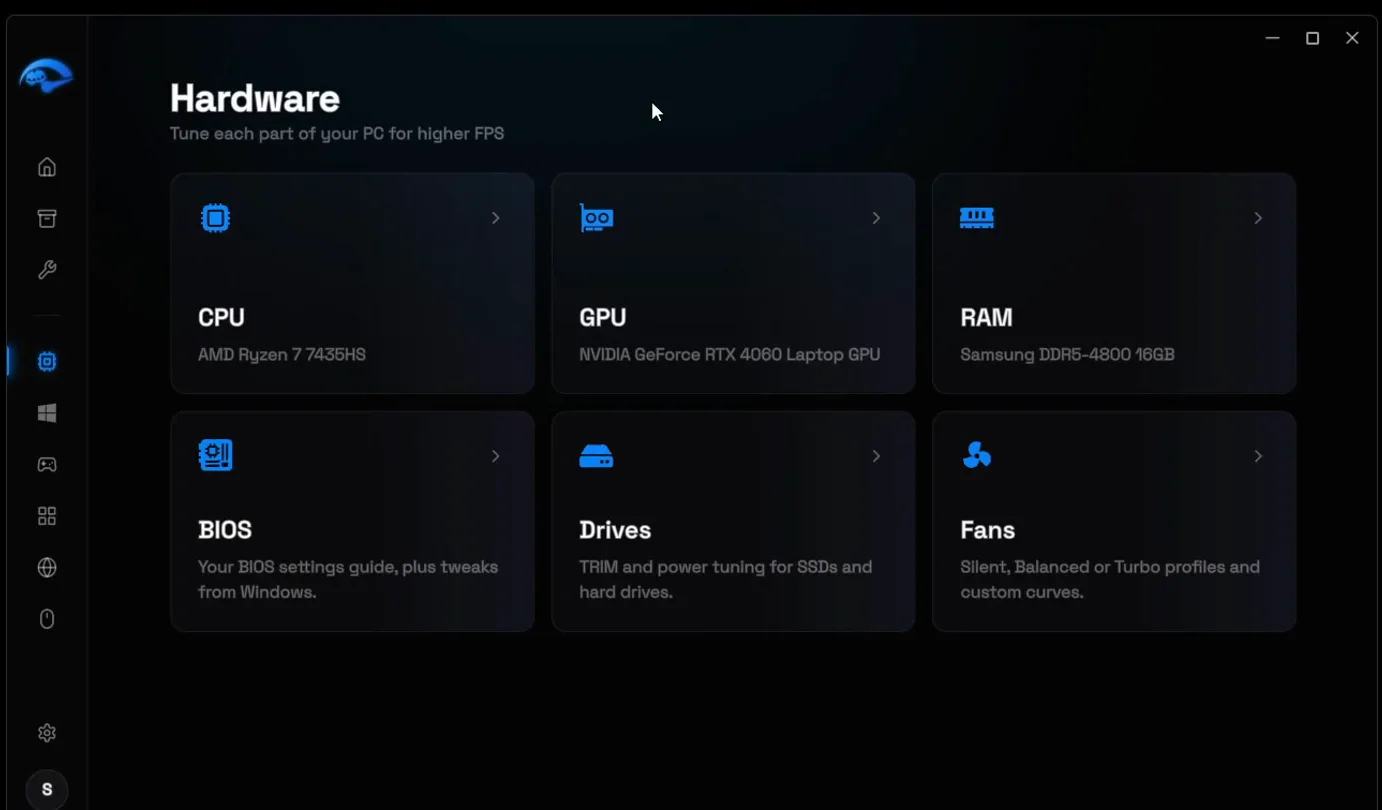
Open Hardware. The app detects your parts by itself: on the PC in the video it found an AMD Ryzen 7 7435HS, an NVIDIA GeForce RTX 4060 Laptop GPU and 16 GB of Samsung DDR5-4800.
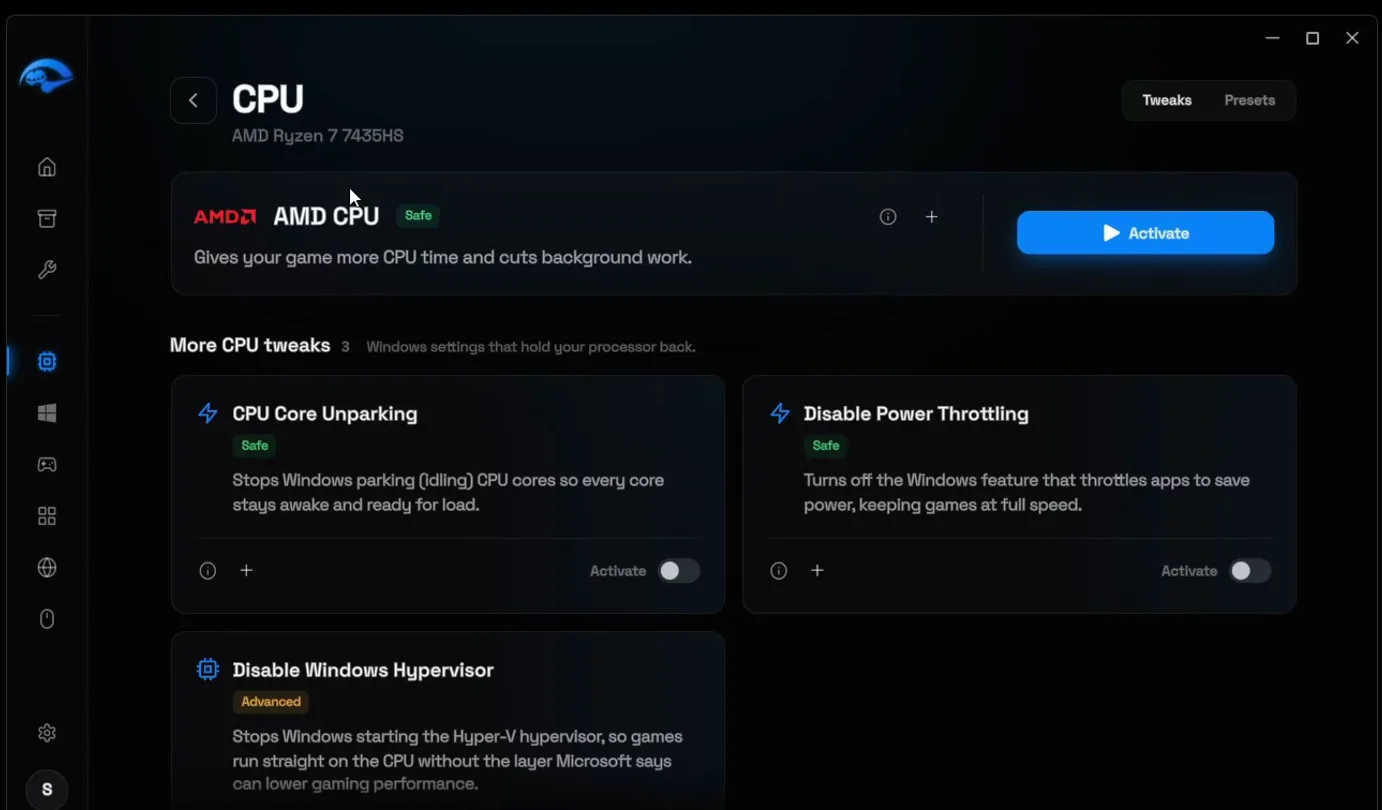
Click CPU. You only see the tweaks for your processor: an AMD CPU gets the AMD tweak and nothing else, an Intel CPU gets the Intel one. Click Activate on the main card, then turn on the other tweaks below it, such as CPU Core Unparking and Disable Power Throttling.
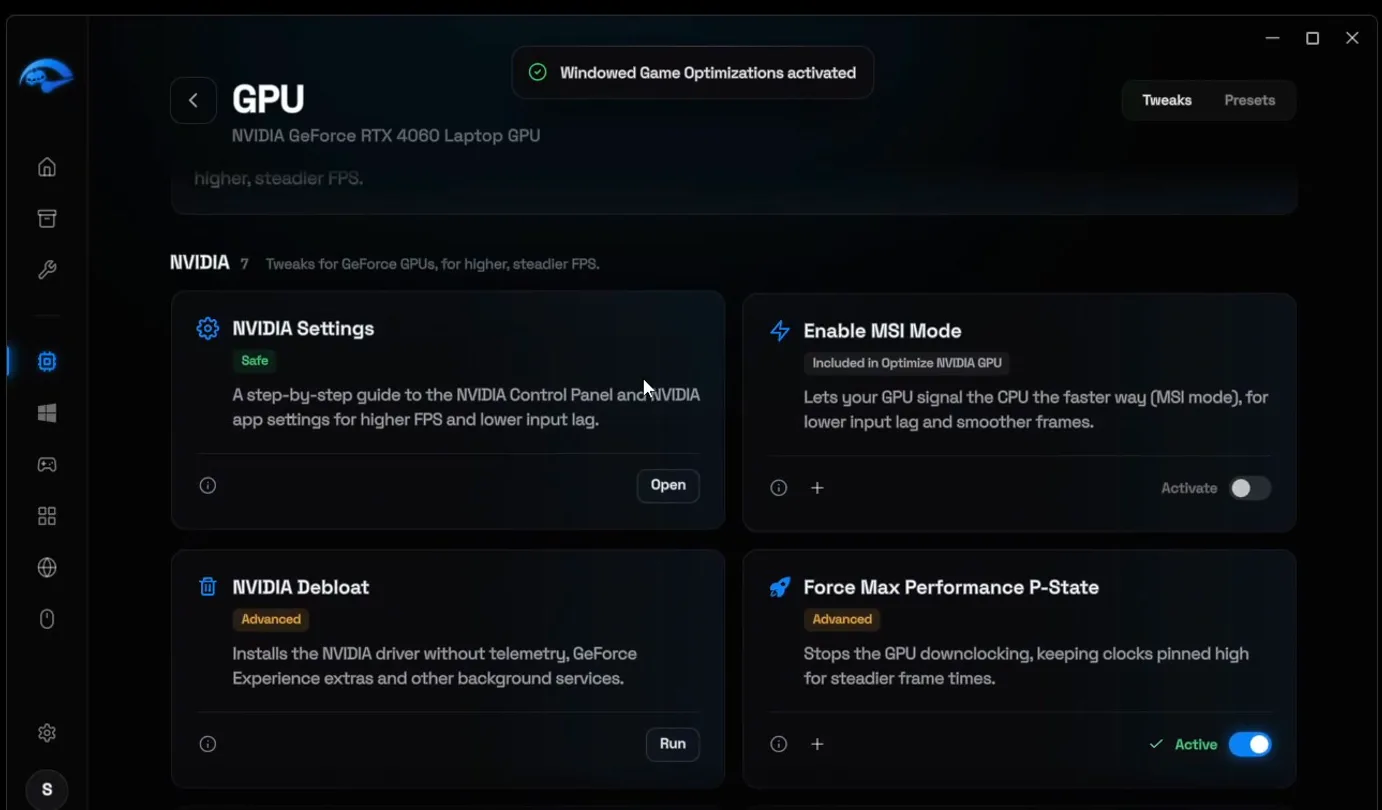
Go back and do the same in GPU: click Activate on the main card (Optimize NVIDIA GPU on this PC) and turn on the other tweaks in the list.
These power tweaks come first because they make sure the PC gives your game full performance before you start on the mouse itself.
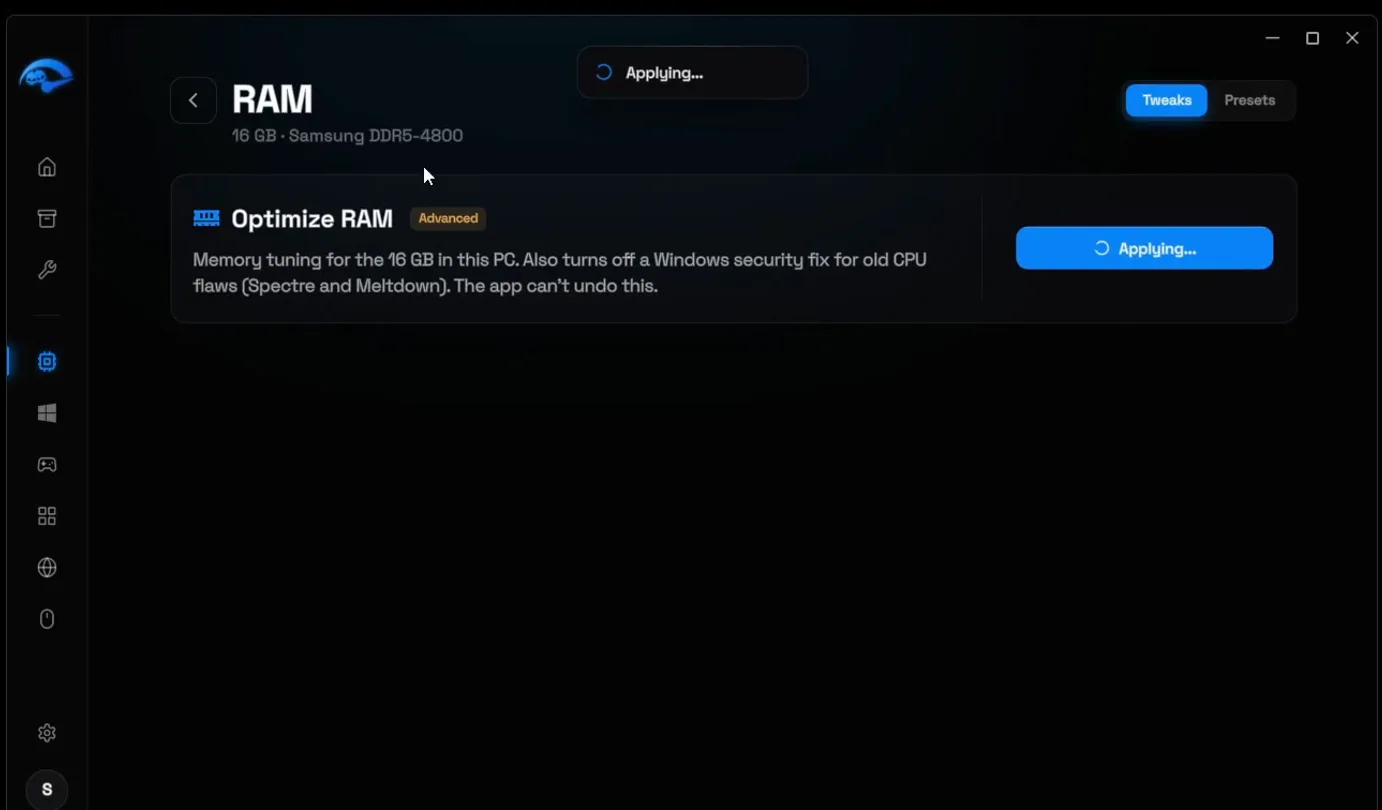
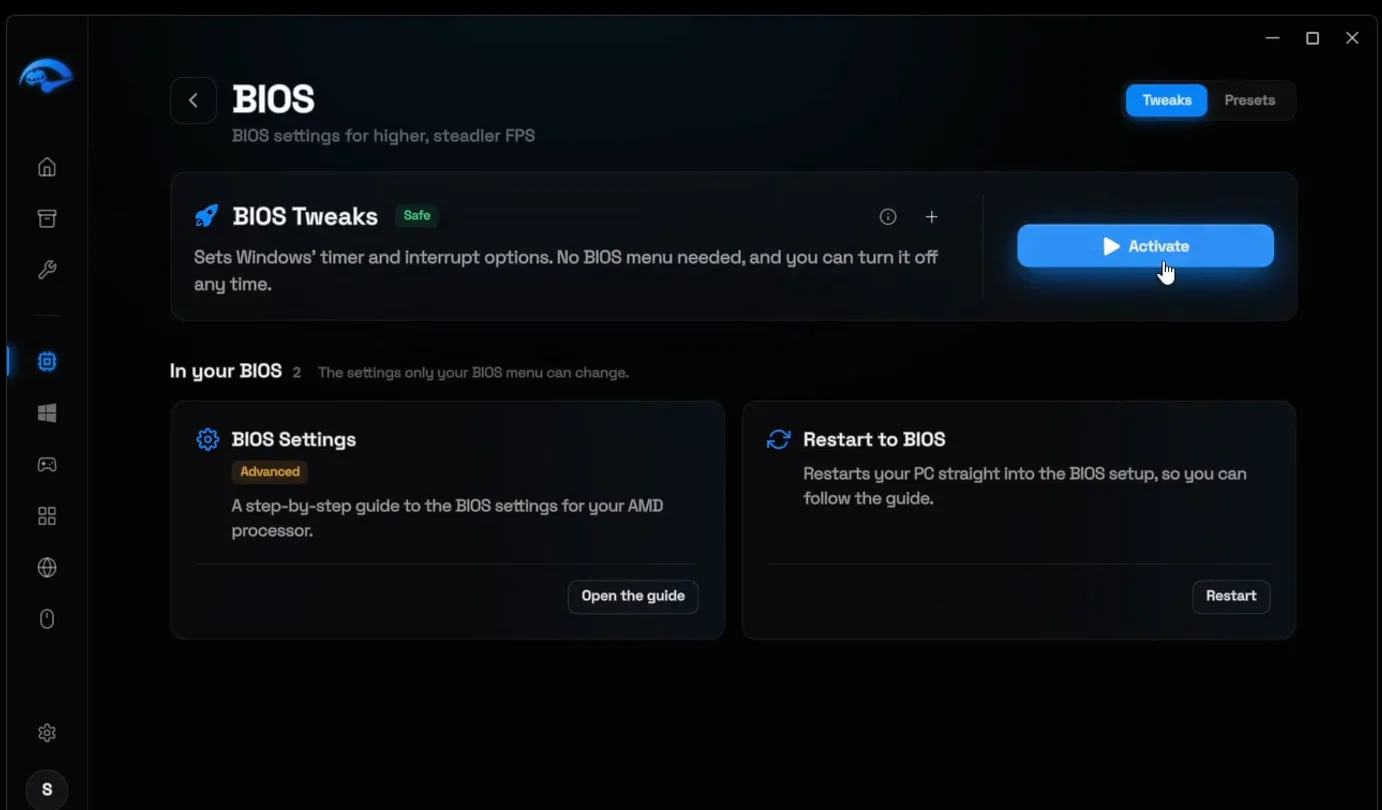
Still in Hardware, open RAM and click Activate on Optimize RAM. Go back, open BIOS and click Activate on BIOS Tweaks: it sets Windows' timer and interrupt options, so you never have to open the BIOS menu. Then open Drives and optimize your SSD, and your hard drive too if you have one.
Careful
Optimize RAM is marked Advanced. Its card says it also turns off a Windows security fix for old CPU flaws (Spectre and Meltdown) and that the app can't undo this one. Read the card and decide before you click.
Hardware is done, now the software. Open Windows, then the Windows card. It detects your version (Windows 11 in the video). Click Activate on the main card, then turn on the other tweaks on the page: Disable Background Apps, Disable Fullscreen Optimizations, the startup delay tweak (Instant Startup Apps) and the rest of the list.
WindowsWindowsActivate
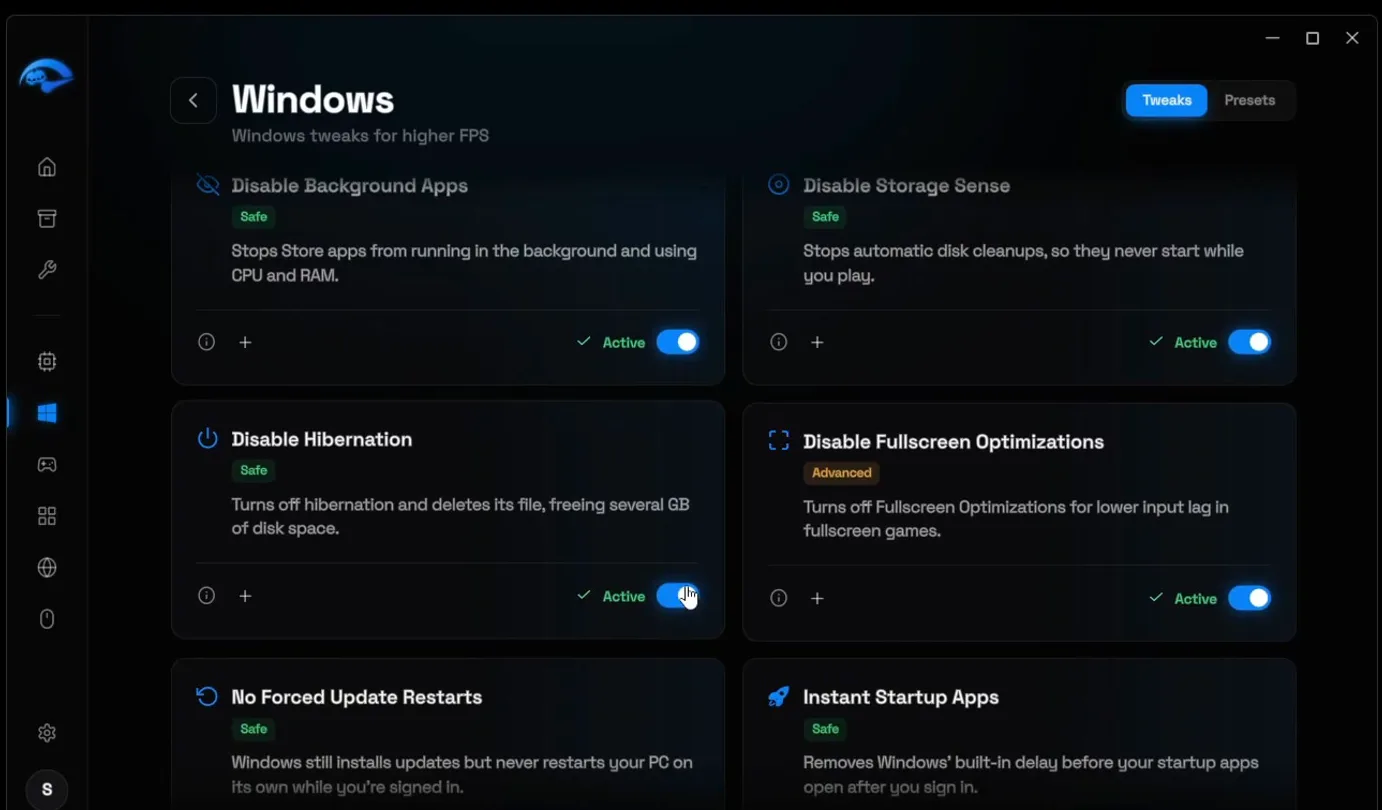
Disable Fullscreen Optimizations is the one aimed at input lag: the app describes it as lower input lag in fullscreen games.
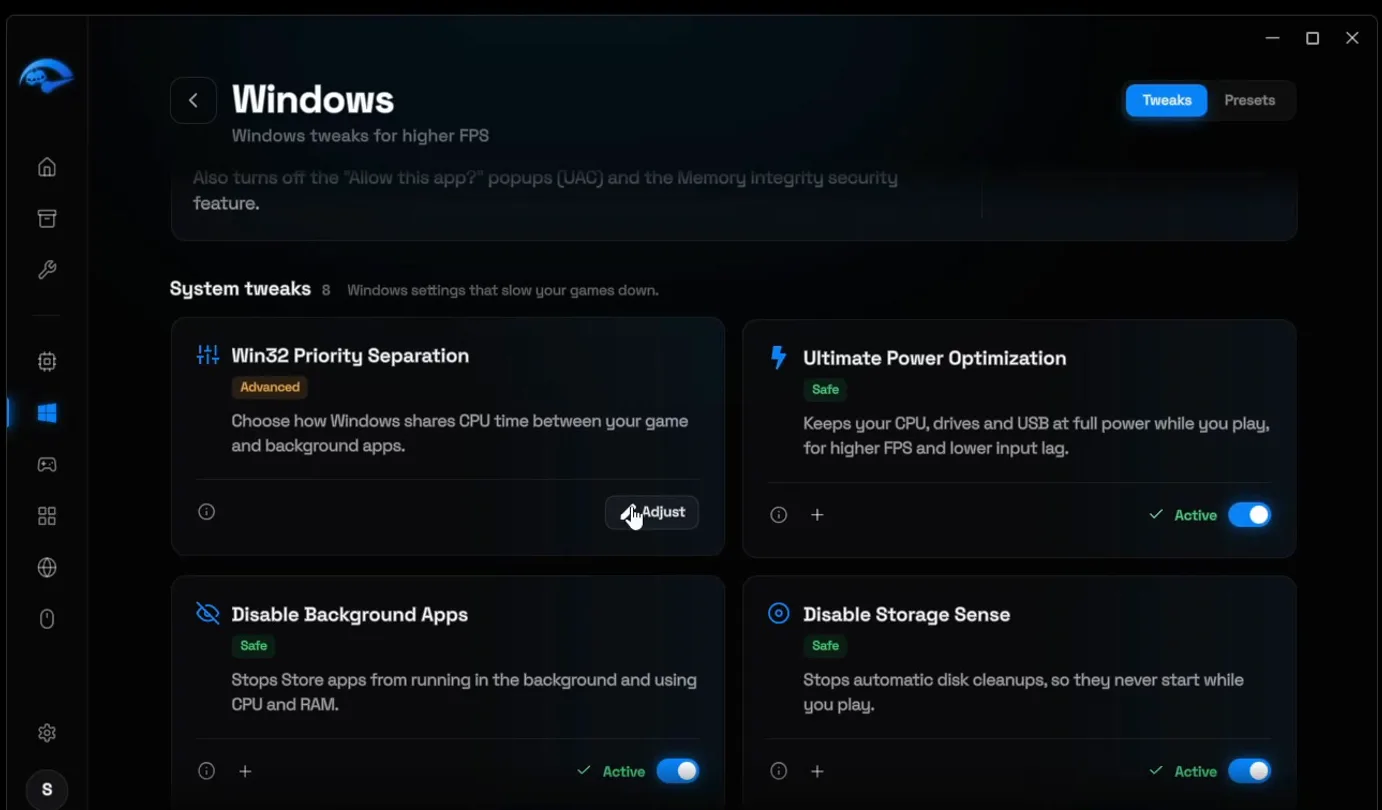
On the same page, find Win32 Priority Separation under System tweaks and click Adjust. Select 26 hex and click Apply. This setting decides how Windows shares CPU time between your game and the apps in the background.
WindowsWin32 Priority SeparationAdjust26 hexApply
Tip
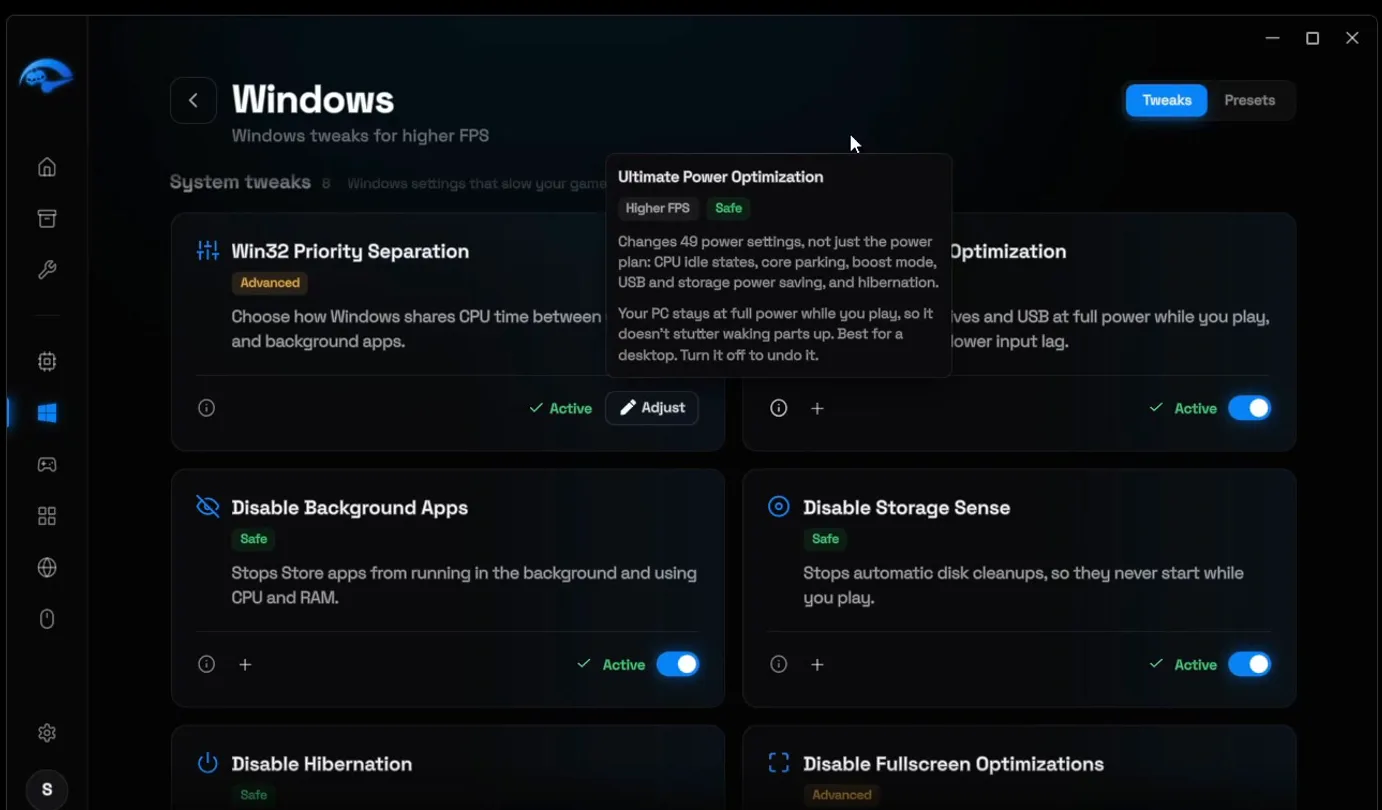
Not sure what a tweak does? Click the i button on its card. It shows what the tweak is for, whether it is Safe or Advanced and exactly what it changes, as with Ultimate Power Optimization in the video.
Go back to Windows and open Power. Click Activate on the RIP Gaming Power Plan, our power plan for gaming with higher FPS and lower input lag at normal temperatures. Then click Edit on PCIe Link State Power, select Off and click Apply.
WindowsPowerPCIe Link State PowerEditOffApply
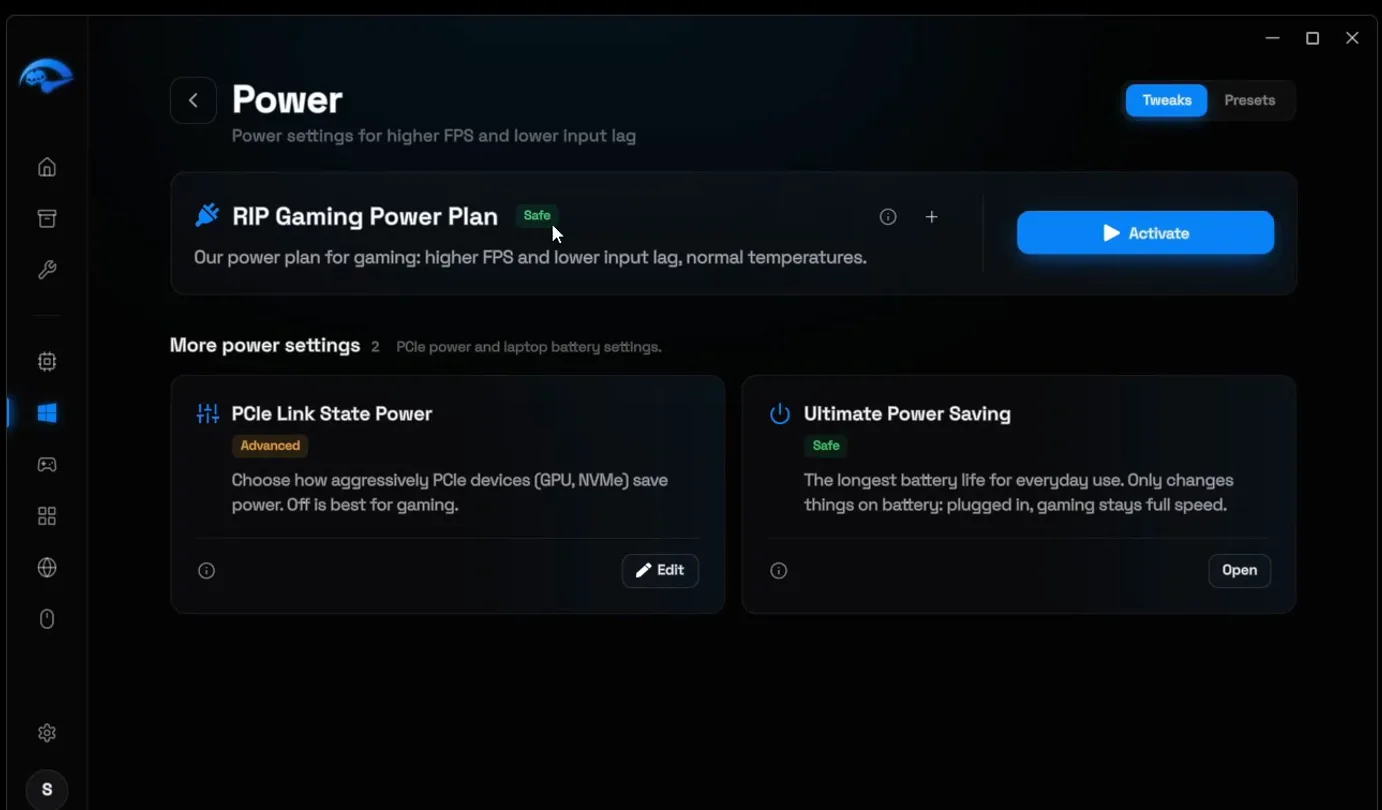
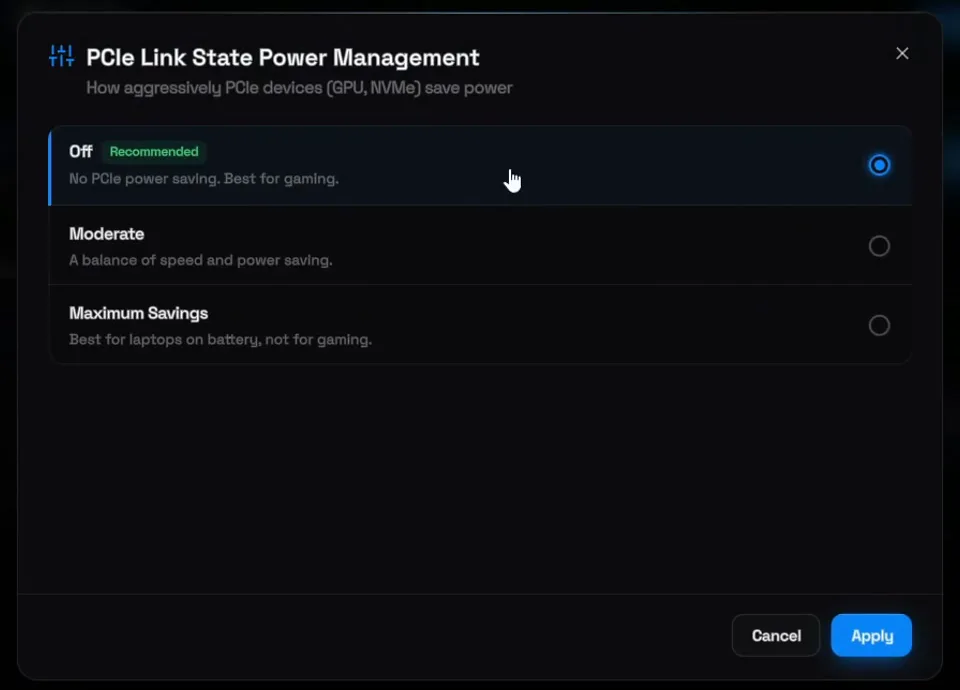
With PCIe power saving on, your GPU and NVMe drive can drop into a power-saving state between loads. Off keeps them awake while you play.
Now the part for your mouse. Open Input Lag in the sidebar and click Activate on Reduce Input Lag, the main input lag tweak: input priority, input buffers, USB power saving and timers. Then turn on Mouse Latency Optimization, which the video calls really important, and Keyboard Latency Optimization.
Input LagReduce Input LagActivate
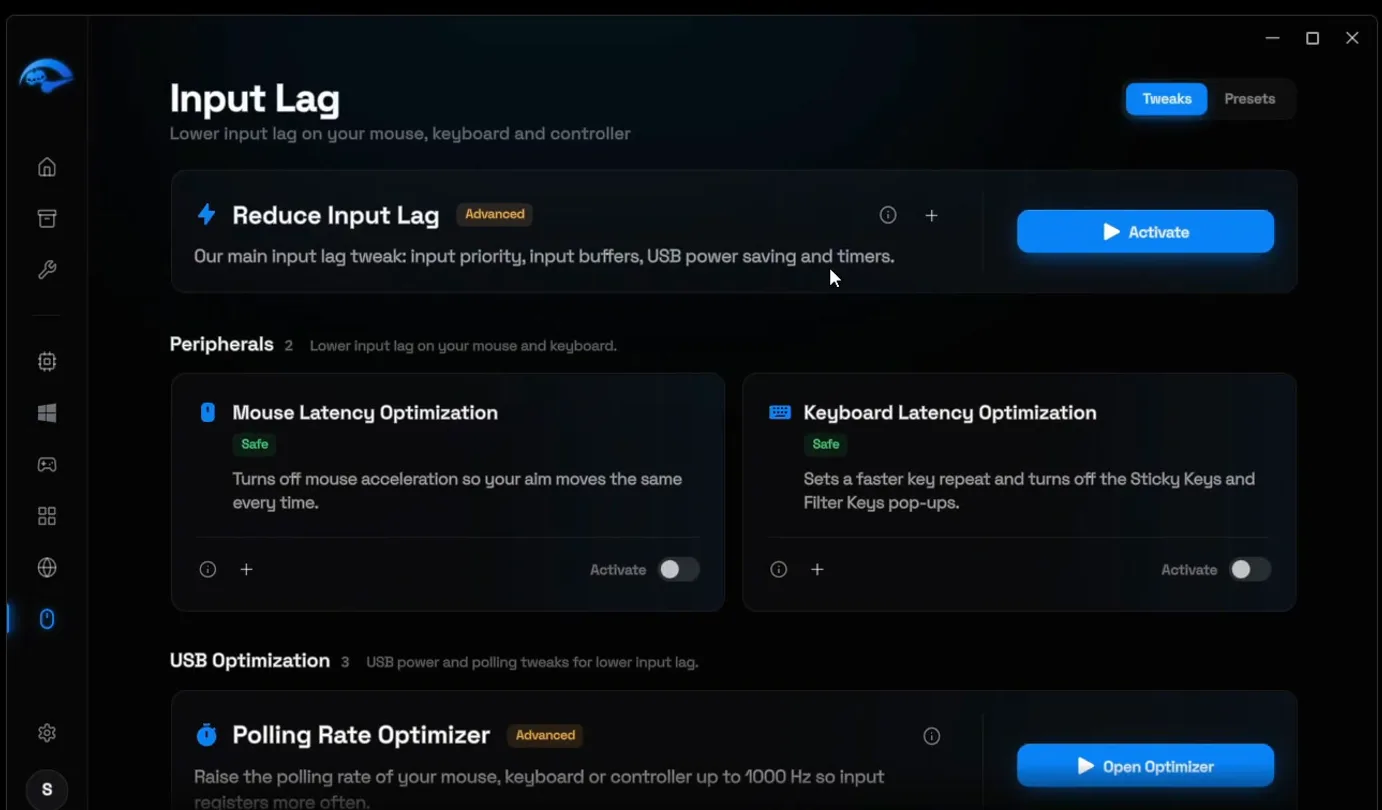
Mouse Latency Optimization turns off mouse acceleration, so your aim moves the same distance every time you move your hand the same distance. Keyboard Latency Optimization sets a faster key repeat and turns off the Sticky Keys and Filter Keys pop-ups.
The video calls the polling rate the final and most important part. The polling rate is how often your mouse reports its position and your clicks to your PC: how many times per second it sends that data. More hertz means more updates.
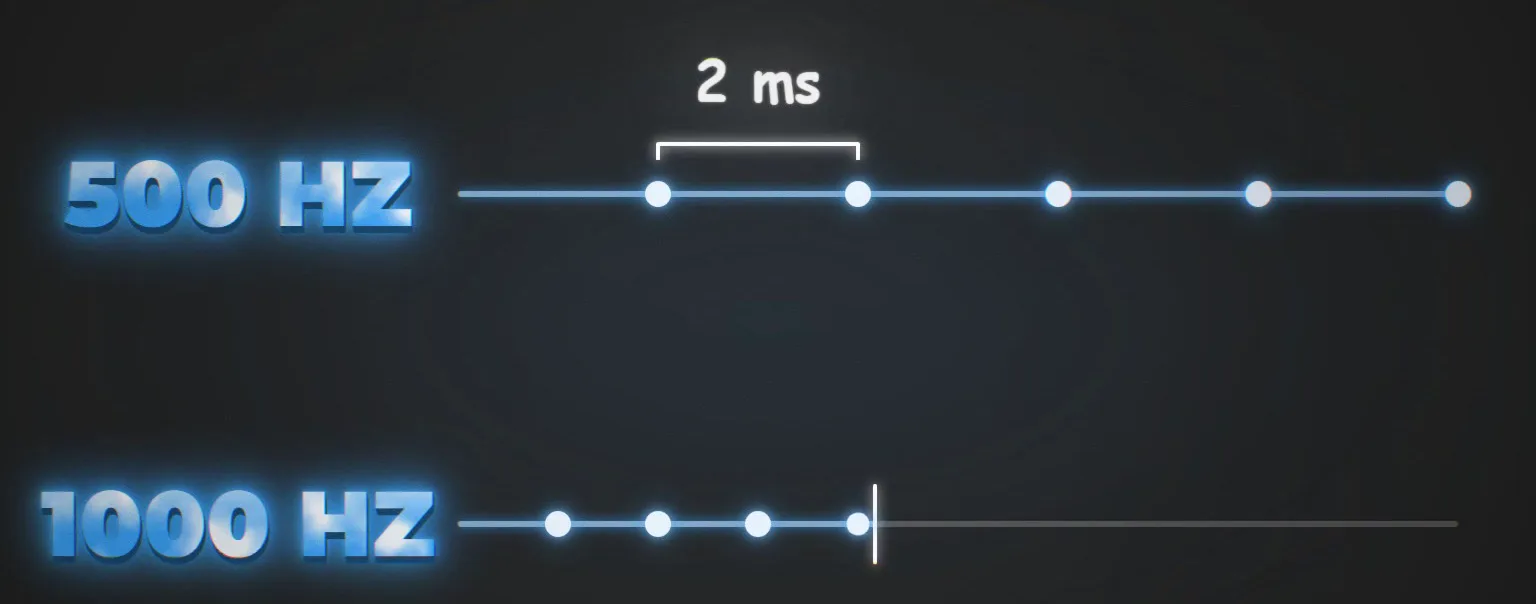
At 500 Hz your movements are updated every 2 milliseconds. At 1000 Hz they are updated every millisecond. As the video puts it, you'll be surprised how much of a difference that one millisecond makes.
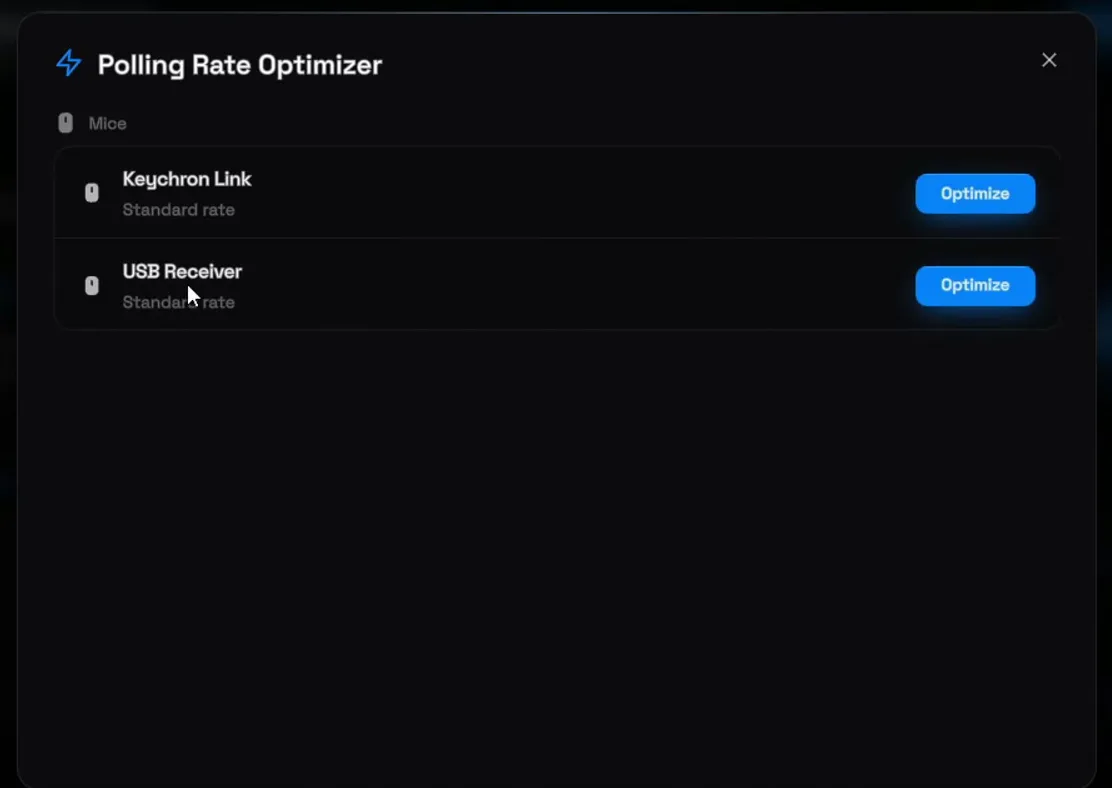
On the Input Lag page, click Open Optimizer on the Polling Rate Optimizer card. It lists your mice; find yours and click Optimize. In the video the mouse is then at 1000 Hz. Close the window.
Input LagPolling Rate OptimizerOpen OptimizerOptimize
Then turn on USB Port Optimization right below it. It keeps your USB ports from sleeping and tunes input buffers for steadier input.
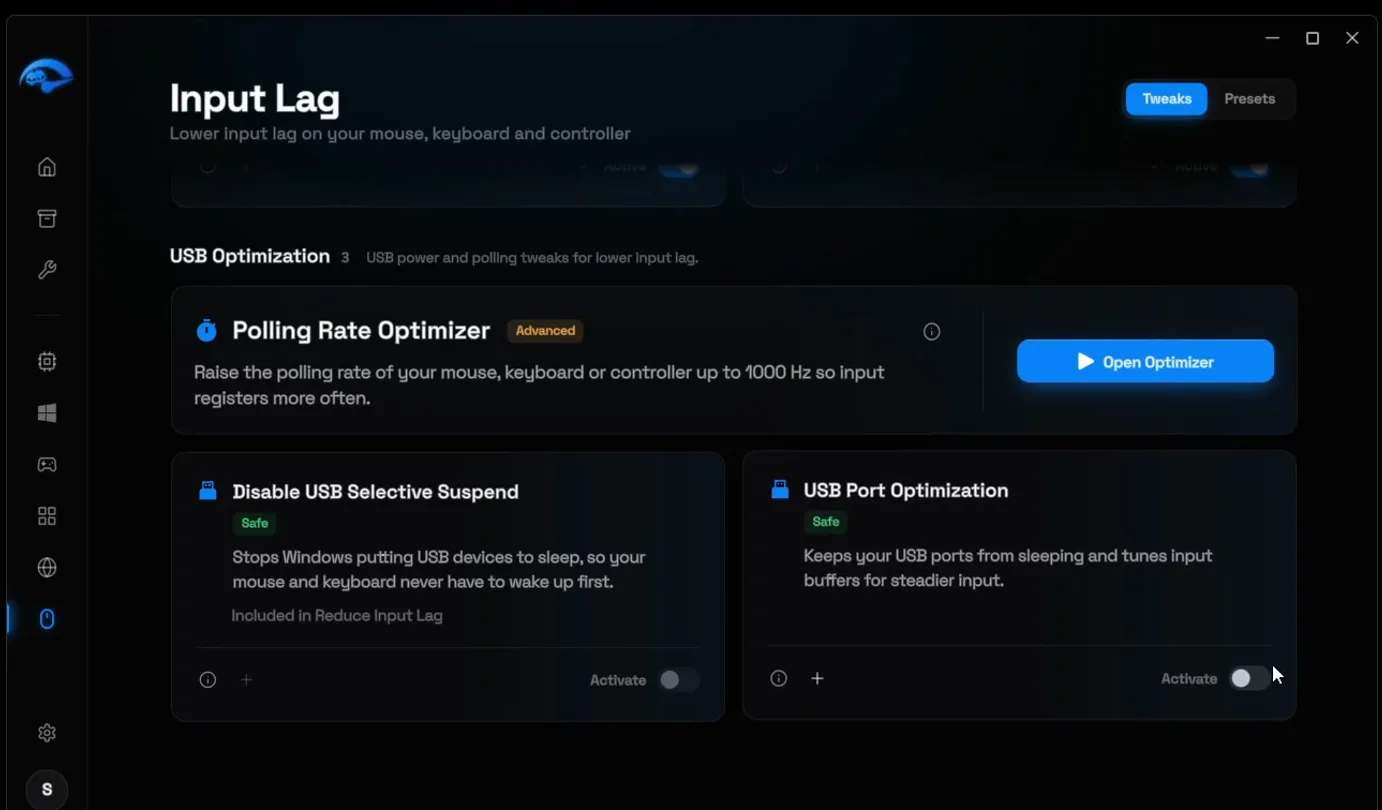
Disable USB Selective Suspend, which stops Windows putting your mouse and keyboard to sleep, is already included in Reduce Input Lag, so you don't need to turn it on separately.
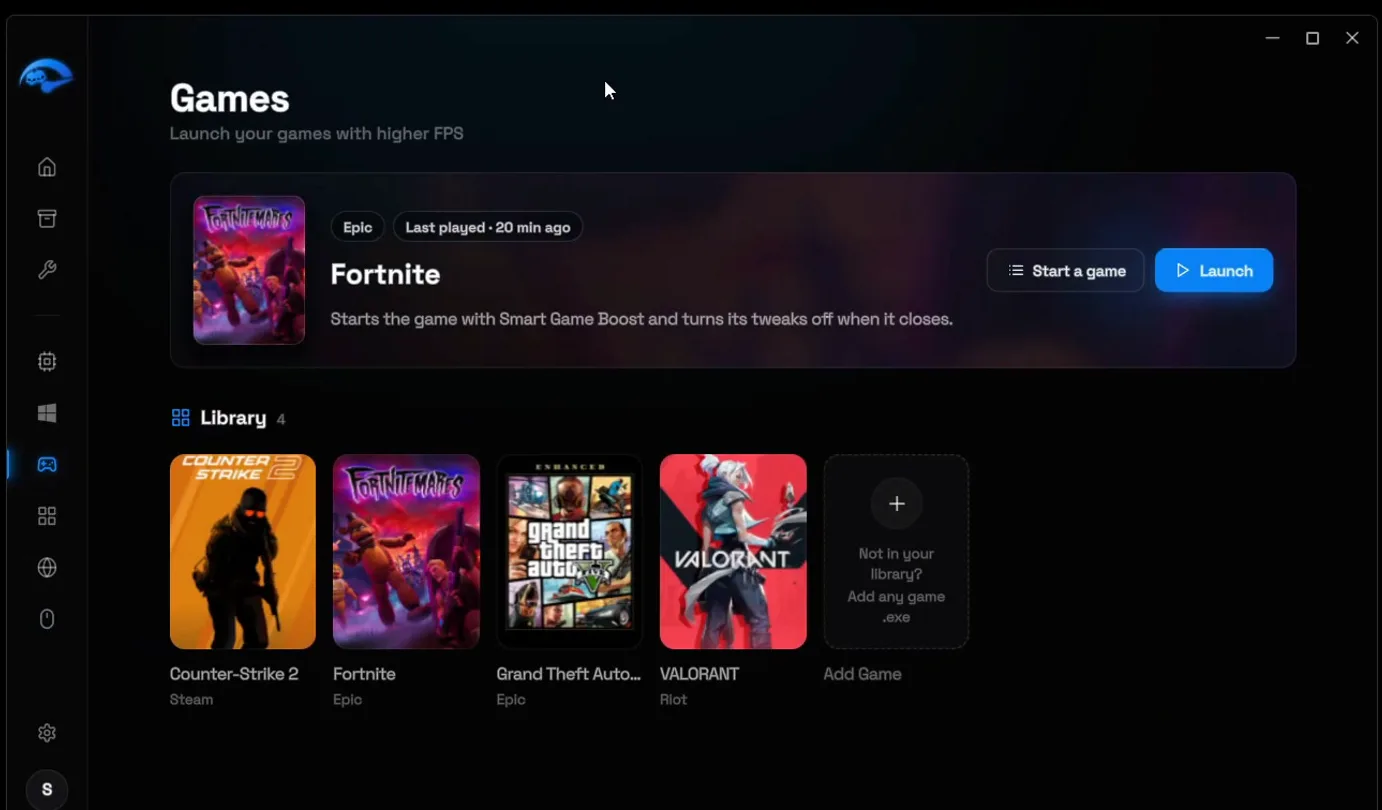
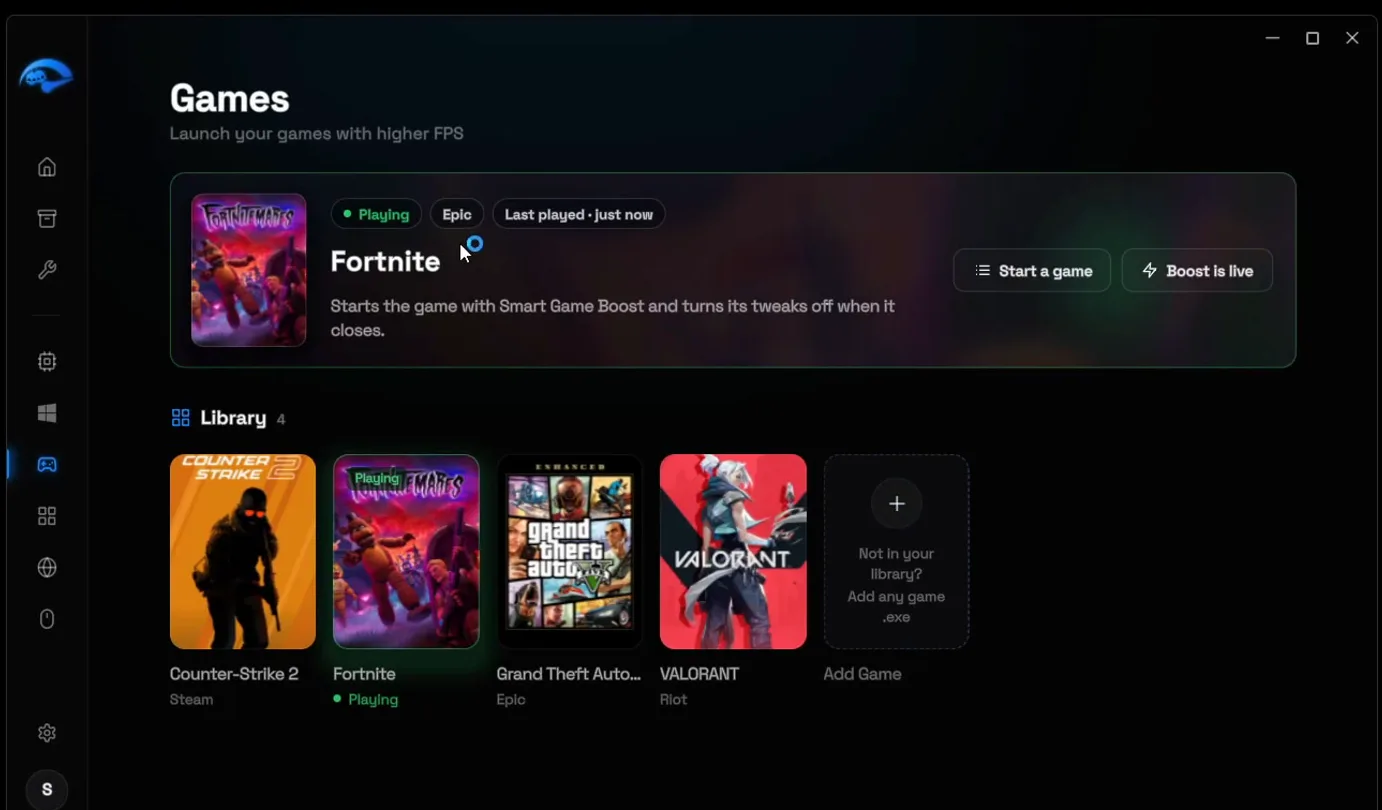
Whatever you play, Fortnite, Counter-Strike or anything else, always launch it optimized. Open Games and select your game. Your library shows the games the app found; a game that is missing can be added with its .exe file.
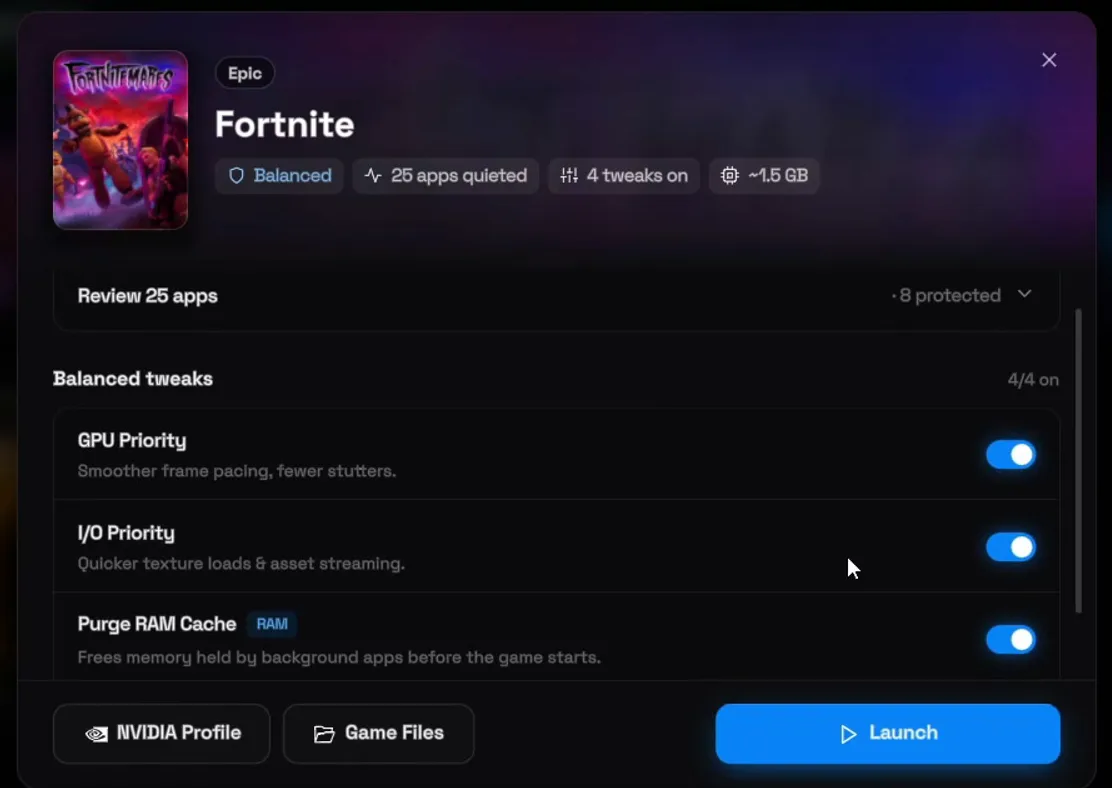
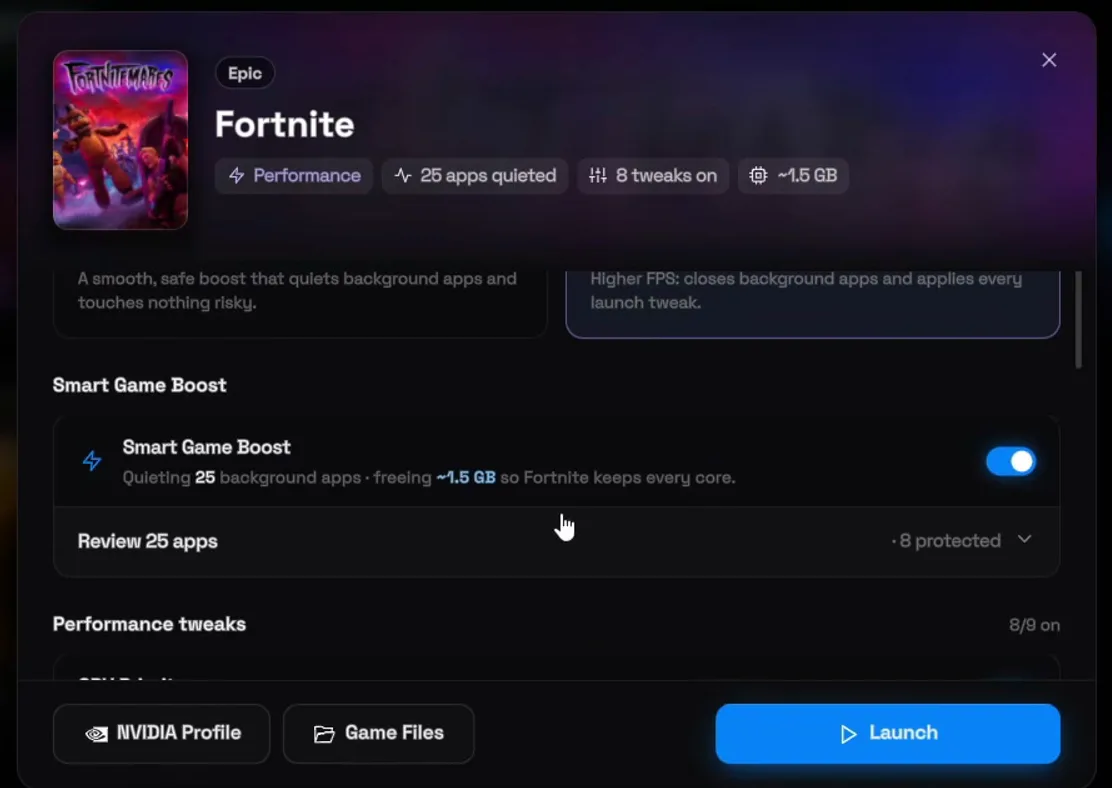
The game window starts a custom game mode: it quiets your background apps and applies GPU, SSD and RAM tweaks in the background while you play. Balanced is the free mode. Performance applies more tweaks; it is part of Premium.
Good to know
Game mode only runs while you play: the app starts the game with Smart Game Boost and turns its tweaks off again when the game closes. Apps you need stay protected (8 on the PC in the video).
How to check it worked
- Open the Polling Rate Optimizer again. Your mouse should show its new rate instead of Standard rate (1000 Hz in the video).
- On the Input Lag page, Reduce Input Lag, Mouse and Keyboard Latency Optimization and USB Port Optimization should all show Active.
- On Home, the Optimization Level counter rises with every tweak you turn on.
- Start your game from Games and look for Boost is live. If you start it from its own launcher instead, game mode does not run.
- In game, flick your aim the same distance a few times. With mouse acceleration off it should land in the same spot each time.
Key settings at a glance
FAQ
What is mouse polling rate?
It is how many times per second your mouse reports its position and clicks to your PC, measured in hertz. At 500 Hz that is every 2 ms, at 1000 Hz every 1 ms. Our polling rate and pointer precision guide covers the same setting for Fortnite.
Is 1000 Hz better than 500 Hz for gaming?
Yes, for input delay. 1000 Hz sends your movement twice as often, so the newest position reaches the game up to 1 ms sooner. It is the rate the Polling Rate Optimizer sets in the video, and the most it raises a mouse, keyboard or controller to.
Can you really get zero input delay?
No setup reaches literally zero: your mouse, PC and monitor each take a little time. What the video does is cut the delay the PC adds on top: power saving on USB and PCIe, background apps, mouse acceleration and a 500 Hz polling rate. The steps work in Fortnite, Valorant, CS2, Warzone and any other game.
Does turning off mouse acceleration reduce input lag?
It makes your aim consistent rather than faster: with acceleration on, a fast flick moves the crosshair further than a slow one over the same distance. Mouse Latency Optimization turns it off so your aim moves the same every time, which is why the video calls it really important.
What does Win32 Priority Separation 26 hex do?
It sets how Windows splits CPU time between the program in front (your game) and the ones in the background. 26 hex gives the foreground program short, variable time slices and the biggest share. Our 16 hex vs 32 hex guide compares other values.
Is RIP Tweaks free?
Yes, the app is a free download and the Balanced game mode is free. Premium unlocks all 250+ tweaks, including the Performance game mode used at the end of the video.
Can I undo the tweaks?
Yes. Switch any tweak off again with its toggle, or restore the backup you made in step 2 from Backups. The app notes that restoring a backup restarts your PC. Optimize RAM is the exception its card names: the app can't undo that one.
Does this work on Windows 10?
Yes, RIP Tweaks works on Windows 10 and 11. The Windows section detects your version and shows the tweaks for it. For more Windows input lag tweaks, see our 10 Windows tweaks for FPS and input lag.
 RIP Tweaks
Do it in a few minutes with RIP Tweaks
- Free plan for Windows 10 and 11
- A backup first, and every tweak can be switched off again
- Made for higher FPS, lower input lag and steadier ping
Free · Windows 10 and 11
