10 Free Windows PC Tweaks for FPS and Input Lag: Restore Point, MSI Mode and More

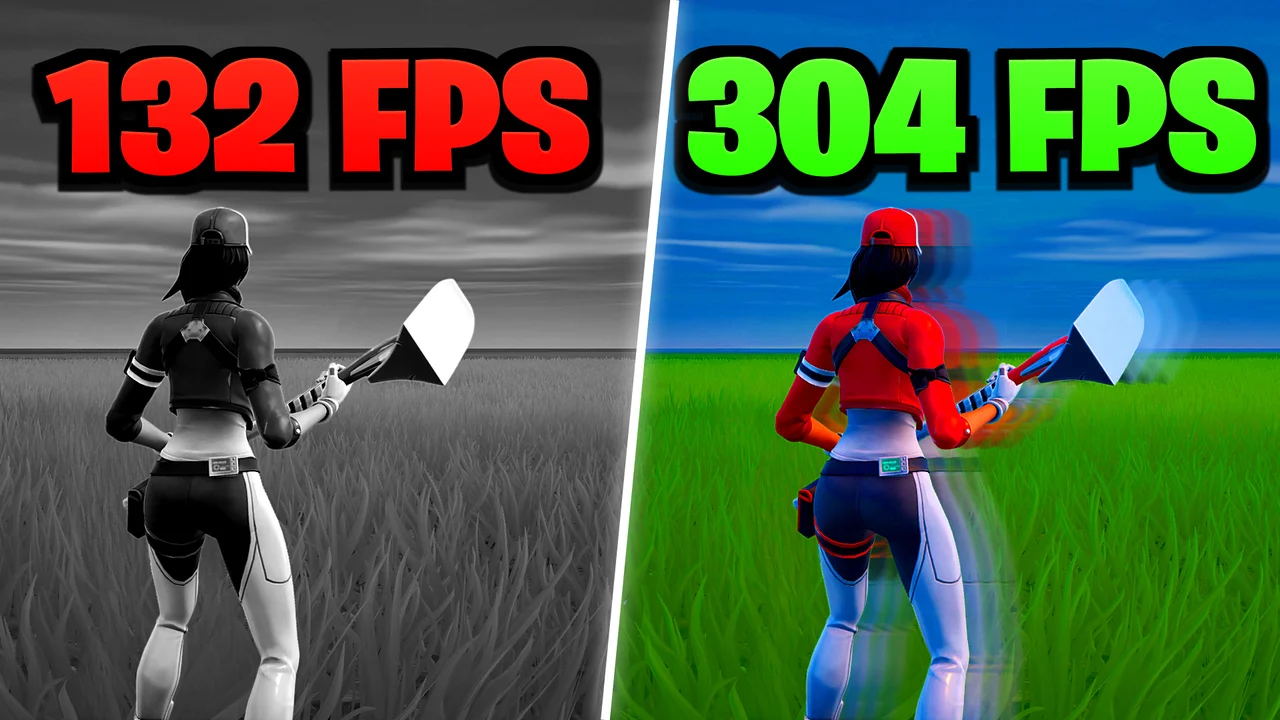
Written version of our video, every step checked against it.
Quick answer
- Create a restore point first, so every later change can be undone.
- Cut background load: remove apps you do not need, disable startup apps and switch Windows Visual Effects to Custom with only three boxes ticked.
- Clean out cache and temp files, match the RAM tweak to the memory you really have and set TCP Optimizer to Optimal.
- Do a clean NVIDIA driver install with NVCleanstall, then set the GPU and network card to High priority in the MSI mode utility.
- Finish with the power tweaks and, for Fortnite, a replaced
GameUserSettings.ini. Results vary by PC, so measure before and after.
This guide is for anyone on a Windows PC who wants a short, safe order of free tweaks for more FPS and less input lag. It follows our older video click by click: ten folders, one tweak each. The video shows an earlier version of our tooling, so this page explains the ideas and settings, not how the current RIP Tweaks app looks today.
In the video the free tweak pack comes from our Discord server: join it, open the YouTube channel area, download the file and save it anywhere. Open the archive with Windows Explorer and drag the folder out. You get ten numbered folders, 1. Start to 10. Fortnite GameUserSettings, and you go through them in that order.
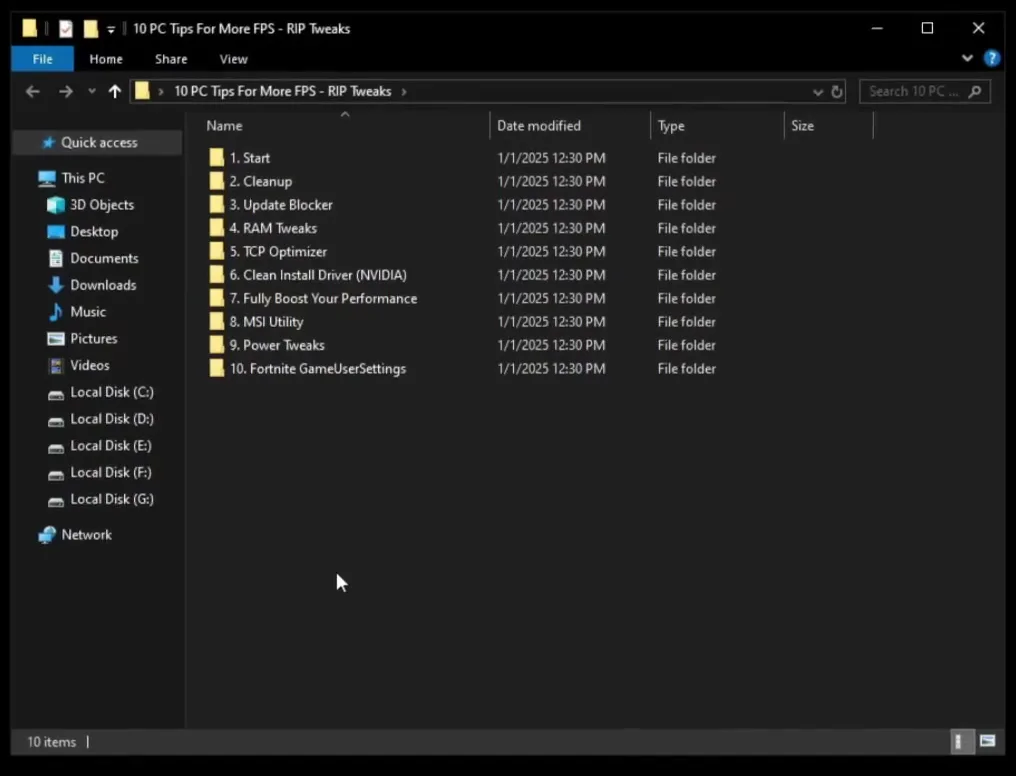
Every step below says what it changes, so you can also do the Windows-only ones by hand without the pack.
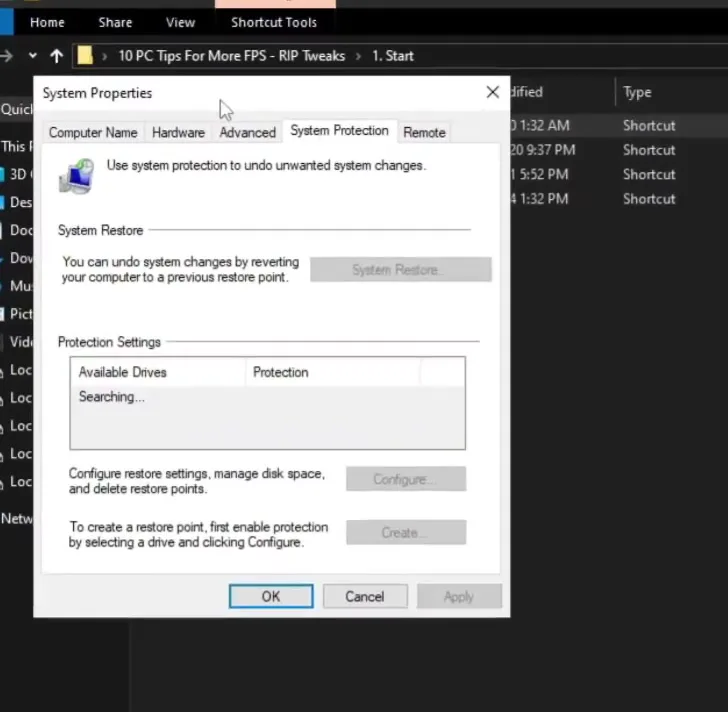
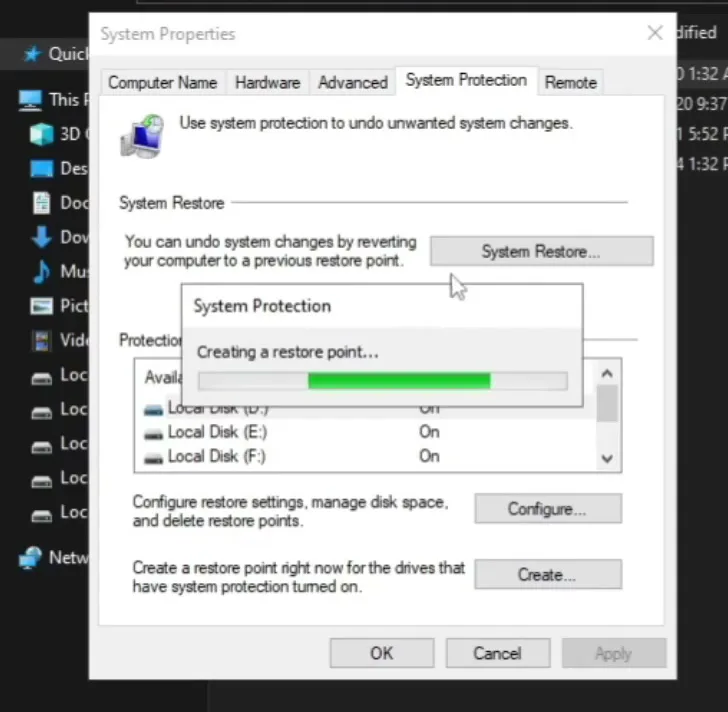
Open 1. Start and run the restore point shortcut. Windows opens System Properties on the System Protection tab. Click Create, type any name, click Create again and wait a few seconds until Windows says it is done.
1. StartRestore pointSystem ProtectionCreate
How to undo it
This is your way back. If a later step causes trouble, open the same System Restore button and pick this restore point.
Two quick checks in the same folder. First open the uninstall list and remove programs you do not use, the video's example is an Android emulator. That also saves disk space. Then open the Startup tab of Task Manager and disable everything you do not need the moment Windows starts: the video's example is a video editor that was set to start with the PC.
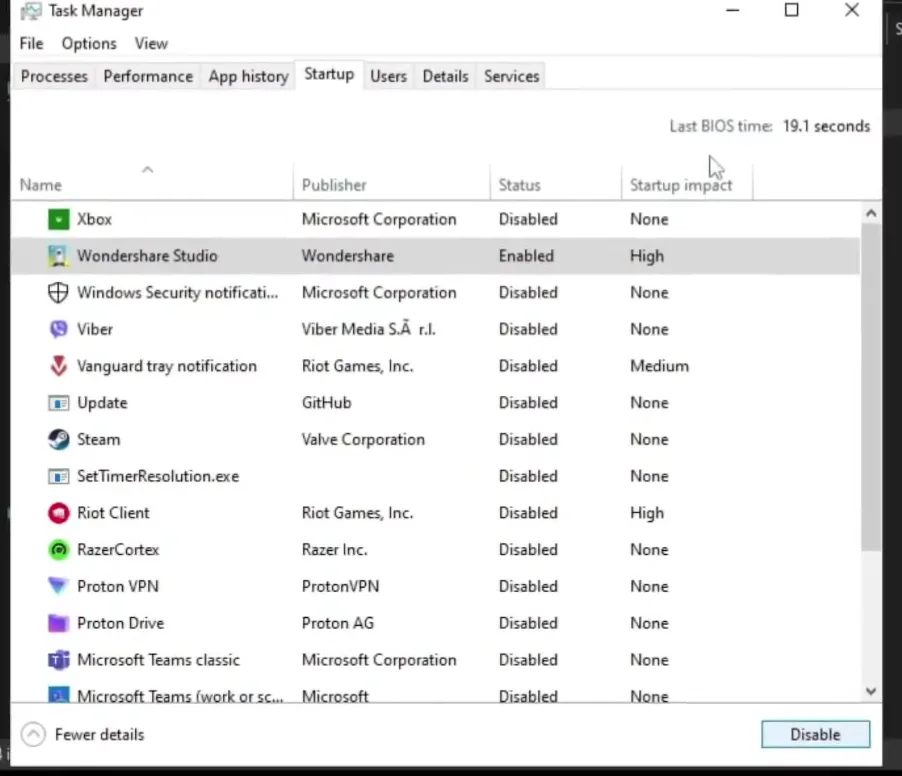
Tip
Sort the Startup tab by Startup impact and start with the rows marked High. Disabling here does not uninstall anything, you can switch an entry back on any time.
The fourth shortcut opens Windows Performance Options. Choose Custom and tick only three boxes: Show thumbnails instead of icons, Show window contents while dragging and Smooth edges of screen fonts. Leave everything else off, then click OK. The video's reasoning: those animations and shadows are effects you do not need, so Windows has less to draw.
Performance OptionsVisual EffectsCustomOK
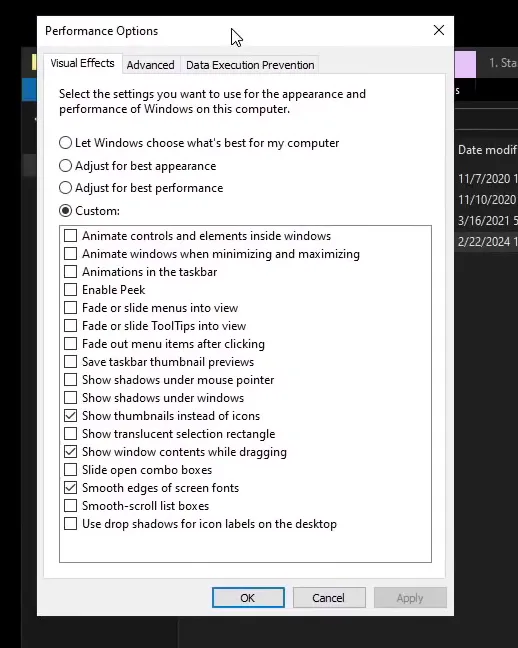
This saves GPU and CPU work on the desktop, not in the game itself, so on a strong PC the change is small.
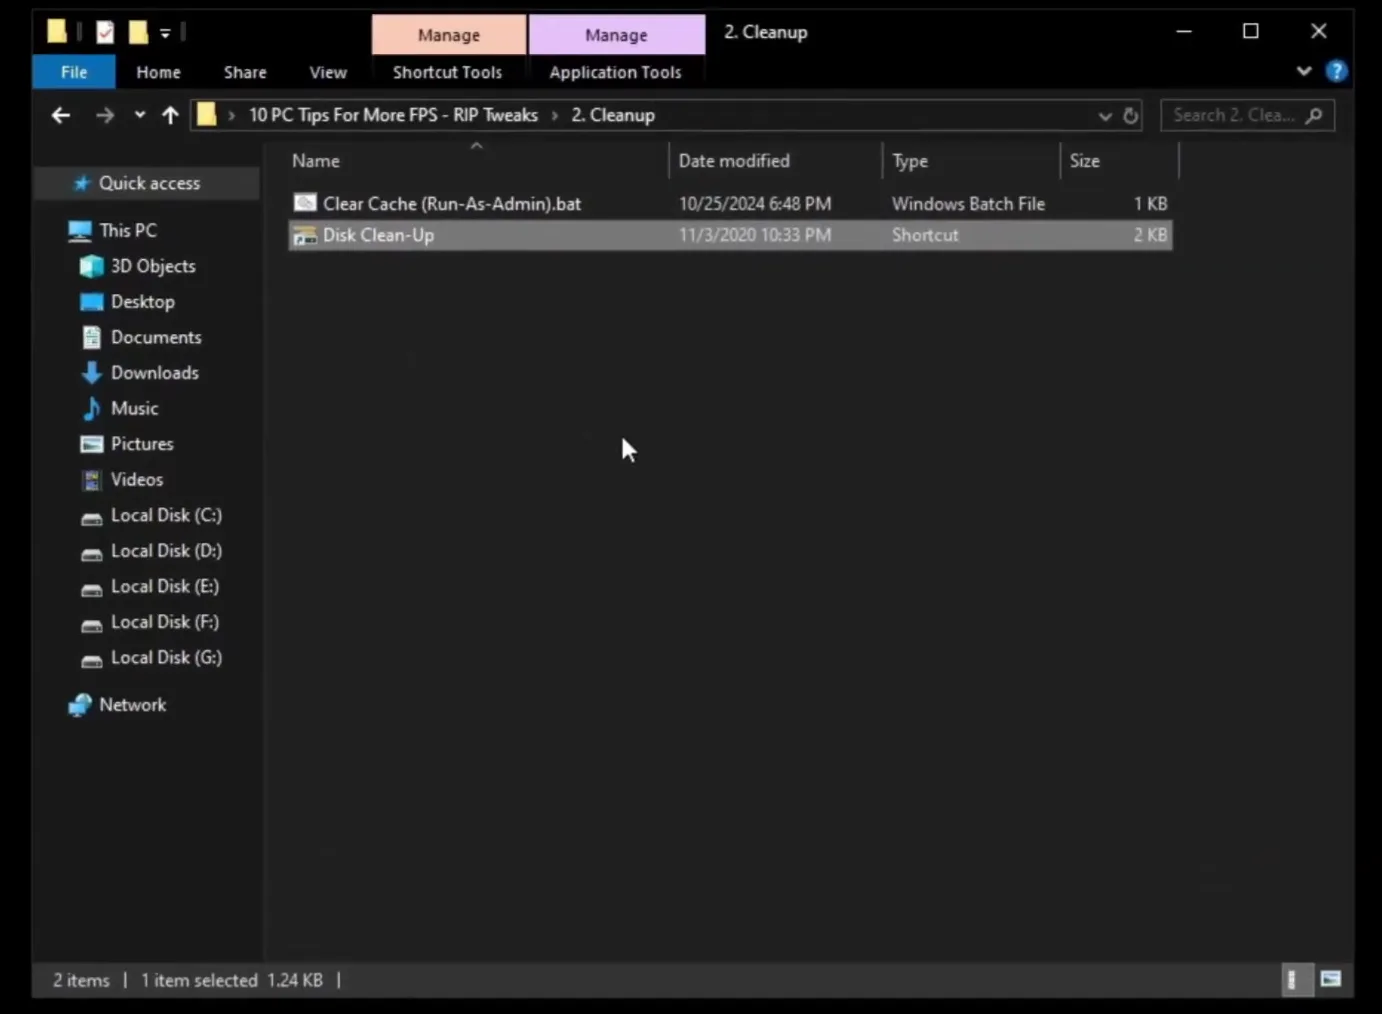
Open 2. Cleanup. First right-click the cache script and choose Run as administrator: it clears temporary files and takes a while. Then open Disk Clean-Up, choose the drive you want to clean and click OK. Windows calculates what it can remove, then click Delete files and wait.
At 2:03 the video continues with 3. Update Blocker: double-click it, click Disable updates and then Apply now. This stops Windows from installing updates in the background while you play.
Careful
Blocking updates also blocks security patches. If you use this step, turn updates back on from the same tool every few weeks and install what is waiting. It is the one step here you should treat as optional.
Open 4. RAM Tweaks. It holds one .reg file per memory size, from 4 GB to 64 GB, plus Reset to Default. To find out how much RAM you have, right-click the taskbar, open Task Manager, go to Performance and open Memory. The PC in the video has 32 GB, so it double-clicks 32GB Ram.reg, clicks Yes and then OK.
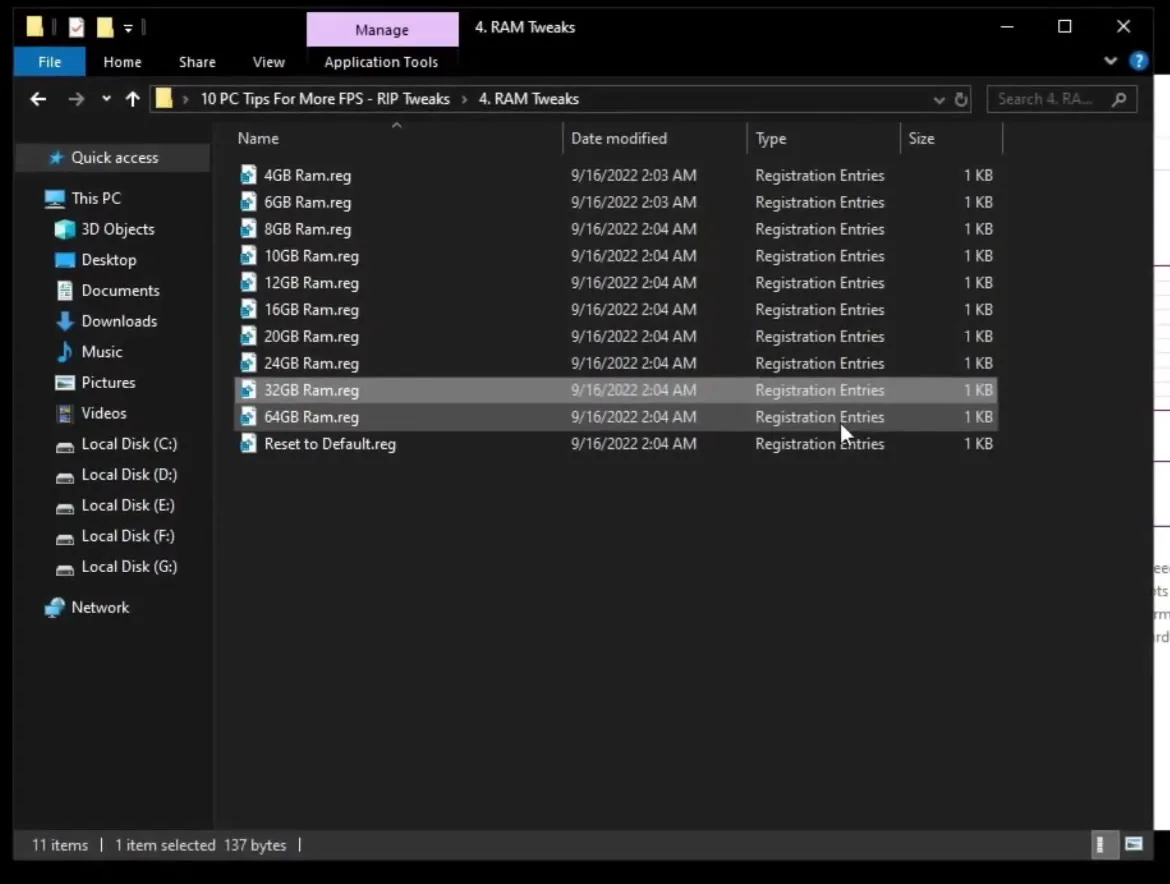
According to the video this lowers the number of running processes on the PC. If you do not like the result, double-click Reset to Default.reg.
Pick the file that matches your real memory, not a bigger one.
Open 5. TCP Optimizer, right-click TCPOptimizer.exe and run it as administrator. On the General Settings tab choose Optimal under Choose settings, then click Apply changes and OK. A window asks whether to reboot now: the video clicks No and reboots later, after the remaining steps.
TCPOptimizer.exe (Run as admin)OptimalApply changesOKNo
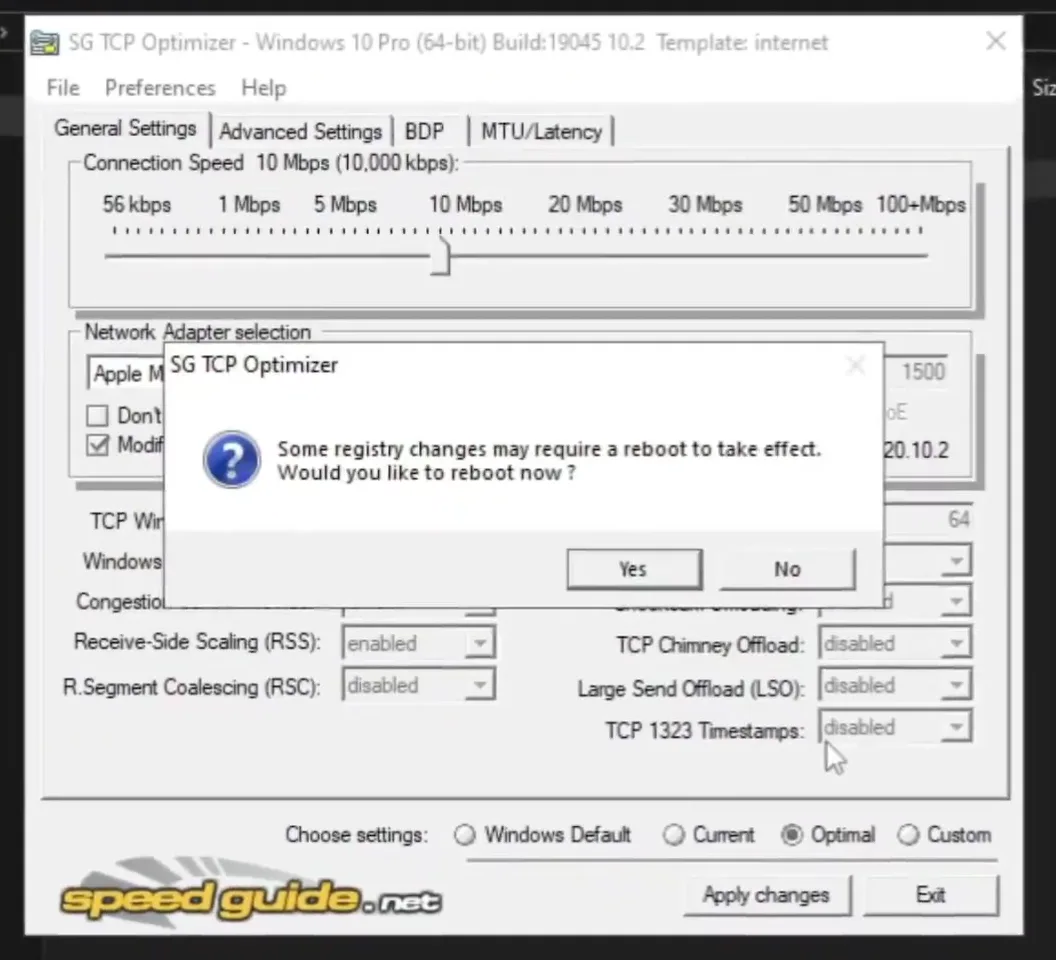
This changes network stack settings, so it targets ping and packet handling, not FPS. If you want the cause of lag spikes, see our bufferbloat guide too.
Only for NVIDIA graphics cards. Open 6. Clean Install Driver (NVIDIA) and start NVCleanstall. Choose Install best driver for my hardware, click Next, then click Recommended in the component list and click Next again. Wait for the driver to install and finish the last Next and Install clicks.
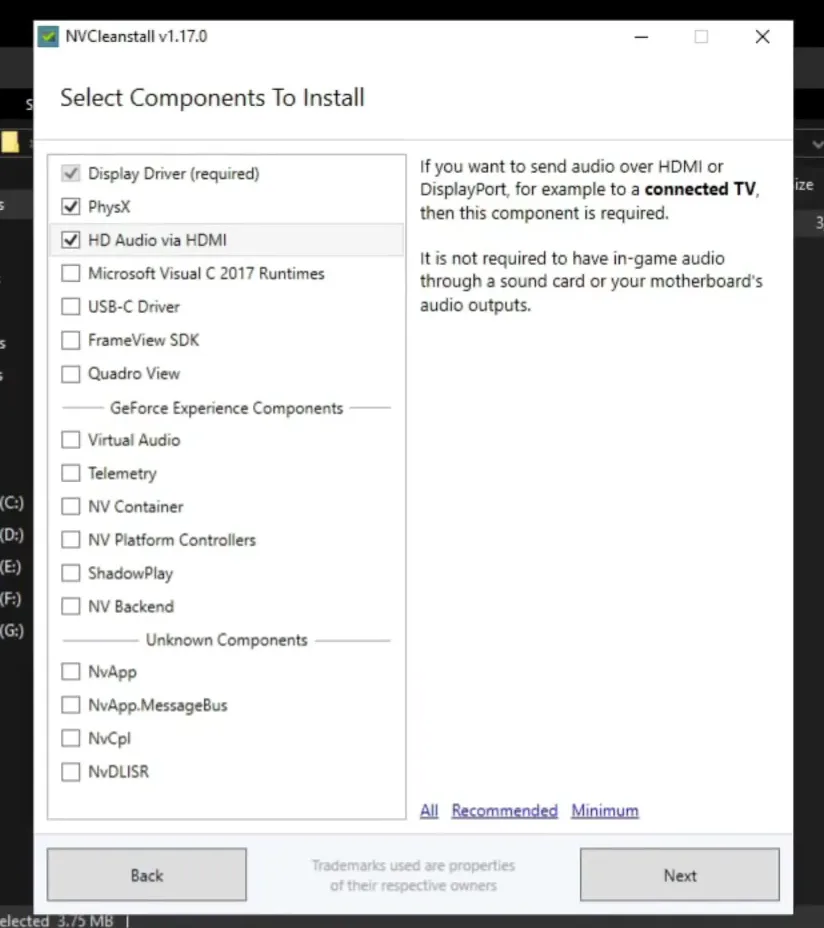
HD Audio via HDMI is only needed if your sound goes over HDMI or DisplayPort, for example to a TV. For the full driver routine, see our driver guide.
Folder 7. Fully Boost Your Performance holds a shortcut that opens the RIP Tweaks website. The video shows the paid packs there: Lite, Pro and Ultimate, and recommends Ultimate. This is the one step that is not free. Steps 1 to 6 and 8 to 10 work without it.
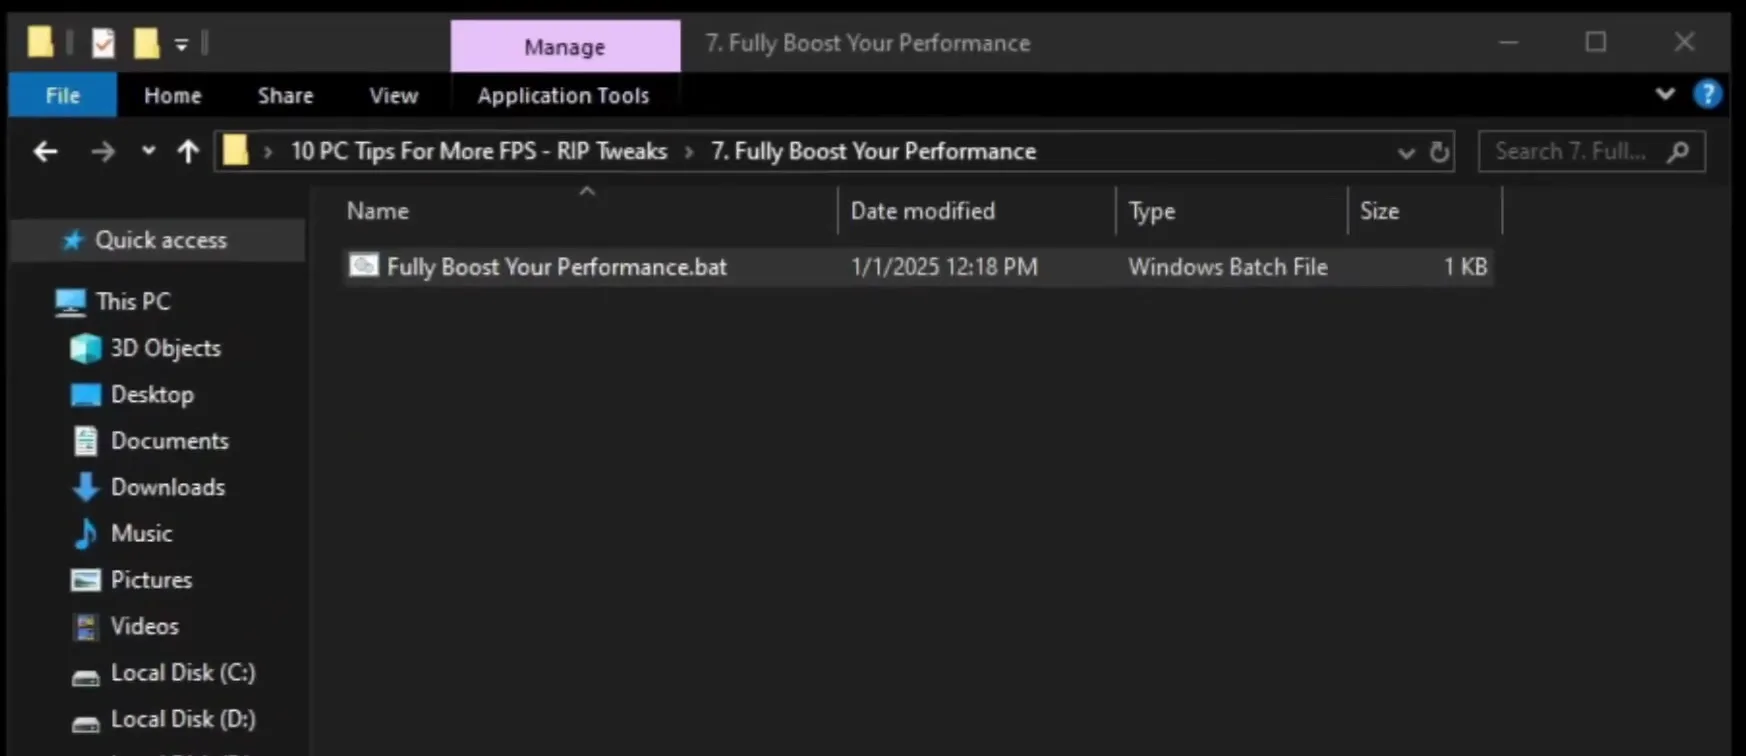
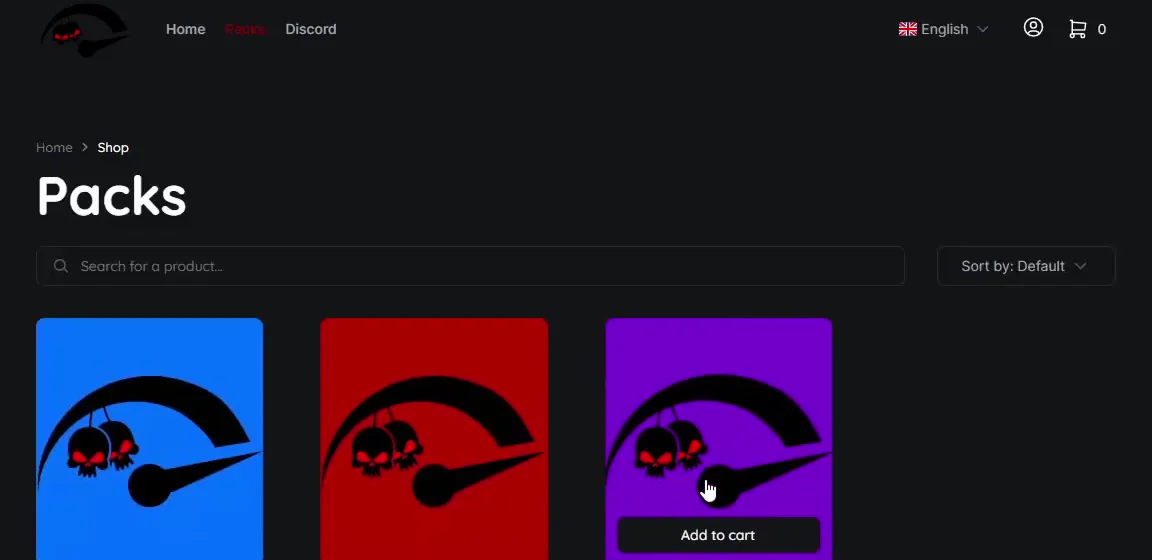
For what the current app does, see how RIP Tweaks optimizes a PC for gaming.
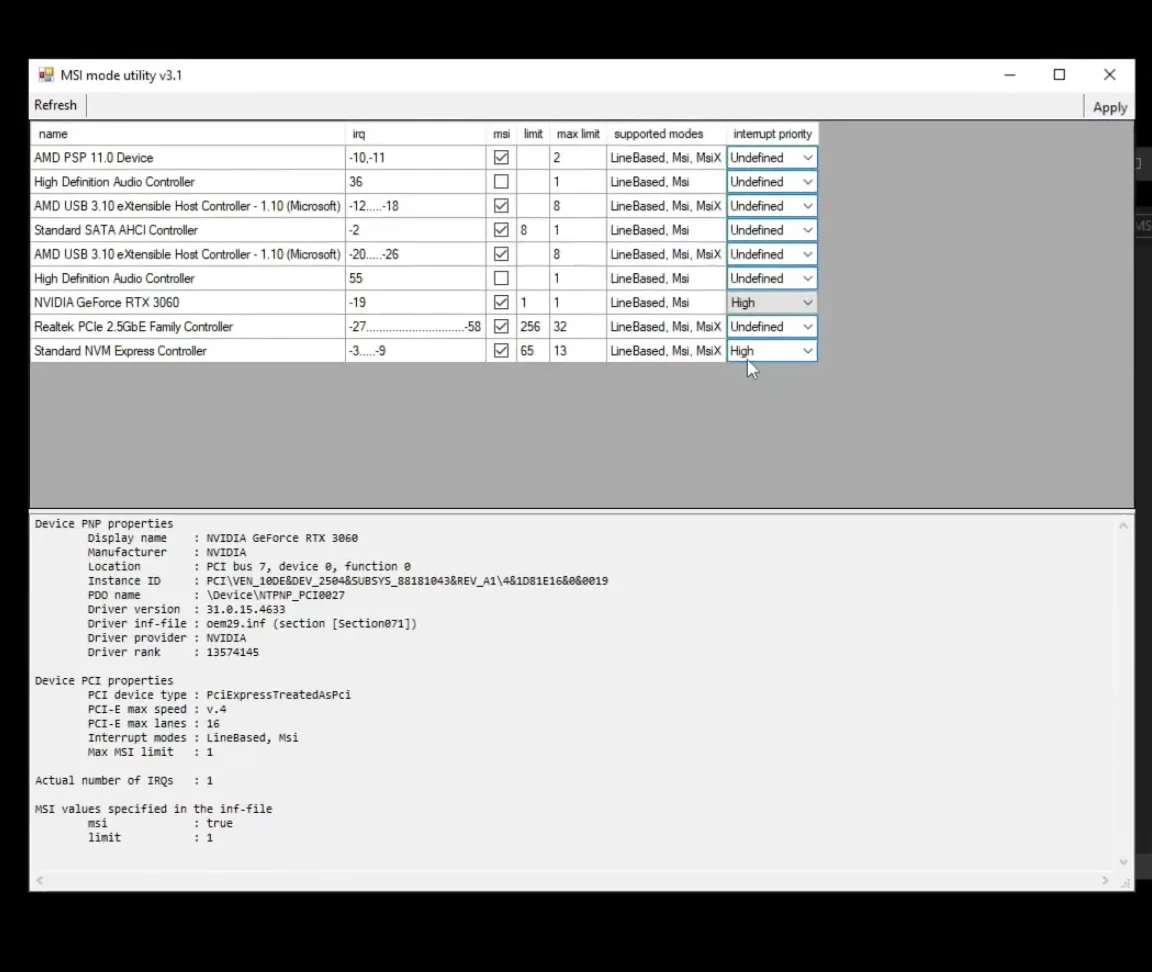
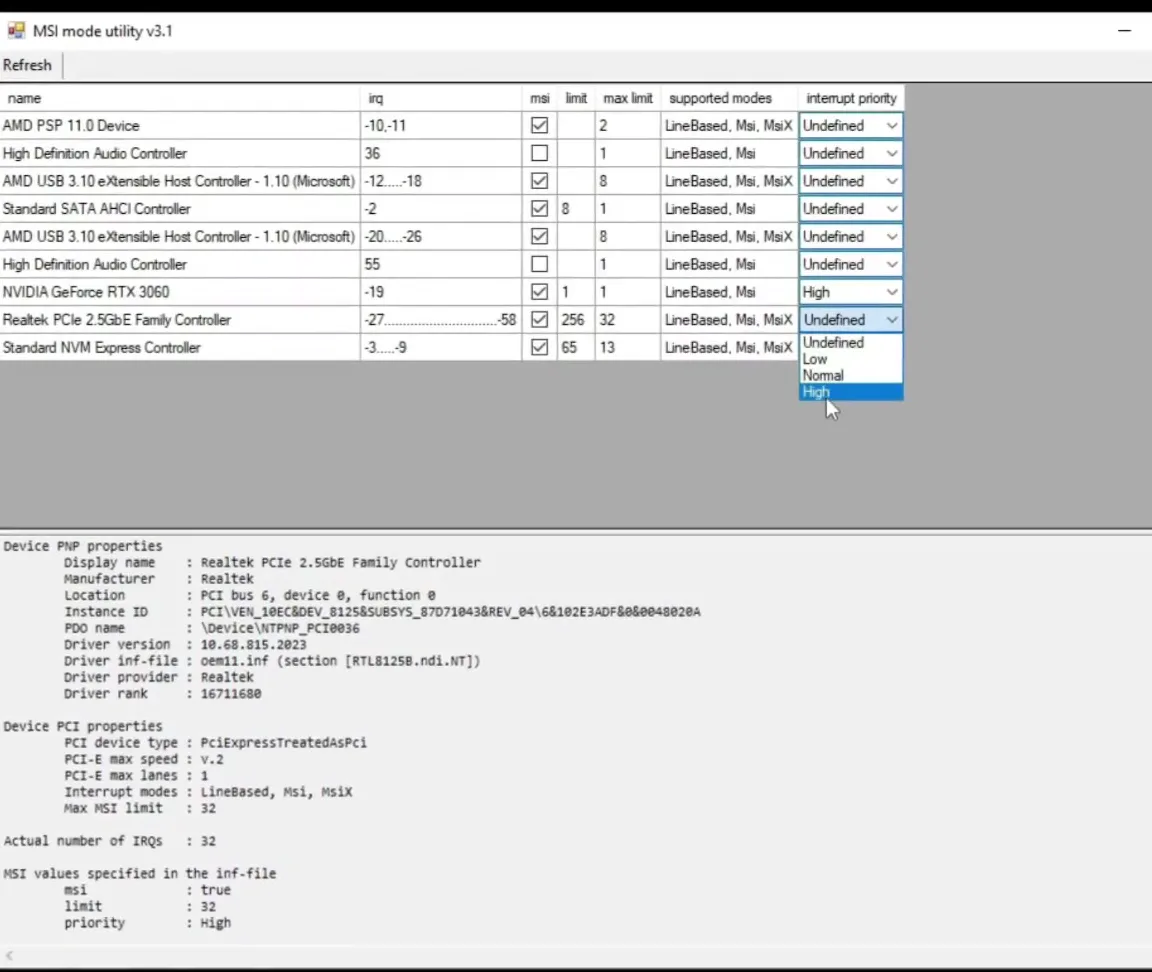
Open 8. MSI Utility and run MSI_util_v3.exe as administrator. The list shows your PCI devices. Tick the msi box for your graphics card and set its interrupt priority to High. Do the same for your network controller: in the video it is a Realtek PCIe 2.5GbE controller, yours may be Wi-Fi. Click Apply and close the tool.
Careful
Change only the graphics card and the network adapter. Leave the other devices on Undefined, as in the video, and reboot afterwards for the change to take effect.
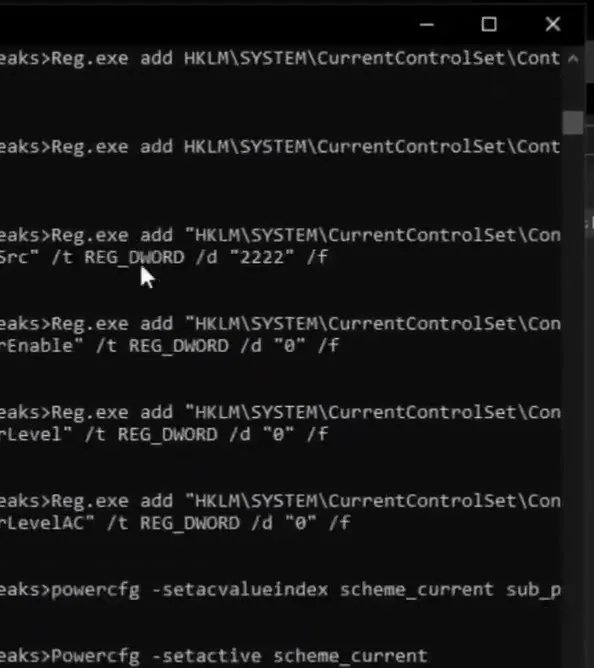
Open 9. Power Tweaks, right-click the batch file and run it as administrator. A command window applies a list of power and registry settings, one line at a time, and each line says The operation completed successfully. Wait until it stops, then close it. Among others, the lines turn off power throttling and set the processor to run its performance mode.
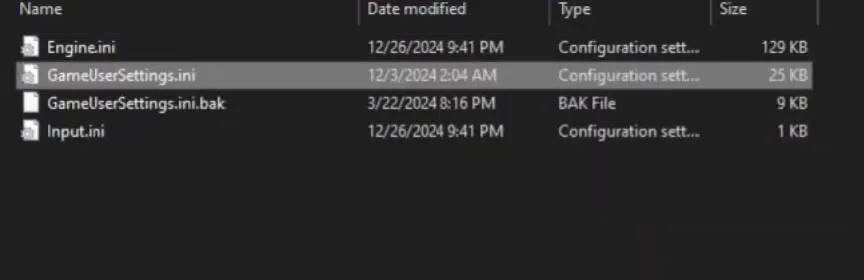
Only for Fortnite. Press Windows + R, type %localappdata% and press OK. Open FortniteGame, then Saved, Config and WindowsClient. Copy the file from folder 10. Fortnite GameUserSettings over the GameUserSettings.ini in there. The video says this gives Fortnite its best performance settings.
Windows + R%localappdata%FortniteGameSavedConfigWindowsClient
How to undo it
Before replacing, copy your own GameUserSettings.ini to the desktop. If you do not like the new file, put yours back. Close Fortnite before you copy.
How to check it worked
Do not trust a feeling, measure it:
- Before step 1, play the same map or training area for two minutes with an FPS counter on and note the average and the lowest FPS. Repeat after the last step and a reboot.
- Restart Windows once, because the TCP and MSI changes only apply after a reboot. Then check Task Manager, Startup: your disabled entries should still say Disabled.
- Reopen the MSI mode utility: the graphics card and network controller should still show msi ticked and High.
- Check ping in your game or with a speed test. TCP Optimizer works on the network side, so a change there shows up in ping and packet handling, not in FPS.
Gains differ a lot from PC to PC. The biggest changes typically show up on older machines with many startup apps, much smaller ones on a clean, fast PC.
Key settings at a glance
FAQ
Are these PC tweaks safe?
They change Windows settings, so make the restore point first, as the video does. Most steps also have an off switch: Reset to Default for the RAM tweak, Windows Default in TCP Optimizer and Task Manager for startup apps.
How much FPS will I get from these tweaks?
It depends on your PC. Typically the gain is largest on PCs with lots of startup apps and background load, and small on a clean system. Measure the same scene before and after, as described above.
What does MSI mode do?
MSI (message signaled interrupts) is a way for a device such as your graphics card to signal the CPU. The utility in the video turns it on for the GPU and network controller and sets their interrupt priority to High.
Which TCP Optimizer setting is used?
Optimal under Choose settings, then Apply changes. The video declines the reboot at first and restarts later. To undo it, choose Windows Default and apply again.
Do I need an NVIDIA card for every step?
No. Only the NVCleanstall driver step is NVIDIA-only, and the MSI step names a GPU for the PC in the video. Restore point, startup apps, visual effects, cleanup, RAM, TCP and power apply to any Windows PC. The last step is for Fortnite only.
Is the pack in the video free?
Yes, everything in the ten folders is free, apart from step 7, which opens the paid RIP Tweaks packs. The video was made with an earlier version of our tooling. For more Windows-level ideas, see hidden Windows tweaks for gaming.
Should I use the Fortnite file on a different PC?
The file holds a set of graphics settings from the PC in the video. Keep a backup of your own file and compare the result in game. Our Fortnite FPS, input delay and ping guide covers the in-game side.
 RIP Tweaks
Do it in a few minutes with RIP Tweaks
- Free plan for Windows 10 and 11
- A backup first, and every tweak can be switched off again
- Made for higher FPS, lower input lag and steadier ping
Free · Windows 10 and 11
