How to Optimize Your PC for Gaming with One Free App (2026)

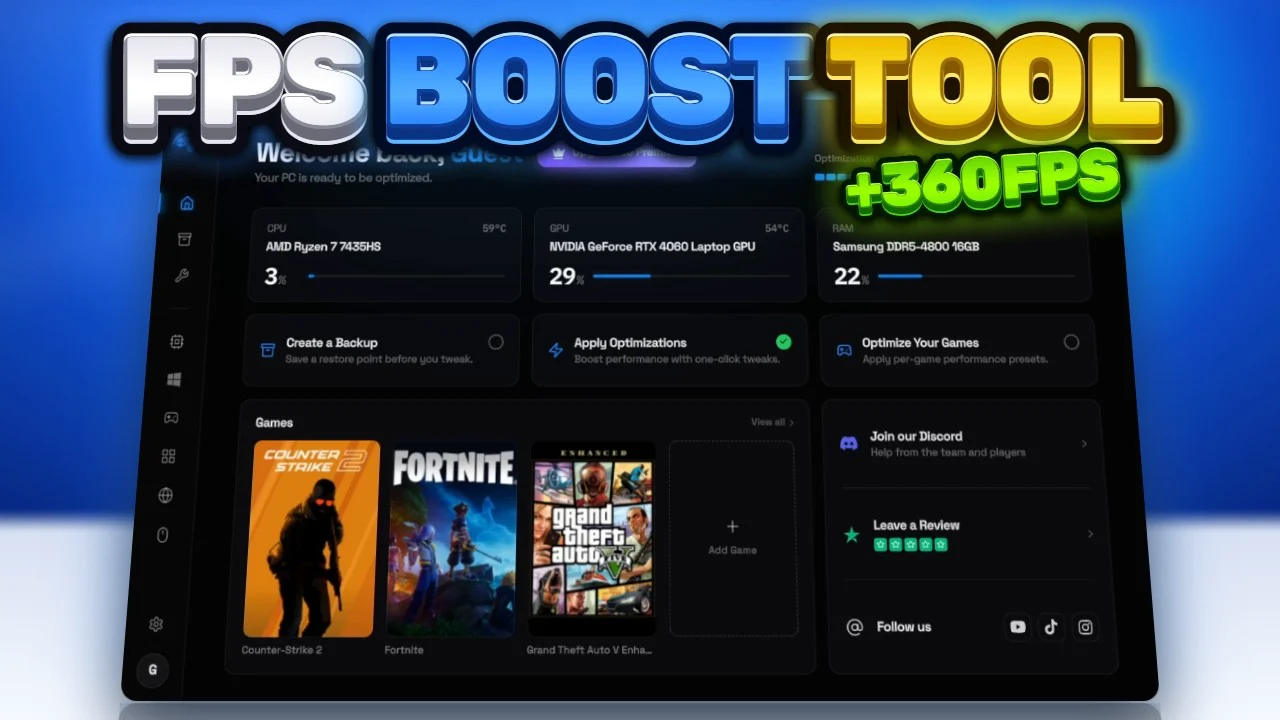
Written version of our video, every step checked against it.
Quick answer
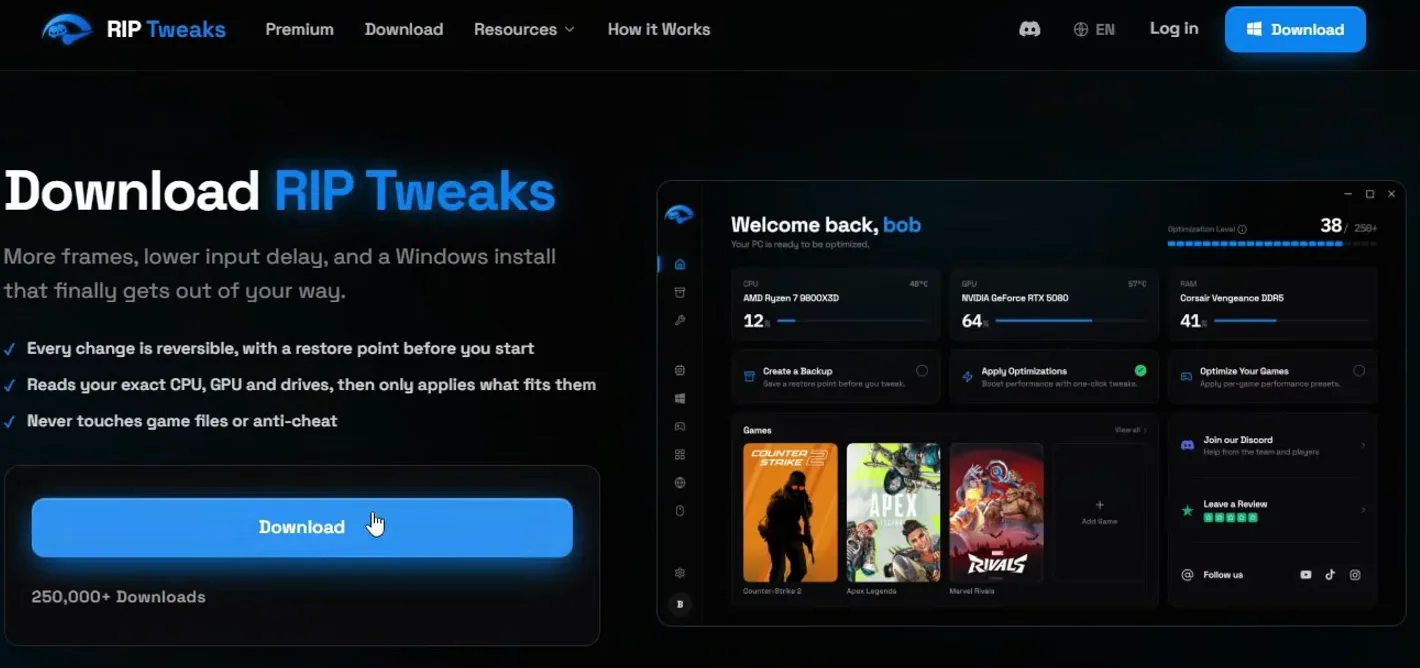
- Install RIP Tweaks from riptweaks.com and make a Before Tweaks backup under Backups first: every step below can be undone.
- In Hardware, activate the CPU and GPU tweaks, run NVIDIA Debloat as a clean install and pick your RAM size.
- In Windows, set Win32 Priority Separation, Disable all startup apps, activate the RIP Power Plan and debloat (56 items on the PC in the video).
- In Network and Input Lag, apply the latency tweaks, Ultra-Low Bufferbloat and a 1000 Hz polling rate.
- Launch your game from Games with Smart Game Boost. After a restart the PC in the video went from 159 to 69 processes.
This guide is for anyone who wants to optimize a whole Windows 10 or 11 PC for gaming in one sitting, without hunting through registry guides. It follows our video click by click: a backup first, then hardware, Windows, power, debloat, network, input lag and the game launch, in the same order and with the same settings.
In this video
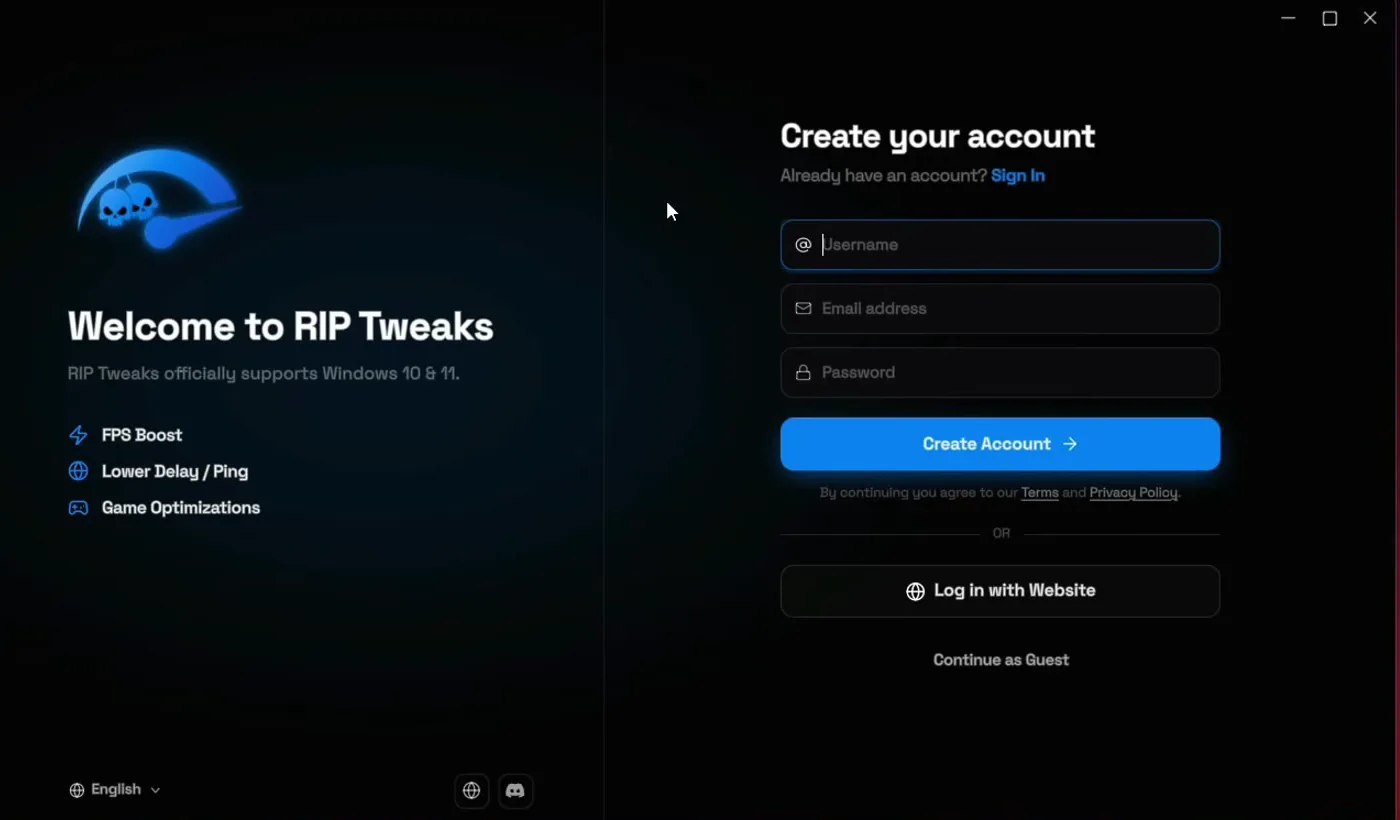
The app opens on its login screen. If you have no account yet, create one on the spot: type a username, your email address and a password, then click Create Account. Click Get Started, fill out the short questionnaire, read the disclaimers and click I understand.
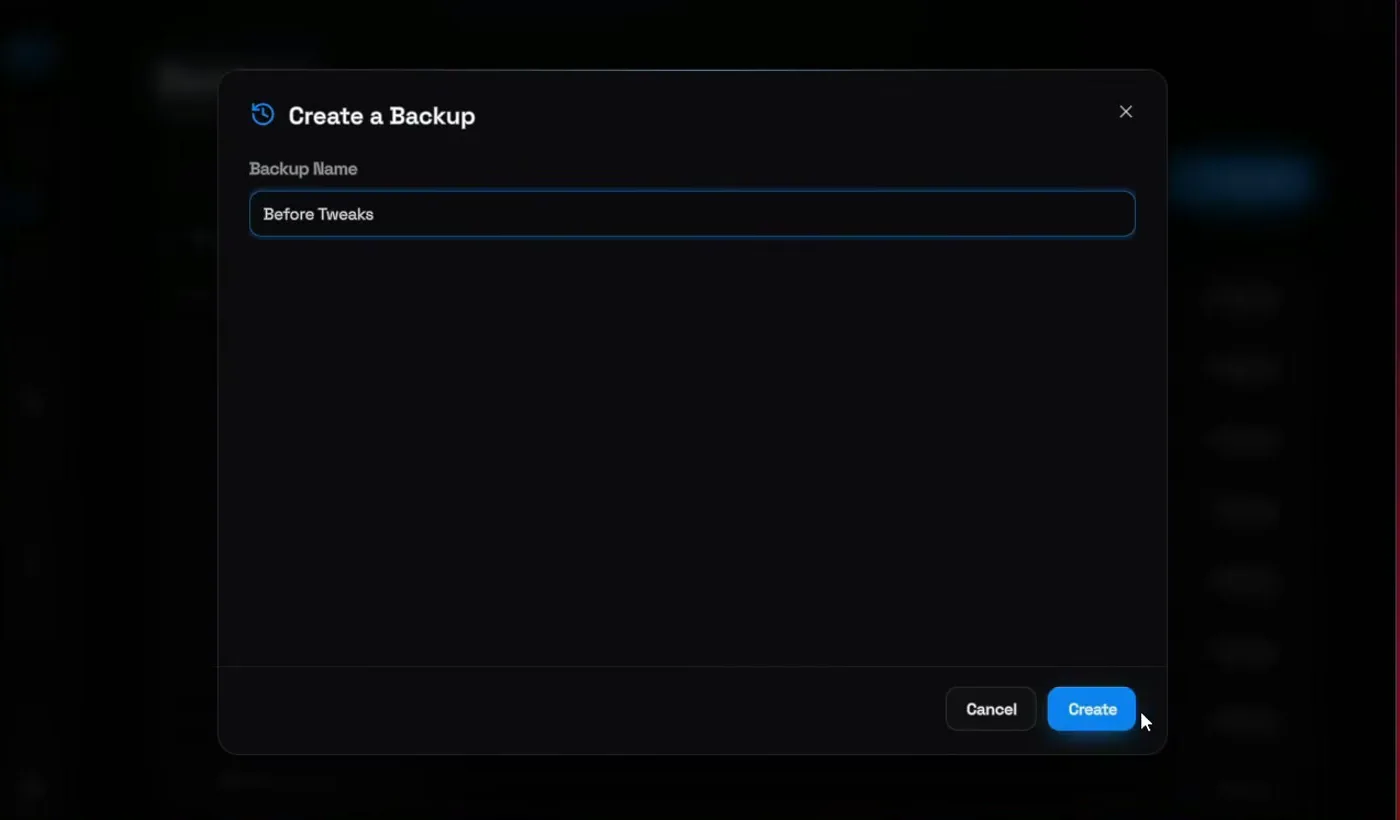
Do this first. Open Backups in the sidebar, click Create New, name it Before Tweaks and click Create. Wait until it is fully finished before you change anything else.
BackupsCreate NewBefore TweaksCreate
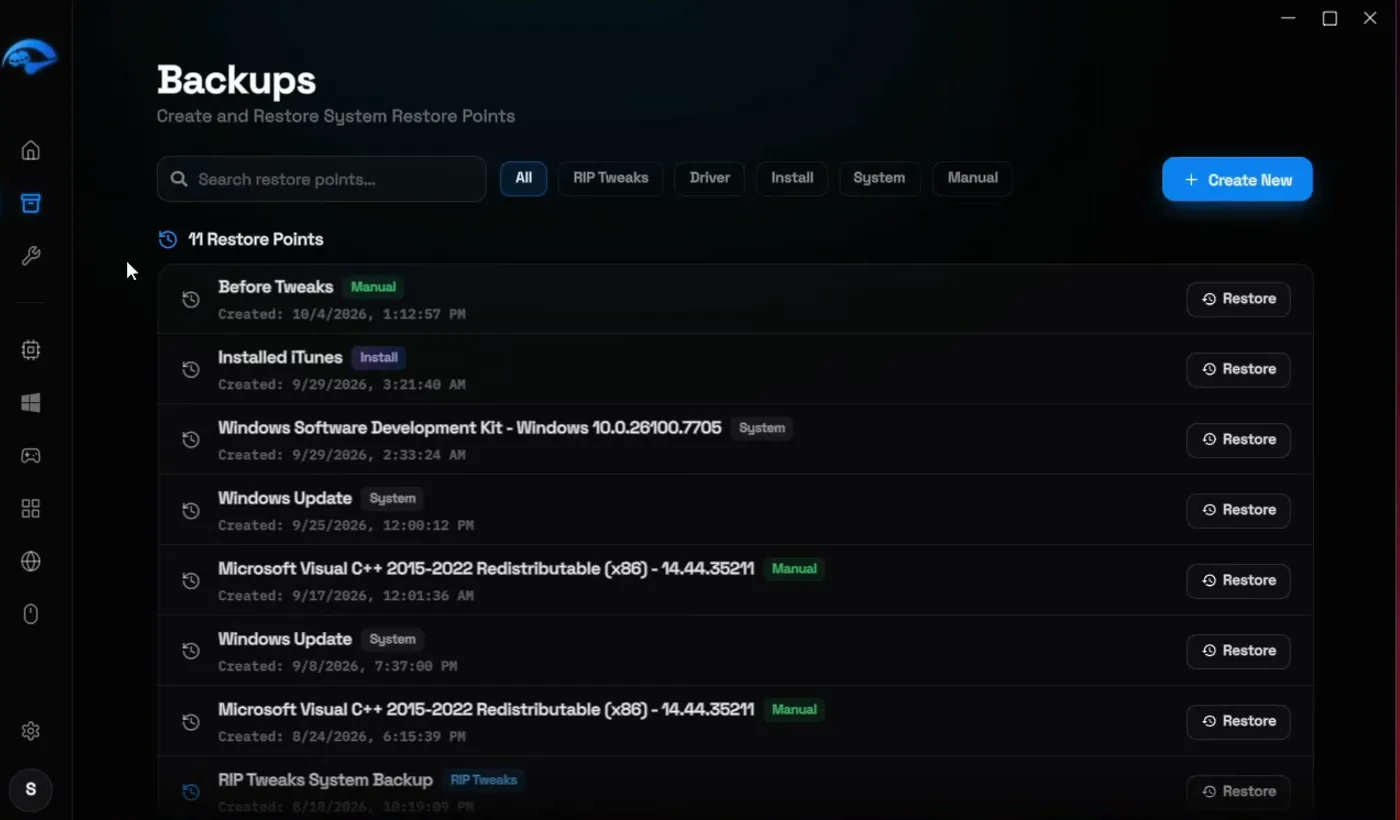
How to undo it
Everything in this guide is reversible. One tweak can be switched off on its own card, and the Restore button next to Before Tweaks takes the whole PC back to how it was.
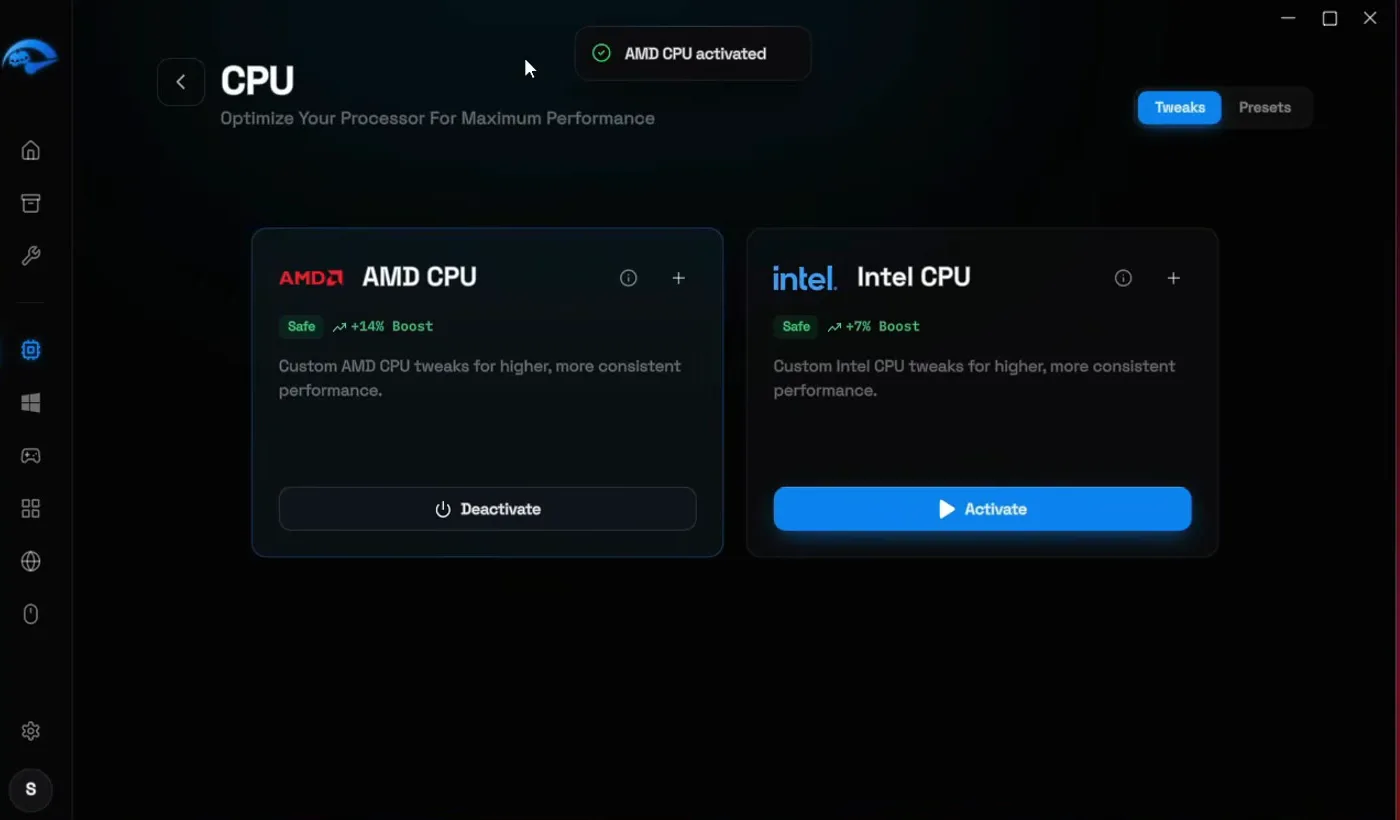
Click Hardware, then CPU. You see an AMD CPU and an Intel CPU card: click Activate on the one that matches your processor. The video uses AMD. After a moment a message confirms it, here AMD CPU activated, and the button turns into Deactivate. Every other tweak in the app works the same way.
HardwareCPUAMD CPU or Intel CPUActivate
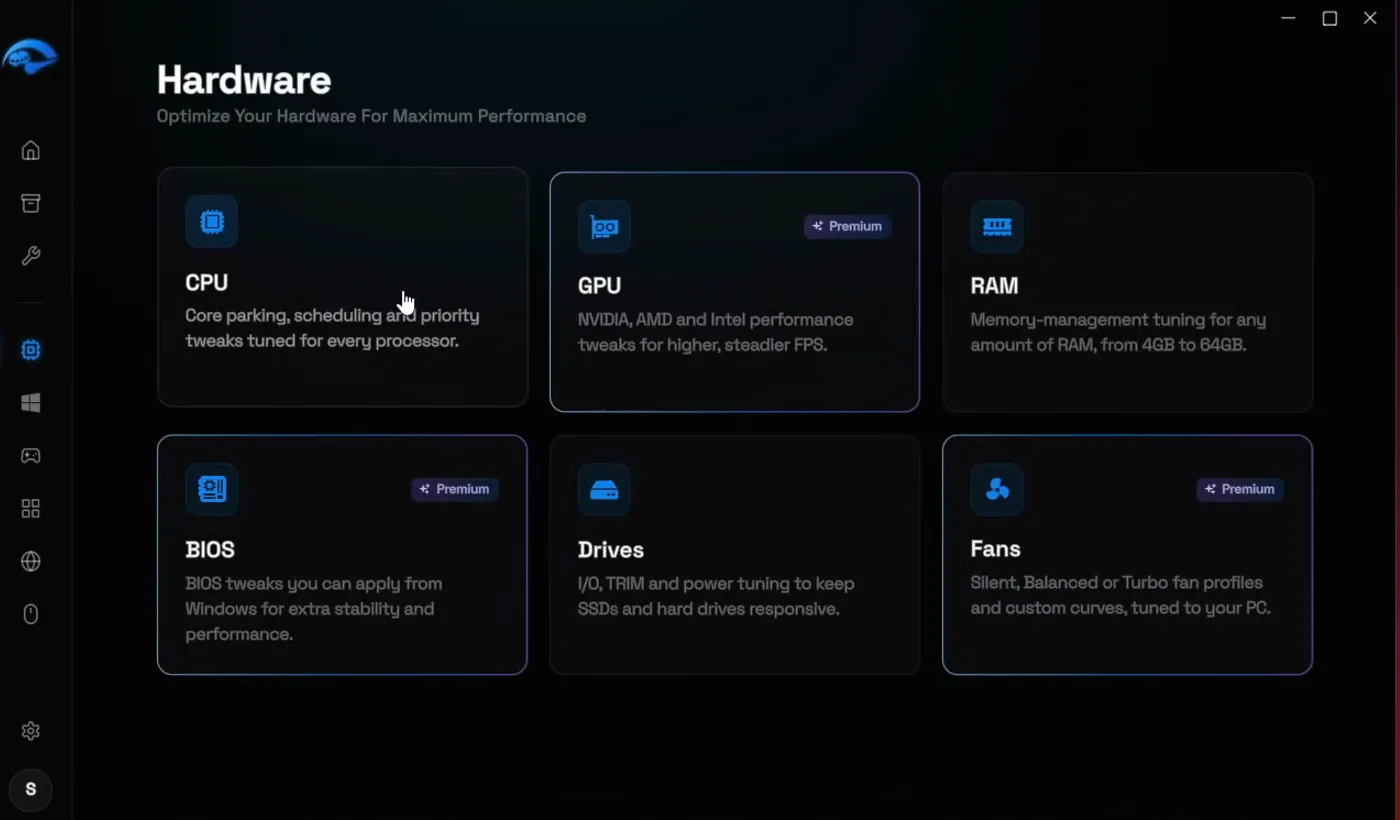
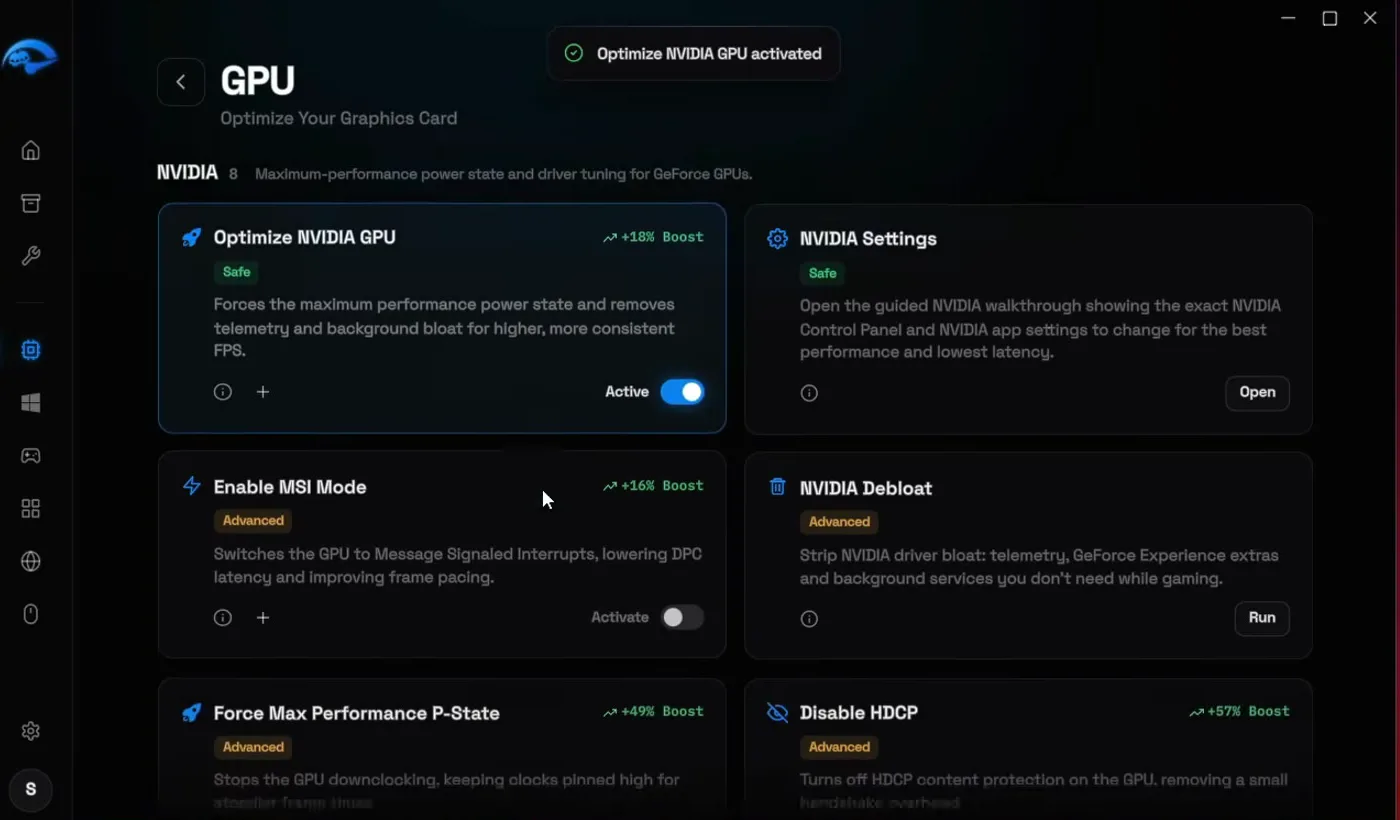
Go back and open GPU. The video has an NVIDIA card, so it switches on Optimize NVIDIA GPU first. In the video every tweak in the list goes on: Enable MSI Mode, Force Max Performance P-State, Disable HDCP, Disable GPU Preemption & TDR and Disable UVM. Each toggle shows Active once it is applied.
HardwareGPUActivate each tweak
On the same GPU page, click Run on NVIDIA Debloat. The NVIDIA Debloater detects your graphics card and the latest driver, then uninstalls the old driver cleanly, strips it down and installs the new one. This is the whole uninstall and reinstall process from other guides, done for you, and it updates you to the latest driver at the same time.
Under Components to keep you choose what stays. The video keeps PhysX, because some games use it. Tick NVIDIA App / overlay as well if you want the NVIDIA app installed automatically. Then click Clean install.
HardwareGPUNVIDIA DebloatRunClean install
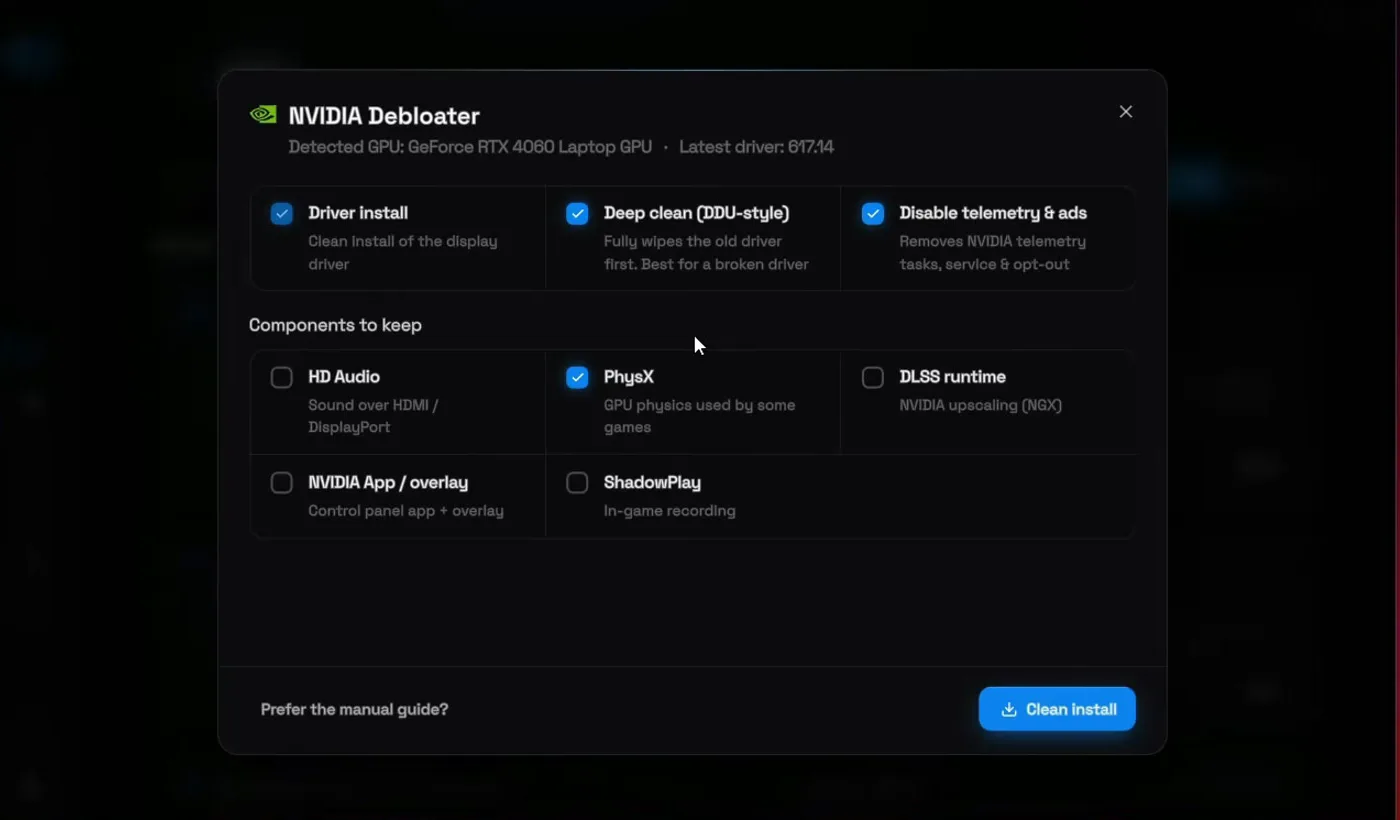
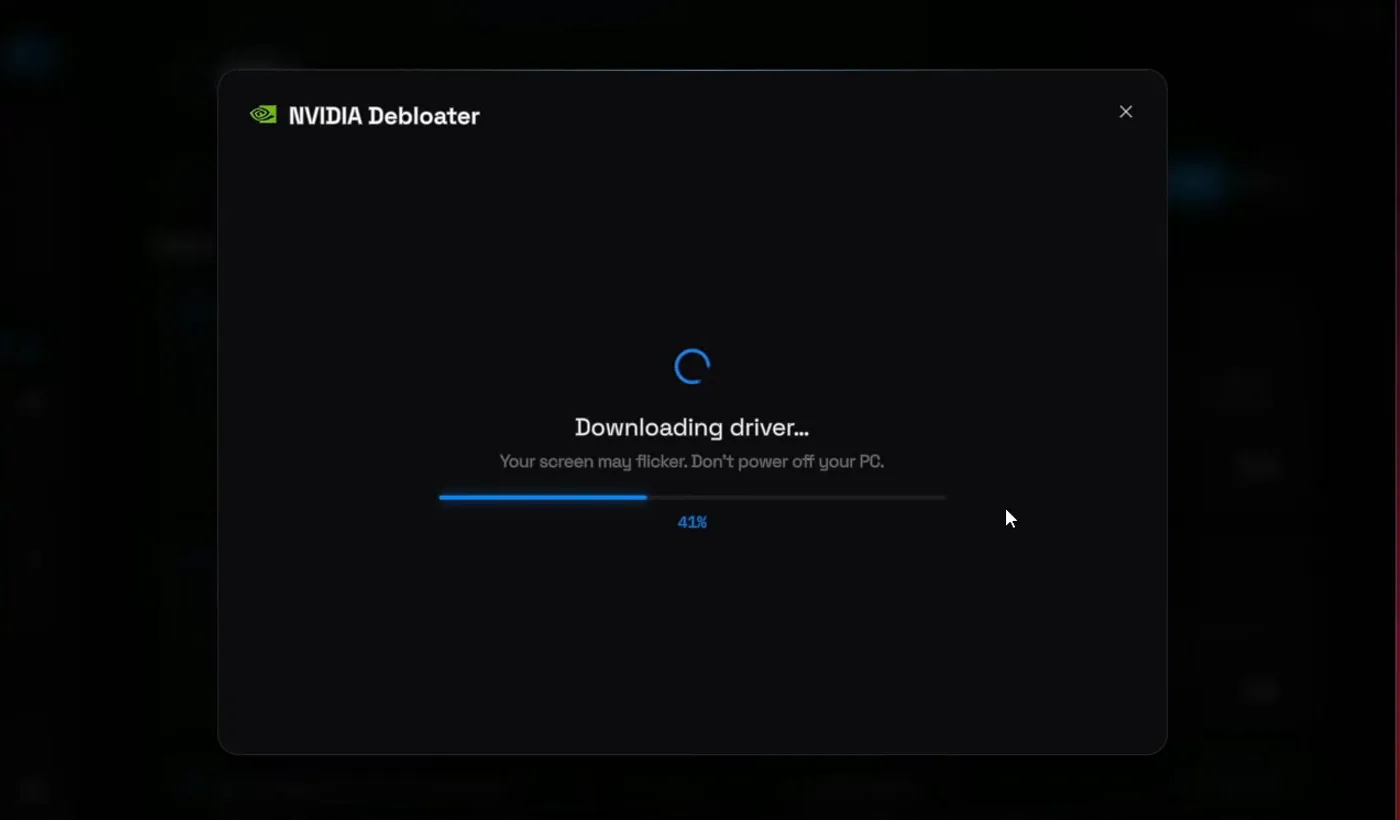
Tip
Leave the PC alone until the Debloater is finished and don't power it off. In the video the driver and the NVIDIA app are both installed at the end. Our NVIDIA settings guide covers the driver settings after the install.
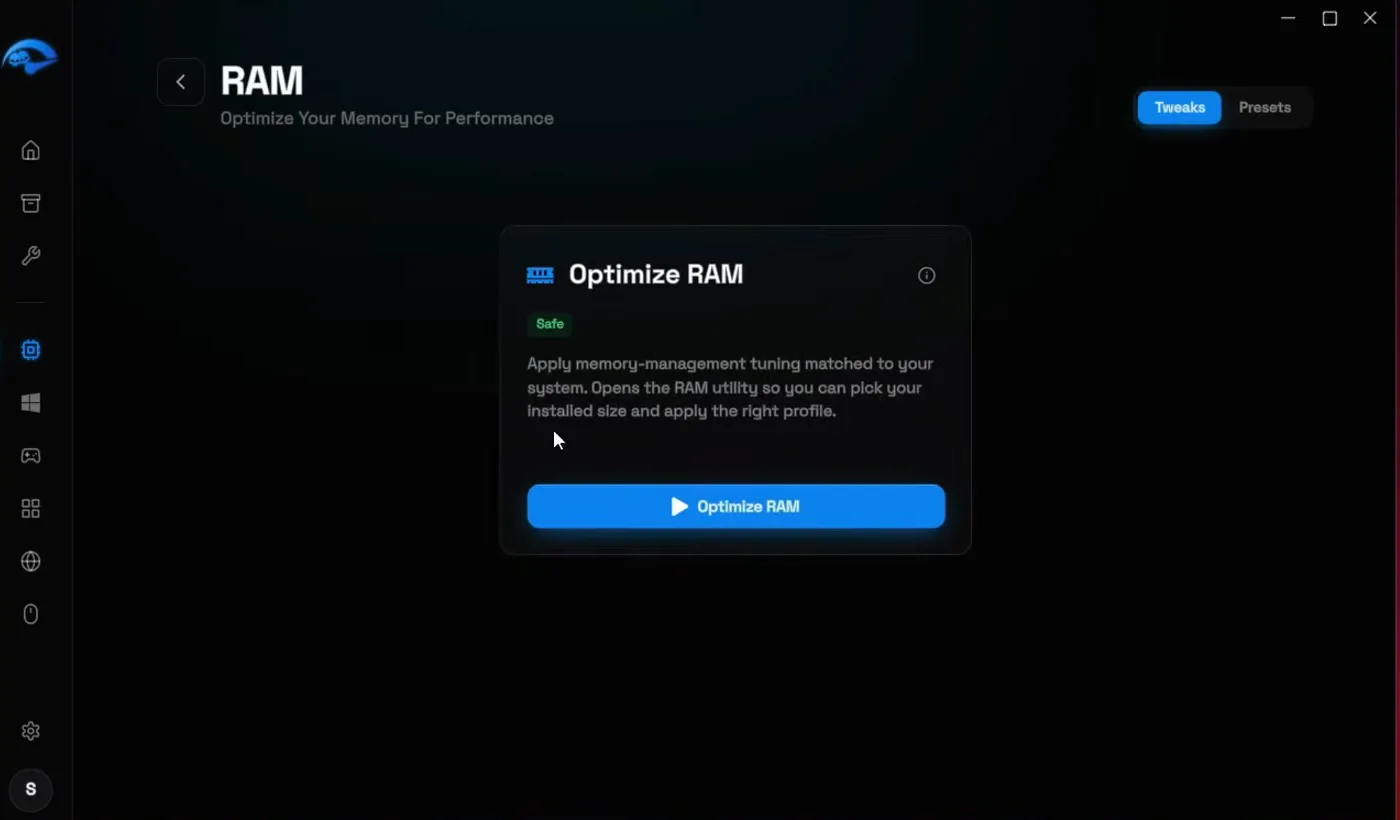
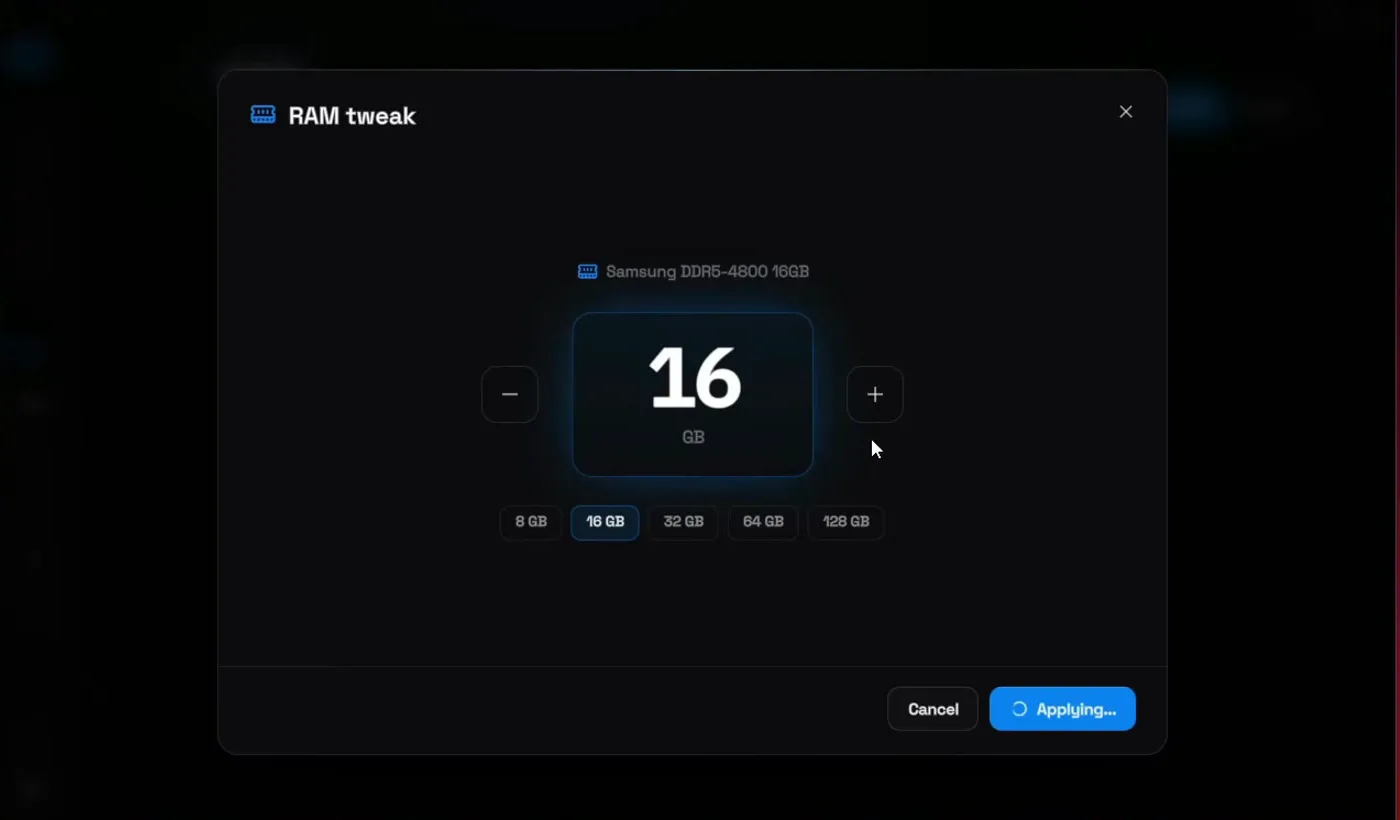
Back in Hardware, open RAM and click Optimize RAM. Pick the amount of RAM you have (the video has 16 GB, and the app reads it from the memory itself) and click Apply. Then go back, optimize the BIOS, and optimize your drives under Drives, which holds the SSD tweaks.
HardwareRAMOptimize RAM16 GBApply
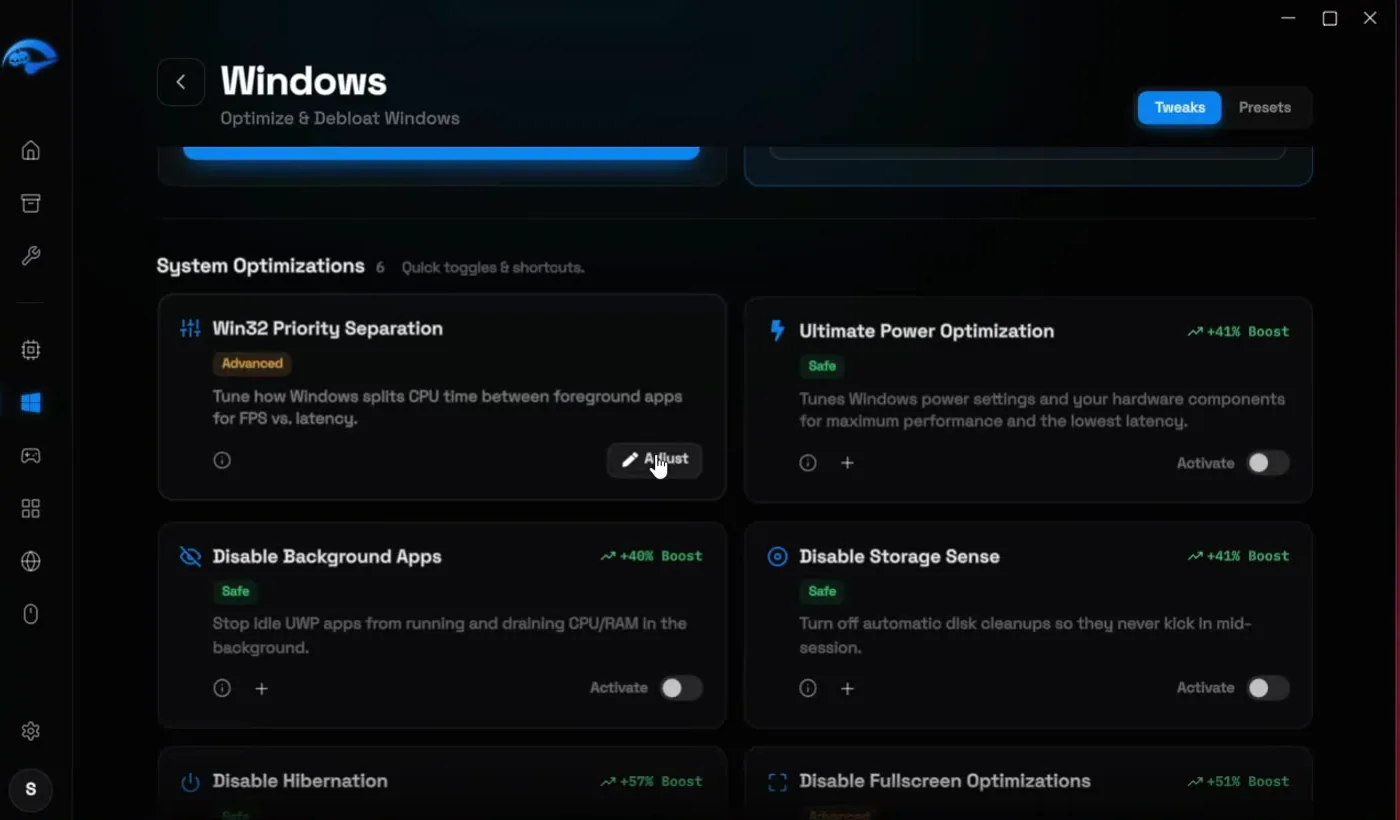
This is the biggest step. Before it, Task Manager on the PC in the video showed 159 processes, mostly preinstalled apps and things that come with Windows. Open the Windows section in the sidebar, then the Windows card.
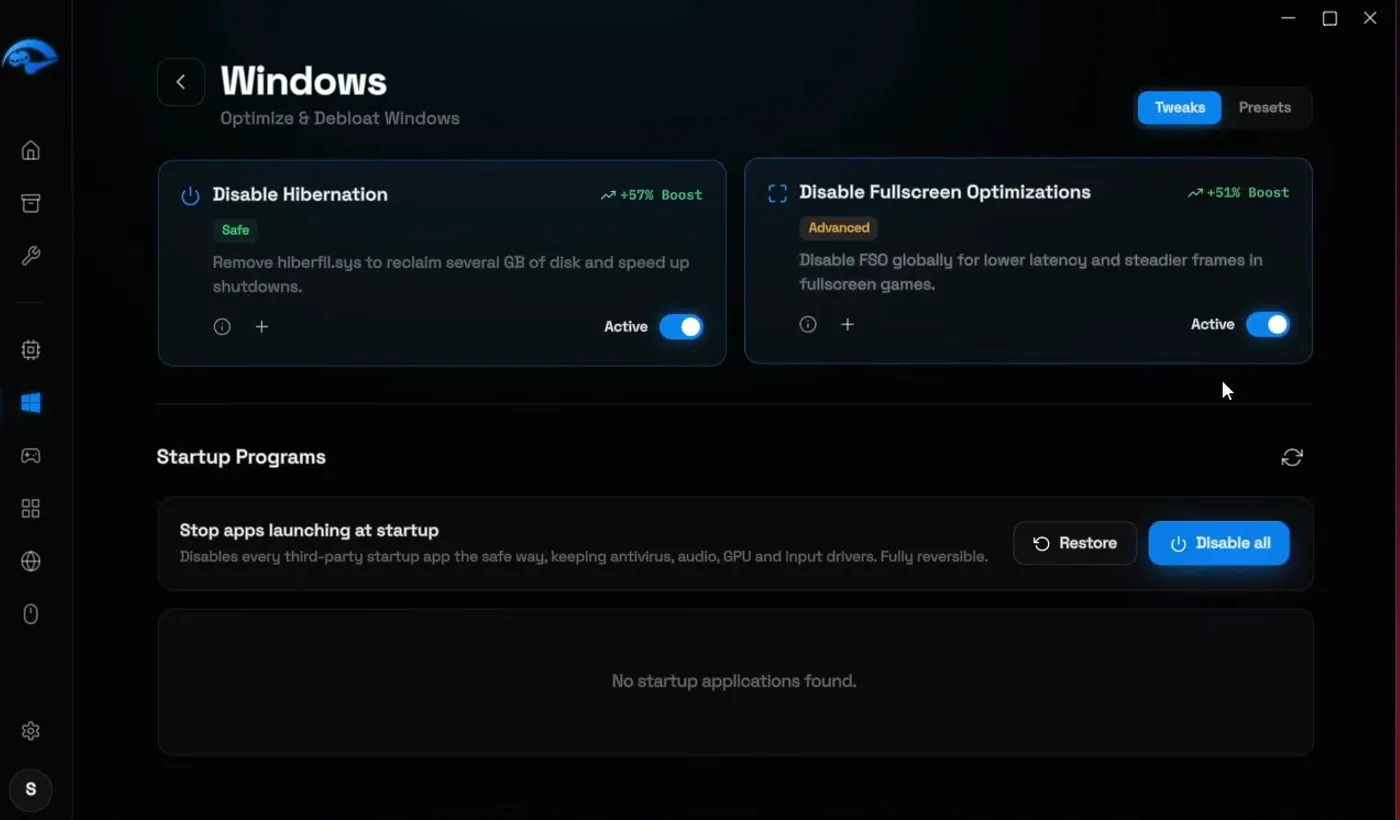
First click Adjust on Win32 Priority Separation, which tunes how Windows splits processor time between the game in front and everything else. Select 26 (hex) and click Apply. Then activate the rest of the list: Ultimate Power Optimization, Disable Background Apps, Disable Storage Sense, Disable Hibernation and Disable Fullscreen Optimizations.
Under Startup Programs, the video had a long list of apps that launch with Windows, almost all with a medium impact. Click Disable all. The app keeps antivirus, audio, GPU and input drivers, and the Restore button brings the startup apps back.
WindowsWindowsWin32 Priority SeparationAdjust26Apply
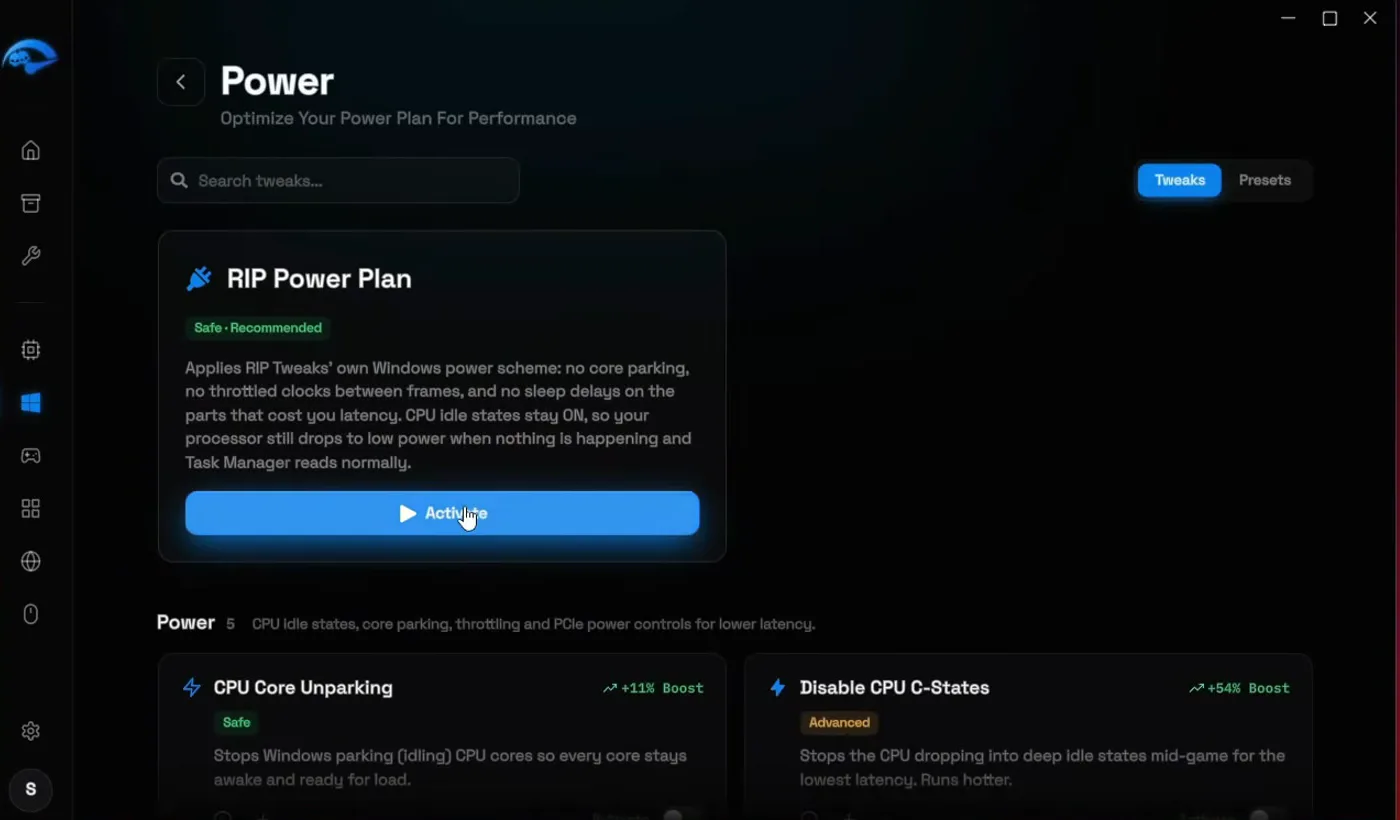
Go back and open Power. Windows usually runs the Balanced plan; click Activate on RIP Power Plan to switch to our own plan made for gaming. In the video it then shows up in the Windows power options as the RIP Tweaks power plan.
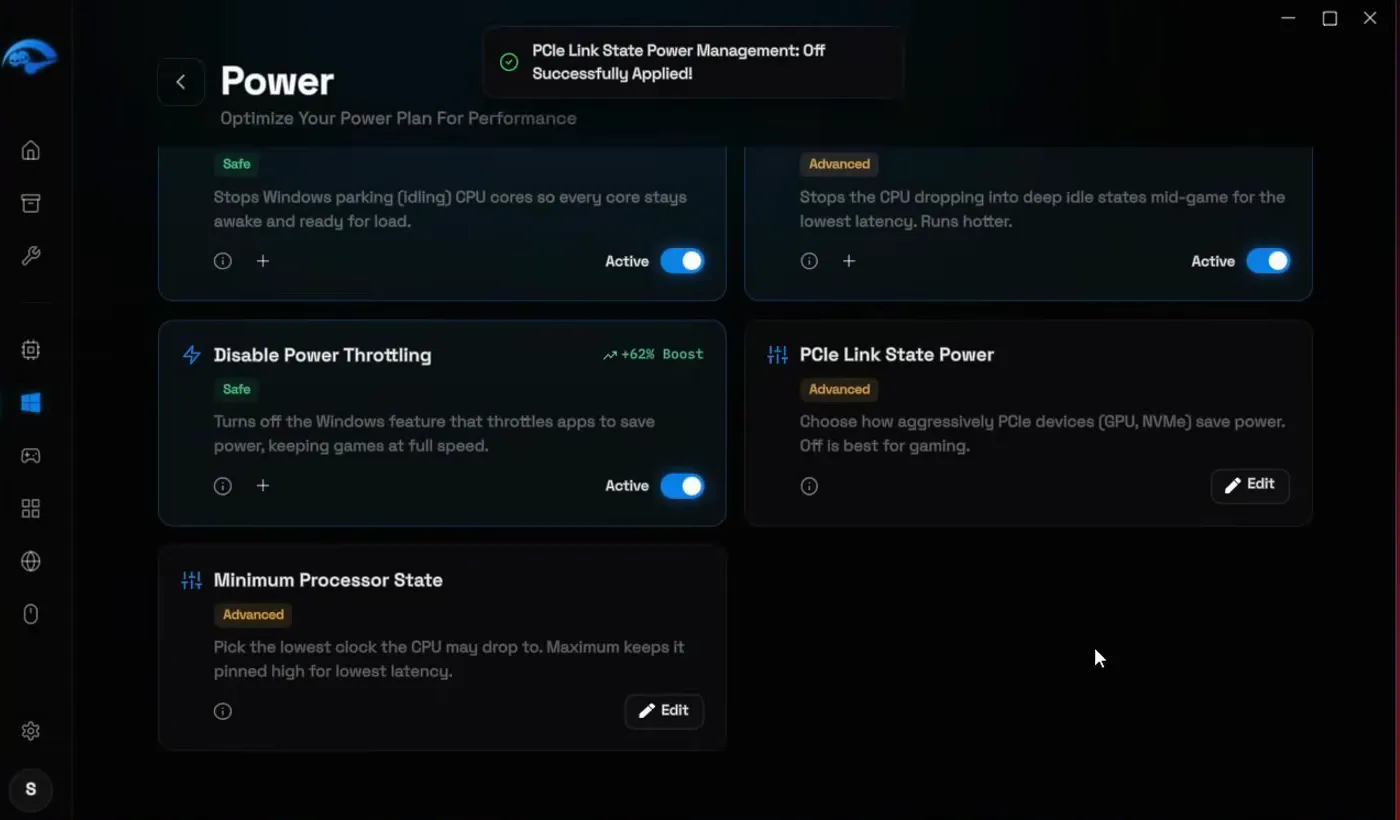
Below it, activate CPU Core Unparking, Disable CPU C-States and Disable Power Throttling. For PCIe Link State Power, click Edit, choose Off and apply. The (i) icon on every card explains what the tweak does, PCIe Link State Power for example is marked as latency reduction, and you can rate the explanation with a like.
WindowsPowerRIP Power PlanActivate
Next, open Debloat in the Windows section. This removes the preinstalled Windows apps and background extras. You get three presets: Basic, Advanced or Custom, where you pick every item yourself. The video uses Custom.
In Custom you can tick the Store apps (Movies & TV, Phone Link, Teams, the new Outlook and more), select all of Telemetry & Privacy at once, the AI items such as Copilot, and the Services. Read the cards and keep what you use. When you are done, click Debloat: on the PC in the video it applied 56 items.
WindowsDebloatCustomCustomizeDebloat
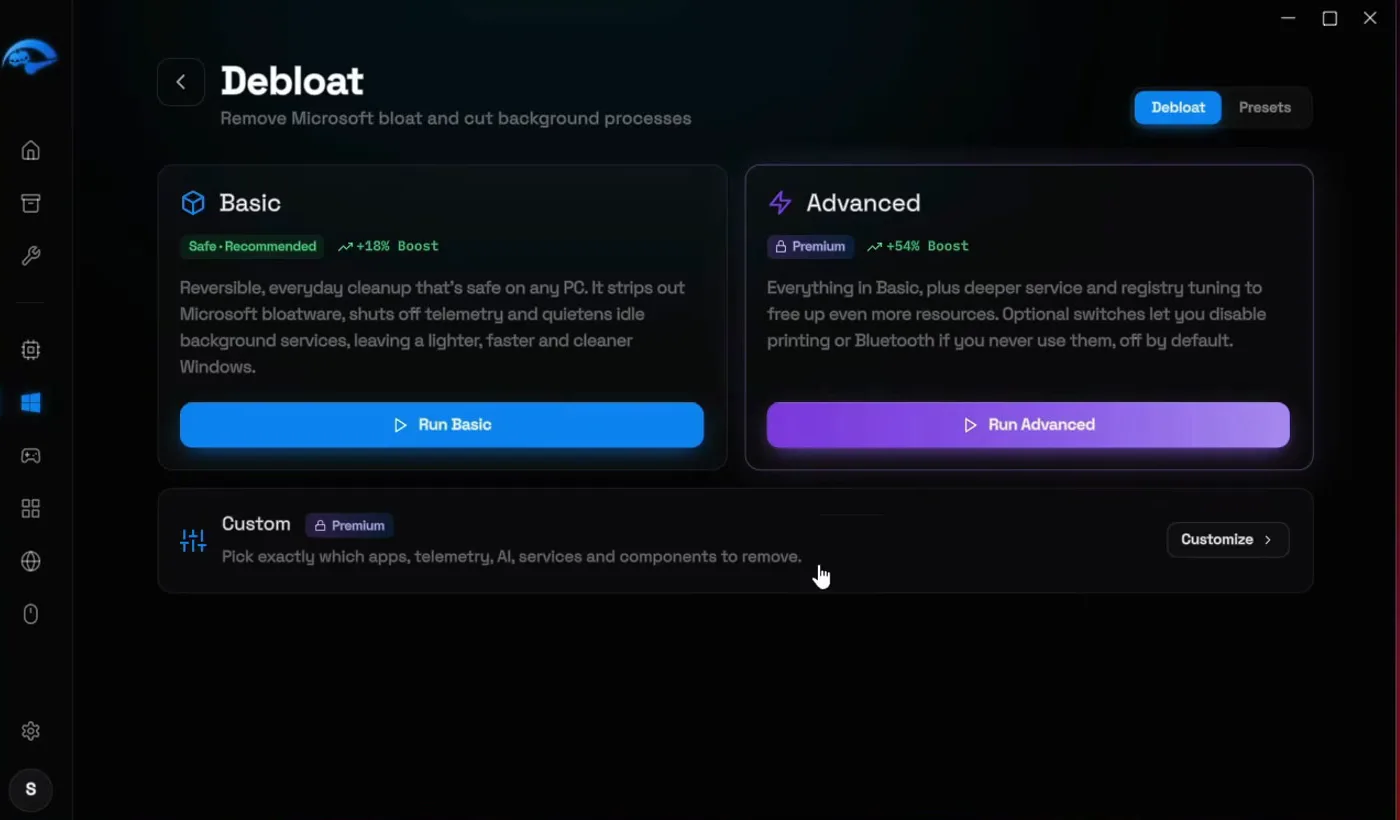
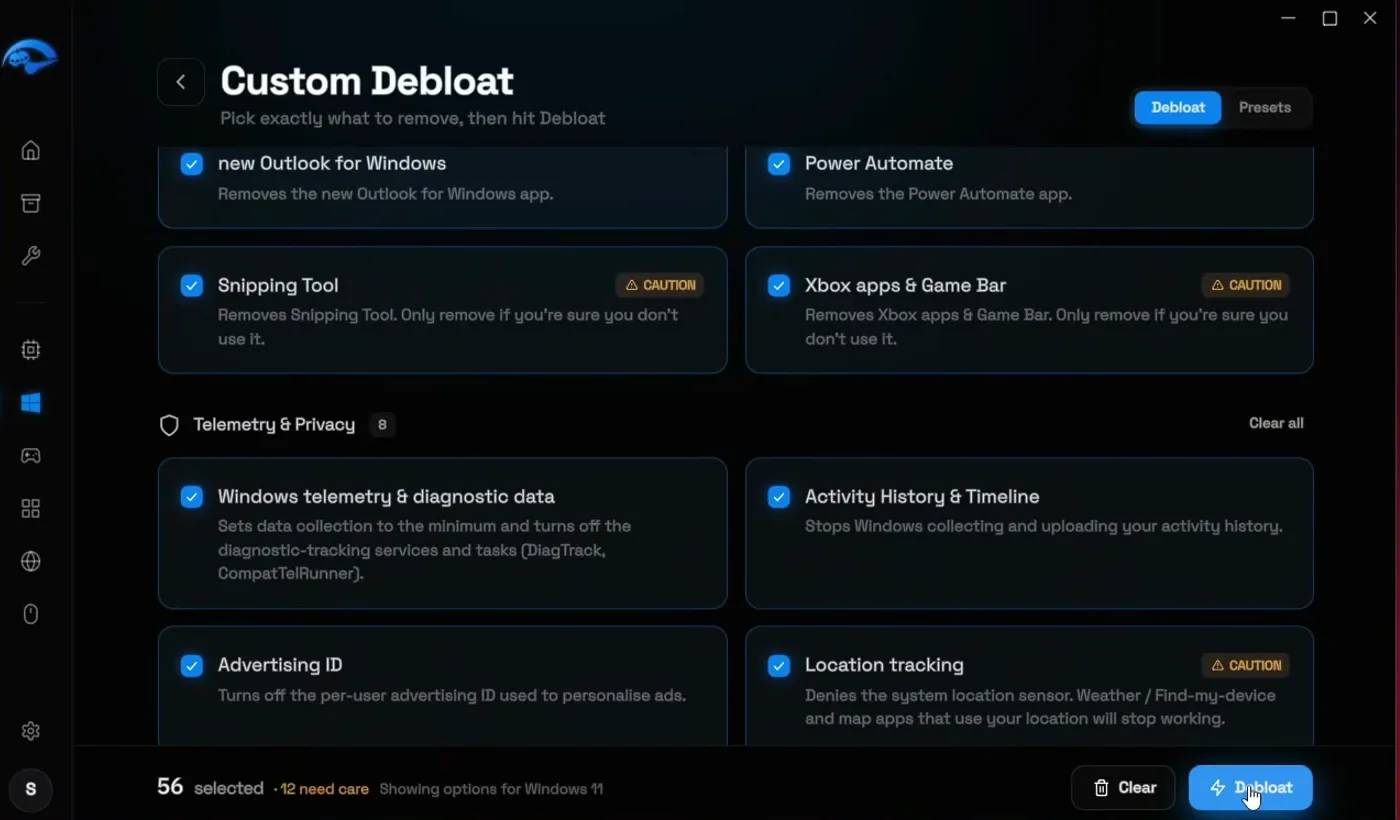
Careful
Items marked CAUTION switch off things some people need. If you print or use Bluetooth headphones, a mouse or a keyboard, untick Disable printing and Disable Bluetooth before you click Debloat.
Open Network and apply the recommended tweaks: Optimize Network Performance, Disable Nagle's Algorithm, Disable QoS Bandwidth Reserve and the Adapter tweaks. Reduce Internet Latency restarts all your network connections: cache can build up over time and push your ping up, and this clears it.
NetworkNetwork & PingActivate the recommended tweaks
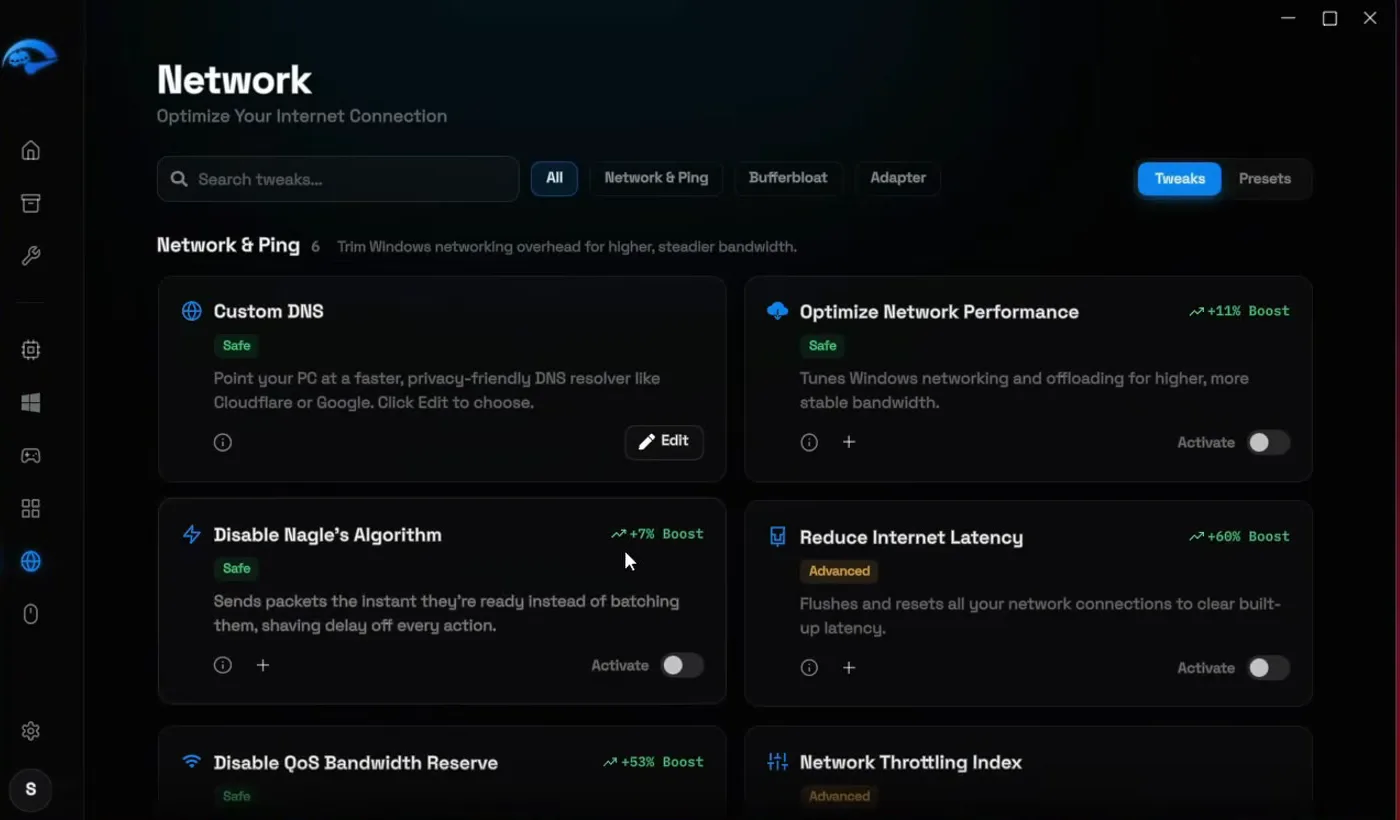
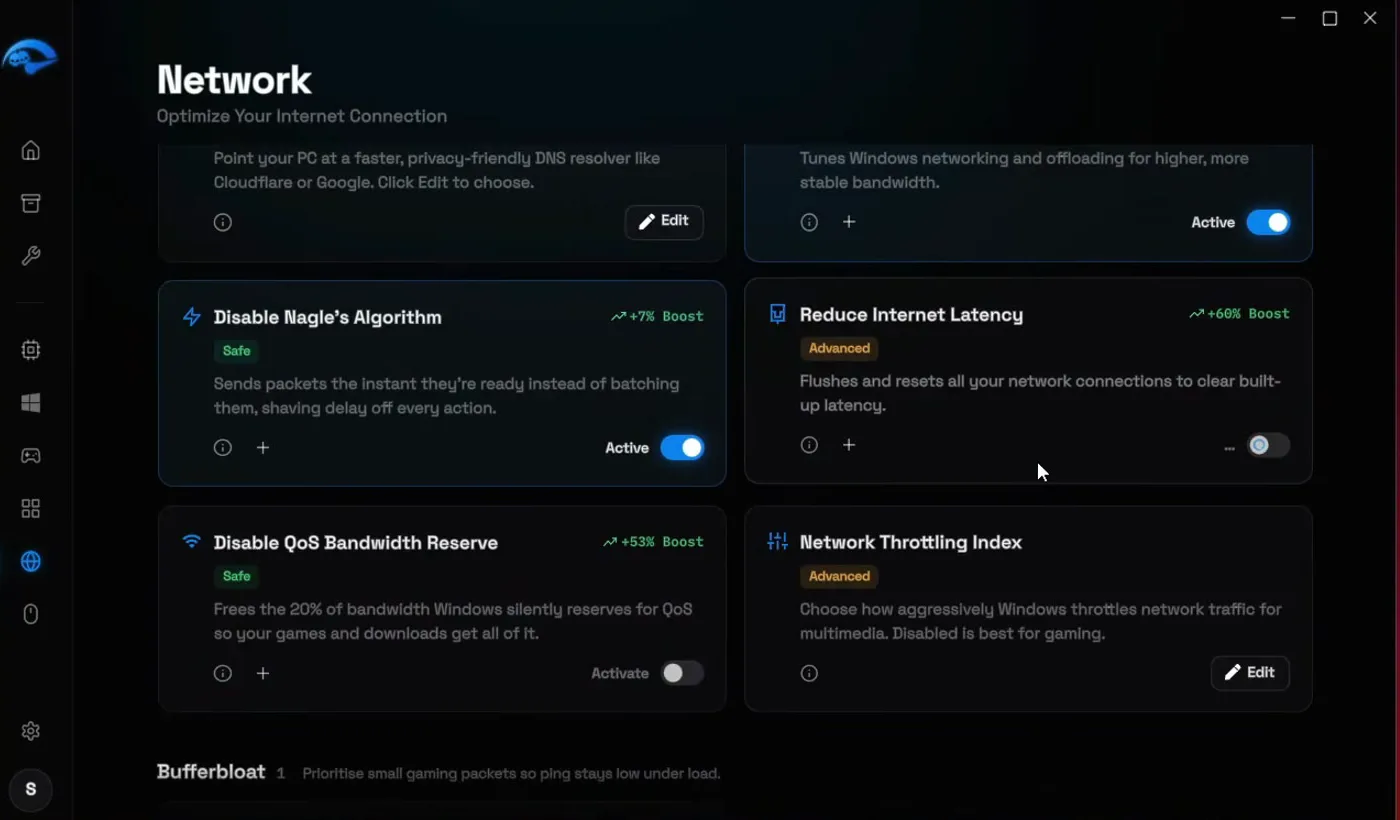
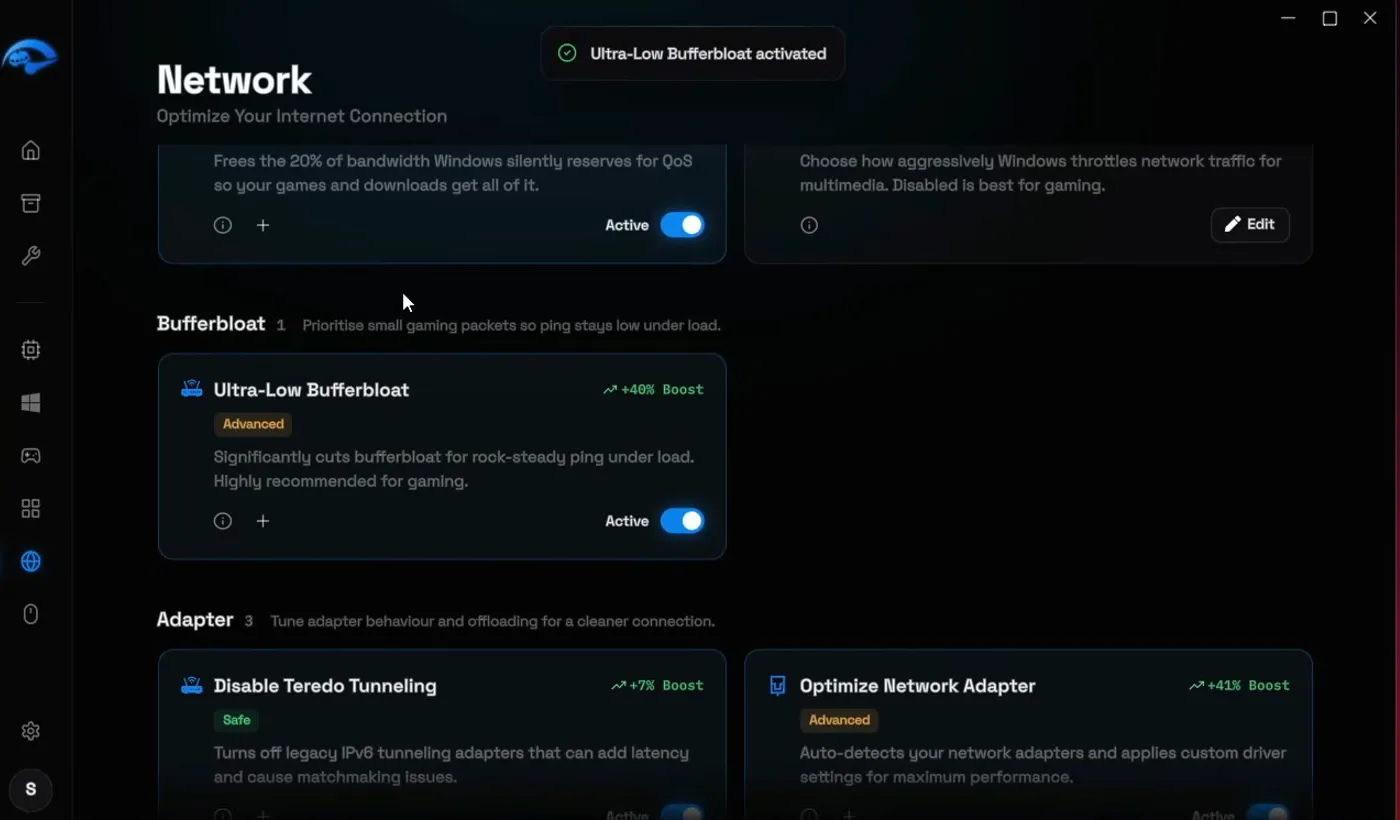
Further down the Network page sits Ultra-Low Bufferbloat. If your connection has a lot of bufferbloat (ping that jumps when something else downloads), this tweak can get rid of it. Click Activate, restart your PC, then play and watch your ping and packets.
Careful
This tweak can lower your internet speed. If you don't like the result, go back and click Deactivate. To see whether you have bufferbloat at all, our bufferbloat guide shows the test and the fix.
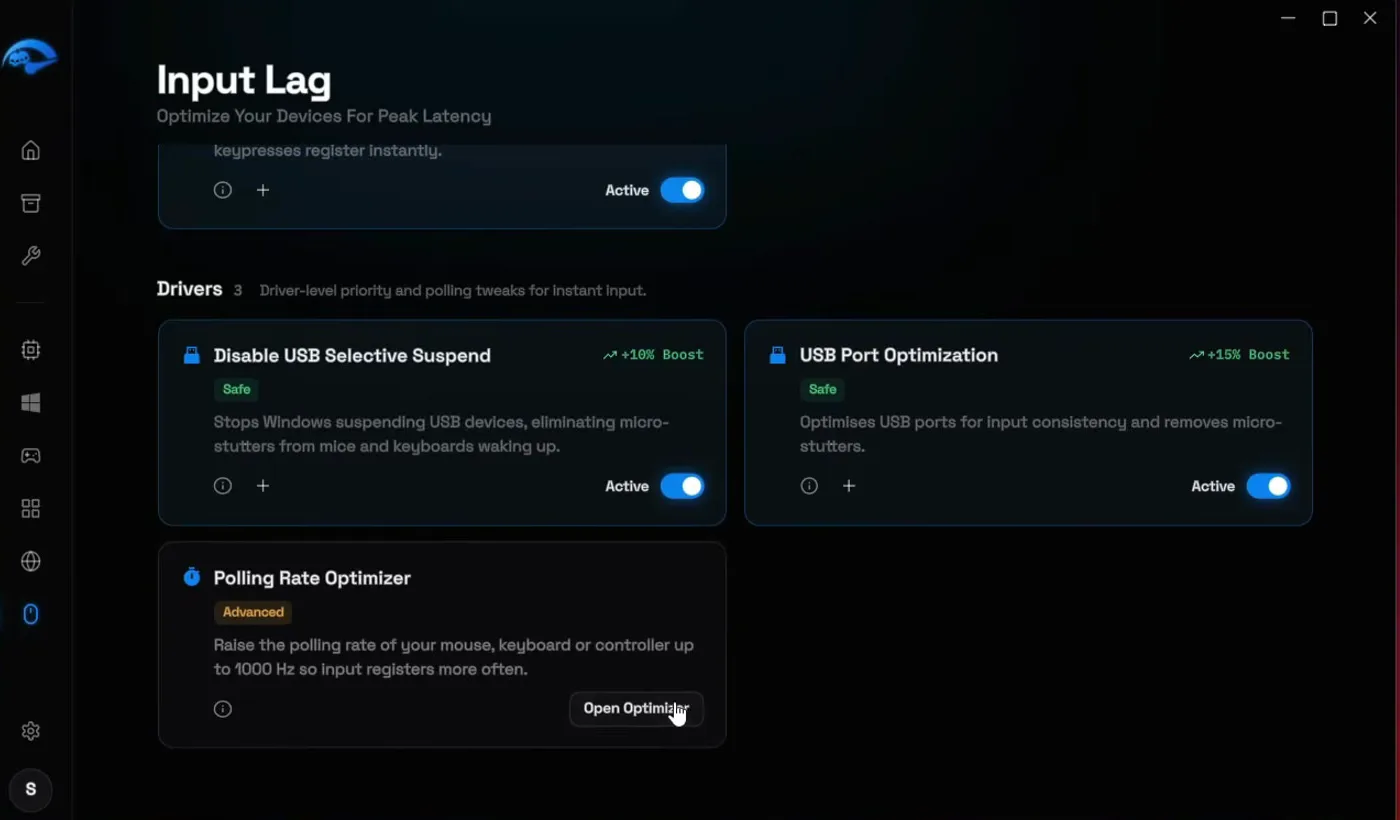
Open Input Lag and apply the tweaks: Mouse Latency Optimization, Reduce Input Lag, Keyboard Latency Optimization, Disable USB Selective Suspend and USB Port Optimization.
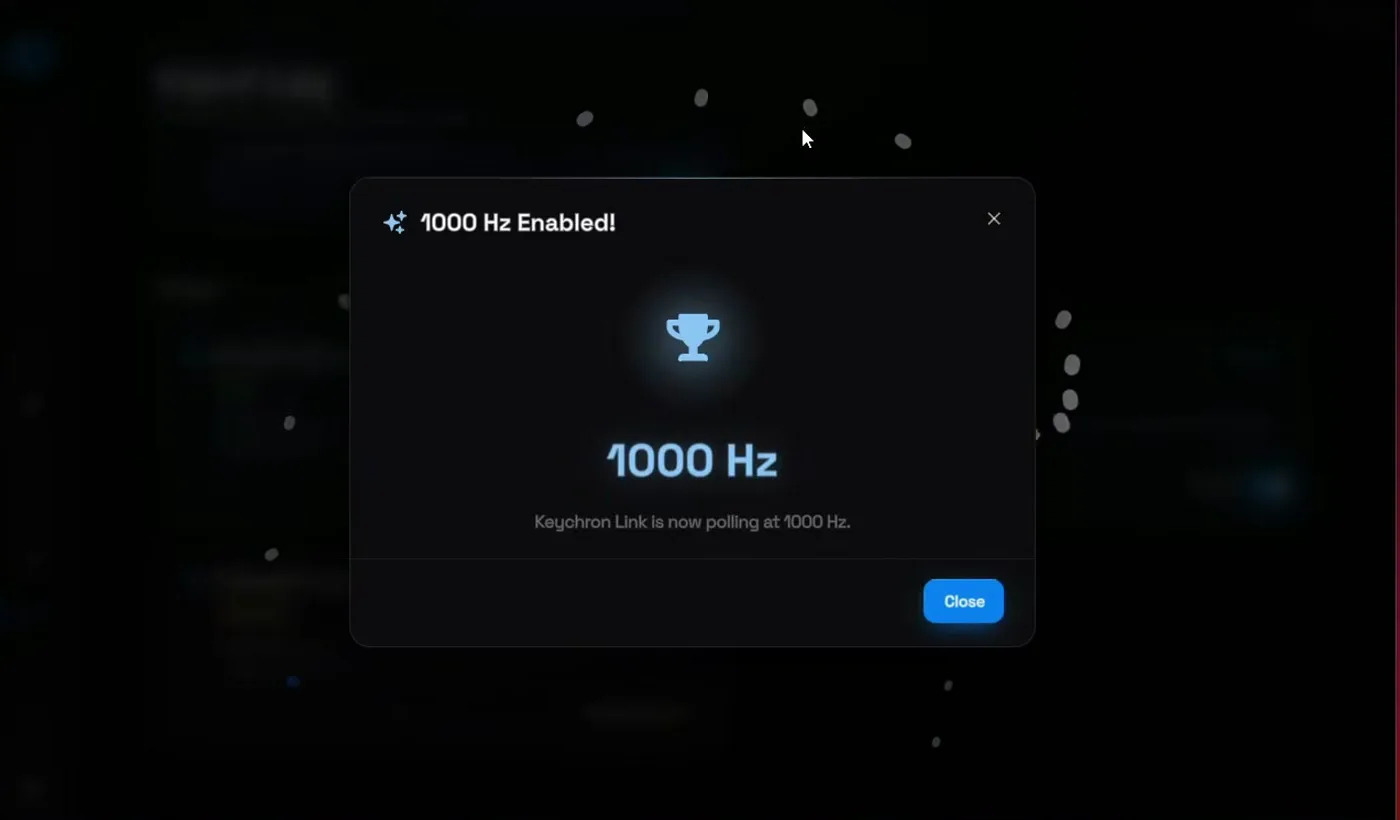
Then click Open Optimizer on Polling Rate Optimizer. It lists your mouse and keyboard; click Optimize and it finds the best polling rate your device supports, 1000 Hz on the PC in the video. At 1000 Hz the device reports to Windows every millisecond.
Input LagPolling Rate OptimizerOpen OptimizerOptimize
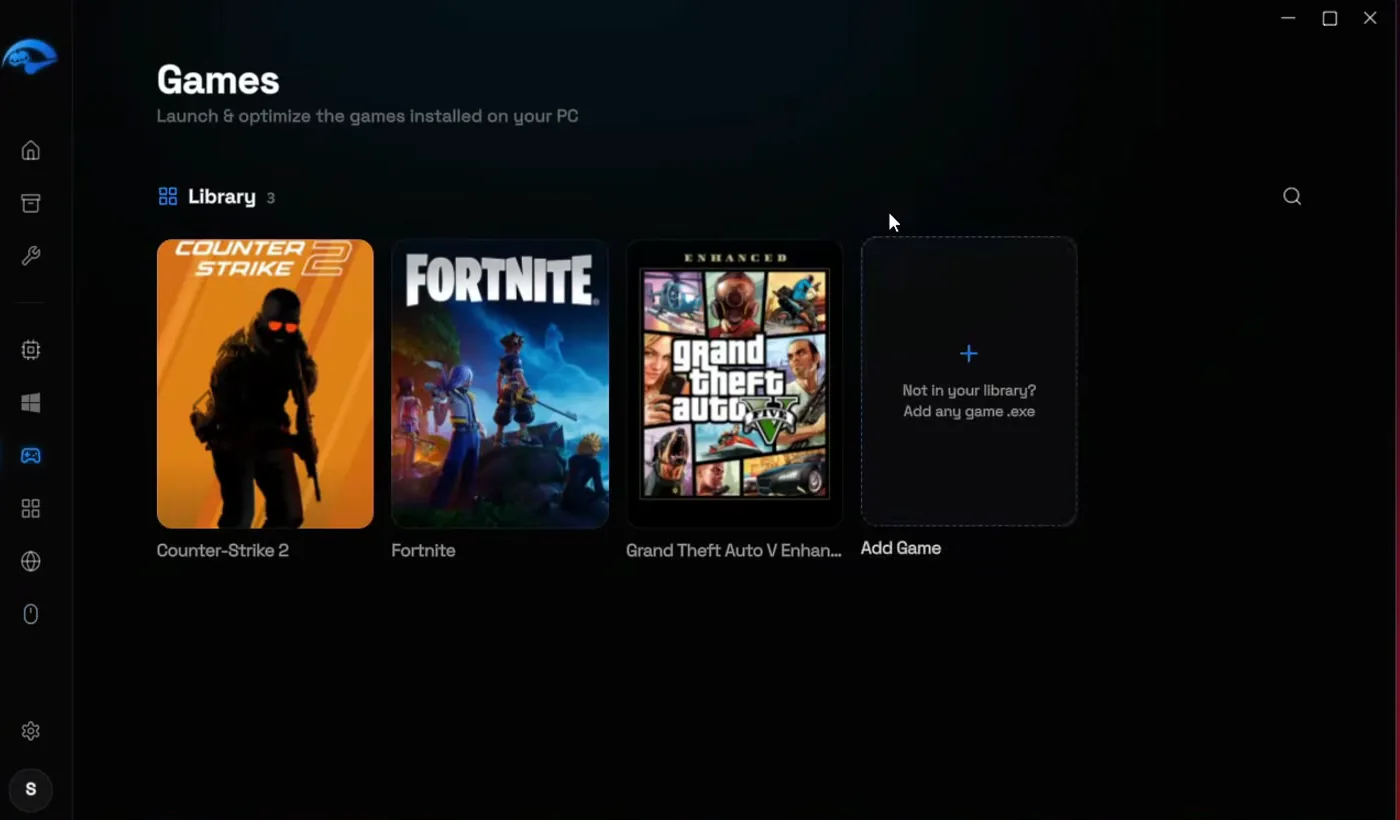
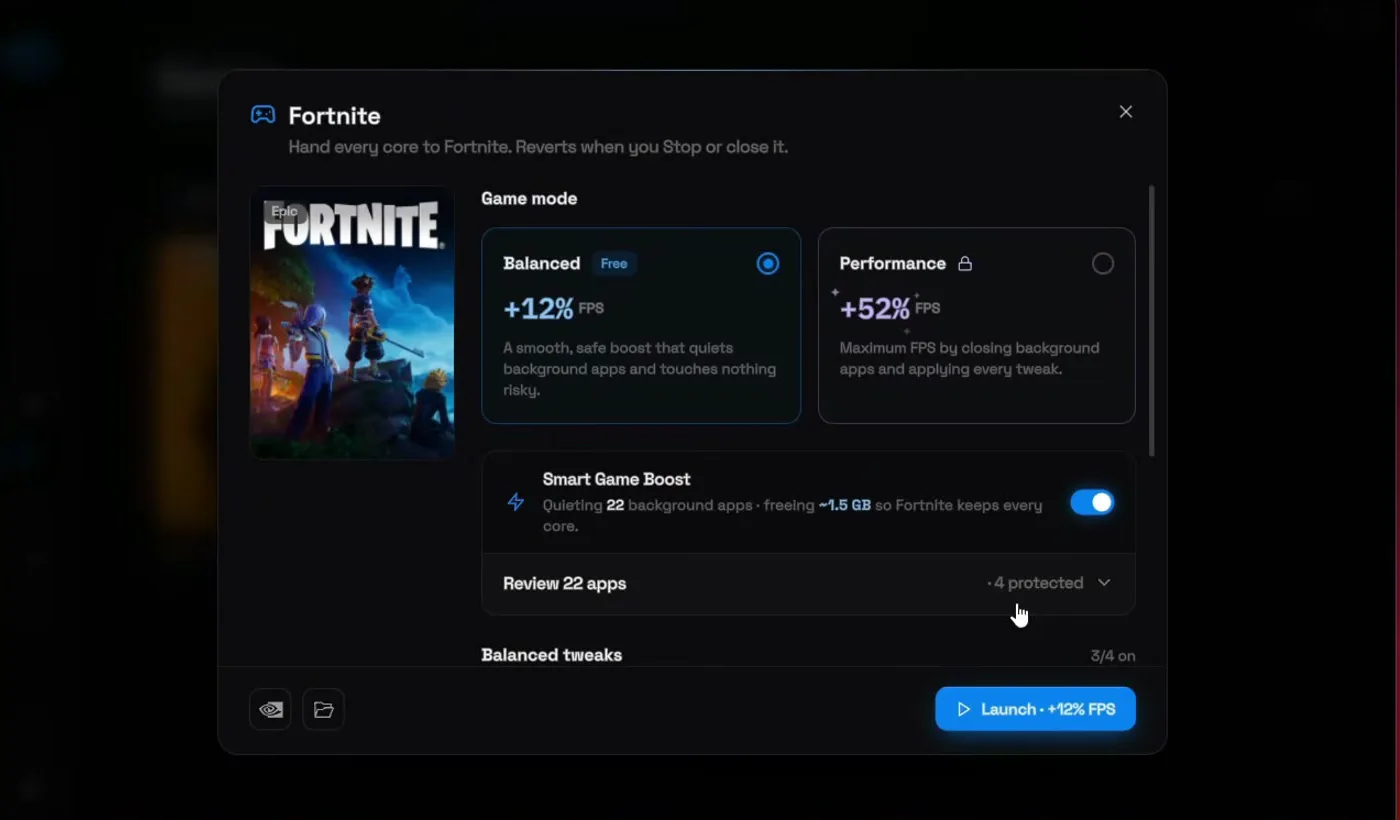
The last section is Games. It lists the games installed on your PC, and Add Game adds any other .exe. Click your game, Fortnite in the video. Smart Game Boost quiets your background apps while you play: on the PC in the video it quiets 22 apps and frees about 1.5 GB of RAM. Its tweaks include GPU Priority, I/O Priority and Purge RAM Cache, which clears cached standby memory before the launch.
Keep the game mode on Balanced and click Launch. RIP Tweaks starts Fortnite for you with these settings, the RAM freed up and all the PC tweaks in place. Everything reverts when you stop or close the game.
GamesFortniteBalancedLaunch
Good to know
The Performance mode and the NVIDIA profiles shown next to it (such as the FPS boost profile) are part of Premium. Everything else in this guide is shown with the free version.
How to check it worked
- Press Ctrl+Shift+Esc, open Performance and note the Processes number before you start. Compare it after the restart.
- Look at the cards in RIP Tweaks: every applied tweak shows Active, and the Startup Programs list says No startup applications found.
- Play a few matches and watch your FPS and its 1% lows, not just the average, plus your ping with something downloading in the background if you used the bufferbloat tweak.
- If something you use stopped working (printing, Bluetooth, a startup app), switch that one tweak off or use Restore on your Before Tweaks backup.
Key settings at a glance
FAQ
How do I optimize my PC for gaming for free?
Follow the steps above with the free version of RIP Tweaks: CPU and GPU tweaks, the NVIDIA clean install, RAM, Windows and startup apps, the power plan, network, bufferbloat, polling rate and the Balanced game launch. Only the Advanced and Custom debloat, the Performance mode and the NVIDIA profiles are Premium.
How do I reduce background processes in Windows 11?
Disable the startup apps, turn on Disable Background Apps, debloat the preinstalled apps and telemetry, then restart. On the PC in the video that took Task Manager from 159 to 69 processes.
Is it safe? Can I undo everything?
Yes. Make the Before Tweaks backup first, as in the video. Any single tweak switches off again on its card, the startup apps come back with Restore, and the backup's Restore button resets the whole PC.
Does this lower ping?
The network tweaks clear built-up cache and trim Windows networking overhead, and Ultra-Low Bufferbloat keeps ping steadier when your connection is busy. How much it helps depends on your connection; test your ping in a real match before and after.
What polling rate should my mouse use for gaming?
1000 Hz, as set in the video, if your mouse supports it. The Polling Rate Optimizer picks the best rate your device can run, so you don't need to know it in advance.
Do I need to do every step?
No, each section stands on its own. For high ping start with Network and bufferbloat, for input lag with Input Lag, for stutter and low FPS with Windows, Power and Debloat.
Does it work on AMD or Intel graphics cards?
Yes. The GPU page has NVIDIA, AMD and Intel filters with tweaks for each. The NVIDIA Debloat clean install is for NVIDIA cards only.
Does RIP Tweaks change my game files?
No. It tunes Windows and your hardware and starts the game for you; the game itself stays as it is. For a deeper Fortnite setup, see our Fortnite FPS, input delay and ping guide.
 RIP Tweaks
Do it in a few minutes with RIP Tweaks
- Free plan for Windows 10 and 11
- A backup first, and every tweak can be switched off again
- Made for higher FPS, lower input lag and steadier ping
Free · Windows 10 and 11
