Best CS2 Settings for FPS and PC Tweaks for Less Input Lag (2026)

Written version of our video, every step checked against it.
Quick answer
- Install RIP Tweaks and create a backup first, so every change can be undone.
- Tweak the hardware: your CPU brand, GPU tweaks, RAM size, BIOS and NVMe Power Saving Off.
- Set Win32 Priority Separation to
18hex, switch on the Windows and power tweaks, then debloat Windows. - In Games, open CS2, run the NVIDIA Profile Inspector profile and launch with a game mode.
- In CS2: Fullscreen, highest refresh rate, V-Sync off, Reflex Enabled + Boost, lowest quality, then
fps_max 999.
This guide is for CS2 players who want more FPS and less input lag without guessing which setting matters. It follows our video step by step: first the PC (hardware, Windows, power and debloat in RIP Tweaks), then the CS2 launch with a game mode, then the video settings and the one console command. On the PC in the video, a gaming laptop with a Ryzen 7 7435HS and an RTX 4060 Laptop GPU, this routine doubled the FPS.
In this video
Get RIP Tweaks from riptweaks.com or, as in the video, from the free tweaks channel on the RIP Tweaks Discord (discord.gg/riptweaks). Click download, save the file and run the installer. When it opens, create your account with a username, e-mail and password, and fill out the short questionnaire.
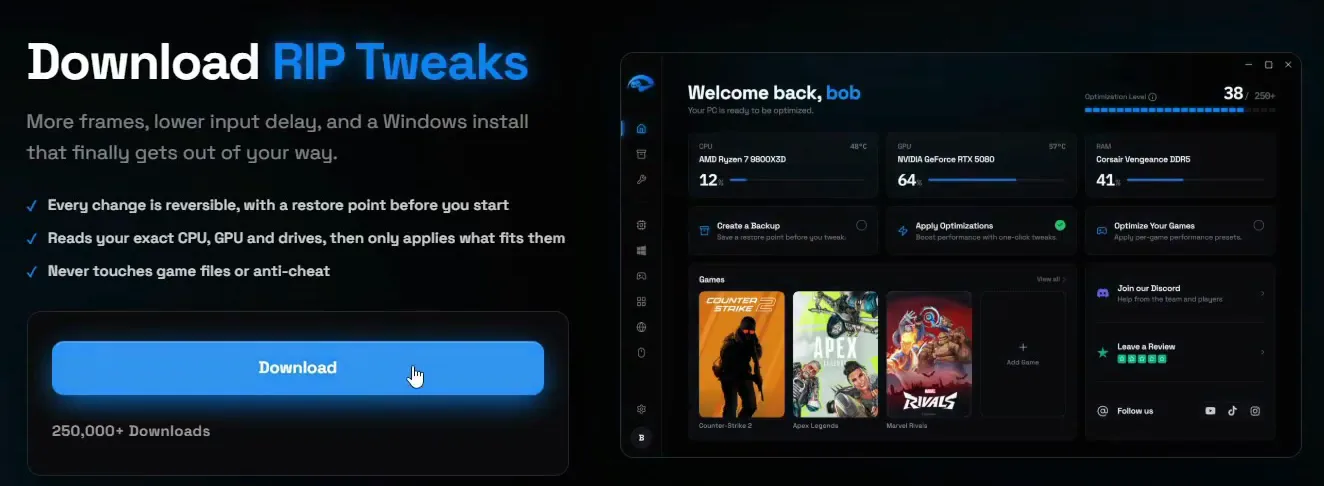
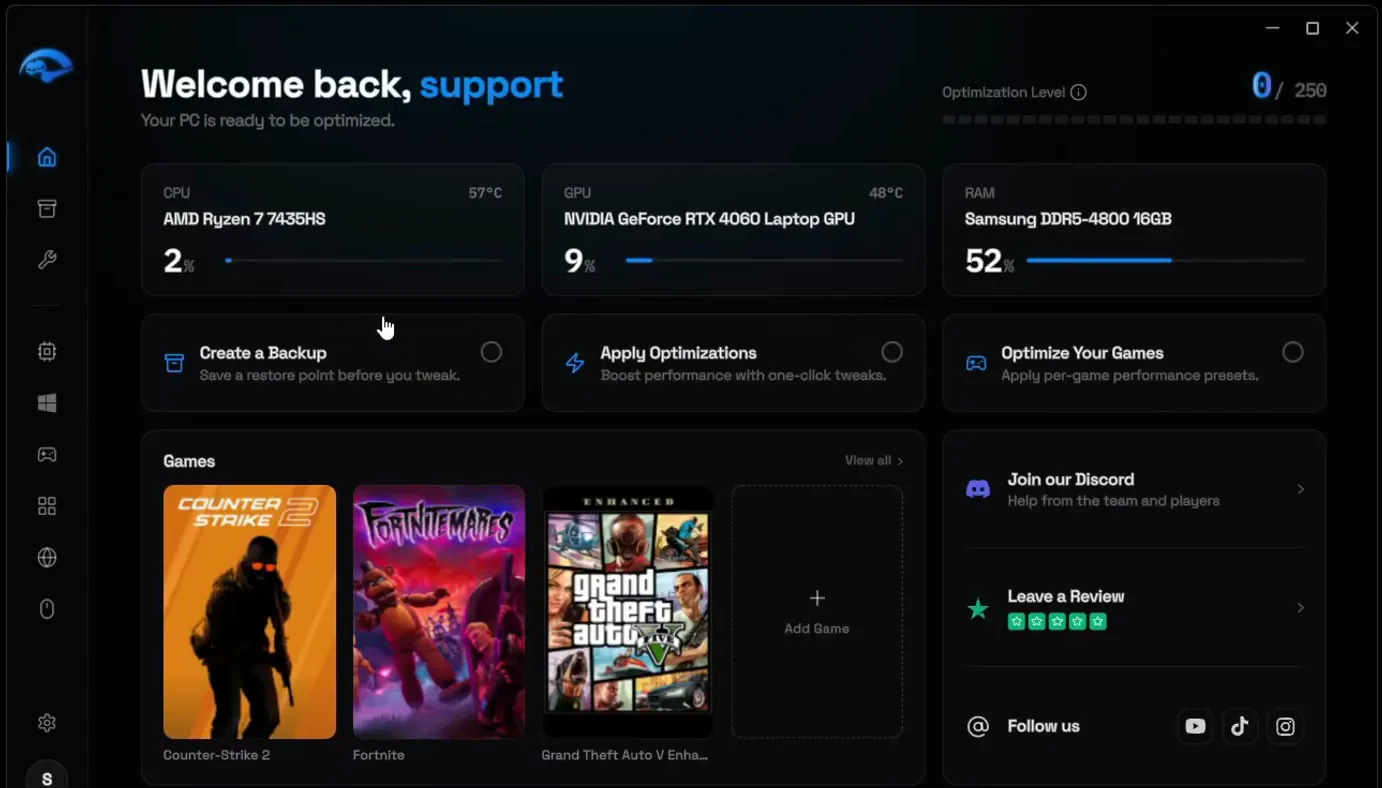
Before you change anything, open the backup section, click Create new, name it (the video simply types "backup") and click Create. Wait until it finishes.
BackupsCreate newName itCreate
Good to know
The backup is your safety net for everything below. Every tweak can also be switched off on its own later, but the backup brings the whole PC back in one go. More on it in creating a restore point.
Open Hardware. It has six cards: CPU, GPU, RAM, BIOS, Drives and Fans. The video goes through them from left to right.
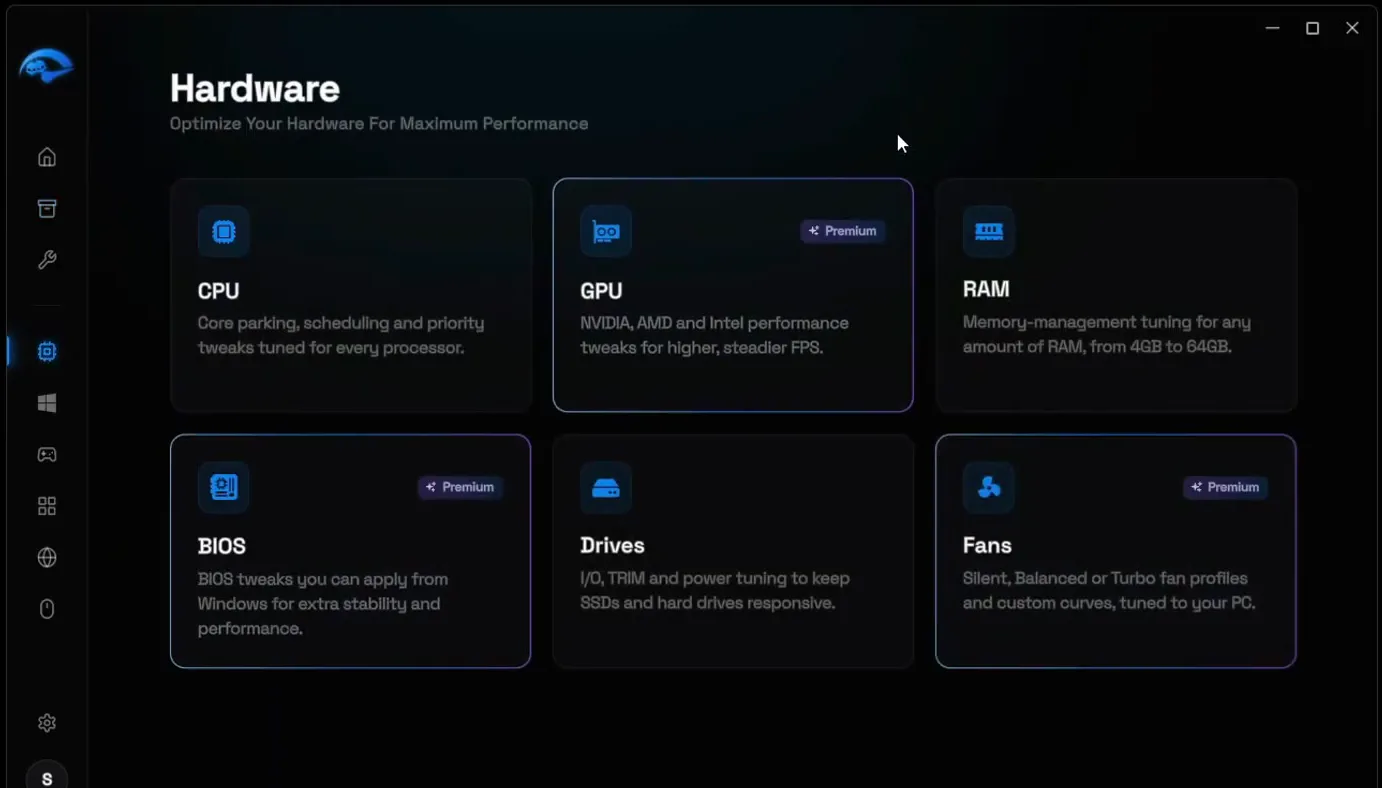
In CPU, click Activate on the card for your processor brand. The video uses an AMD CPU, so it activates AMD CPU, then also activates Prefer Performance Cores. Go back, open GPU and pick NVIDIA, AMD or Intel to match your graphics card. With an NVIDIA card, the video switches on every tweak on the page, such as Enable MSI Mode and the NVIDIA GPU optimization.
HardwareCPUAMD CPU or Intel CPUActivate
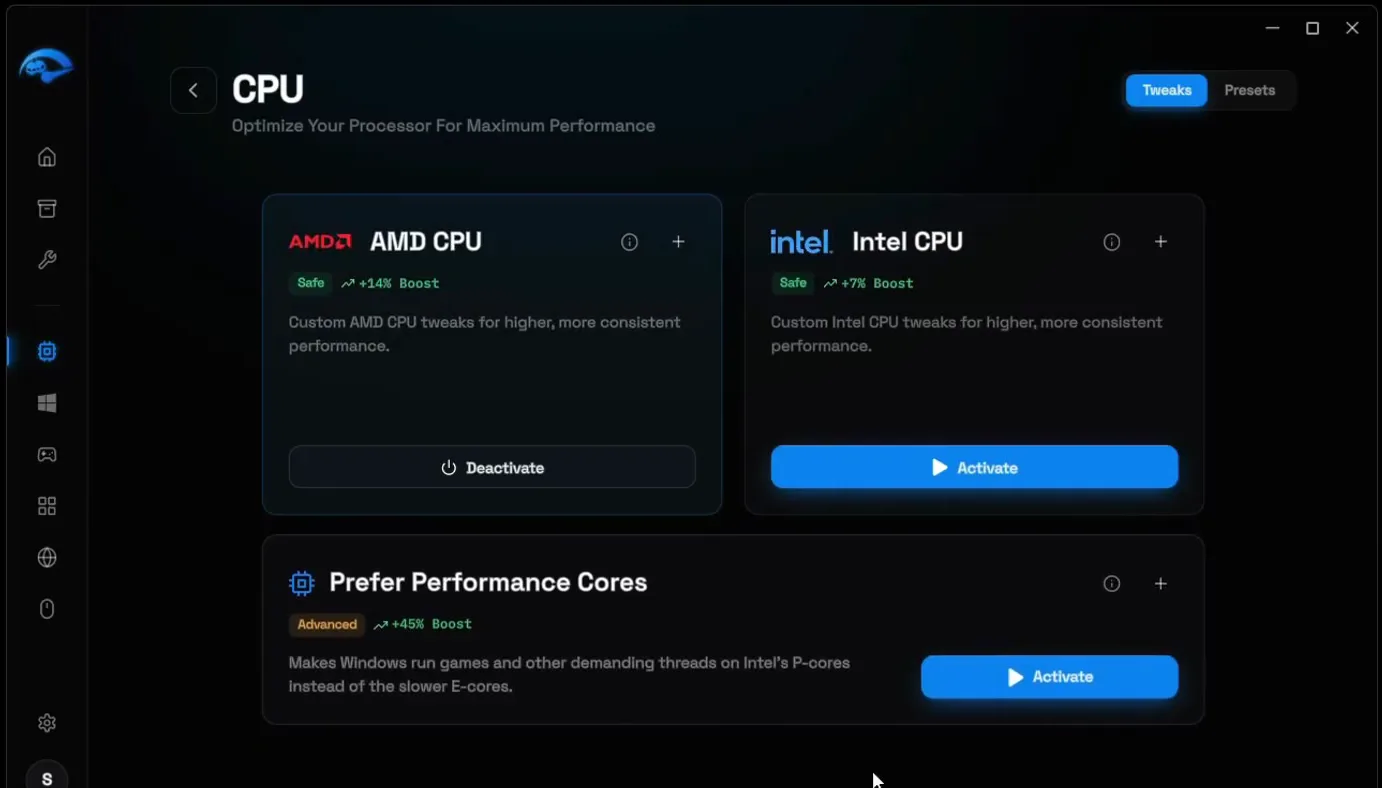
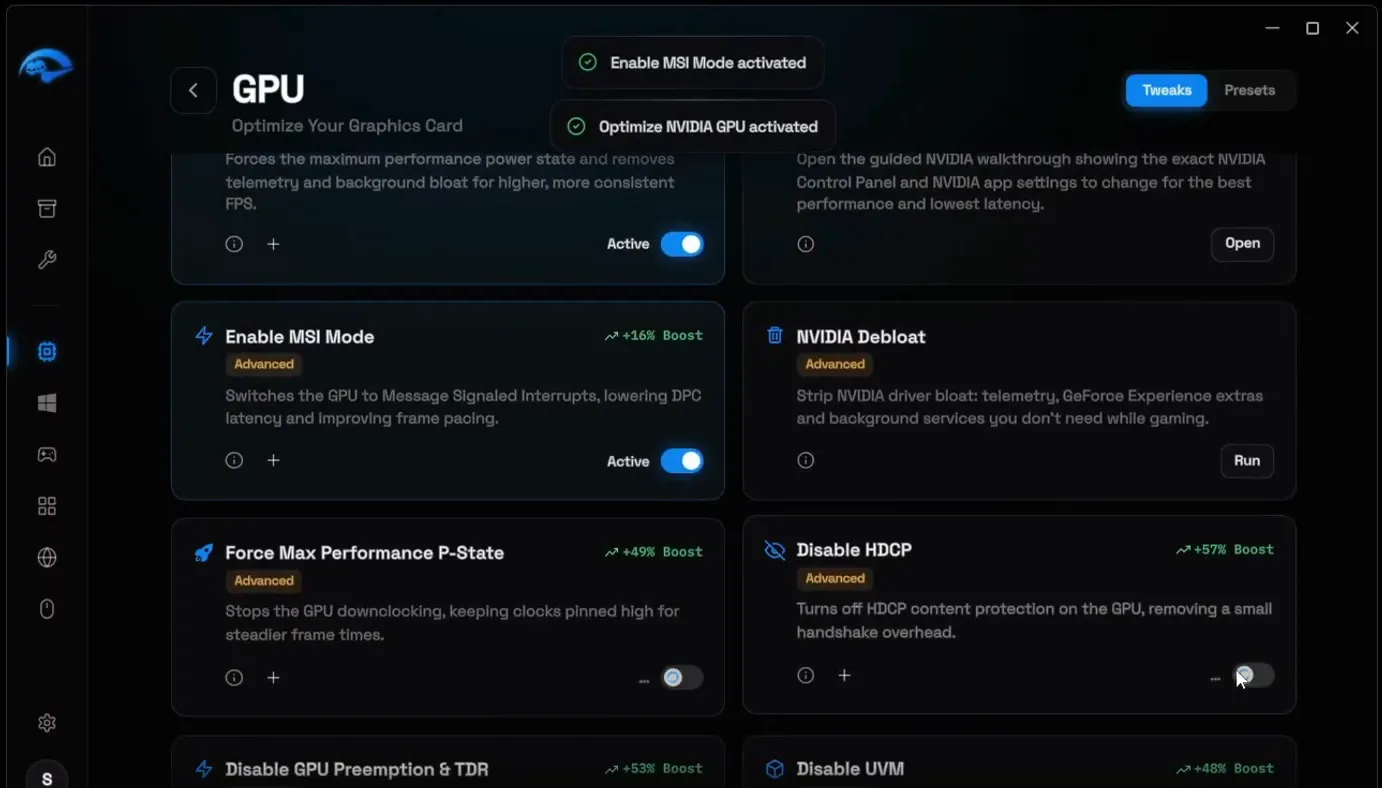
Tip
Activate only the card that matches your hardware: AMD CPU tweaks on an AMD processor, NVIDIA GPU tweaks on an NVIDIA card. The CPU tweaks guide explains each one.
Go back and open RAM, click Optimize RAM and choose how much memory your PC has. The window shows the RAM it detected (Samsung DDR5-4800 16GB on the PC in the video), so the video picks 16 GB and clicks Apply.
HardwareRAMOptimize RAM16 GBApply
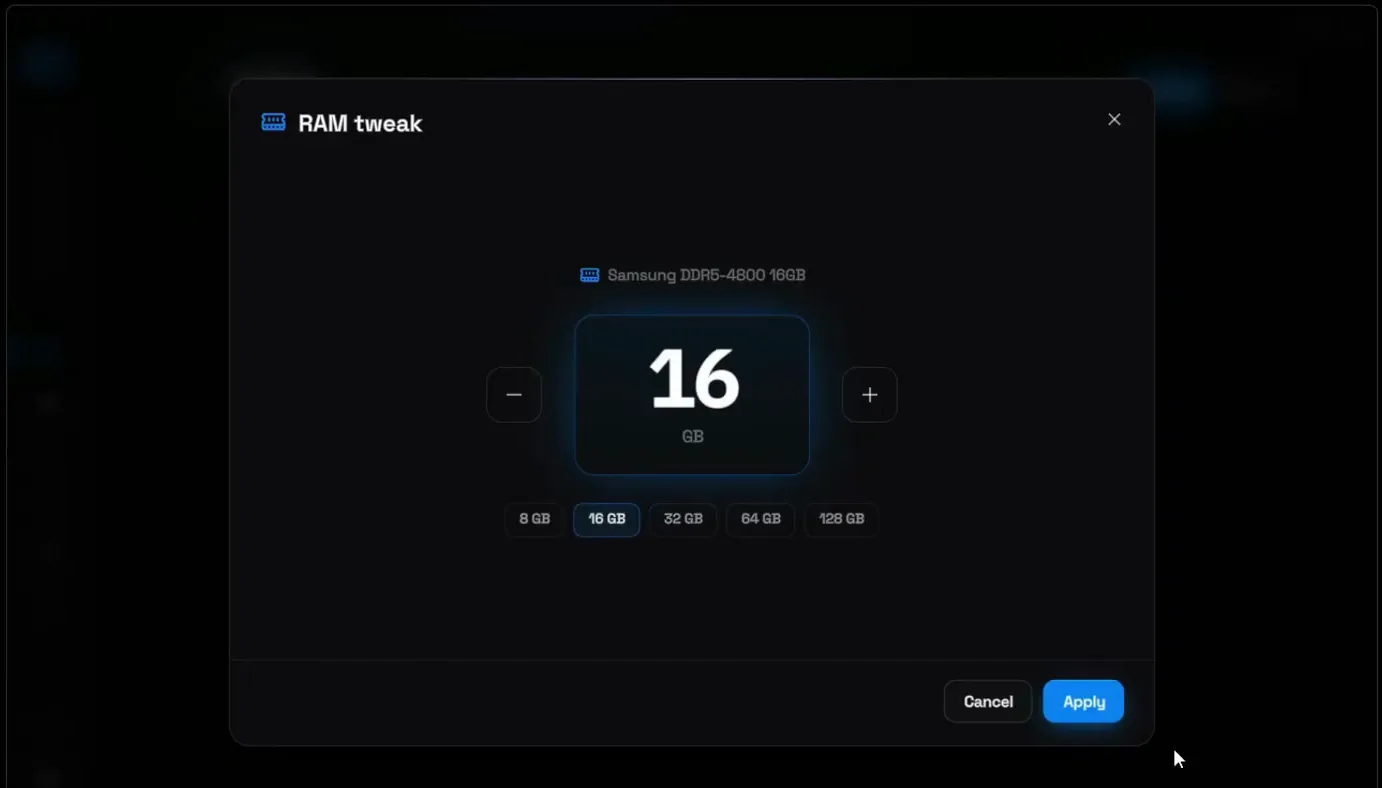
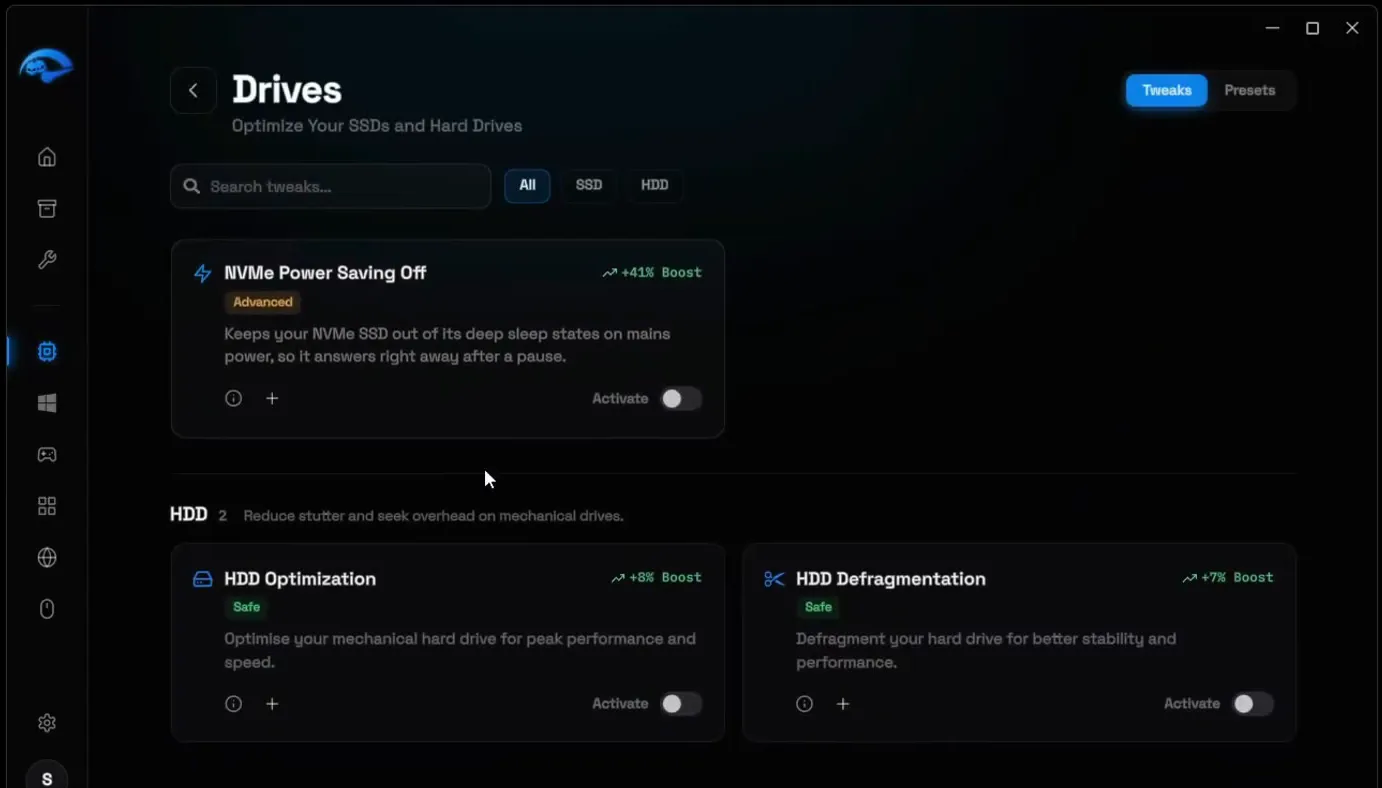
Next, open BIOS, then BIOS tweaks, and click Activate. Last in this section is Drives: choose what you have. The video has an SSD, so it turns on SSD optimization and NVMe Power Saving Off. On a mechanical hard drive, the HDD tweaks below are the ones for you. Our drives guide covers what each one does.
Open Windows. Under System Optimizations, find Win32 Priority Separation, click Adjust, choose the 18 hex value and click Apply. This tunes how Windows splits processor time between the game in front and the apps behind it.
WindowsWin32 Priority SeparationAdjust18 hexApply
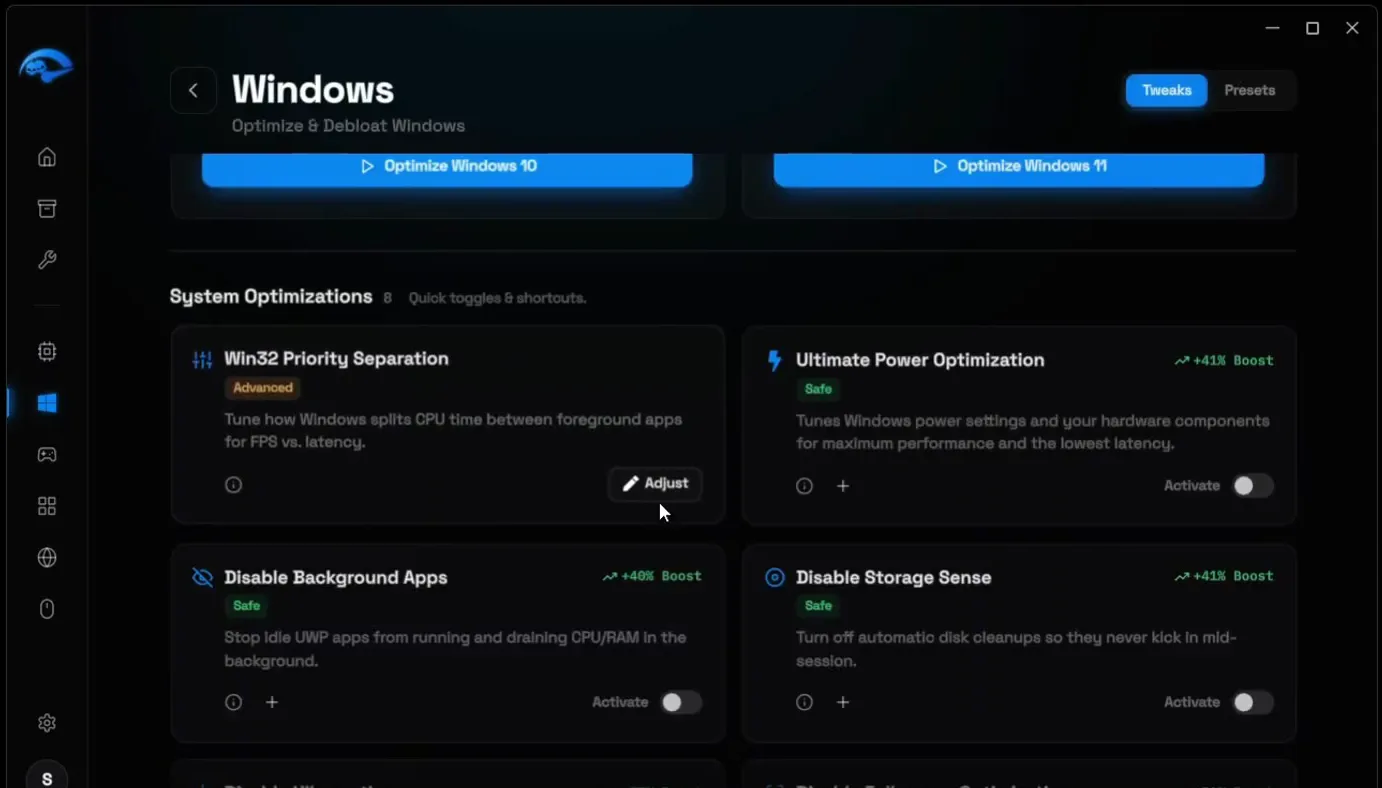
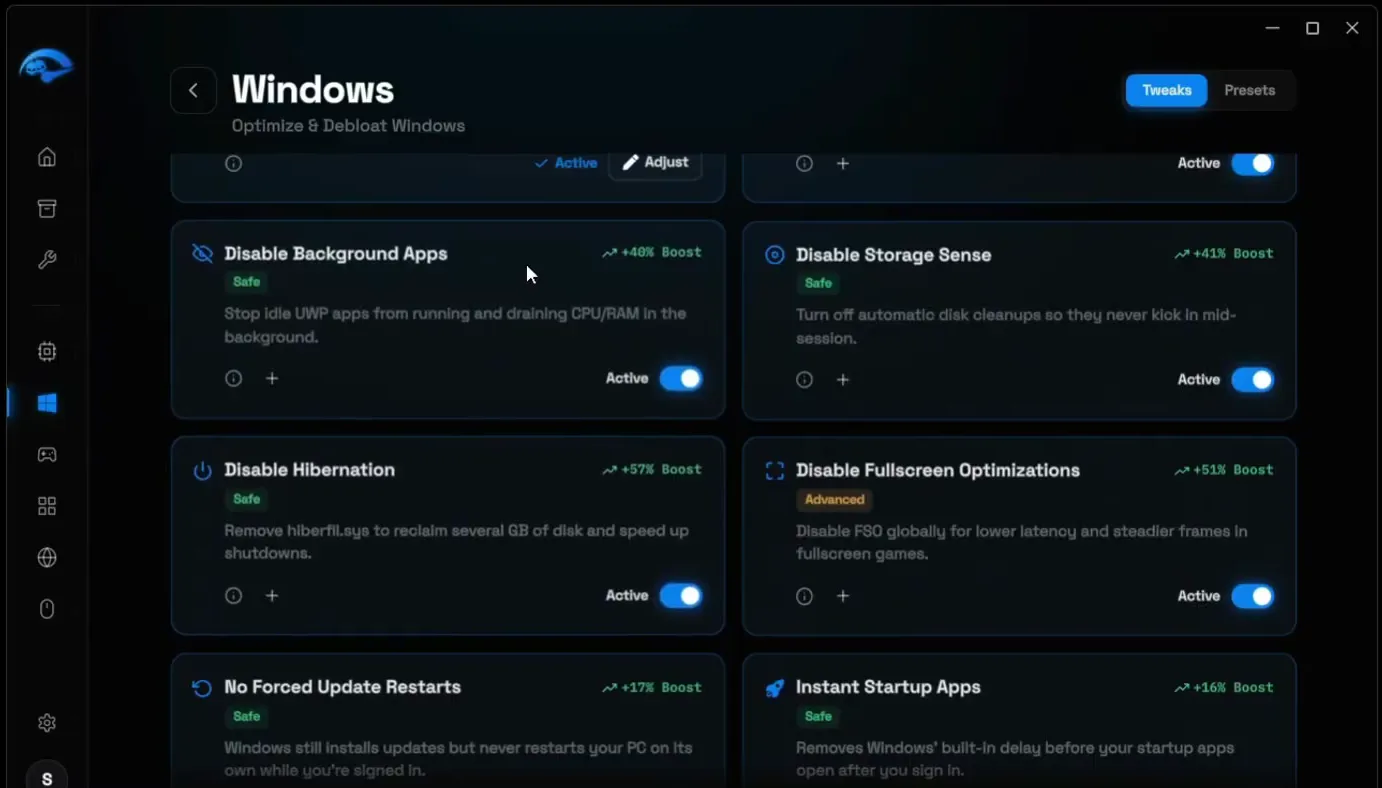
Then tick every option on that page, including Disable Background Apps, Disable Storage Sense, Disable Hibernation and Disable Fullscreen Optimizations, so idle apps stop running while you play. Go back, open Power and set its four tweaks to on. The video then clicks Edit on the last option, sets it to off and clicks Apply.
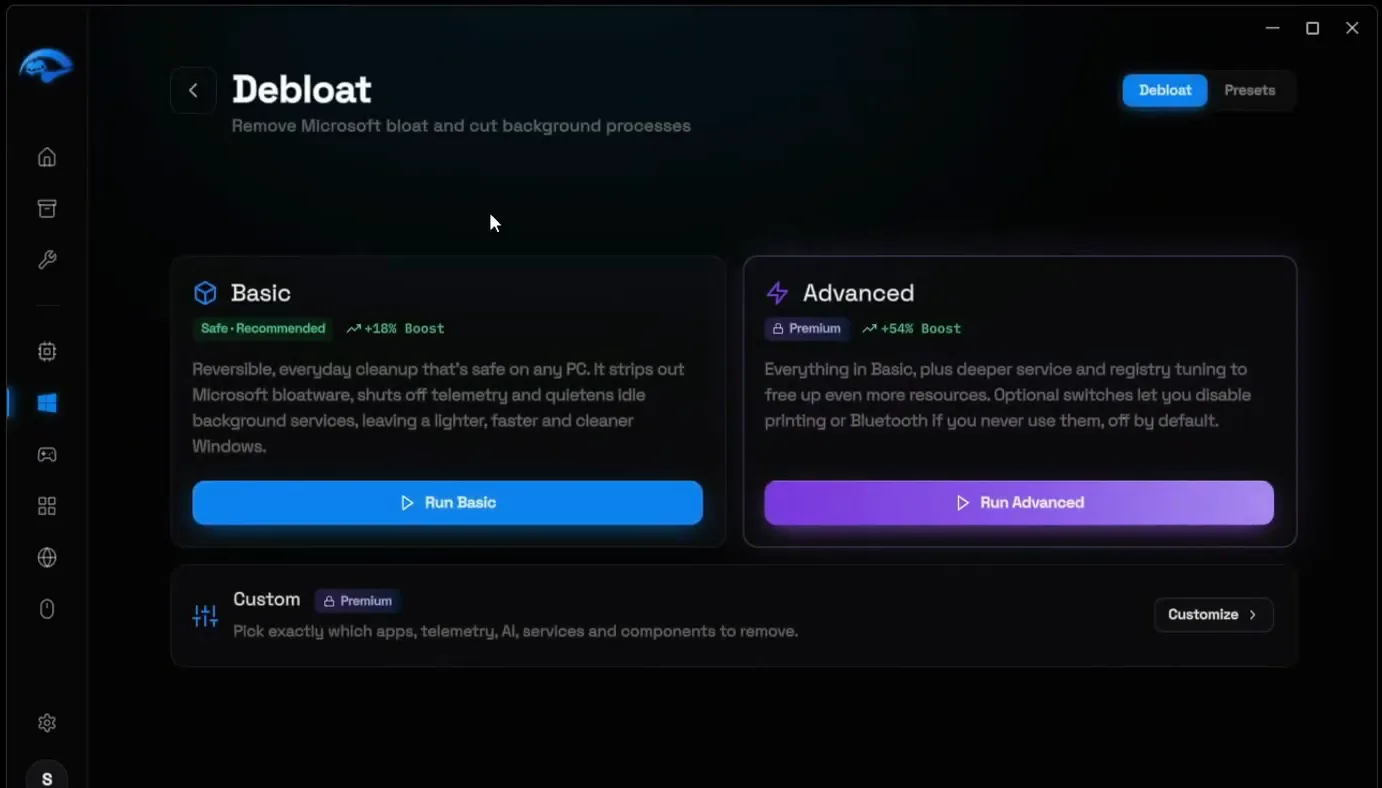
Go back and open Debloat. There are three ways to run it: Basic (free, marked Safe and Recommended), Advanced and Custom (both Premium). Basic is a reversible cleanup that is safe on any PC. Custom lets you pick every item yourself.
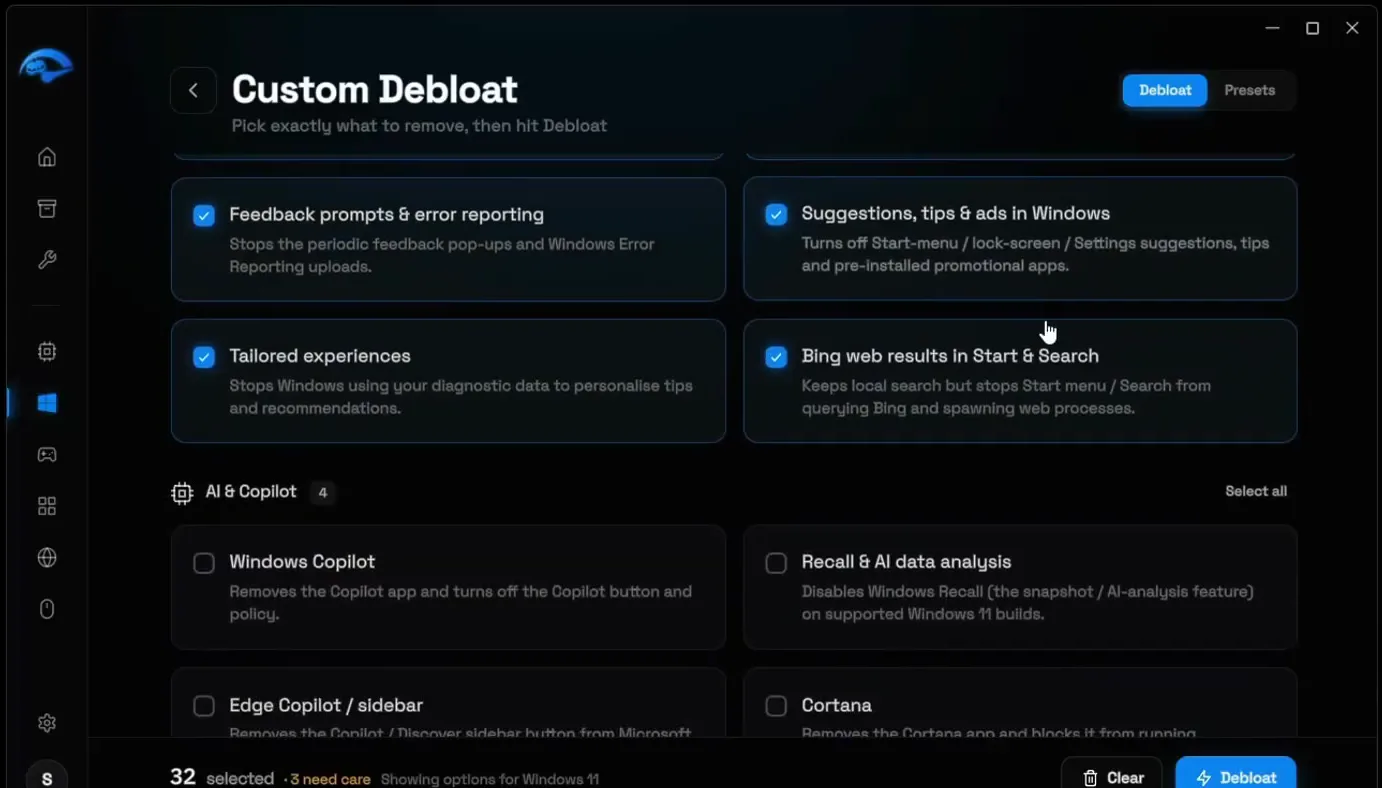
The video uses Custom and selects the Store apps, all telemetry and privacy items, all the AI features (Cortana, Windows Copilot), services it never uses (Xbox services, printing and SuperFetch) and OneDrive. On the PC in the video that came to 51 items. Click Debloat, wait until all items show as completed and close the window.
Careful
Only remove what you really don't use. If you print, play through the Xbox app or keep files in OneDrive, leave those items unticked.
Open the Games section and click Counter-Strike 2 in your library. If you have an NVIDIA card, click the NVIDIA Profile Inspector icon at the bottom left of the CS2 window and click Next. Set Force Resizable BAR to enabled, pick the FPS Boost profile and wait until it says it has finished.
GamesCounter-Strike 2NVIDIA Profile InspectorForce Resizable BAR: enabledFPS Boost
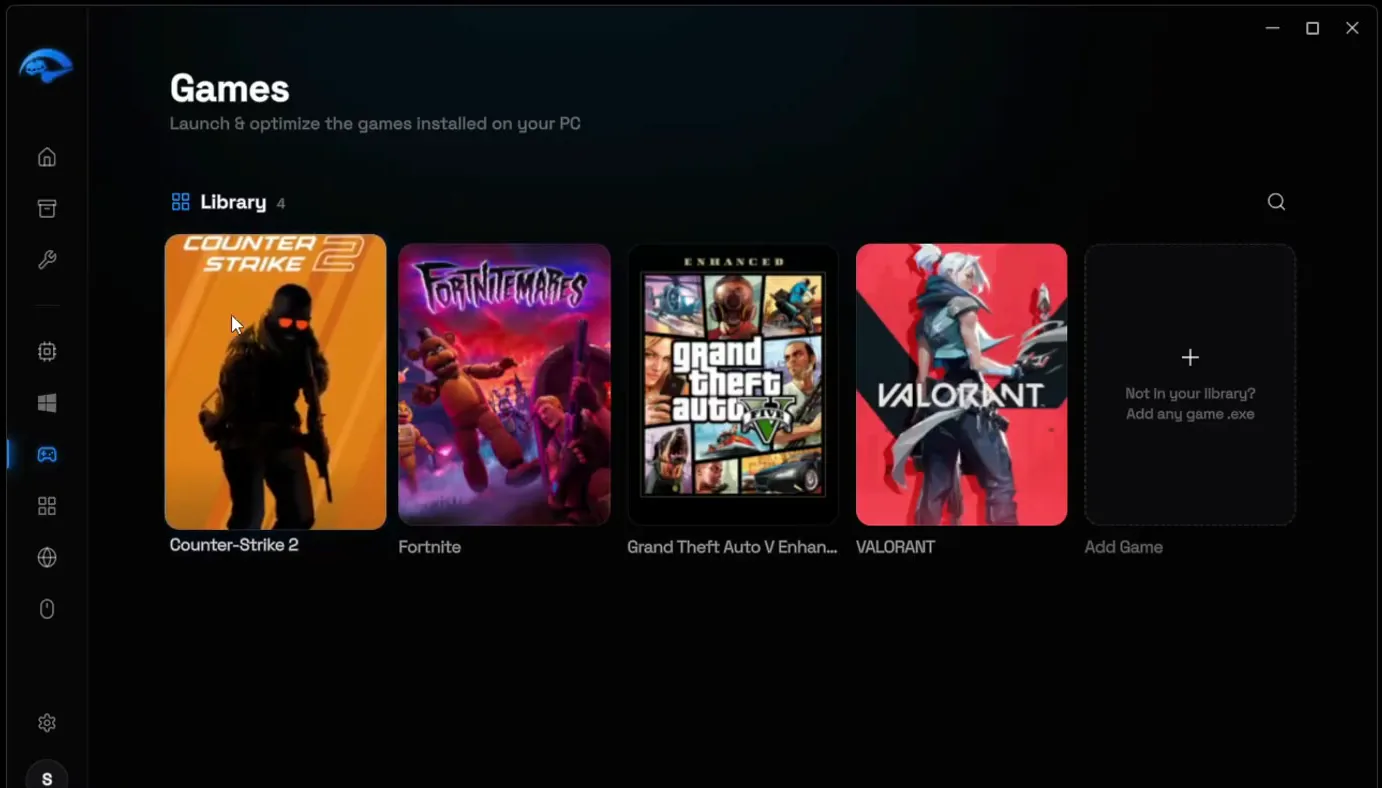
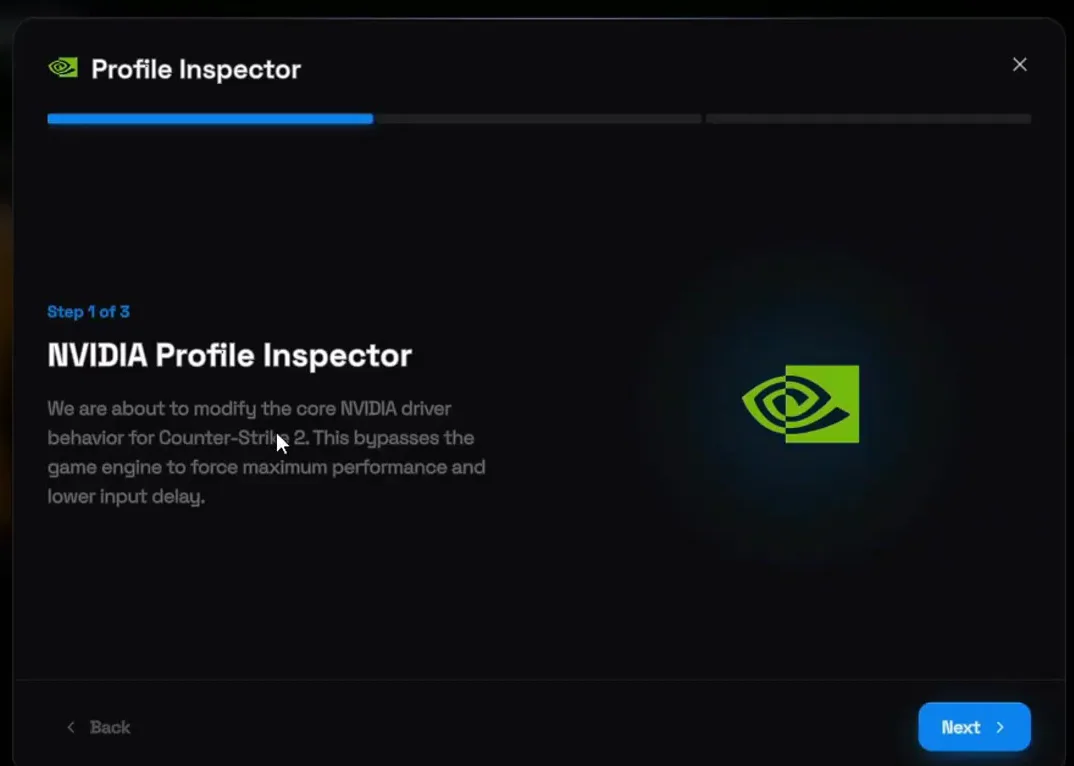
This step is for NVIDIA cards only. On AMD or Intel graphics, skip it and go straight to the game mode. Our NVIDIA settings guide covers the rest of the driver side.
In the same CS2 window you choose a Game mode: Balanced (free) or Performance (Premium). Both quiet your background apps, free up RAM and start the game with tweaks such as GPU priority, I/O priority and purging the RAM cache. Performance applies more of them. Pick one and click Launch, then wait for CS2 to start.
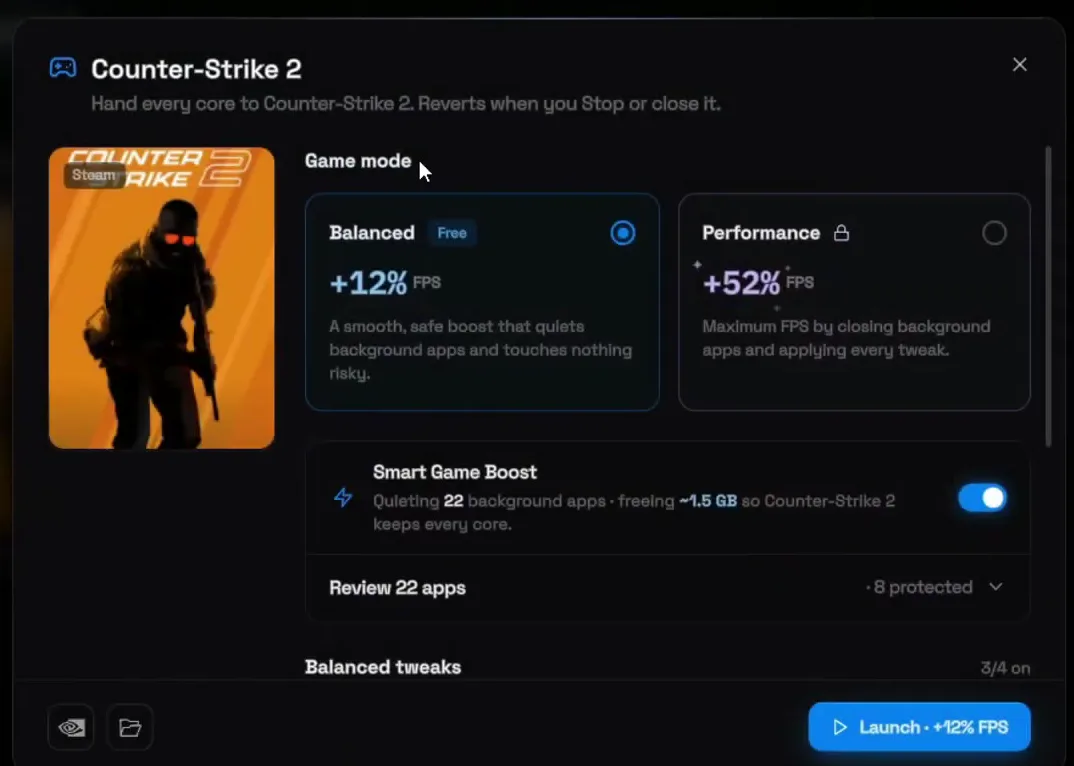
The window says it hands every core to CS2 and reverts when you stop or close the game, so nothing stays changed after your session. On the PC in the video, Smart Game Boost quieted 22 background apps and freed about 1.5 GB of RAM.
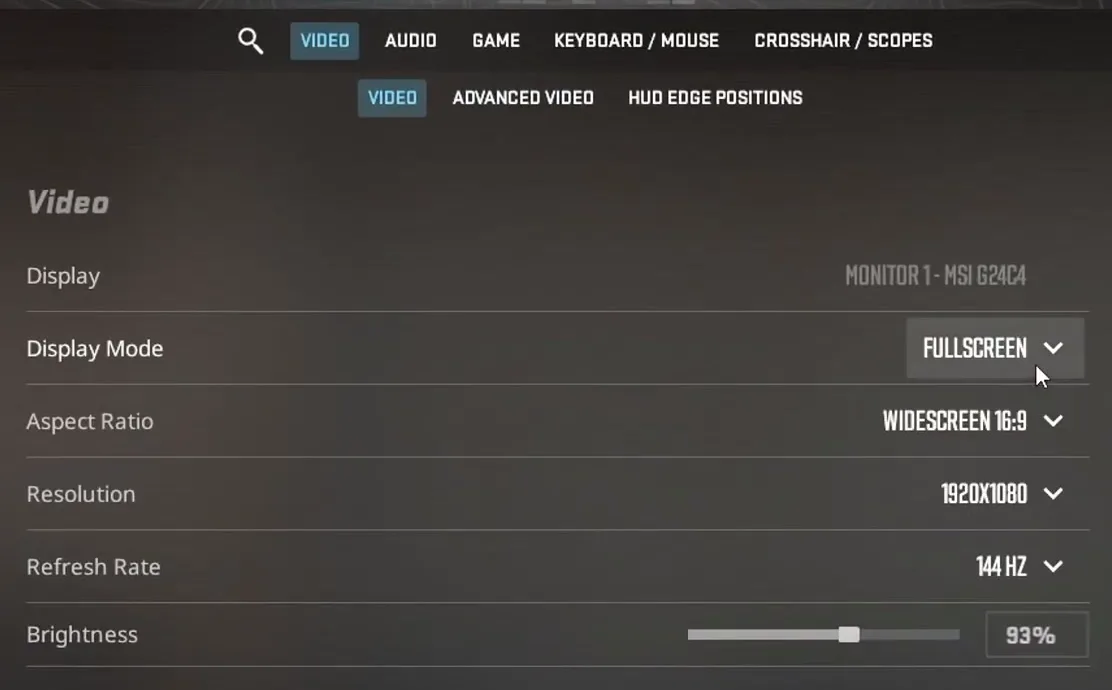
In CS2, open Settings and go to Video. Set Display Mode to Fullscreen and Refresh Rate to the highest your monitor offers (144 Hz on the PC in the video).
SettingsVideoDisplay Mode: FullscreenRefresh Rate: highest
Then open Advanced Video. Set V-Sync to Disabled, NVIDIA Reflex Low Latency to Enabled + Boost, and the quality settings below to their lowest options.
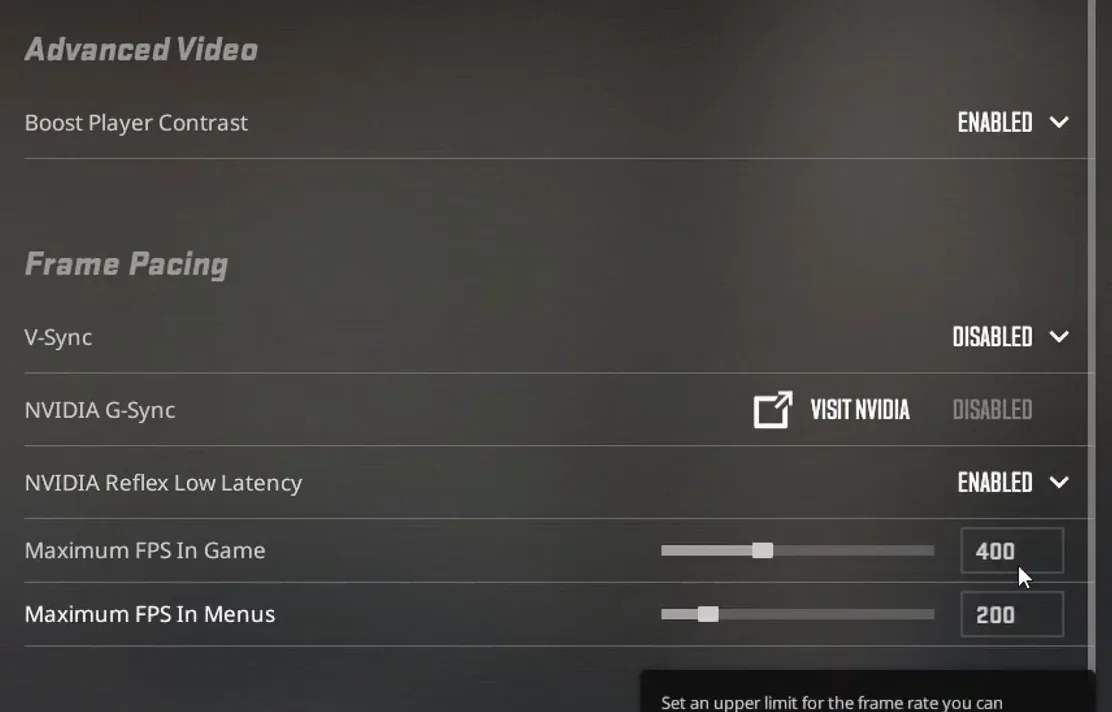
Last, open the console and type fps_max 999, then press Enter. That lifts the frame cap so it no longer holds the game back. Fullscreen and V-Sync off let frames reach the screen without waiting, and Reflex keeps the queue of frames short, which is what lowers input lag.
Tip
If the console does not open, go to Settings, Game and set Enable Developer Console (~) to Yes. Then press the ~ key.
How to check it worked
Compare before and after in the same place so the numbers mean something:
- Turn on the frame rate display in CS2 (Settings, Game, Telemetry) and note your FPS on one spot of one map, for example a practice match on Dust II, before you start.
- After all the steps, launch CS2 through RIP Tweaks with your game mode and stand on the same spot. Watch the lows and how often the number dips, not only the top value.
- Check that the Advanced Video settings stayed as you set them and that the console accepted
fps_max 999without an error.
How to undo it
To undo a single tweak, switch it off again in RIP Tweaks. To undo everything, restore the backup you made in the first step. CS2 settings change back in the game menu.
Key settings at a glance
FAQ
What are the best CS2 settings for FPS?
The ones from the video: Fullscreen, your monitor's highest refresh rate, V-Sync disabled, NVIDIA Reflex Low Latency on Enabled + Boost, the quality settings in Advanced Video on their lowest options and fps_max 999 in the console.
Is fps_max 999 better than fps_max 0?
Both take the frame cap out of the way. The video uses 999, which is high enough that the cap is no longer what holds the game back on almost any PC, while still being a number you can see and change later.
Should NVIDIA Reflex be Enabled or Enabled + Boost?
The video sets Enabled + Boost. Reflex keeps the queue of frames short so your clicks reach the screen sooner, and Boost also keeps the graphics card clocked up. The option only shows up on NVIDIA cards.
Does V-Sync cause input lag in CS2?
It can: V-Sync makes each frame wait for the monitor, which adds delay. That is why the video turns it off and uses Reflex instead.
Which steps are free?
RIP Tweaks is free to download, Basic debloat is free and the Balanced game mode is marked Free. In the video, the GPU and BIOS cards, Advanced and Custom debloat and the Performance game mode carry the Premium badge, so check the badge on each card in your app.
Does this work with an AMD or Intel graphics card?
Yes, except for two parts: the NVIDIA Profile Inspector and the Reflex setting are for NVIDIA cards. In the GPU section, pick the AMD or Intel tweaks instead. Everything else in this guide is the same.
Can I undo the tweaks?
Yes. Each tweak switches off on its own in RIP Tweaks, the game mode reverts when you close CS2, and the backup from the first step brings the whole PC back.
Does RIP Tweaks change CS2's game files?
No. RIP Tweaks tunes Windows and your hardware settings and does not edit game files. The CS2 video settings and fps_max 999 are set by you in the game itself. For launch options and network settings, see our CS2 FPS boost and input lag guide.
 RIP Tweaks
Do it in a few minutes with RIP Tweaks
- Free plan for Windows 10 and 11
- A backup first, and every tweak can be switched off again
- Made for higher FPS, lower input lag and steadier ping
Free · Windows 10 and 11
