Fortnite Chapter 6 FPS Boost and Input Delay Settings (Season 1 Guide)

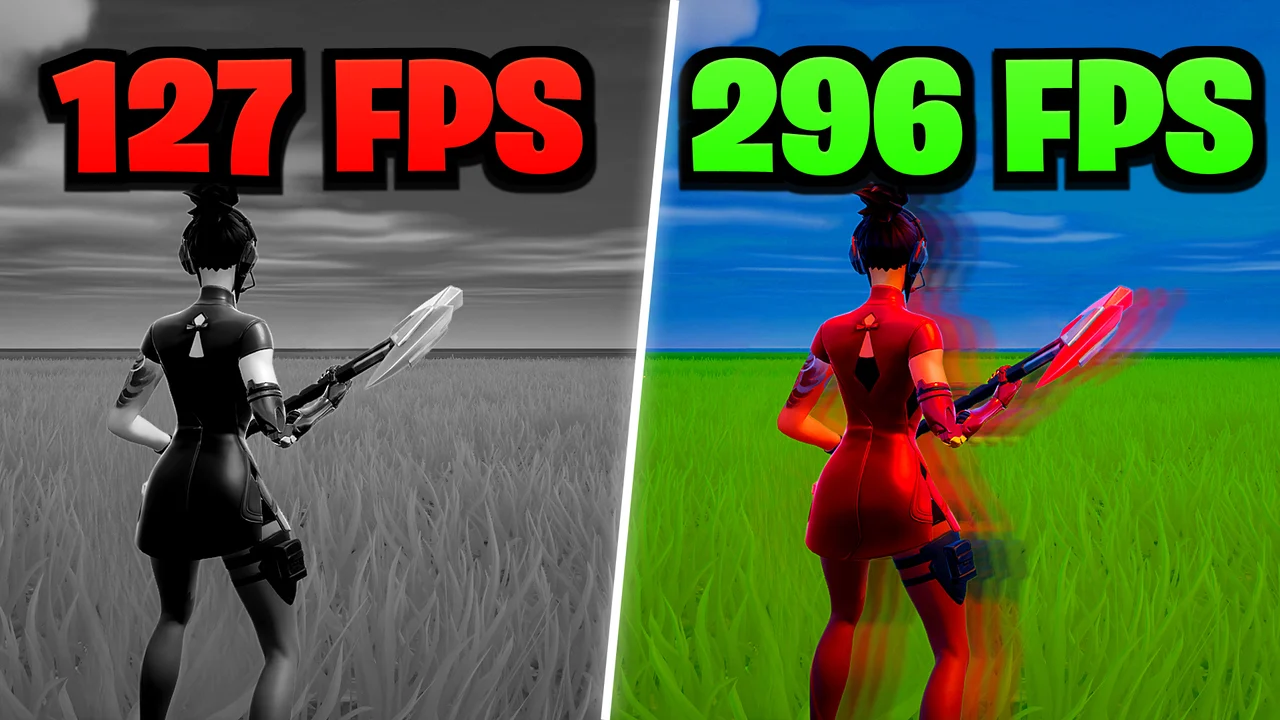
Written version of our video, every step checked against it.
Quick answer
- Create a restore point first, then turn off High Resolution Textures in the Epic Games Launcher options for Fortnite.
- Replace your
GameUserSettings.iniin%localappdata%\FortniteGame\Saved\Config\WindowsClientwith the one from the free pack. - In Fortnite, use Performance - Lower Graphical Fidelity (or DirectX 11), set 3D Resolution to 85% and NVIDIA Reflex Low Latency to On + Boost.
- Run the free pack as administrator and use the input delay, keyboard, mouse, RAM and Fortnite options.
- Finish in Windows: Game Mode and GPU scheduling on, background apps and startup apps off, Adjust for best performance in the visual effects.
This guide is for anyone who plays Fortnite Chapter 6 on a Windows PC and wants more FPS and less input delay. It follows our video step by step: the safe backup, the Fortnite settings file and in-game video settings, the free tweaking pack from our Discord, and the Windows settings that finish the job. In the intro of the video, Leon says this took his PC from 300 to 600 FPS. Your result depends on your hardware.
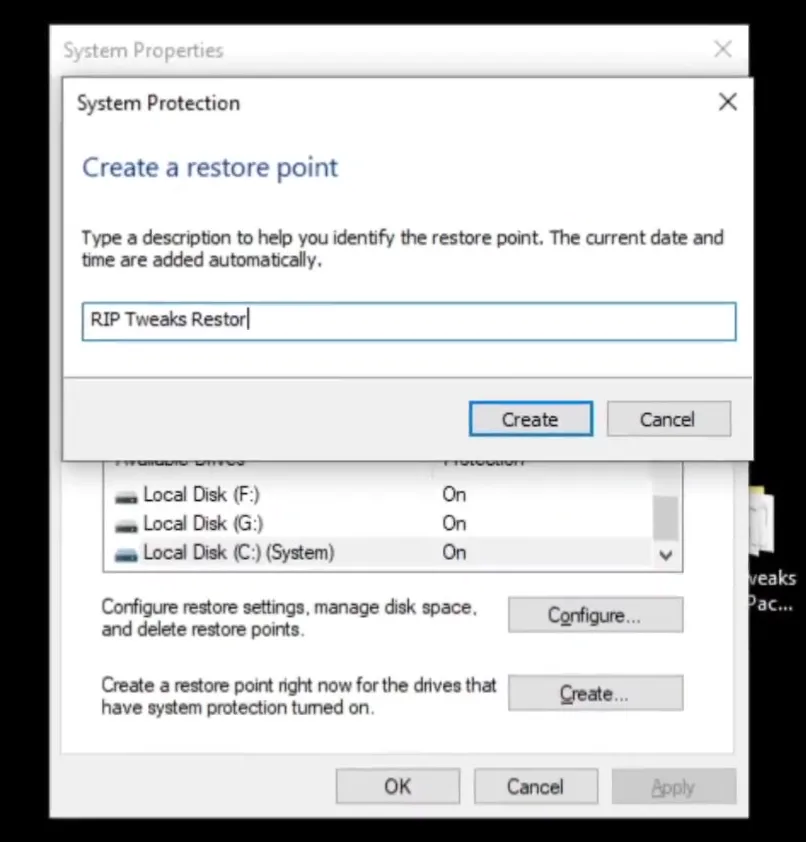
Everything after this changes Windows or Fortnite files, so make the backup before you start. Type create a restore point into the Windows search bar and open the result. In the System Protection window, click Create, type any name you like (the video uses "RIP Tweaks Restore") and click Create again. Wait until Windows says it finished.
Search: create a restore pointSystem ProtectionCreateName itCreate
How to undo it
If a tweak ever makes the PC behave badly, open System Restore from the same System Protection window and pick this restore point to go back.
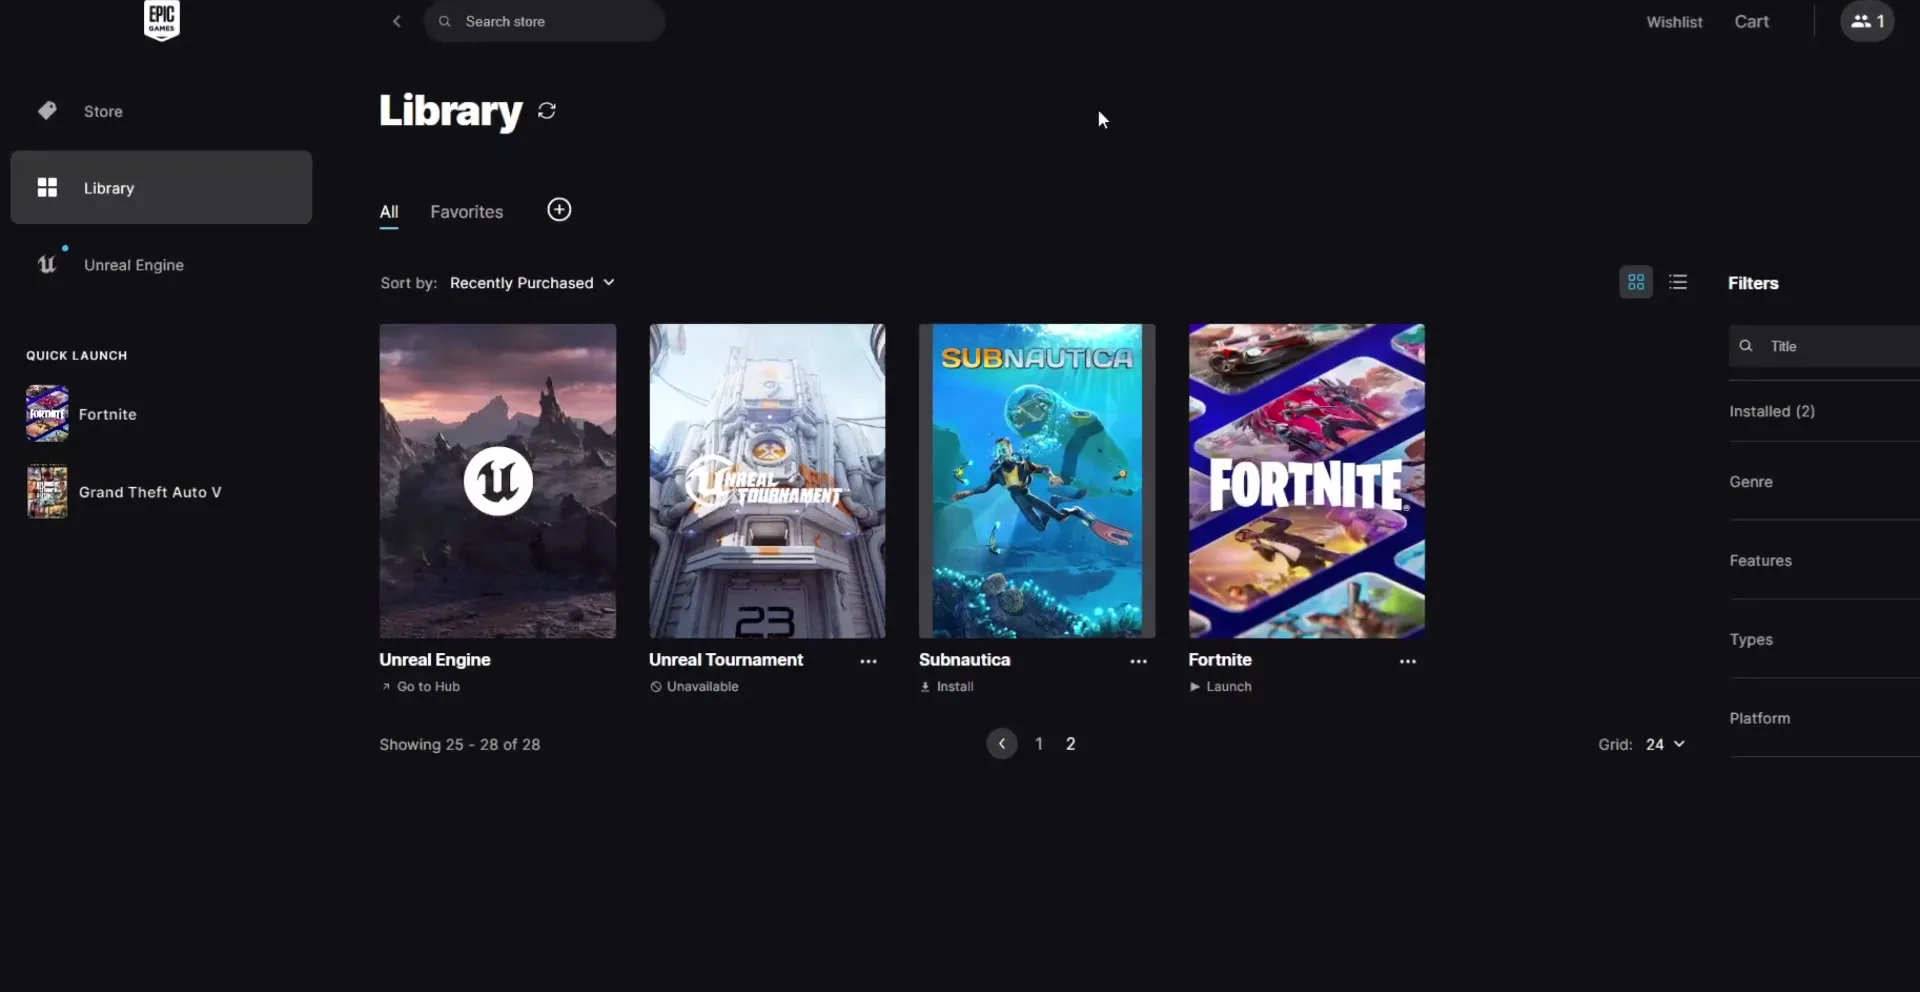
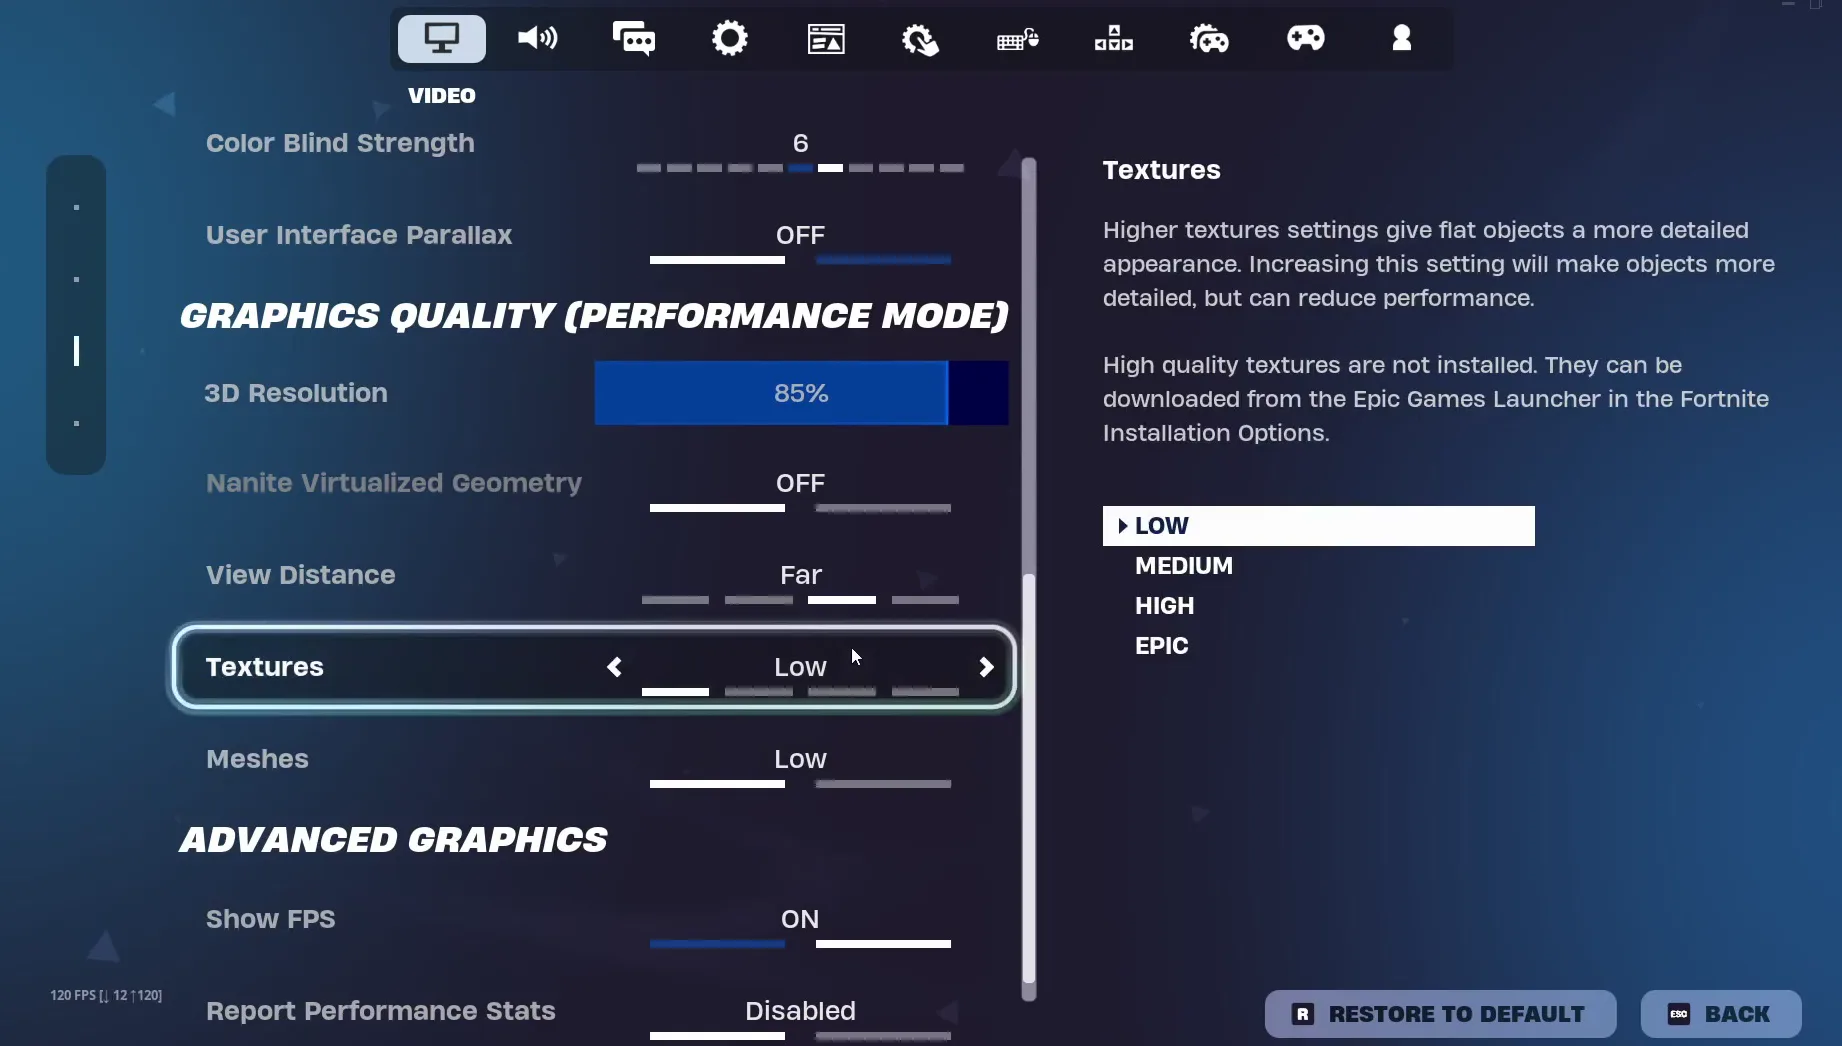
Open the Epic Games Launcher and go to your Library. Find Fortnite, click the three dots under it, choose Options and uncheck High Resolution Textures. Fortnite then runs without the extra texture pack, and the in-game Textures setting reads "High quality textures are not installed".
Epic Games LauncherLibraryFortnite ... (three dots)OptionsHigh Resolution Textures (uncheck)
Press Windows + R, type %localappdata% and press Enter. Open FortniteGame, then Saved, then Config, then WindowsClient. The file you need is GameUserSettings.ini.
%localappdata%FortniteGameSavedConfigWindowsClient
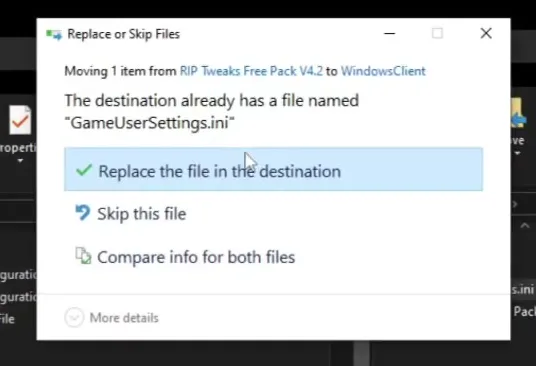
Now open the free pack you downloaded from the free tweaks channel of our Discord. It contains the same file. Drag it into the Fortnite WindowsClient folder and click Replace the file in the destination. Then close every window and start Fortnite.
How to undo it
Before you drag the new file in, copy your current GameUserSettings.ini somewhere safe. If you ever want your old in-game settings back, put that copy into the same folder again.
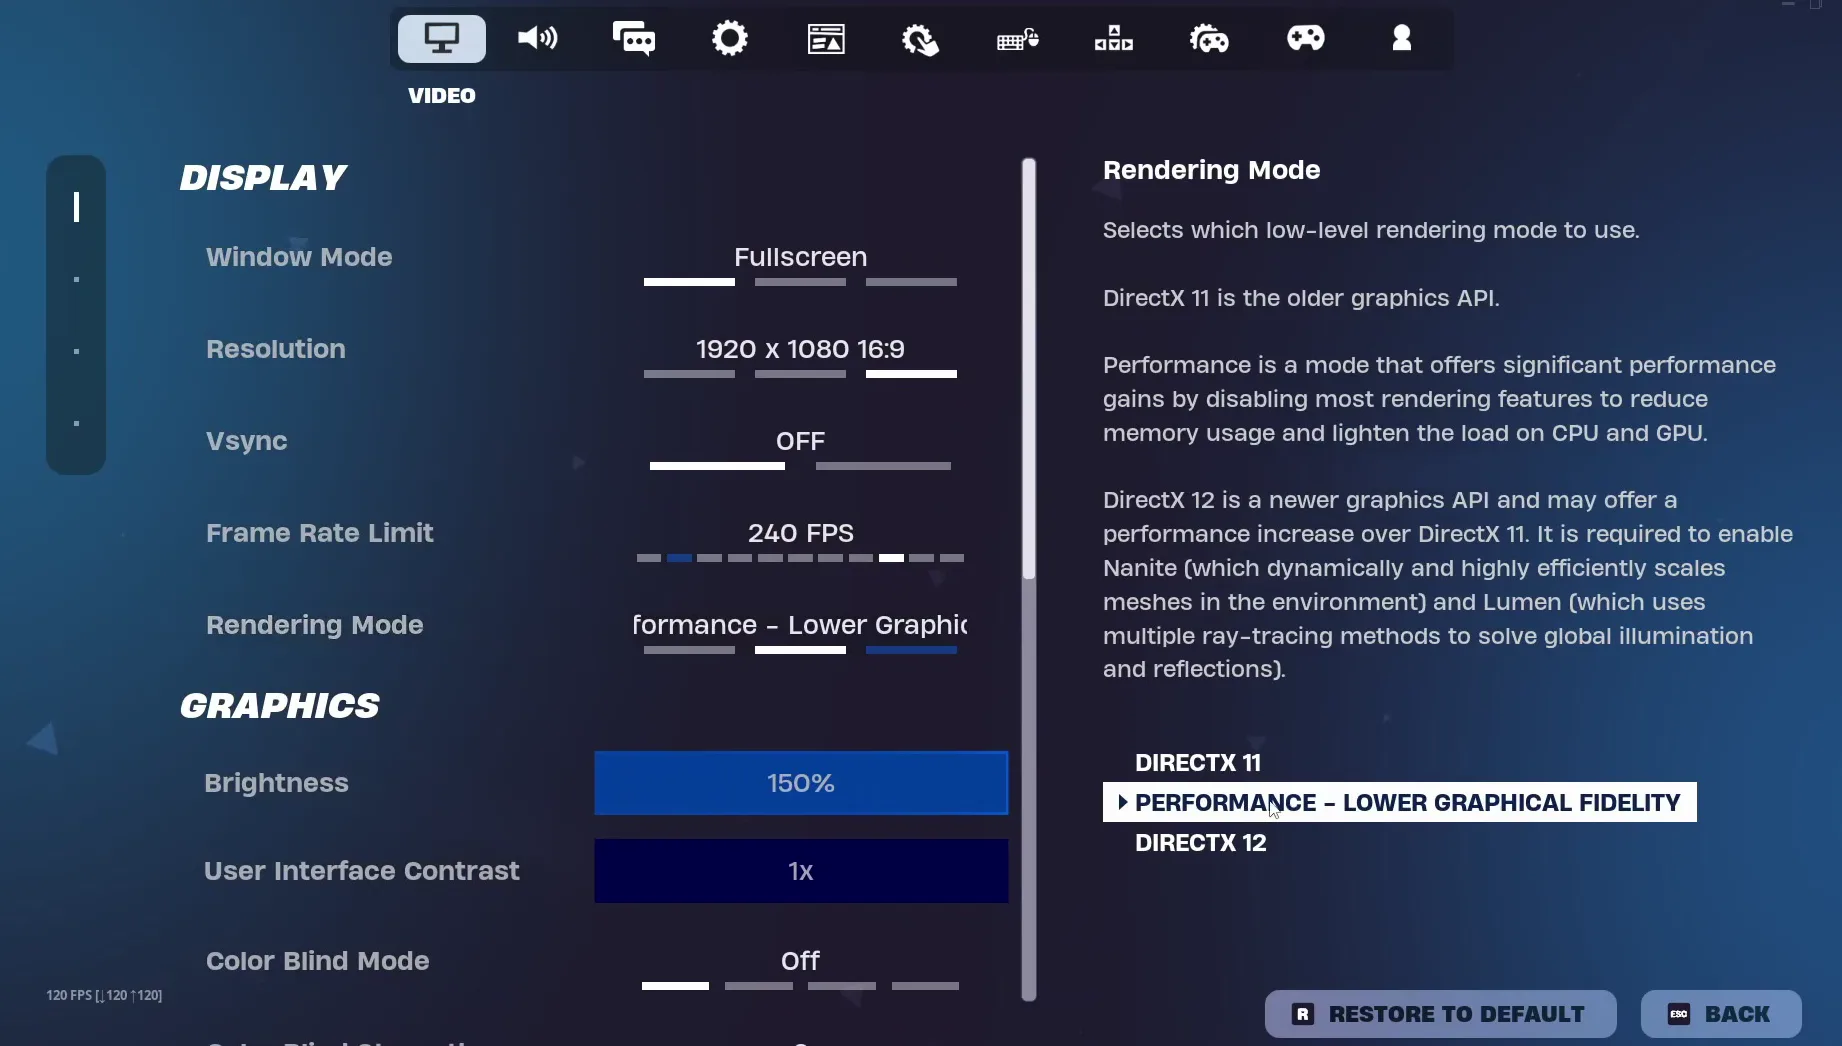
In Fortnite open Settings, then the Video tab. Make sure Rendering Mode is on Performance - Lower Graphical Fidelity. The game's own help text says Performance mode gives significant performance gains by turning off most rendering features to lighten the load on CPU and GPU.
SettingsVideoRendering ModePerformance - Lower Graphical Fidelity
Then set 3D Resolution to anything you like. Leon always uses 85%, because on his PC it is the best balance between quality and performance. The screen in the video also shows Textures, Meshes, Effects and Post Processing on Low and Show FPS on, so you can watch your FPS while you test.
Tip
3D Resolution is the one setting that trades looks for FPS directly. If 85% looks too soft for you, raise it a little and check the FPS counter. Leon says it does not matter much, so pick what you like.
You can also change Rendering Mode to DirectX 11. Leon says it is similar to Performance mode and gives you far more options to customise. In DirectX 11 mode, scroll down to NVIDIA Reflex Low Latency and set it to On + Boost for the lowest input delay. Reflex is an NVIDIA feature, so you only see it with a compatible NVIDIA card.
SettingsVideoRendering ModeDirectX 11NVIDIA Reflex Low LatencyOn + Boost
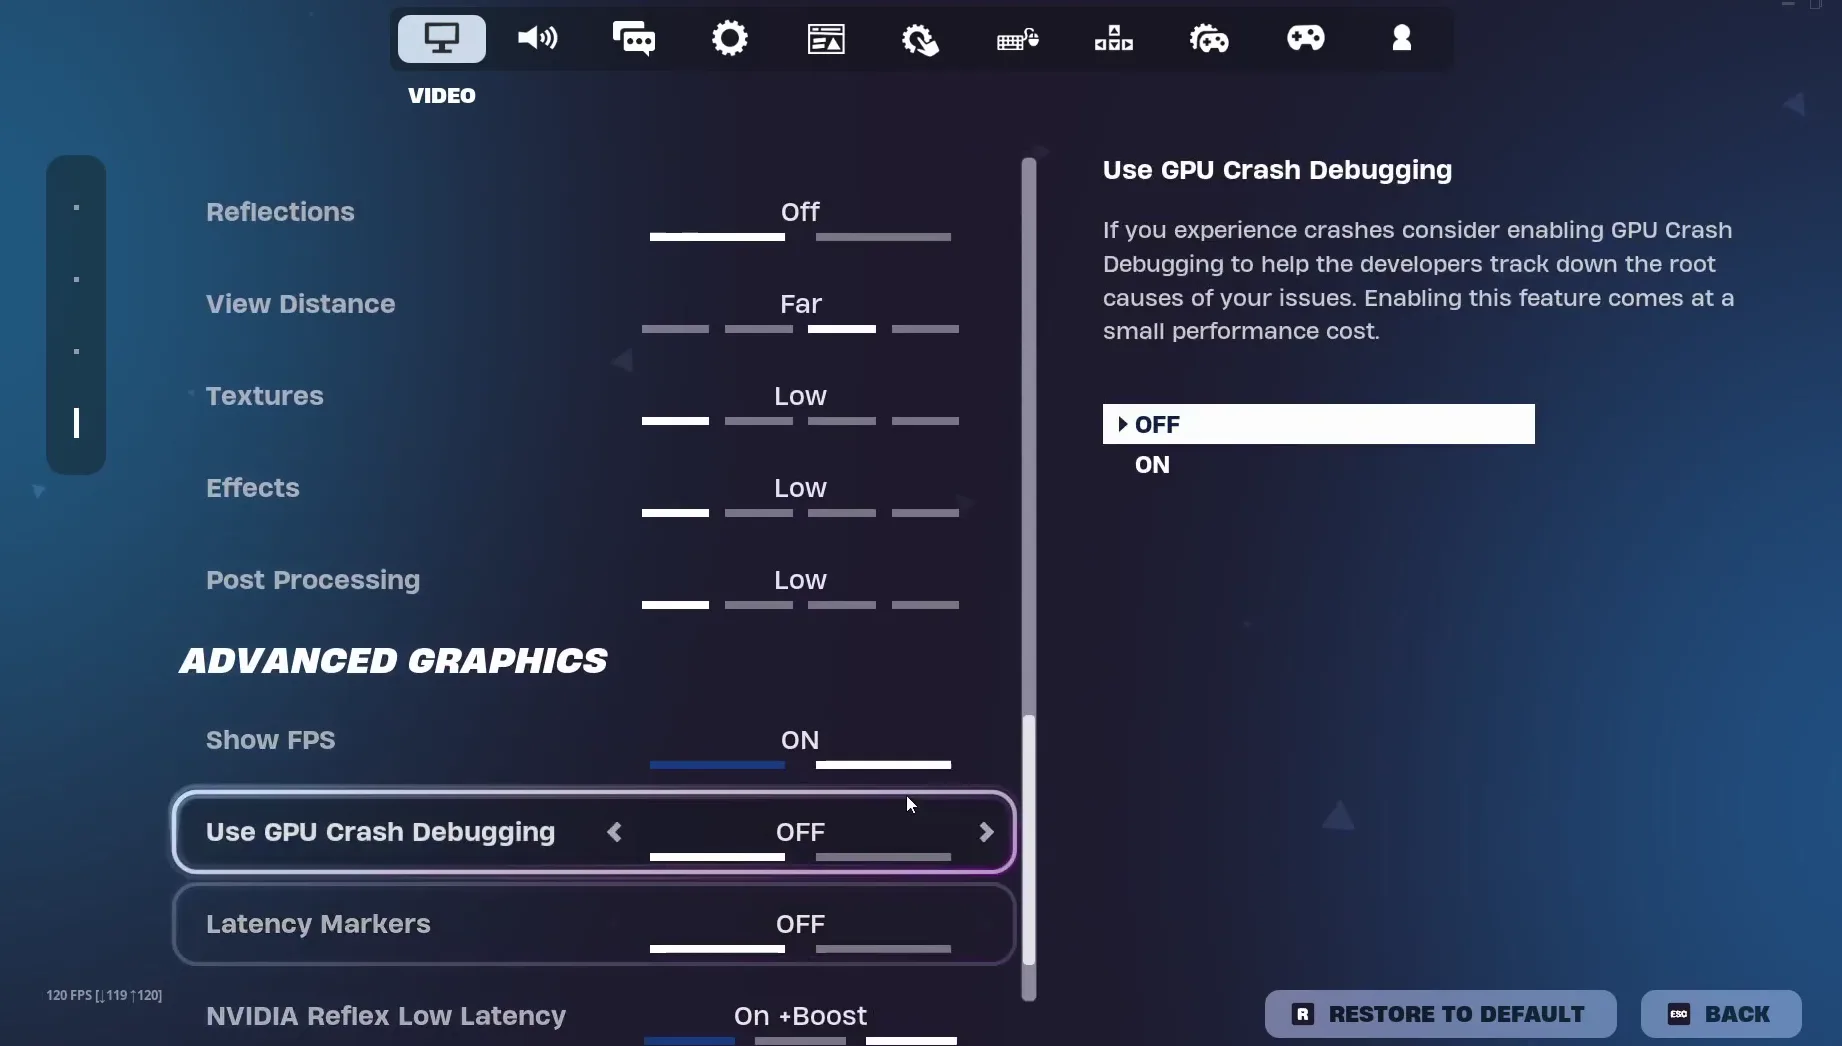
If your card has the option, also select NVIDIA DLSS and set it to Performance to get the most FPS.
Open the free pack folder, right-click the batch file and choose Run as administrator. A warning screen opens first. It says there is no support for the free packs, that you use them at your own risk and that a restore point is recommended. It asks you to type skip to go on without a restore point or restore to create one. The video already made one by hand in the first step.
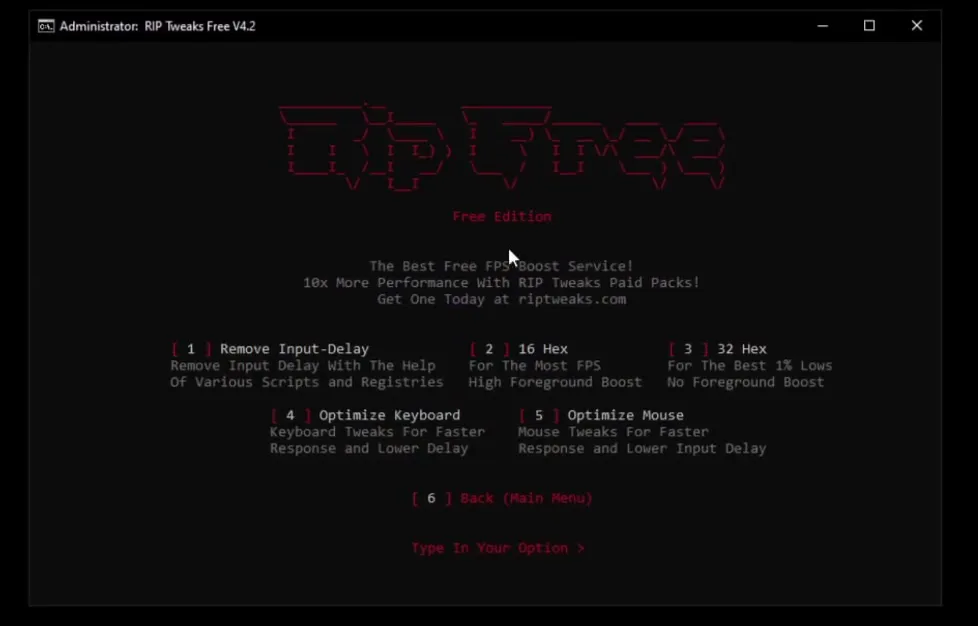
The menus work with the keyboard: press the key shown in front of an option, no mouse clicks needed. Leon presses 3 to tweak his graphics card and says you can do the same for your own card and for any other option you want. Pick the ones that match your own hardware.
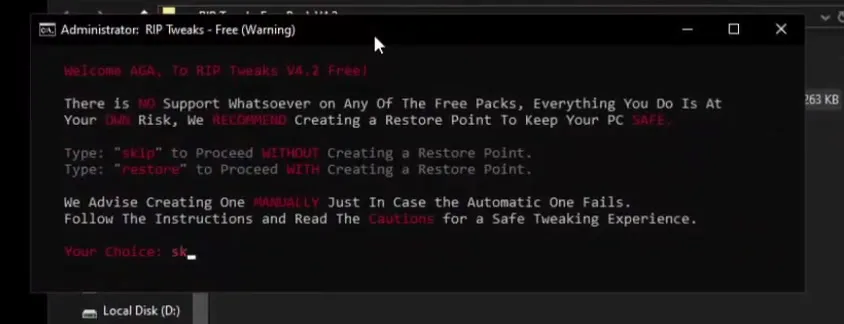
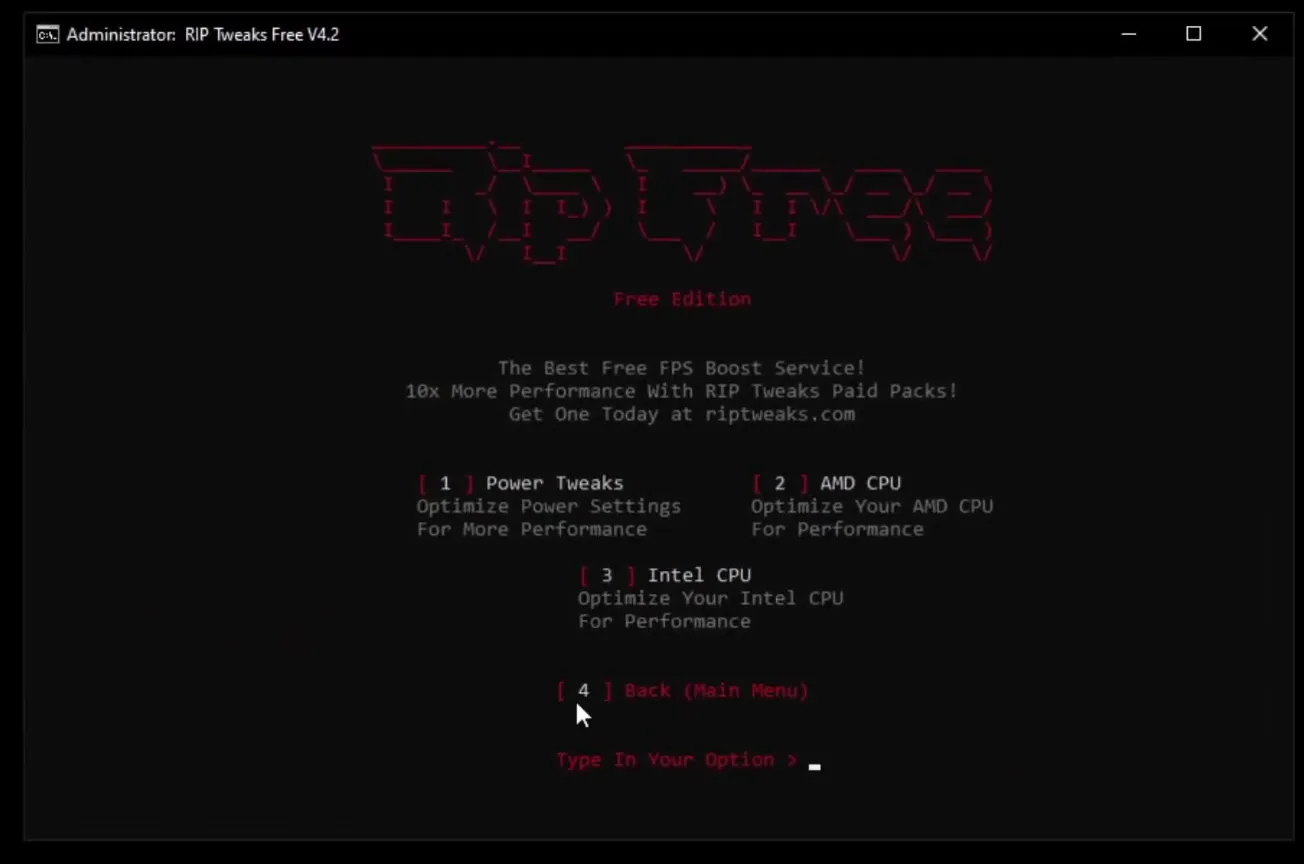
Use the same number system for the input options: Remove Input-Delay, Optimize Keyboard and Optimize Mouse. The menu describes the first as removing input delay with the help of various scripts and registry changes, and the other two as keyboard and mouse tweaks for faster response and lower delay. Leon talks over this part of the video while the tweaks run, then just waits for every option to complete.
Careful
Leon warns that the Windows Tweaks option (shown as 1000+ tweaks for a smoother Windows) is really dangerous and can delete files, because it deletes a lot of Windows. Use it with caution, and only with your restore point in place.
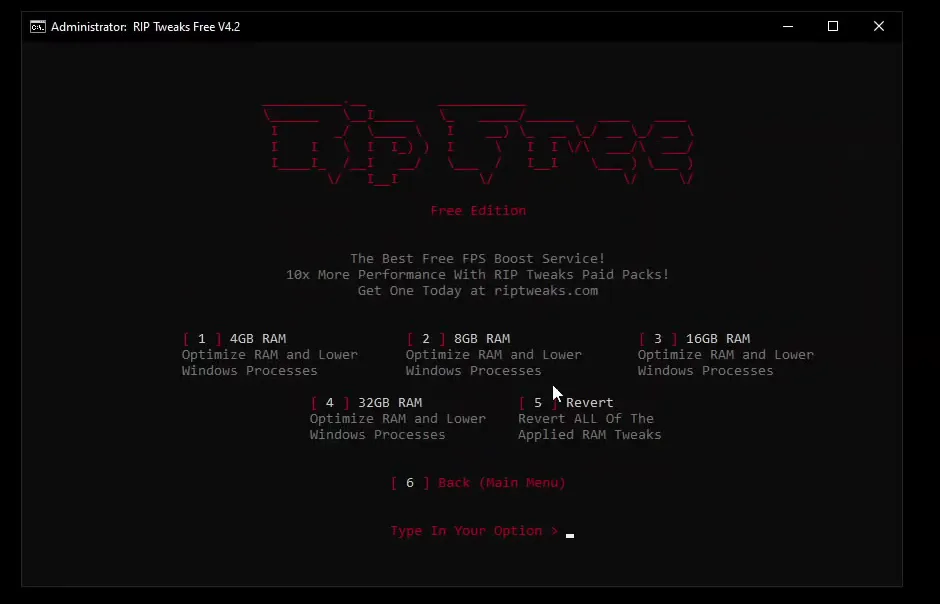
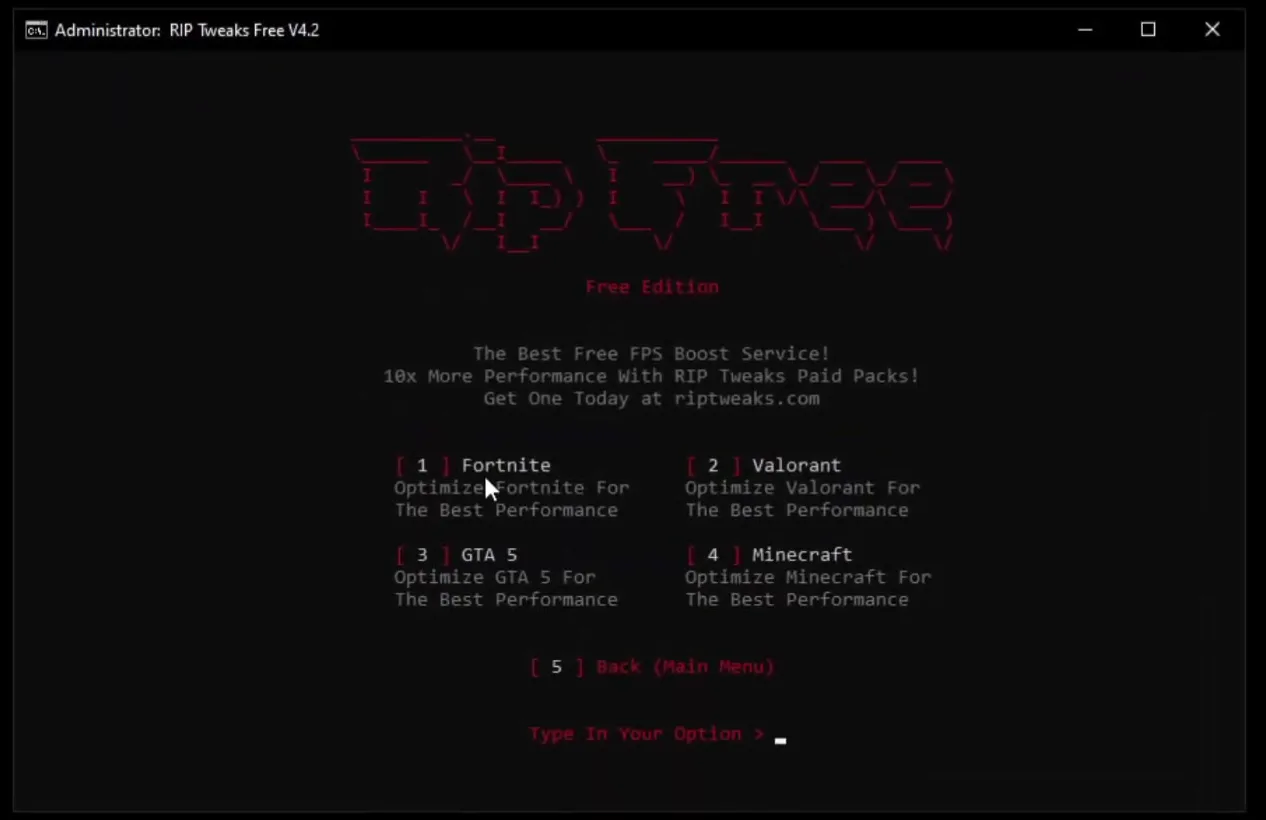
Open Task Manager and look at how much RAM you have, then pick the same option in the RAM menu (4GB, 8GB, 16GB or 32GB). The video has 32 GB, so it presses the 32GB option. After that, open the game section and select Fortnite. That is all for the pack.
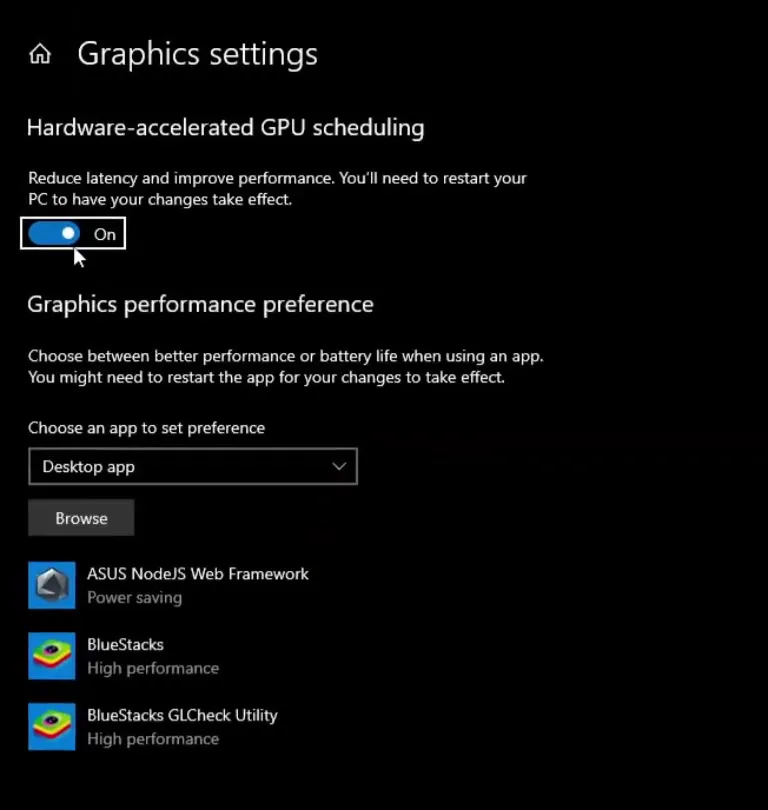
Now open the Windows settings and enable Game Mode. Leon says it can give an FPS boost, and the same goes for Hardware-accelerated GPU scheduling, which Windows describes as reducing latency and improving performance. Set it to On and restart the PC so it takes effect.
Windows SettingsGraphics settingsHardware-accelerated GPU schedulingOn
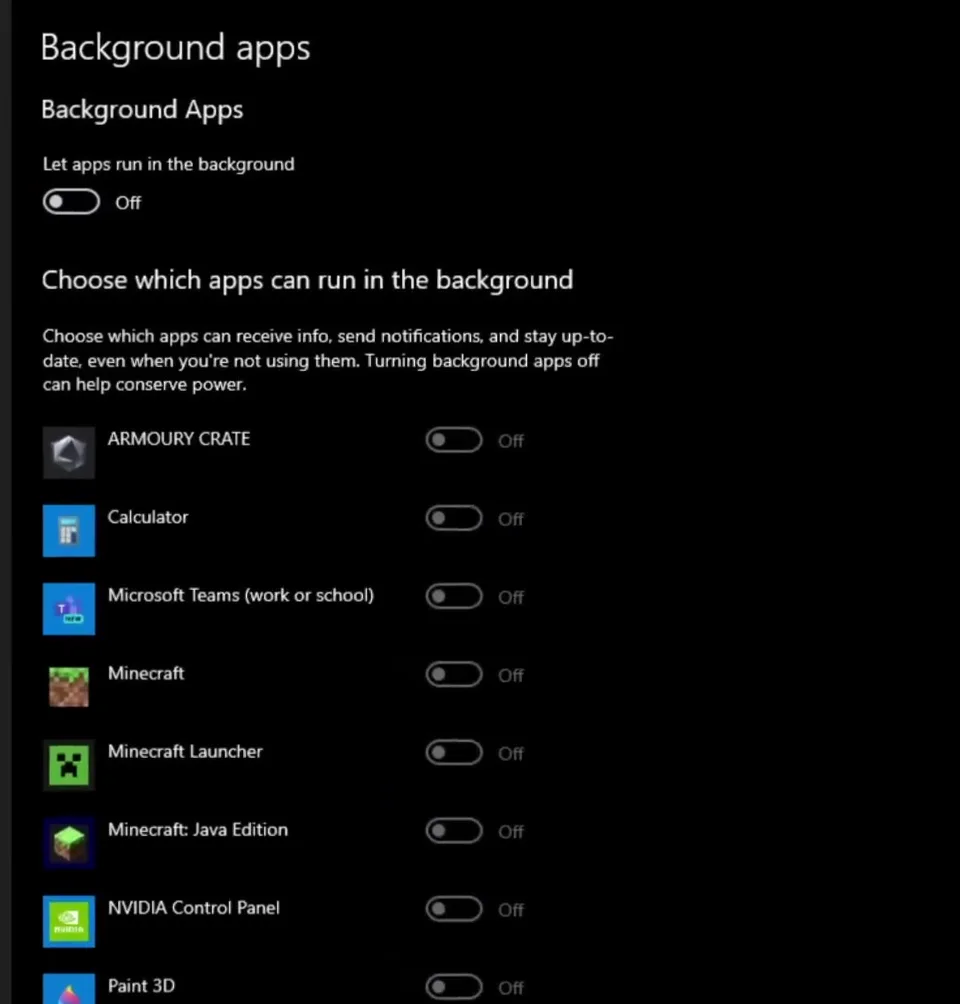
Next, switch off background apps so nothing else competes with Fortnite. Leon says to not let them run in the background, as it slows the PC down. In the video, the main Let apps run in the background switch is Off and every app below it is Off too.
Windows SettingsPrivacyBackground appsLet apps run in the background (Off)
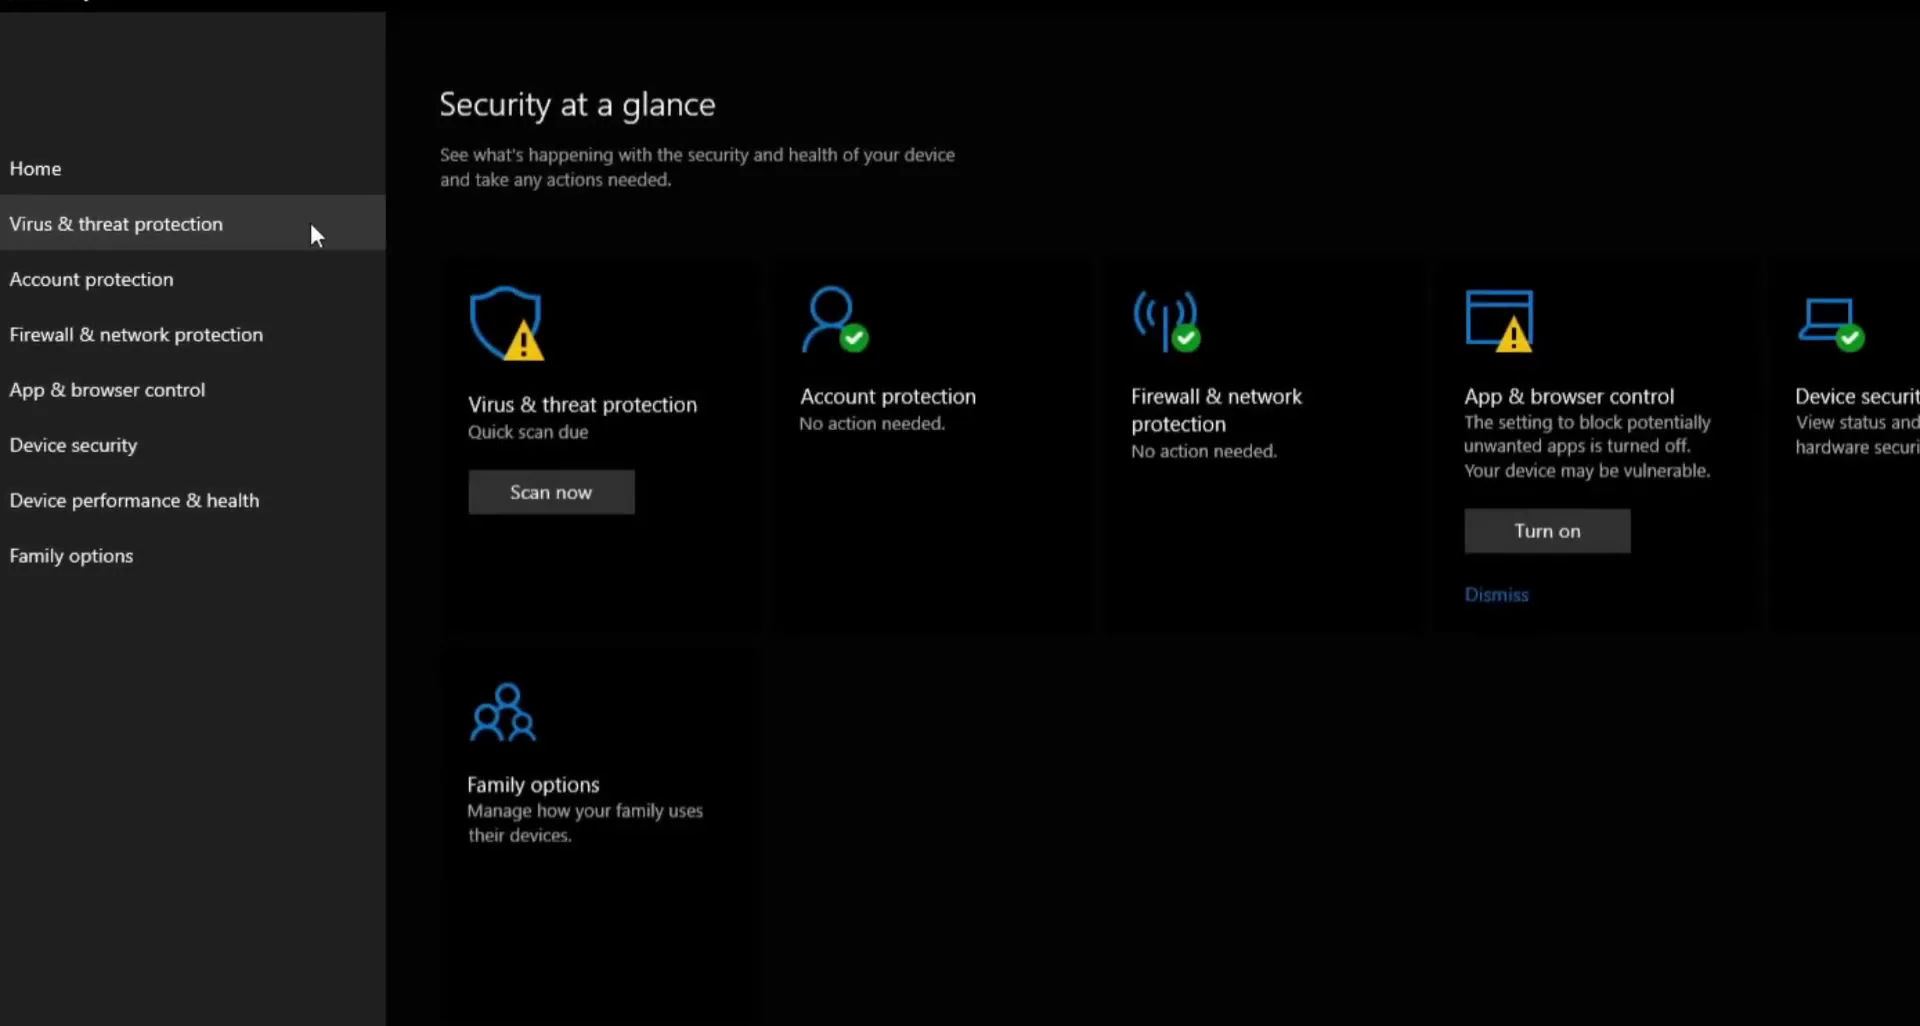
Open Windows Security, go into Device security and disable Memory Integrity. Leon says it may give an FPS boost. Then open the Startup tab in Task Manager and disable everything you do not need at startup, as it can lower performance.
Windows SecurityDevice securityMemory integrity (off)
Careful
Memory Integrity is a Windows protection feature, so turning it off is a trade of some protection for a possible FPS gain. It is your call; you can switch it on again in the same place.
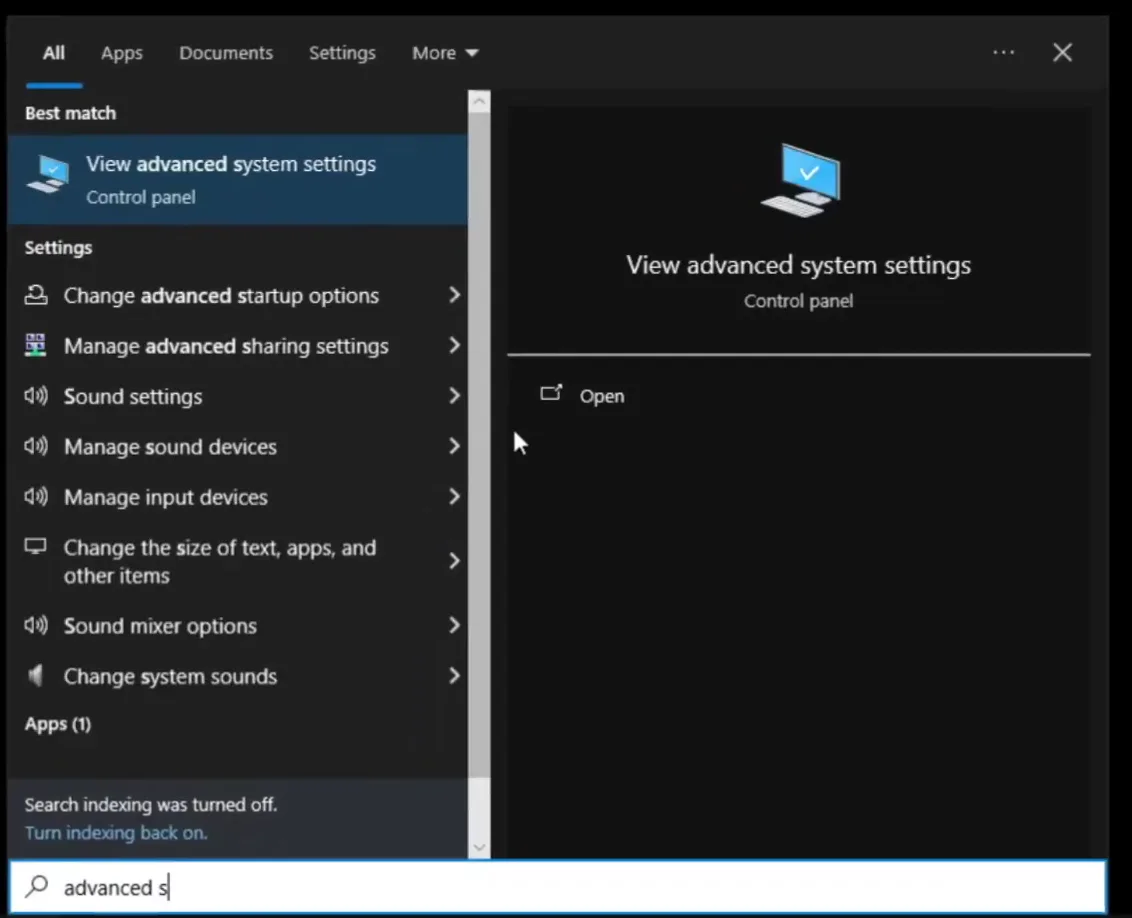
Search for Advanced system settings and open it. Under Performance, choose Adjust for best performance. If Windows now looks ugly, enable Smooth edges of screen fonts and Show window contents while dragging again and it looks normal.
Search: Advanced system settingsAdvancedPerformance SettingsVisual EffectsAdjust for best performance
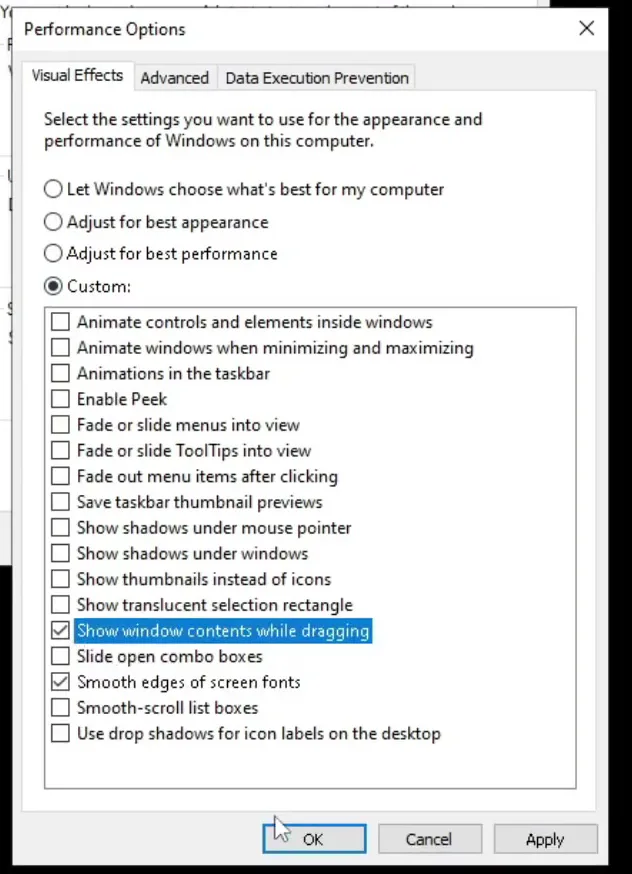
How to check it worked
Test before you queue for a match, so you can compare against your old numbers:
- Open Fortnite, go to Settings, Video, Advanced Graphics and make sure Show FPS is On, as in the video. Load into a match or the lobby and watch the counter.
- Check the settings stuck: Rendering Mode on Performance or DirectX 11, 3D Resolution at 85% and Reflex on On + Boost.
- Restart Windows once so GPU scheduling and the other settings take effect, then test again.
- For the input delay side, compare how your mouse and keys feel in the same spot you tested before. The video does not measure it with a number, so use your own feel.
Want to try your settings in a real fight? Play our free 1v1 map, RIP Tweaks 1V1 (code 8541-1720-3175).
Key settings at a glance
FAQ
What are the best Fortnite Chapter 6 settings for FPS?
The video uses Performance - Lower Graphical Fidelity or DirectX 11 for Rendering Mode, 3D Resolution at 85%, textures on Low, and NVIDIA Reflex Low Latency on On + Boost. If your NVIDIA card has DLSS, set it to Performance.
How do I lower input delay in Fortnite Chapter 6?
Set Reflex to On + Boost in DirectX 11 mode, run the free pack's Remove Input-Delay, Optimize Keyboard and Optimize Mouse options, and turn on Game Mode and GPU scheduling. For a deeper look at the ping and network side, see our Fortnite FPS, input delay and ping guide.
Is Performance mode or DirectX 11 better?
In the video, Performance mode is the first choice. Leon says DirectX 11 is really similar to it and gives you way more customisation options, and Reflex shows up in the DirectX 11 mode. Our Legacy Performance mode guide covers the Performance mode in more detail.
Is it safe to run the free pack?
The pack's own warning says there is no support and that you use it at your own risk, so make the restore point first, as in the video. Leon calls the Windows Tweaks option dangerous, and the video does not use it.
Do I need an NVIDIA graphics card?
Reflex and DLSS are NVIDIA options, so you only see them with a compatible card. The Windows steps and the rest of the Fortnite settings work on any PC.
Does this still work after Chapter 6 Season 1?
The video is from Chapter 6 Season 1, in December 2024. Fortnite menus and options can change between seasons, so check the names against your own screen. For the current guide, see our Fortnite input delay and FPS guide.
How do I see my FPS in Fortnite?
Open Settings, Video, scroll to Advanced Graphics and set Show FPS to On, like the video's settings screen shows.
 RIP Tweaks
Do it in a few minutes with RIP Tweaks
- Free plan for Windows 10 and 11
- A backup first, and every tweak can be switched off again
- Made for higher FPS, lower input lag and steadier ping
Free · Windows 10 and 11
