RTX 3060 Fortnite FPS Boost with the Free RIP Tweaks Pack (Step by Step)

Written version of our video, every step checked against it.
Quick answer
- Note your FPS in the same Fortnite map first. On the RTX 3060 PC in the video that was around 200 FPS.
- Run the Free Tweaks pack as administrator and type
restoreat the first prompt to create a restore point. - Use Power Tweaks and your CPU tweak alone first: on the PC in the video that already added about 50 FPS and stopped the dips.
- Then run GPU, Ping, Input, Windows and RAM tweaks, but skip Debloat Tweaks unless you accept that it removes files and services.
- Open Fortnite again with the same settings and compare: the video reached about 300 FPS with the free pack.
This guide is for anyone with a mid-range card such as an RTX 3060 who wants more FPS in Fortnite without touching a single in-game setting. It follows the video in order: how Leon measured the starting point, how the free pack is started safely, which tweak groups he ran and in what order, and how he compared the result. The video shows an earlier version of the pack (V4.1, a command window with numbered menus), so this page explains the ideas and menus it uses, not how the current RIP Tweaks app looks.
The whole test only means something if the game settings stay the same. In the video the settings are not changed at all: Leon notes that he gets around 200 FPS on his RTX 3060, then compares against that number after each step.
To get the pack, open discord.gg/riptweaks in your browser and join the Discord server. Open the free tweaks channel, download the Free Tweaks pack and click Continue to download. Drag the downloaded archive onto your desktop, right-click it, choose Open with Windows Explorer and drag the files out of the archive. Do not run anything from inside the zip.
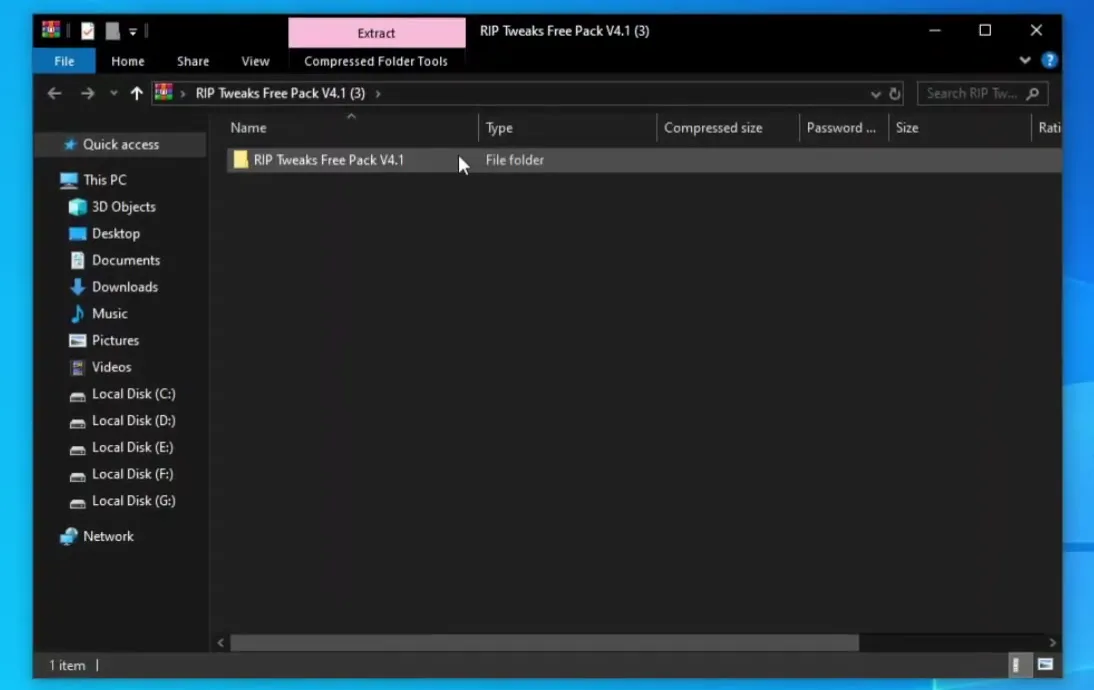
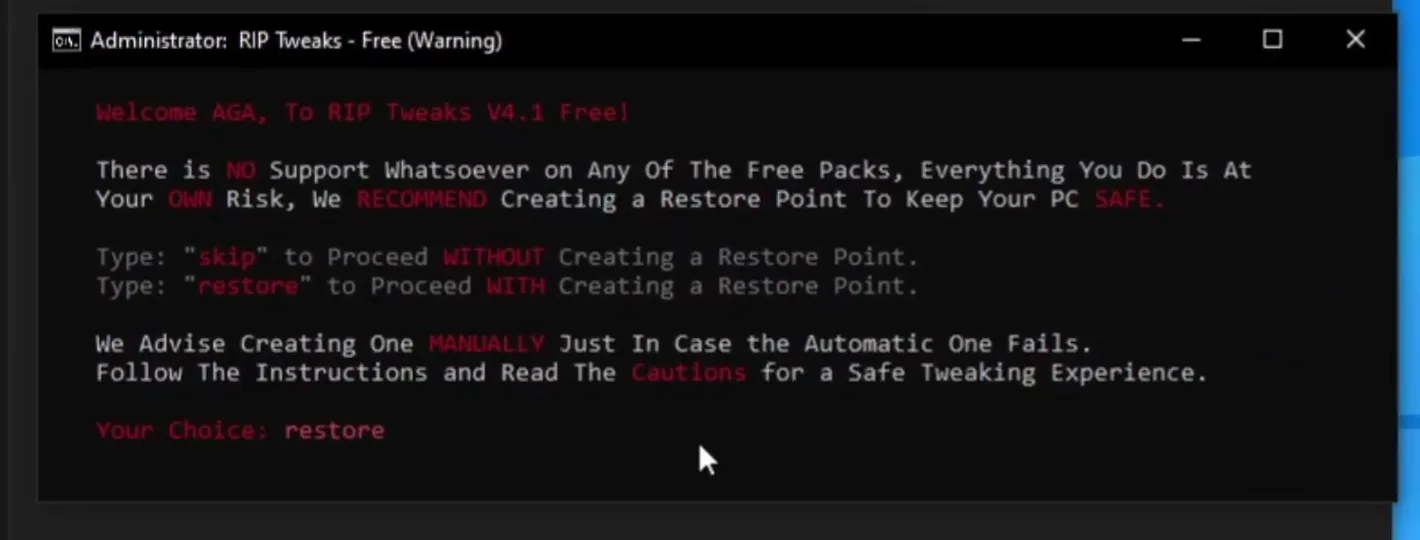
Open the extracted folder, right-click the batch file named RIP Tweaks - Free Pack V4.1 and choose Run as administrator. The first screen is a warning: the free packs have no support, everything is at your own risk, and a restore point is recommended. It asks you to type skip to go on without one or restore to create one.
Right-click the .bat fileRun as administratorType restoreEnter
How to undo it
The restore point is your way back. If a change makes something behave worse, open System Restore in Windows and return to the point created here. Wait until the prompt finishes before you carry on.
The main menu has nine entries: Power Tweaks, GPU Tweaks, Ping Tweaks, Input Tweaks, Windows Tweaks, Debloat Tweaks, RAM Tweaks, Games and Socials. To see what the pack can do on its own, the video runs only two things: 1 for Power Tweaks and then 2 for the AMD CPU option (Leon's PC has an AMD processor; pick the Intel option, number 3, if you have an Intel CPU).
Main menu1 Power TweaksType 12 AMD CPU
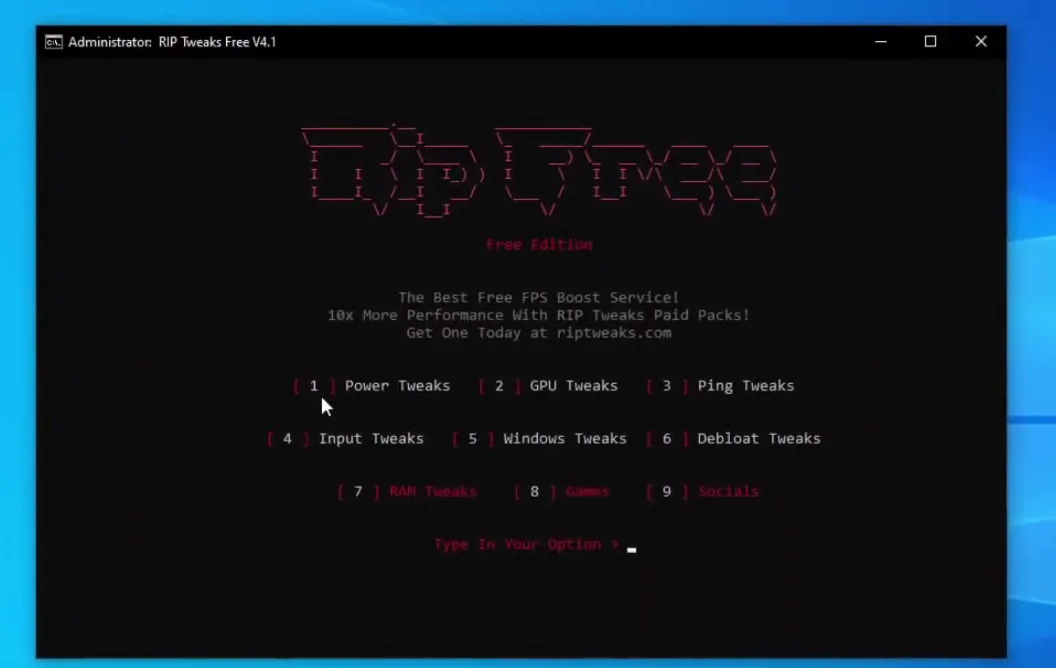
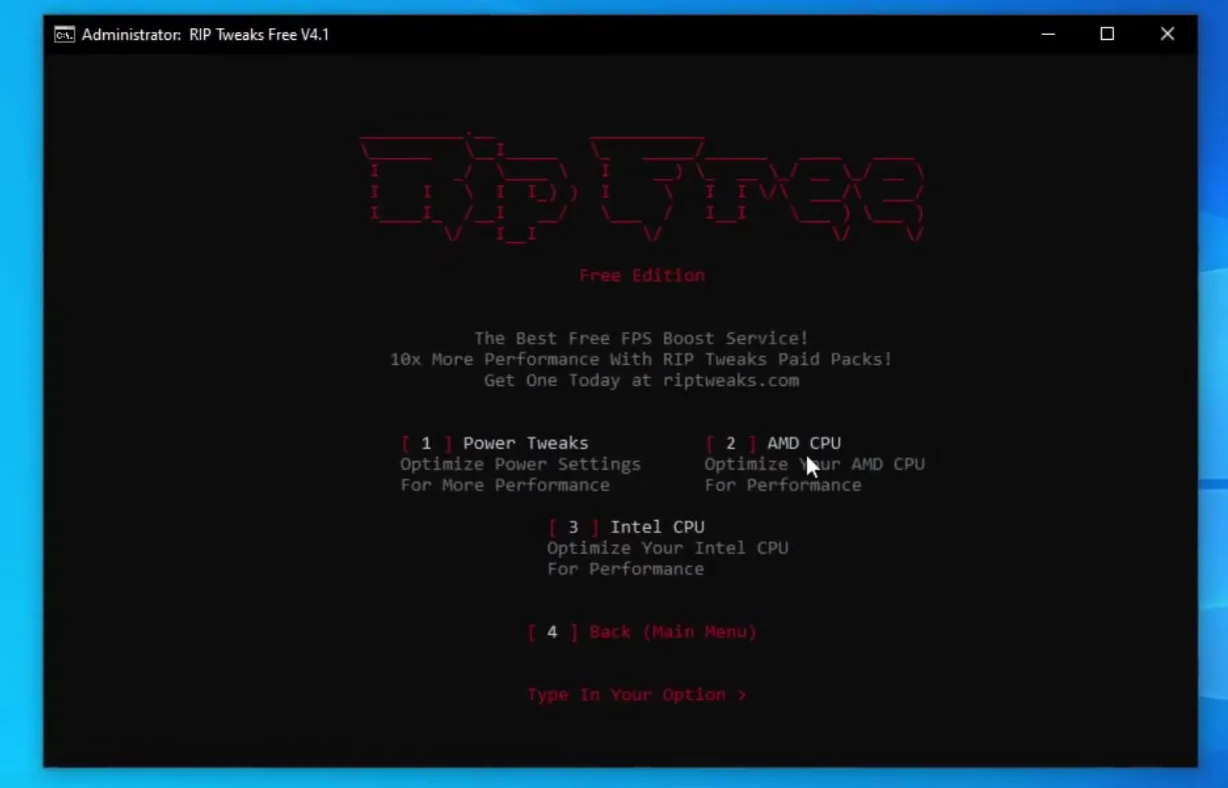
Picking Intel or AMD matters: each CPU option is written for its own processor, so run only the one you have.
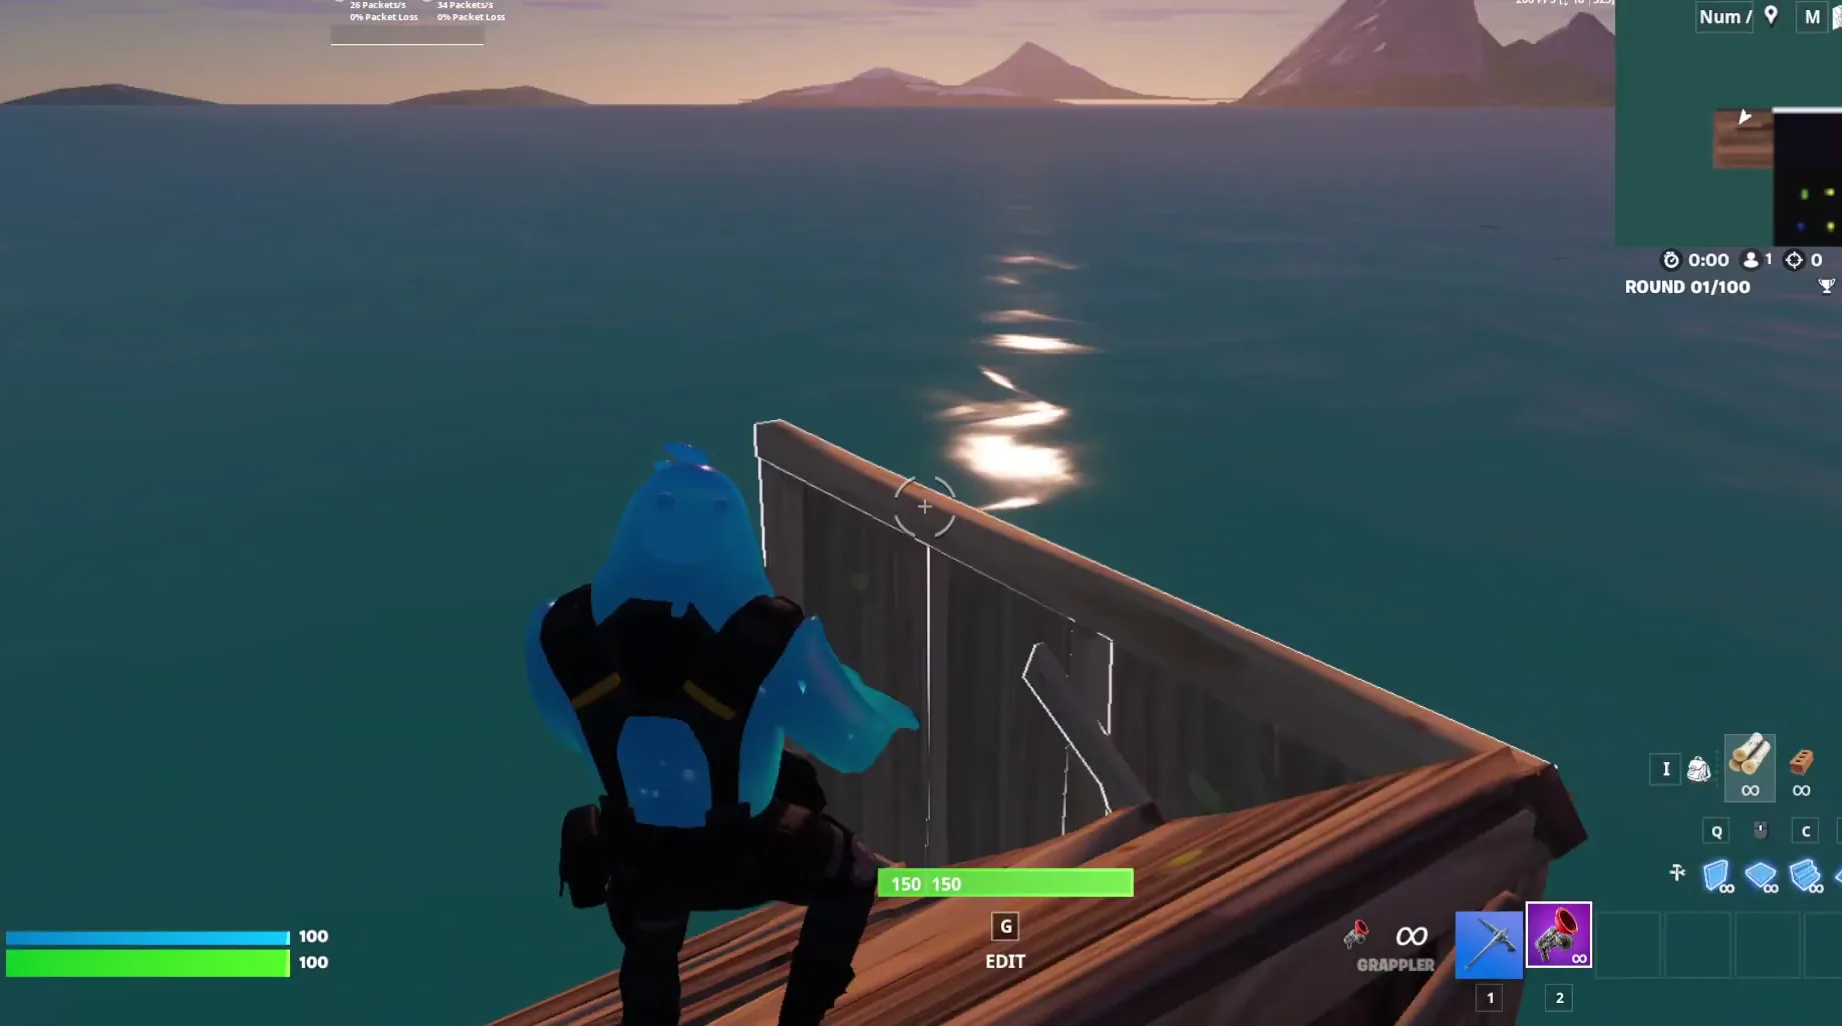
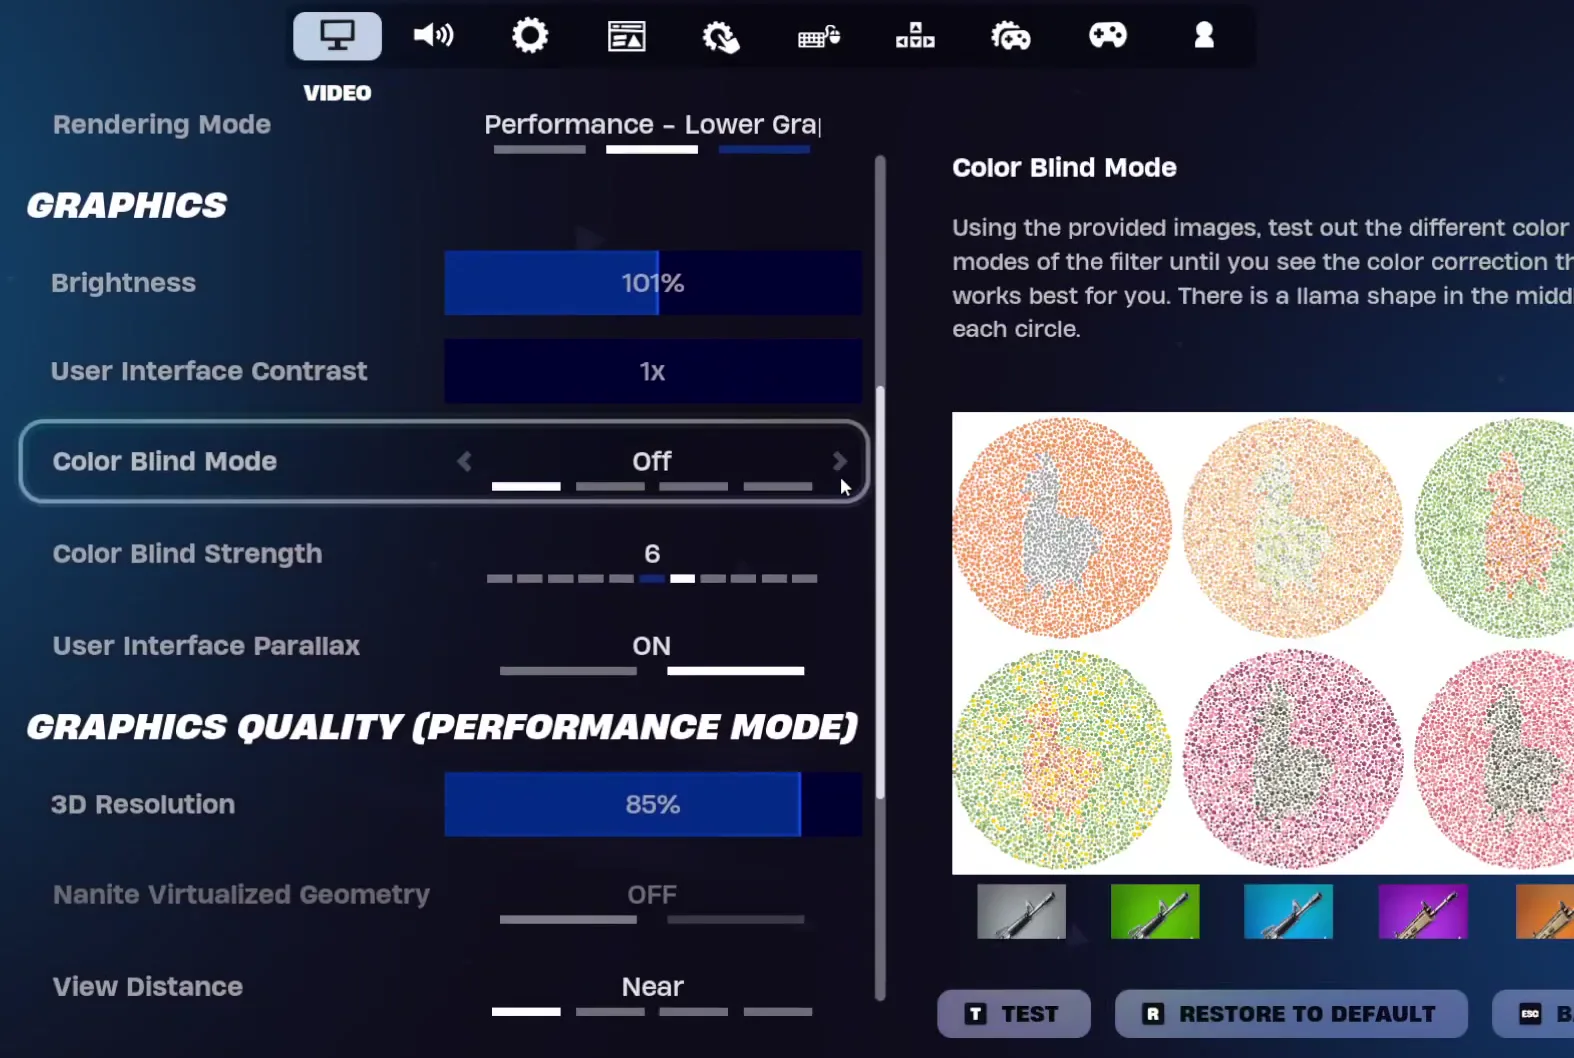
Go back into the same Fortnite map and look at the FPS counter in the top-right corner (the ping and packet loss readout sits in the top-left). In the video this single step, Power Tweaks plus the CPU tweak, raised the FPS by about 50 on Leon's PC and the counter no longer dropped to 100. The game settings were identical.
Good to know
That is one result on one PC (an RTX 3060 in the video). Your gain depends on your CPU, power plan and what already runs in the background, so typically expect something smaller or larger, and measure it yourself.
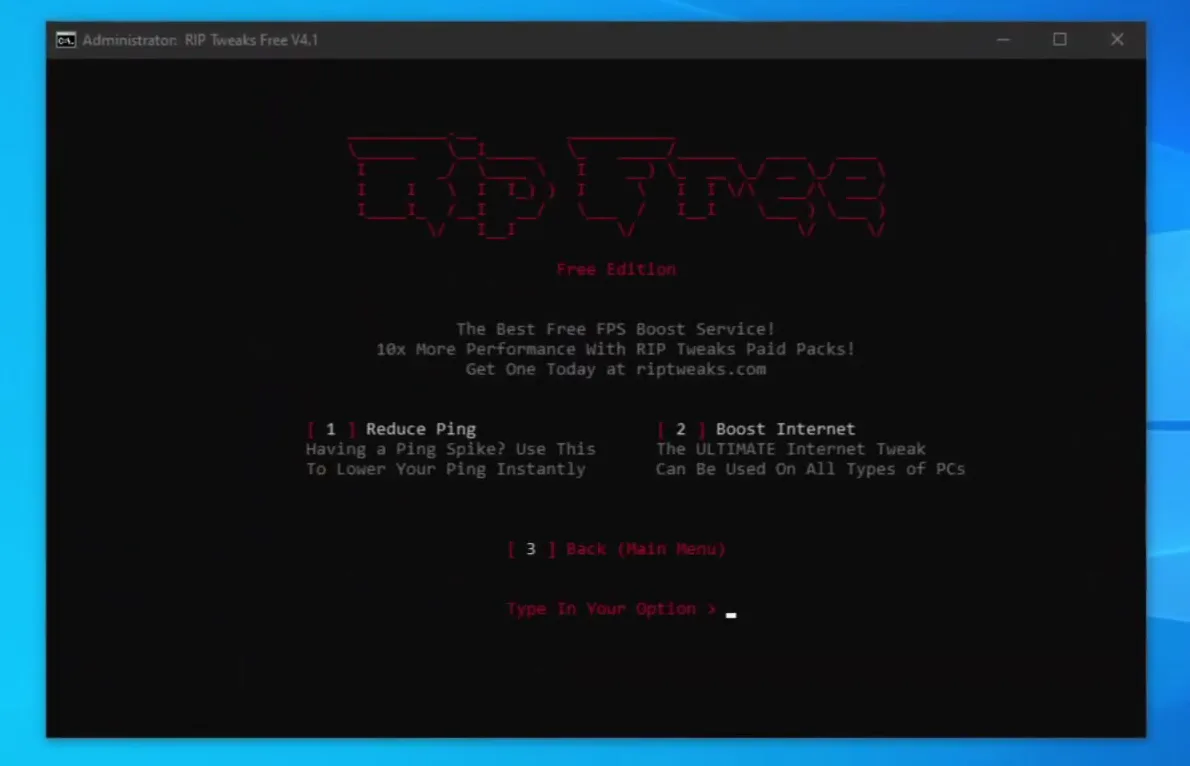
After the first test Leon goes through the rest of the menu. He uses the GPU tweaks, then the Ping Tweaks, which offer Reduce Ping (for ping spikes) and Boost Internet (an internet tweak for all types of PCs). Back in the main menu he opens Input Tweaks and applies the optimizations for keyboard and mouse, and then Windows Tweaks to tune Windows itself. Each choice prints a long list of "The operation completed successfully" lines while it works; wait for it to finish and return to the menu before the next one.
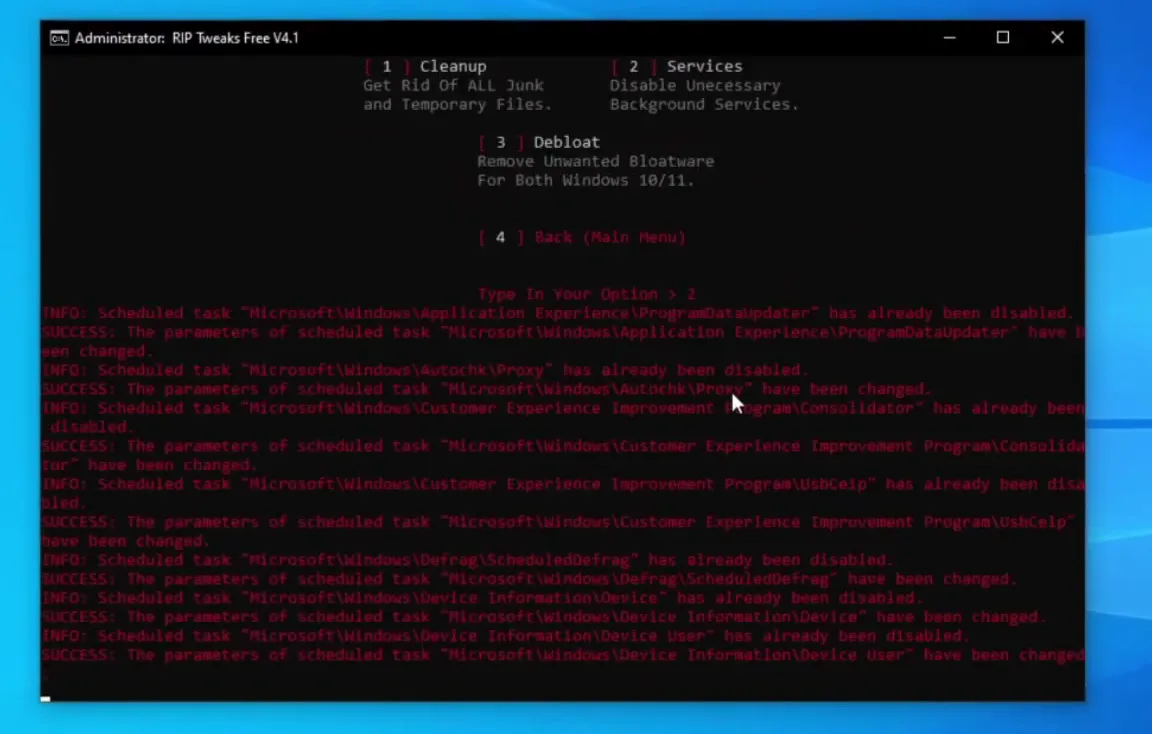
The video gives one specific warning here: do not use the Debloat Tweaks if you do not want files and services removed. It cleans up Windows, removes some services and strips out built-in apps. The Windows submenu shown in the video splits this into Cleanup (junk and temporary files), Services (disable unnecessary background services) and Debloat (remove unwanted apps for Windows 10 and 11).
Careful
Debloat removes things you may use later (for example built-in apps) and is the one group that is hard to undo by hand. If you are not sure, leave it out: the video's FPS gain came from the other groups too.
In RAM Tweaks you choose the size that matches your PC: the menu offers 4 GB, 8 GB, 16 GB and 32 GB entries, each described as optimizing RAM and lowering Windows processes. To find yours, open Task Manager, go to the Performance tab and click Memory: the total is shown at the top right (32.0 GB on the PC in the video).
Task ManagerPerformanceMemoryTotal at top right
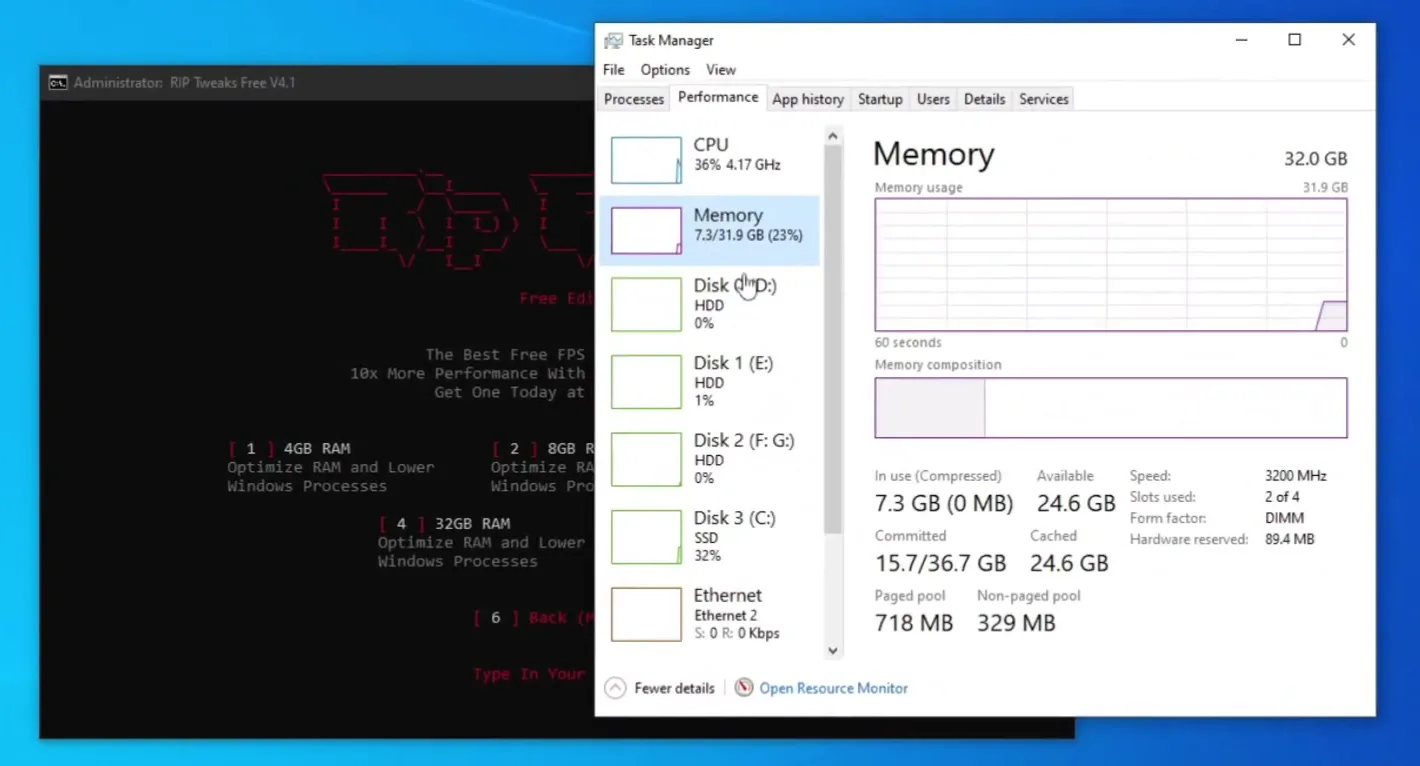
Tip
Choose the amount you actually have installed, not the nearest bigger or smaller entry. The wrong size is the easiest mistake in this menu.
The Games menu has entries for Fortnite, VALORANT, GTA V and Minecraft. Leon selects Fortnite, then starts the game and reads the counter again. On the PC in the video the FPS went from about 200 to about 300, which he describes as a 100 FPS gain from the free pack alone, with every in-game setting unchanged.
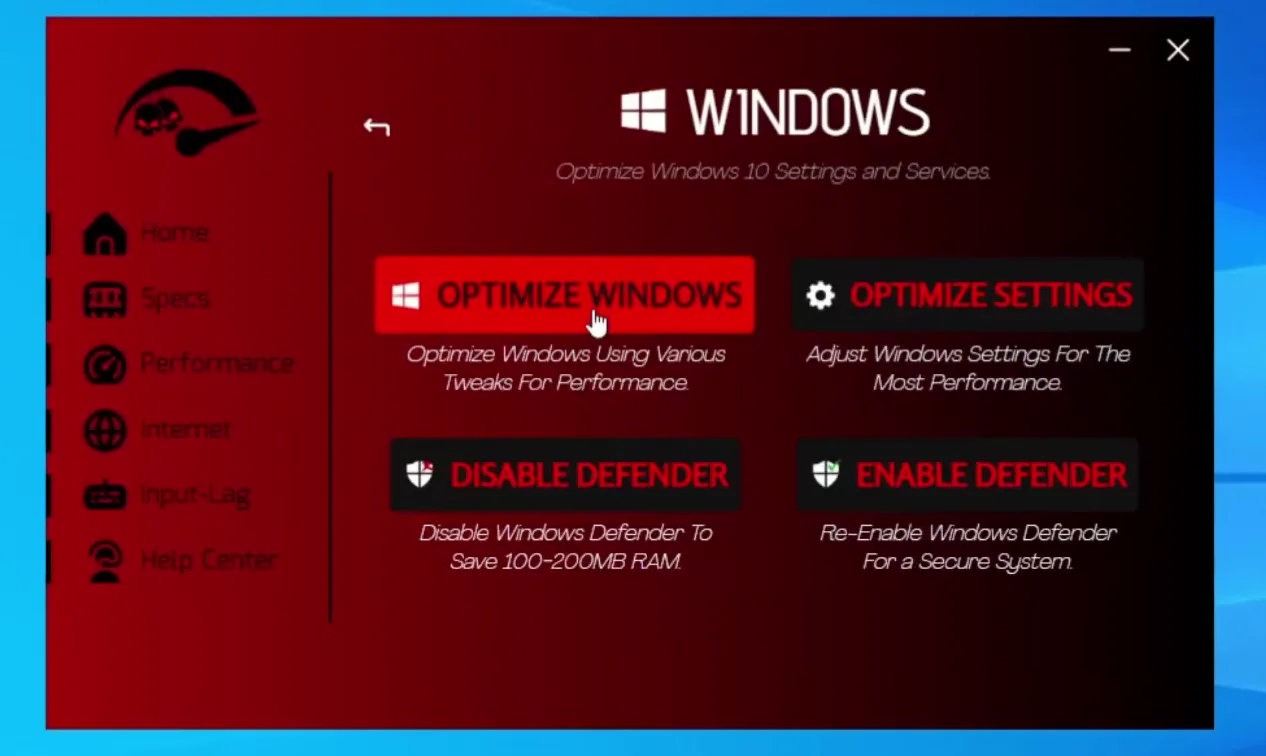
To finish, the video switches to the paid Ultimate pack. In the version shown, the Windows page of the app has buttons such as Optimize Windows, Optimize Settings, Disable Defender and Enable Defender, and the video lists tweaks for CPU, GPU, RAM, BIOS, keyboard, mouse and monitor, 45 games, custom crosshairs and a custom game mode.
Good to know
This screen is from an earlier version of the app. Use it to understand what the groups do; today's RIP Tweaks app has its own layout, so follow the app in front of you.
With the Ultimate pack applied, the counter in the video climbs into the 400 to 600 range and moves up and down while Leon plays. That is why he reads it over a few seconds in the same map and compares with the ~200 FPS he noted at the start, instead of quoting one lucky number.
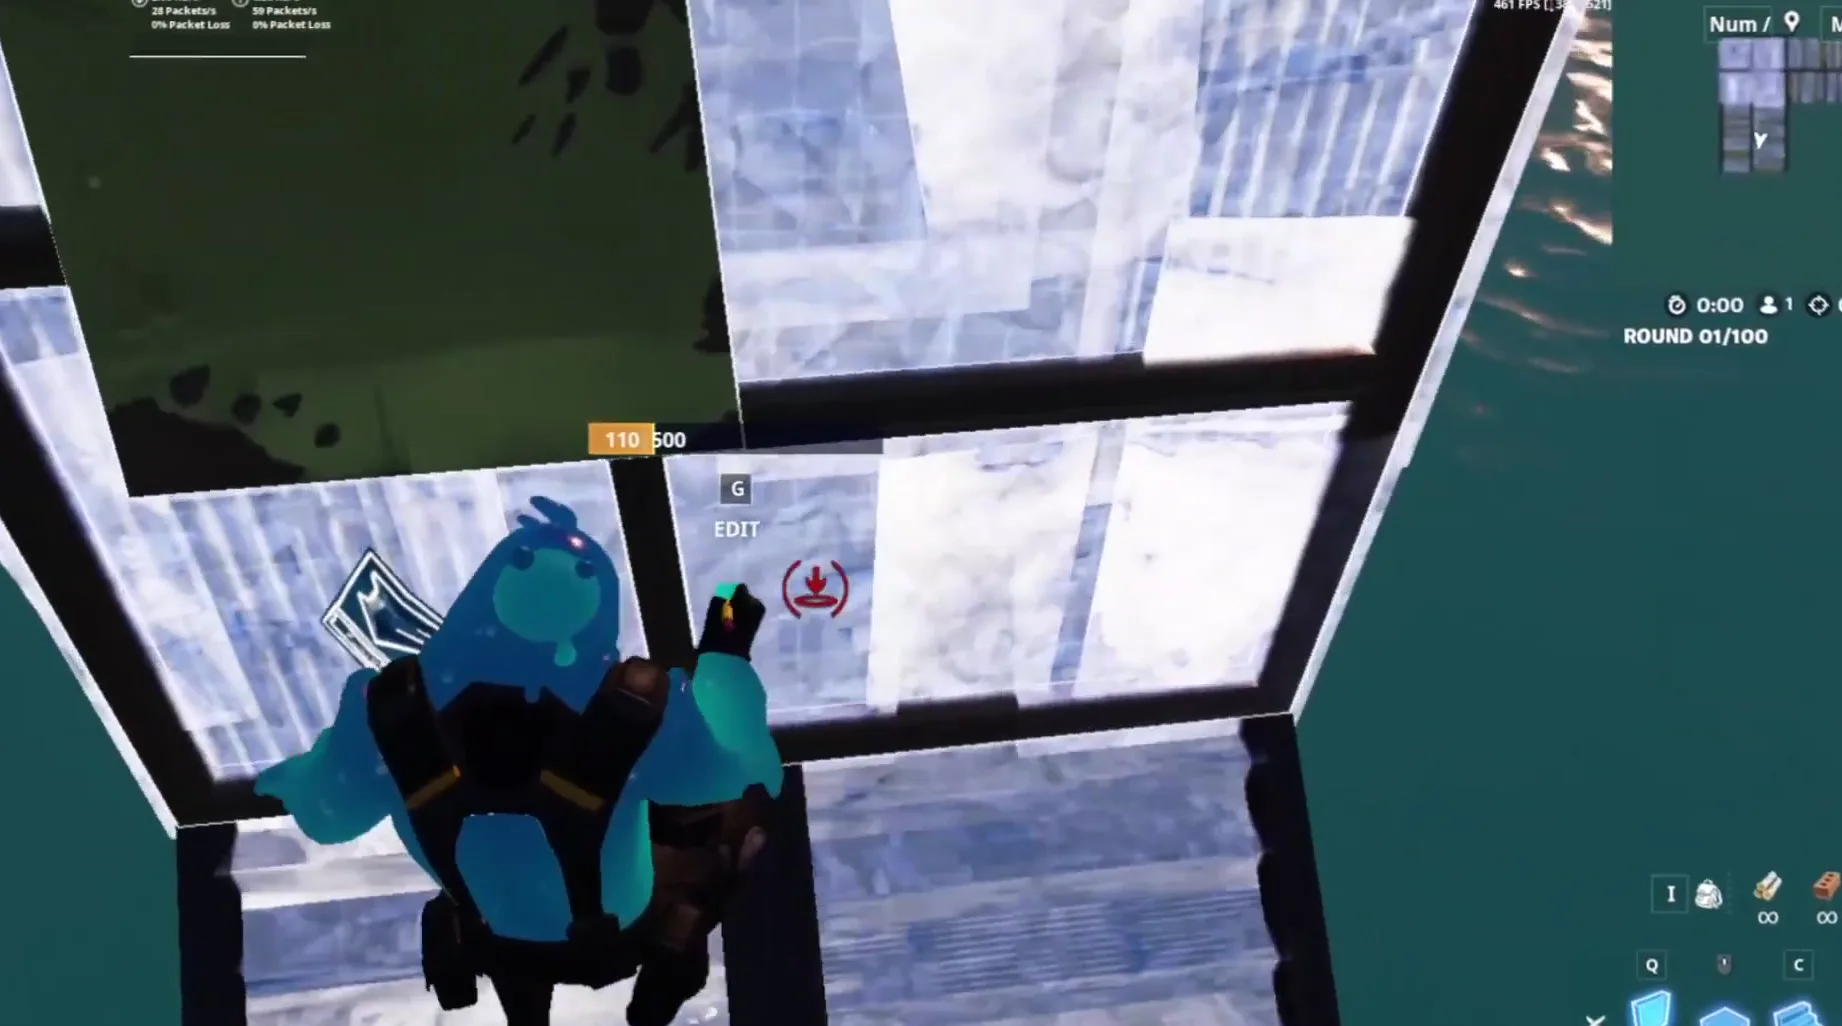
How to check it worked
Use the same method as the video so the comparison is fair:
- Test in the same map and spot, with the same in-game settings, and look at the FPS counter for a few seconds, not one frame.
- Write down the number before you run anything, then again after the Power and CPU tweak, and again after the full pack. Typically a few tens of FPS per step is a realistic range, not a promise.
- Look at the minimum too: in the video the counter stopped dipping to 100 after the first tweak, which matters as much as the average.
- Check the ping and packet loss readout after the Ping tweaks. Anything that gets worse after a step is the step to undo.
If the tweaks do not seem to change anything, update your graphics driver and read our free PC optimizer for Fortnite guide, our restore point and MSI mode guide or the Fortnite FPS, input delay and ping guide.
Key settings at a glance
FAQ
How much FPS can an RTX 3060 gain in Fortnite from tweaks?
It depends on the PC. On the RTX 3060 PC in the video the counter went from around 200 to around 300 FPS with the free pack, with the in-game settings unchanged. Typically the result is smaller on a PC that is already clean, so measure your own before and after.
Is the Free Tweaks pack safe to run?
The pack warns you itself that there is no support on the free packs and that you use it at your own risk, and it asks you to create a restore point first. Type restore at the first prompt, as the video does, and skip Debloat Tweaks unless you want files and services removed.
Which tweak group should I run first?
The video runs Power Tweaks and then the CPU option alone first, to see their effect on its own, and only then runs everything else. That order makes it clear which group did what.
Do I pick Intel or AMD in the CPU tweaks?
The one that matches your processor. The video's PC has an AMD CPU, so Leon picks AMD CPU (option 2). With an Intel processor you pick option 3, Intel CPU. You can check your processor in Task Manager under Performance, CPU.
How do I know which RAM size to pick?
Open Task Manager, go to Performance and click Memory. The installed total is at the top right (32.0 GB in the video), and the RAM Tweaks menu offers 4 GB, 8 GB, 16 GB and 32 GB entries to match.
Does this video show the current RIP Tweaks app?
No. The video is from 2024 and shows version 4.1 of the free pack, a command window with numbered menus, and an earlier Ultimate app. The ideas (restore point, power and CPU tweaks, ping, input, RAM, then compare in the same map) still apply, but the screens in the video are not how the app looks today.
Why does the FPS counter jump up and down?
FPS is not a fixed number: it changes with what is on screen. In the video the counter moves up and down while Leon plays after the Ultimate pack, which is why you compare the same map and spot over a few seconds rather than one frame.
 RIP Tweaks
Do it in a few minutes with RIP Tweaks
- Free plan for Windows 10 and 11
- A backup first, and every tweak can be switched off again
- Made for higher FPS, lower input lag and steadier ping
Free · Windows 10 and 11
