How to Boost FPS and Reduce Input Delay in Fortnite OG (Free Pack + Game Settings)

Written version of our video, every step checked against it.
Quick answer
- Get the Free Pack V5.1 from the free-tweaks channel on our Discord, run it as administrator and type
restoreto make a restore point first. - Go through the tweak menus that fit your PC: CPU, power, GPU, ping, input (the video picks 16 Hex), keyboard, mouse, RAM, drive type and the Fortnite option.
- Press Win + R, open
%localappdata%and replace GameUserSettings.ini inFortniteGame\Saved\Config\WindowsClientwith the native or stretched resolution file. - In Fortnite, use Performance - Lower Graphical Fidelity or DirectX 11 as the rendering mode, and set 3D Resolution to 85 (the video's pick).
- In DirectX 11, set NVIDIA Reflex Low Latency to On + Boost and, if you have it, NVIDIA DLSS to Performance.
This guide is for Fortnite players on Windows who want more FPS and less input delay in Fortnite OG and the current seasons without guessing at settings. It follows the video step by step: the free tweak pack, the optimized game settings file with an optional stretched resolution, and the in-game settings that matter. The video's own PC has an AMD CPU, an NVIDIA graphics card, 32 GB of RAM and an SSD, so pick the options that match your hardware.
Type discord.gg/tweaks into your browser. Discord opens, and you go to the free-tweaks channel under FREE TWEAKS and download the Free Pack V5.1. Save it on your desktop, right-click it and extract it with Windows Explorer, then drag the extracted folder onto the desktop.
discord.gg/tweaksFREE TWEAKSfree-tweaksFree Pack V5.1
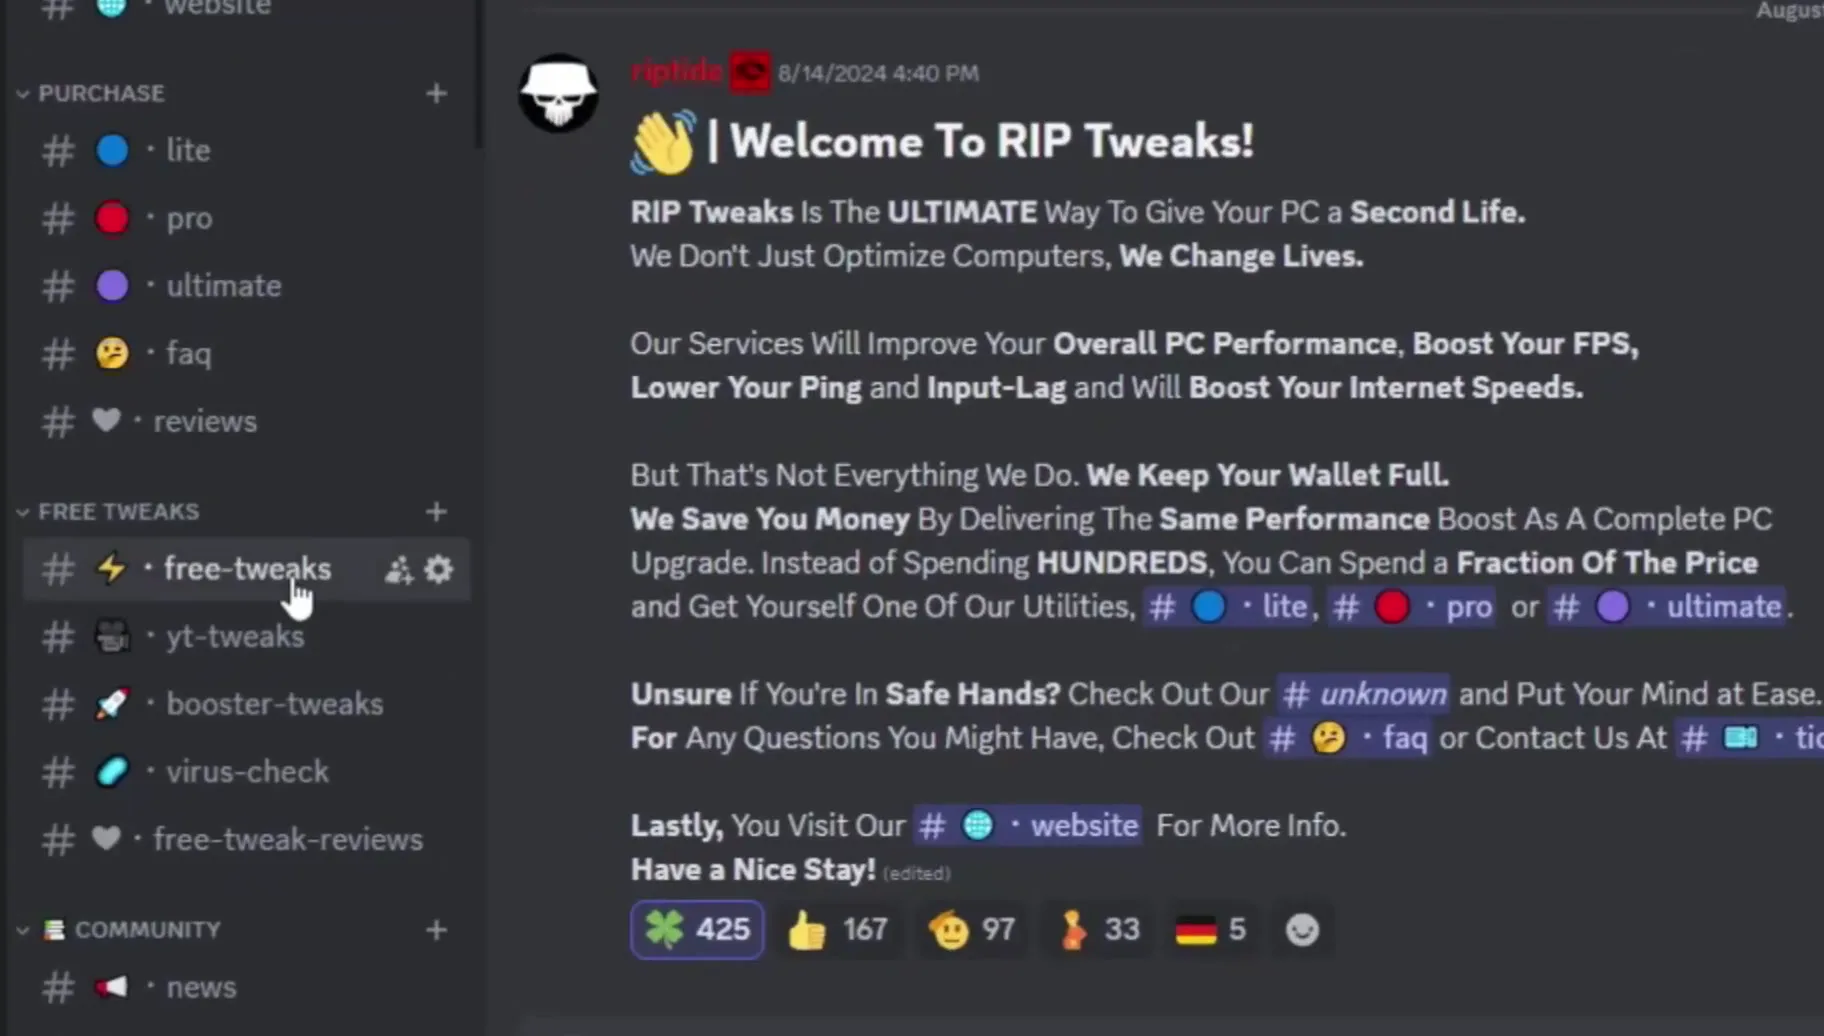
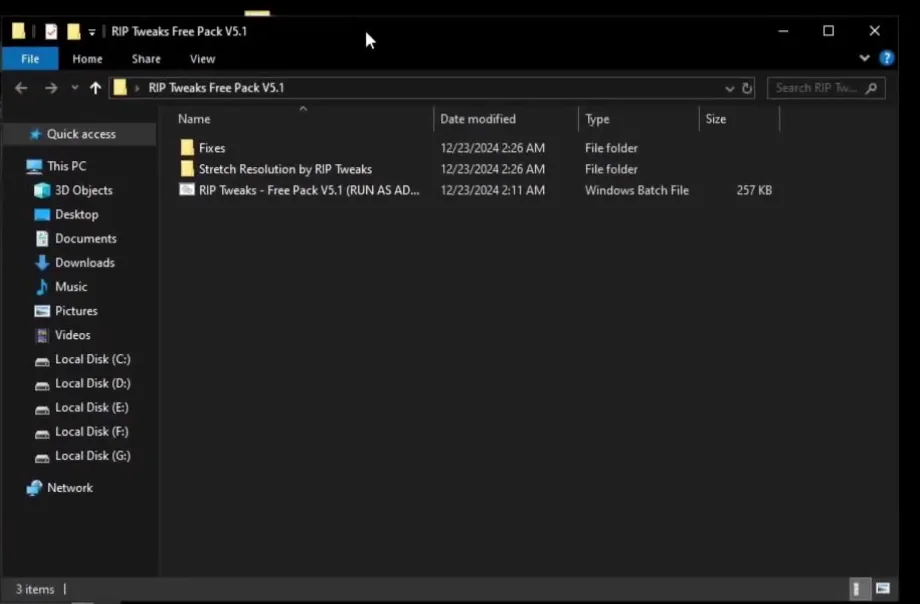
Inside the extracted folder you find three things, as the video shows later: a Fixes folder, a Stretch Resolution by RIP Tweaks folder and the batch file you run next.
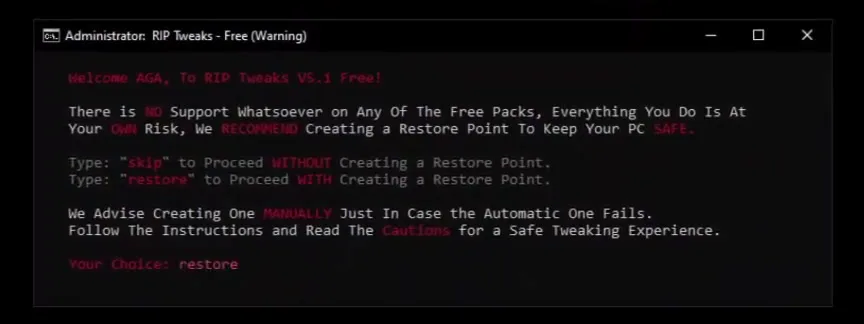
Double-click the batch file, or right-click it and choose run as administrator. The window warns that the free packs come without support and recommends a restore point. Type restore and press Enter to continue with a restore point. Typing skip continues without one, and the video recommends everyone creates the restore point.
How to undo it
If a tweak does not suit your PC, the restore point is how you go back. The video also says to create one manually in case the automatic one fails.
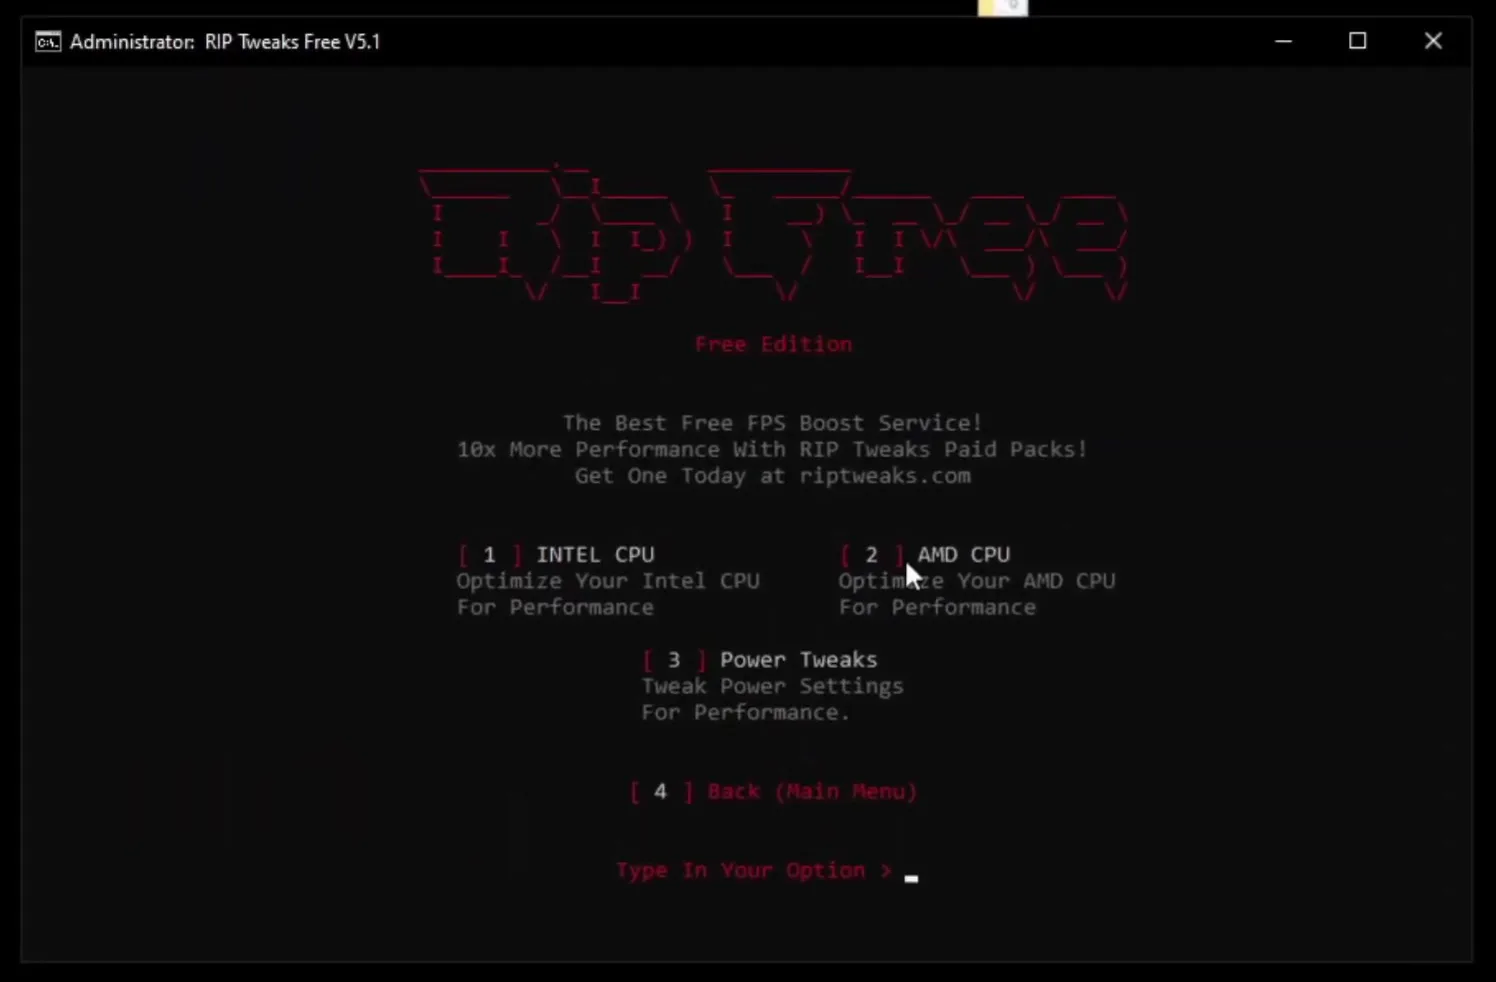
The main menu is a list of tweak groups, and the video goes through them one by one. First is CPU tweaks: choose Intel or AMD to match your processor (the video picks AMD). Then Power tweaks (option 3) and back, then GPU tweaks: again pick the one that matches your graphics card, which is NVIDIA in the video.
CPU tweaksAMD CPUBackPower tweaksGPU tweaksNVIDIA
Open the Ping tweaks to boost your internet, then the Input tweaks. This menu has five options:
- Remove Input-Delay: removes input delay with scripts and registry changes.
- 16 Hex: for the most FPS, with a high foreground boost. This is the one the video always picks.
- 32 Hex: for the best 1% lows, with no foreground boost.
- Optimize Keyboard and Optimize Mouse: faster response and lower delay.
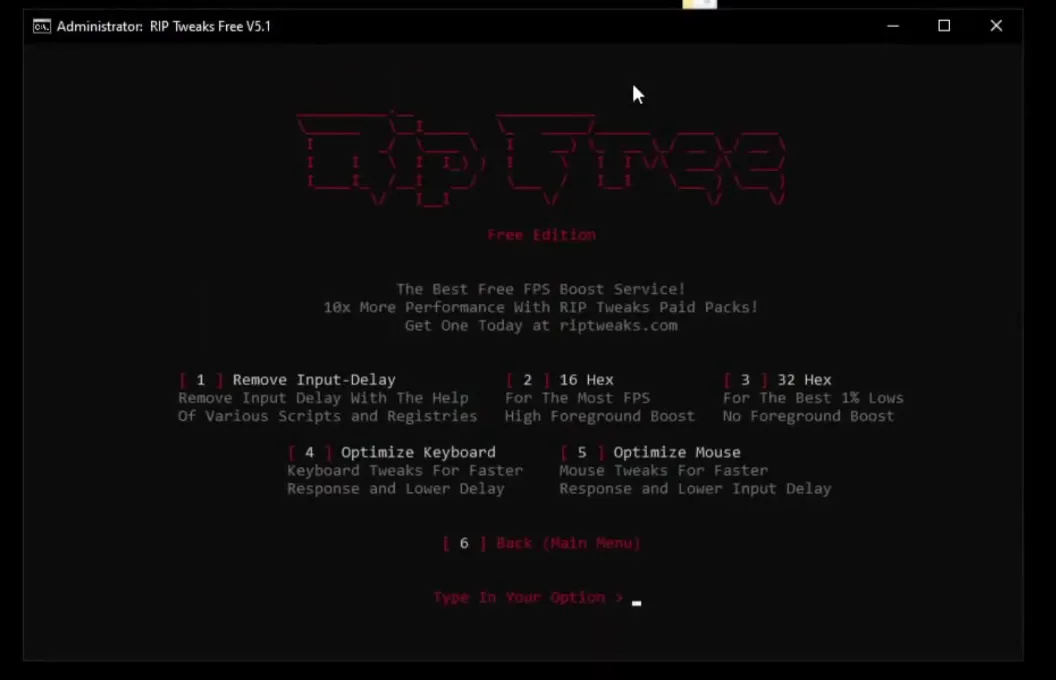
After that come the Windows tweaks (for example disabling animations) and the DirectX tweaks. The video goes through them the same way: open, apply, go back.
The next menu holds the Blow tweaks: Cleanup, Services and Debloat. The video's advice is clear: if you do not know what they are, skip them entirely. They remove a lot from your PC, so skip them if you do not want any files removed.
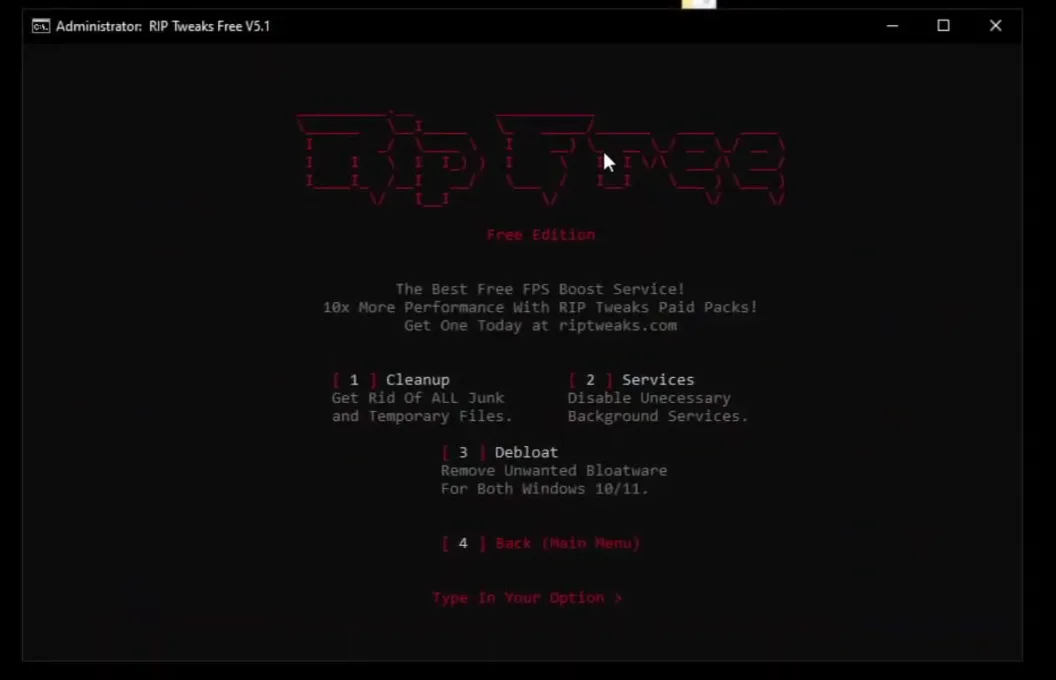
Don't do this
Do not open this menu on a PC where you are unsure what is installed. Everything else in the pack works without it.
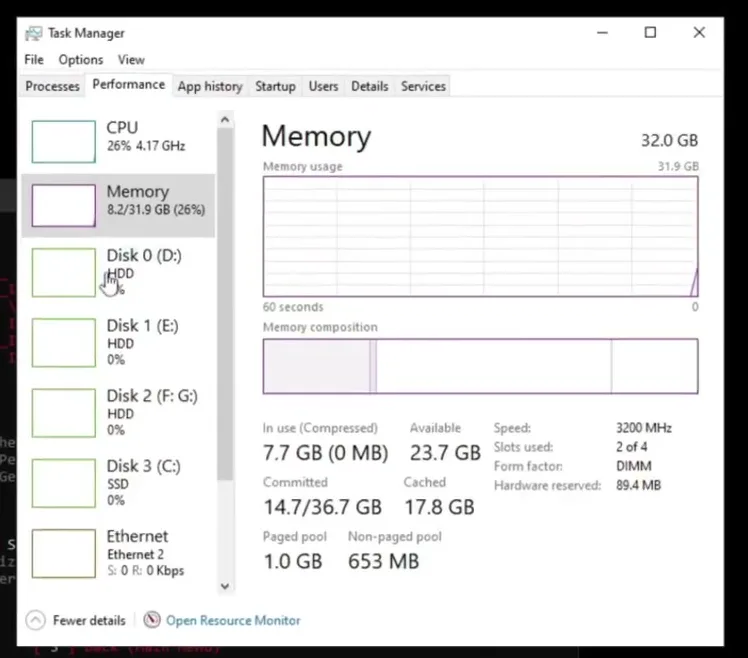
For the RAM tweaks you need to know how much memory you have. If you do not, open Task Manager, go to the Performance tab and look at Memory. The video's PC has 32 GB, so it picks option 4, the 32GB RAM one. Then open Drives: Task Manager shows whether your C drive is an SSD or a hard drive. The video's C drive is an SSD, so it picks SSD.
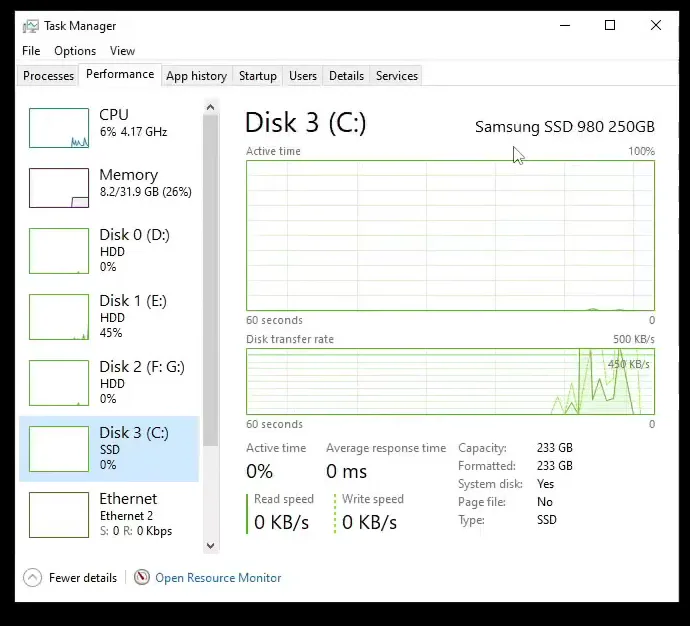
Finally open the Game section and pick option 1 for Fortnite. Then close the tweak window, because the next part happens in Windows folders.
RAM tweaks32GB RAMDrivesSSDGame1 (Fortnite)
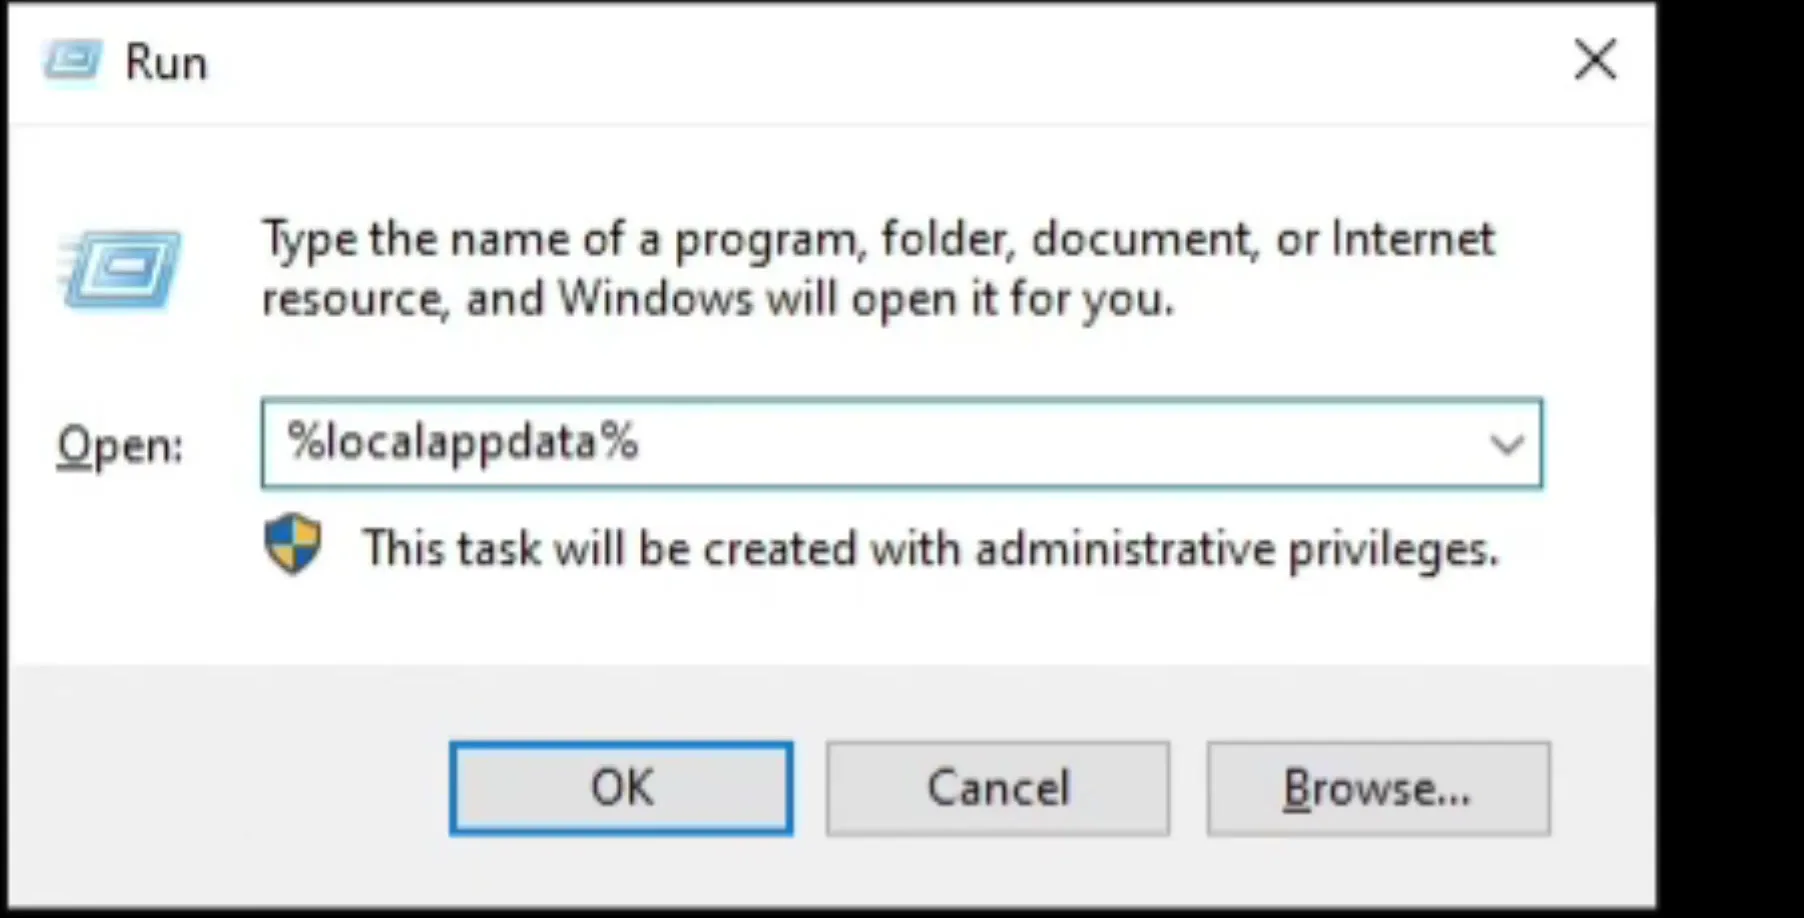
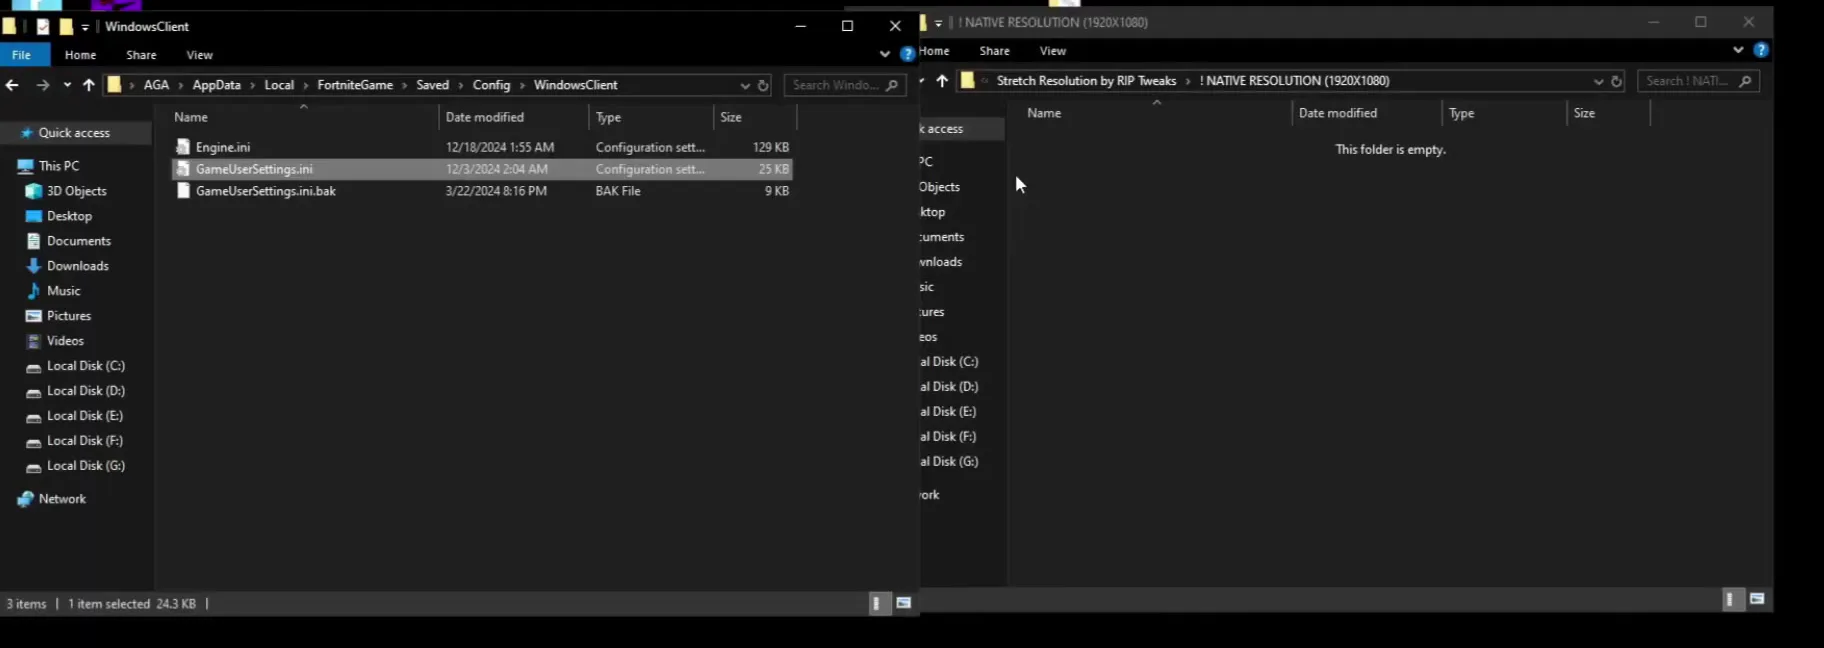
Press Win + R, type %localappdata% and click OK. In the folder that opens, go to FortniteGame, then Saved, then Config, then WindowsClient. This folder holds the GameUserSettings.ini file that you replace in the next step.
Win + R%localappdata%FortniteGameSavedConfigWindowsClient
Tip
Before you replace anything, copy your current GameUserSettings.ini somewhere safe, so you can put your own settings back later. Close Fortnite first.
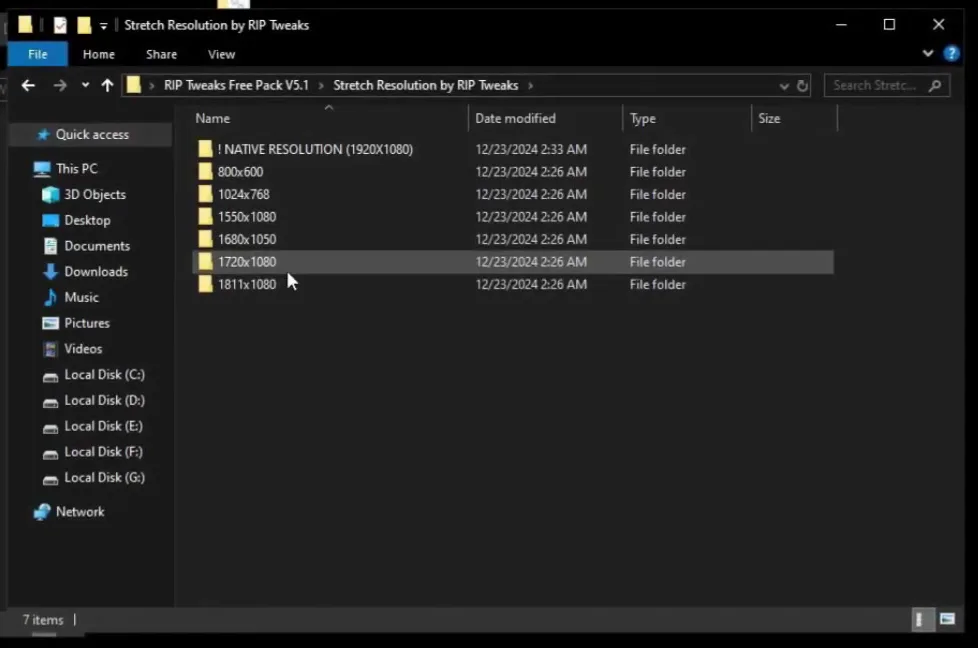
Open Stretch Resolution by RIP Tweaks in the pack. It has a folder per option: ! NATIVE RESOLUTION (1920X1080), 800x600, 1024x768, 1550x1080, 1680x1050, 1720x1080 and 1811x1080. If you do not want a stretched resolution, take the native folder. Drag the GameUserSettings.ini from it into your WindowsClient folder and click Replace. You now have the optimized game user settings file, which the video says will boost your FPS.
For a stretched resolution, go back and open the folder you want. The video picks 1720x1080: drag its file into the same place and click Replace again.
Stretch Resolution by RIP Tweaks1720x1080GameUserSettings.iniReplace
Careful
The stretched files change the resolution Fortnite starts in, so your picture is stretched on screen. If you do not like it, put the native file back or restore the copy of your own file.
Close everything and start Fortnite. Open the settings, go to the Video tab and make sure the Rendering Mode is Performance - Lower Graphical Fidelity, as the video asks you to check. Below it, under Graphics Quality (Performance Mode), set 3D Resolution to anything you want. The video always sets 85, as the best balance between quality and performance for that PC.
SettingsVideoRendering ModePerformance - Lower Graphical Fidelity
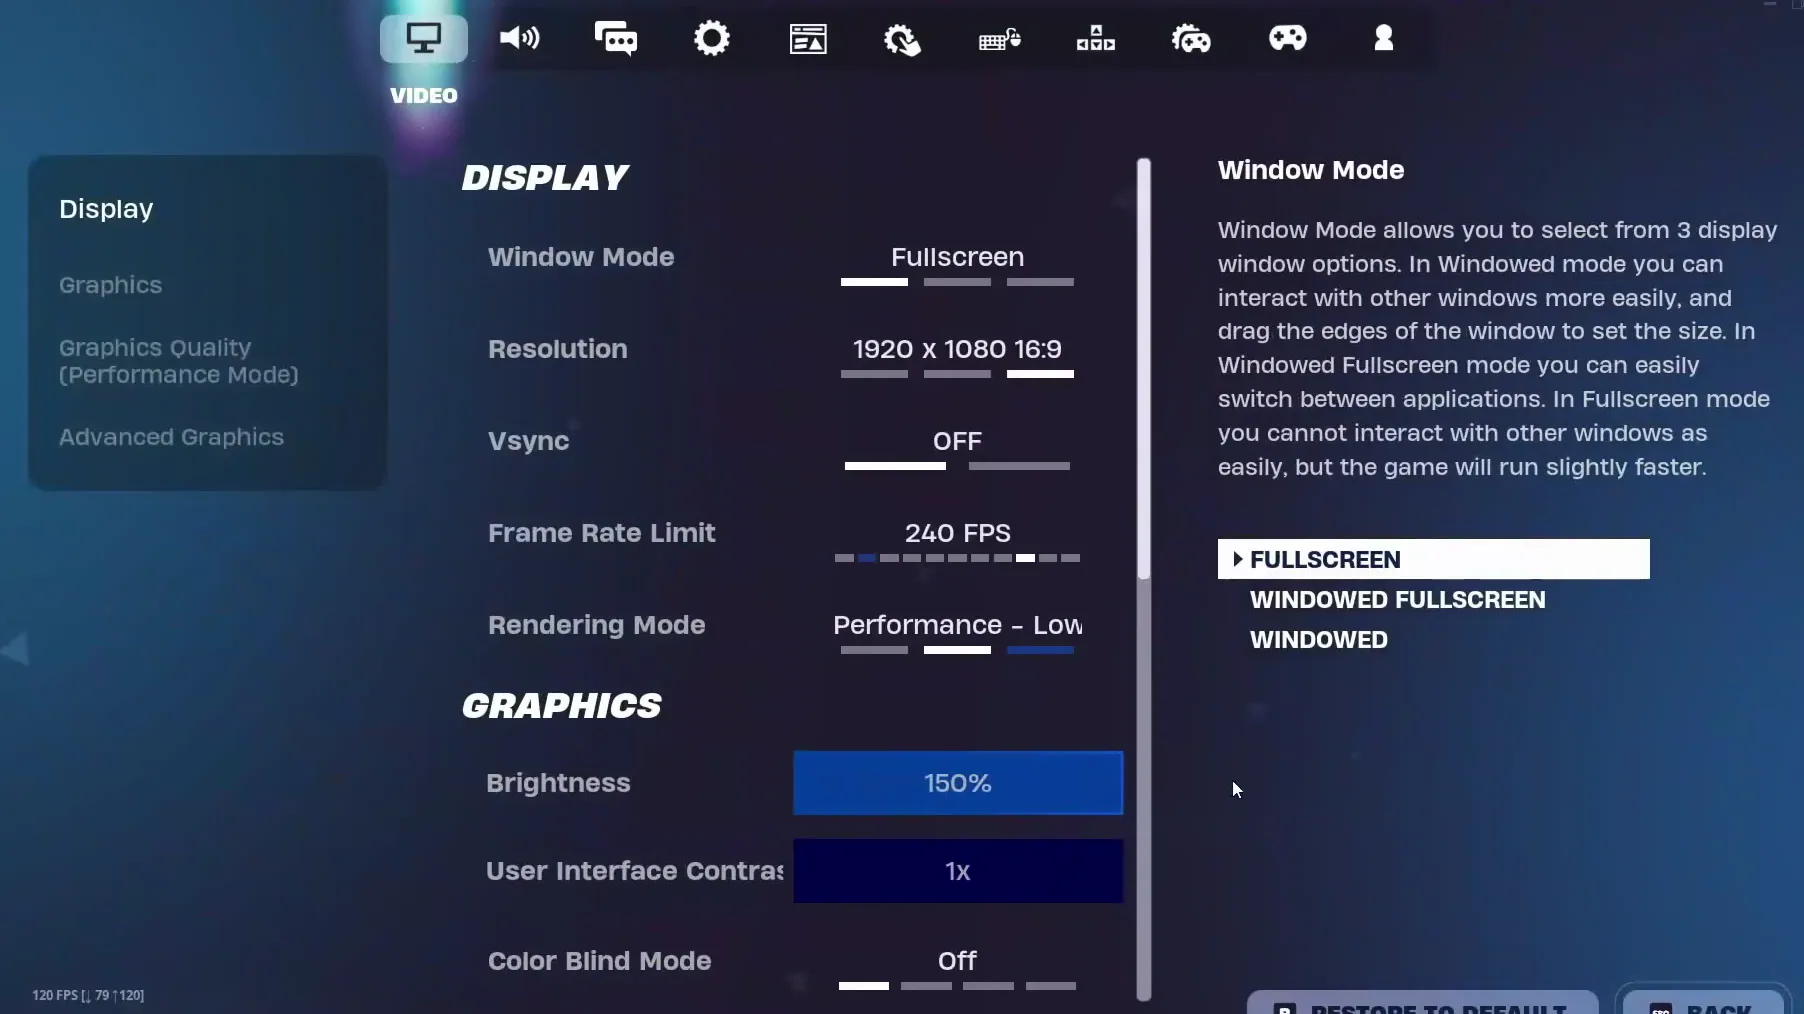
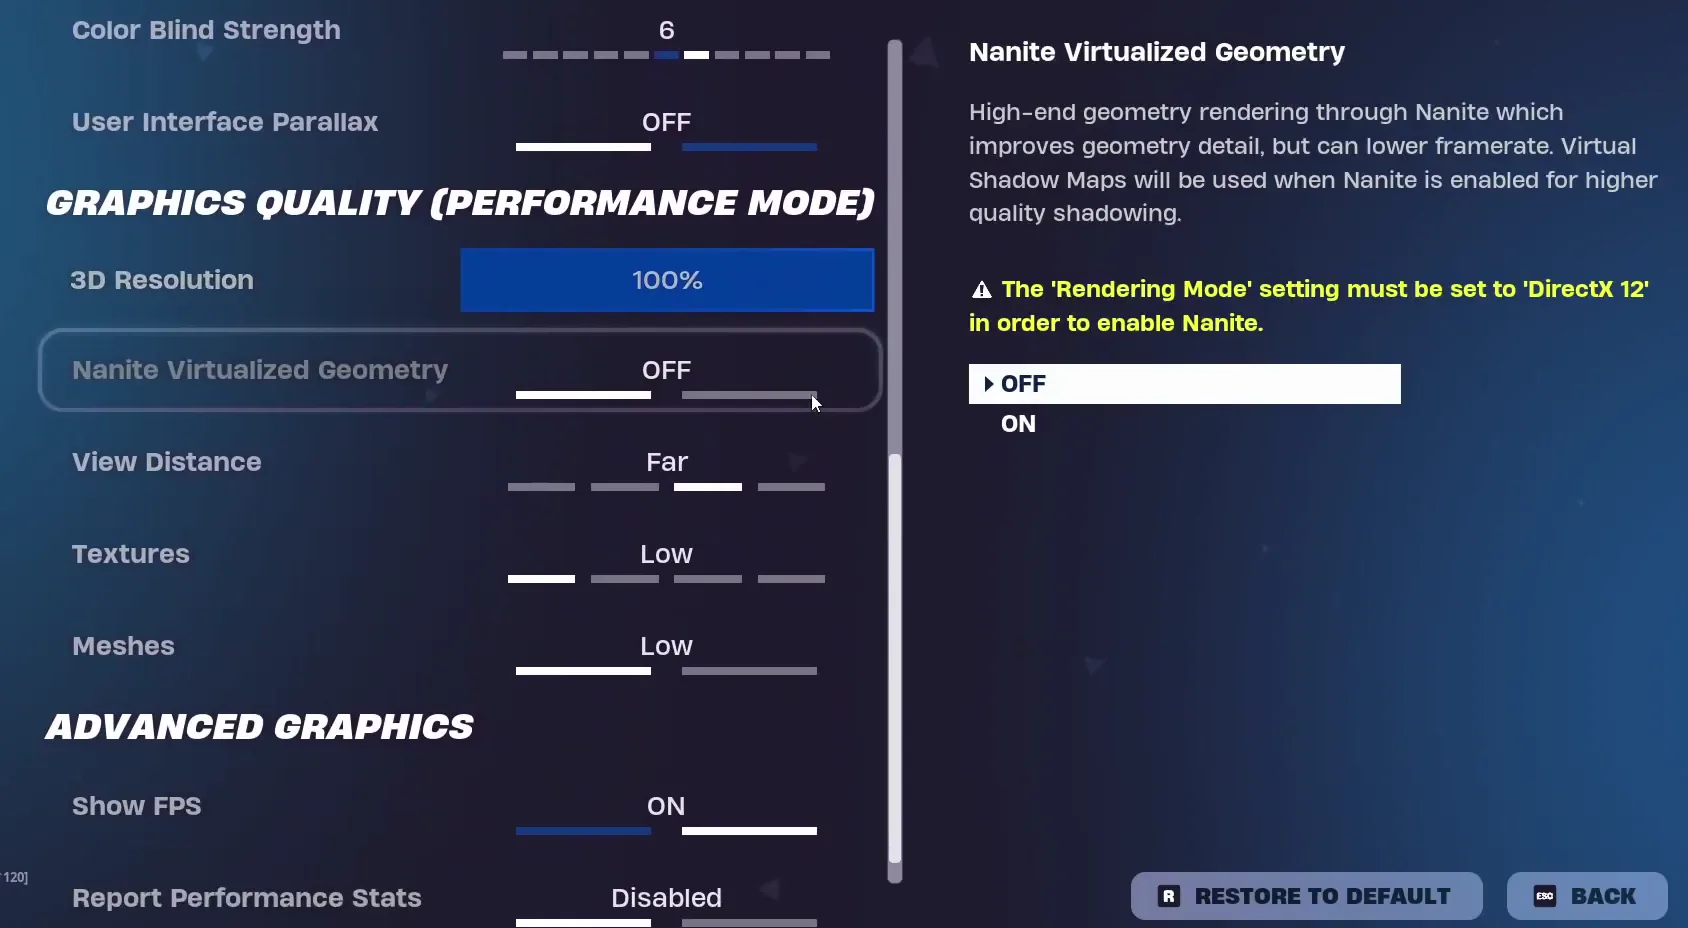
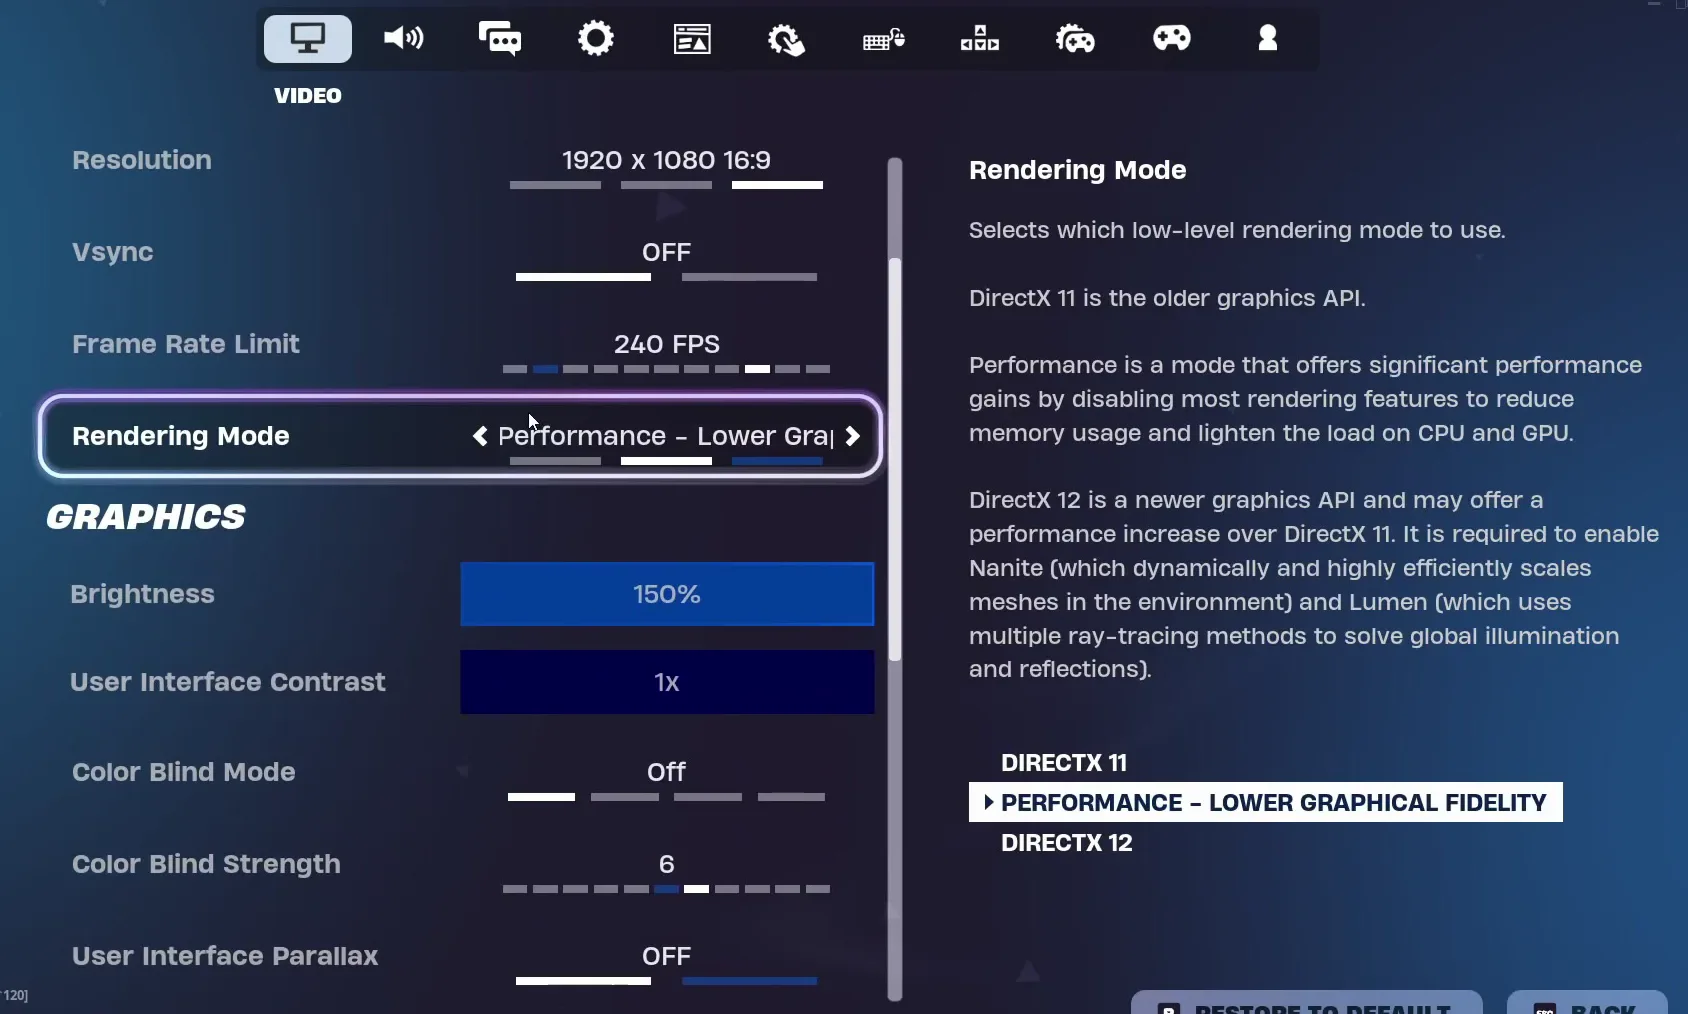
The video's second option is DirectX 11. It is similar to Performance mode and gives you far more options to customise. In the Rendering Mode list you see three entries: DirectX 11, Performance - Lower Graphical Fidelity and DirectX 12.
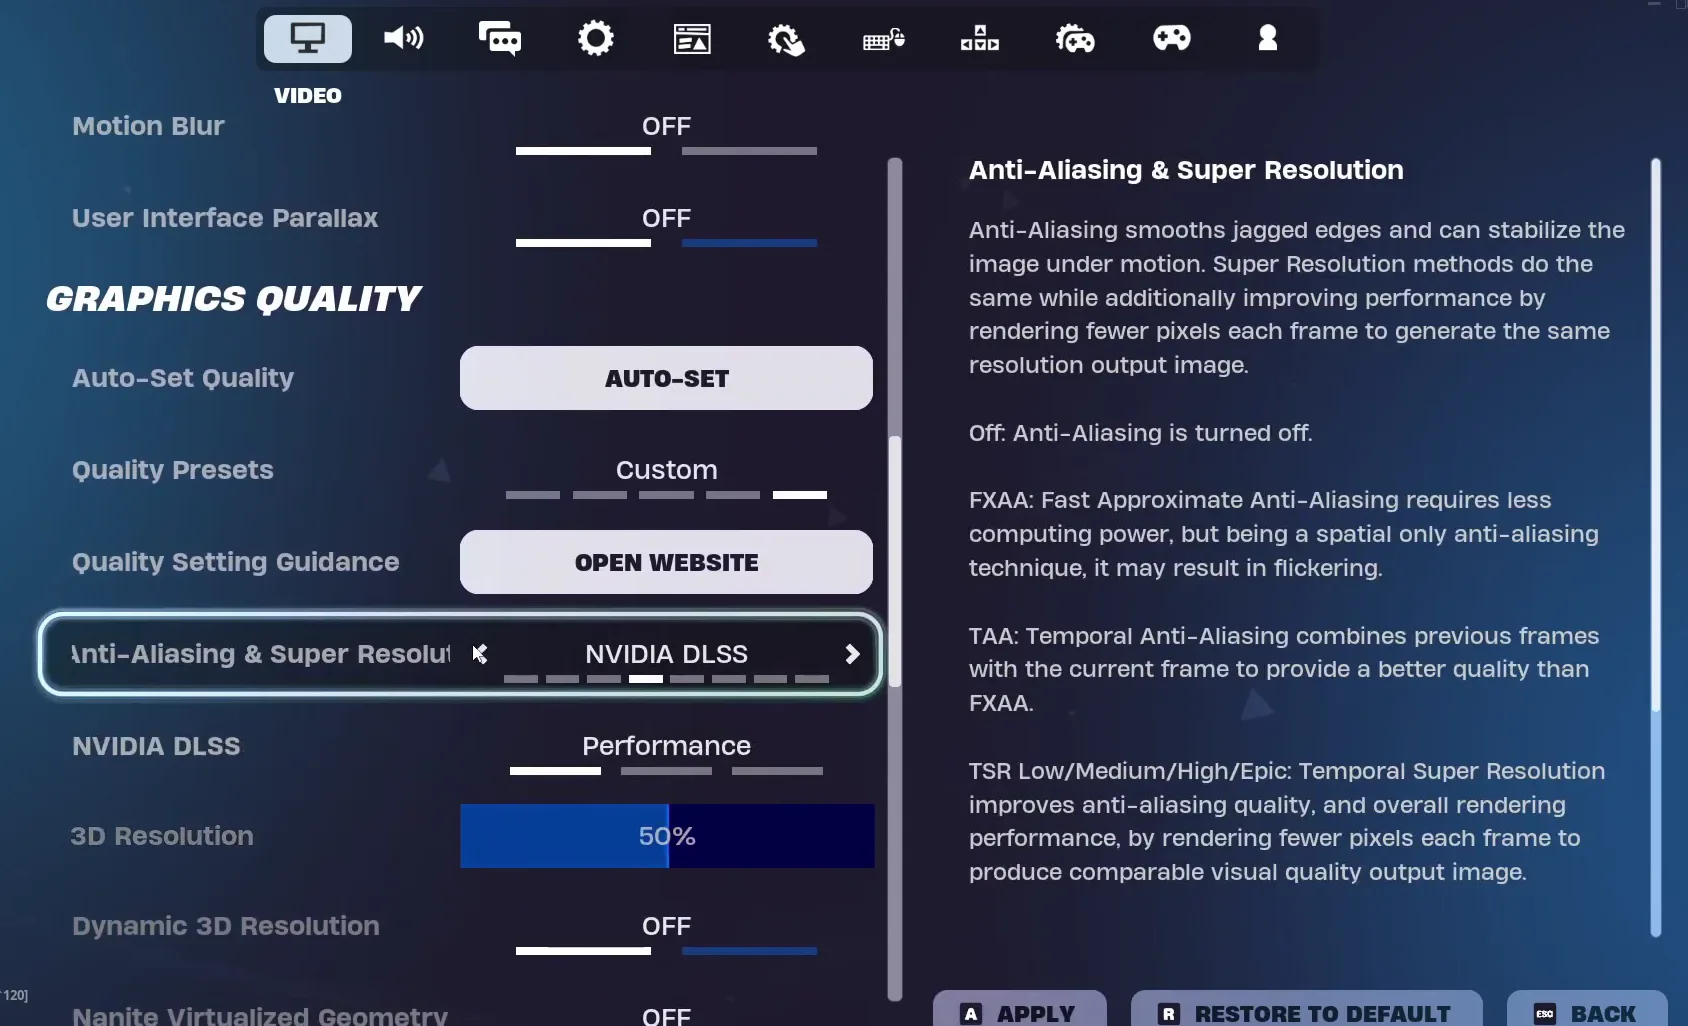
In DirectX 11 mode, look for NVIDIA Reflex Low Latency and set it to On + Boost for the lowest input delay. If your graphics card offers it, open Anti-Aliasing & Super Resolution, choose NVIDIA DLSS and set it to Performance for the most FPS.
SettingsVideoNVIDIA Reflex Low LatencyOn + Boost
How to check it worked
- Turn on Show FPS under Advanced Graphics in the Video settings. The video has it on, and the counter sits in the corner of the screen.
- Look at the Rendering Mode and 3D Resolution after the restart. If they changed back, your GameUserSettings.ini was replaced again by the game or by another copy.
- Check Reflex and DLSS in DirectX 11 mode: they should read On + Boost and Performance.
- Then play a match and judge the feel, not only the counter. Lower input delay shows in how fast your aim and movement respond.
How to undo it
To go back, put your saved copy of GameUserSettings.ini into the WindowsClient folder, or use the restore point you made in step two.
Key settings at a glance
FAQ
Does this work for Fortnite OG?
Yes, the steps are the game's own settings plus a replaced config file, and the video recorded them for Fortnite in December 2024. Your menus can look a little different in later seasons, but Rendering Mode, 3D Resolution and Reflex stay in the same Video tab. For more on this game, see our Fortnite input delay guide.
What does GameUserSettings.ini do?
It is Fortnite's saved settings file, in FortniteGame\Saved\Config\WindowsClient. The pack's version holds the optimized settings and, in the stretched folders, a different resolution, so replacing it changes the game before you even open the menu.
Should I pick 16 Hex or 32 Hex?
The video picks 16 Hex for the most FPS, with a high foreground boost. The menu text says 32 Hex is for the best 1% lows with no foreground boost, and the video says you can use it if you want.
Which stretched resolution should I choose?
The pack has 800x600, 1024x768, 1550x1080, 1680x1050, 1720x1080 and 1811x1080, and a native 1920x1080 folder for no stretch. The video picks 1720x1080. If you want no stretch, use the native file.
Is Performance mode or DirectX 11 better?
The video calls DirectX 11 similar to Performance mode but with many more customisation options, and Reflex shows up in DirectX 11. Performance mode is the lighter one, with lower graphical fidelity. For a deeper look at it, read our Fortnite Performance mode guide.
Why can't I find NVIDIA Reflex or DLSS?
Both are NVIDIA features, and the video asks for Reflex in DirectX 11 mode. If your card does not offer DLSS, or you are on Performance mode, the options may not be listed.
Is it safe to run the free pack?
The pack itself warns that the free packs have no support and that you use them at your own risk, and it recommends a restore point. Make one with restore at the start, and skip the Blow tweaks as the video does. For more on FPS, input delay and ping in Fortnite, see our Fortnite FPS, input delay and ping guide.
 RIP Tweaks
Do it in a few minutes with RIP Tweaks
- Free plan for Windows 10 and 11
- A backup first, and every tweak can be switched off again
- Made for higher FPS, lower input lag and steadier ping
Free · Windows 10 and 11
