Windows 11 Optimization Guide for Gaming, Step by Step

Written version of our video, every step checked against it.
Quick answer
- Create a restore point before you change anything. It is the one way back from every step below.
- Trim the system first: disable startup apps, set Windows to Adjust for best performance, then clear caches and run Disk Cleanup.
- Apply the system tweaks in order: power tweaks, services, Ultimate Performance power plan, debloat script, the RAM file for your memory size and the SSD or HDD tweak.
- Tune the network: network restart, TCP Optimizer profile, adapter settings (interrupt moderation off, buffers 512 or 1024 and double), DNS
8.8.8.8and8.8.4.4. - Finish with the hardware: CPU tweak, unpark cores, your GPU tweak, MSI mode on the GPU, then Game Mode and a High performance GPU preference for your game.
This guide is for anyone who wants a clean, responsive Windows 11 gaming PC and prefers to see each change before it happens. It follows our older video click by click, from the restore point to the Windows graphics settings. The video uses a folder of scripts and small tools from our Discord and an earlier version of the RIP Tweaks app, so this page explains the ideas and settings, not how the app looks today.
In this video
The video starts in the RIP Tweaks Discord. Join the server from the video description, open the tutorial pack channel and download windows11optimizations.zip. Your browser opens the file, you drag it to the desktop, open it and drag the Windows 11 Optimizations folder out onto the desktop. Everything that follows happens inside that folder, numbered from 1 to 10.
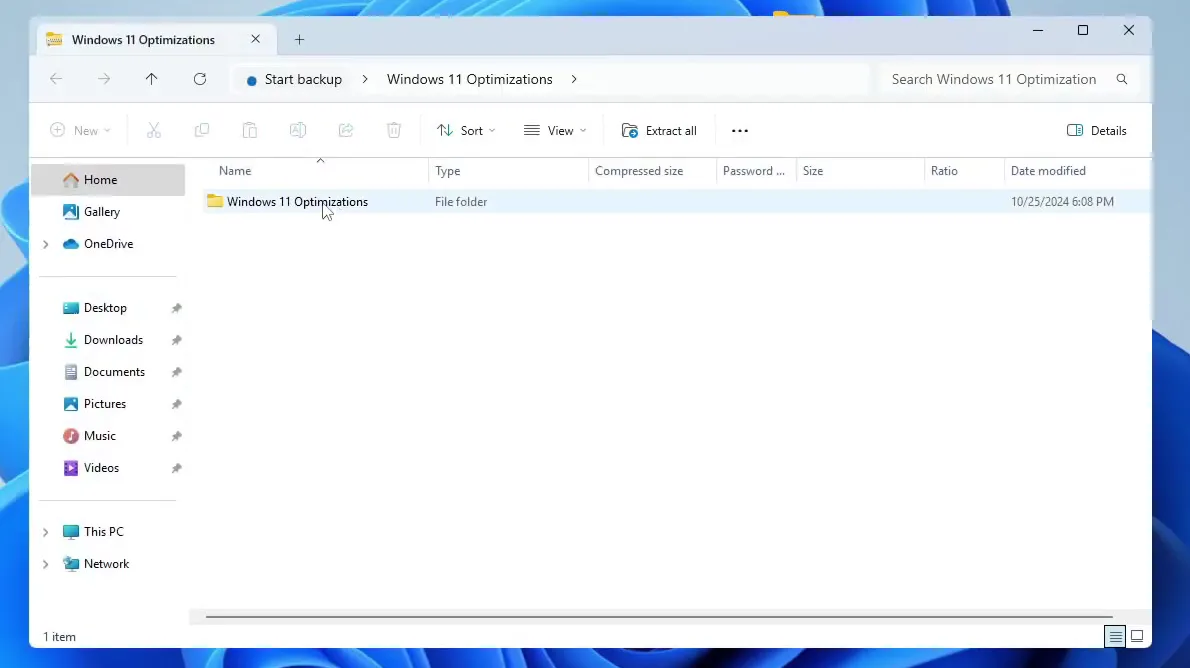
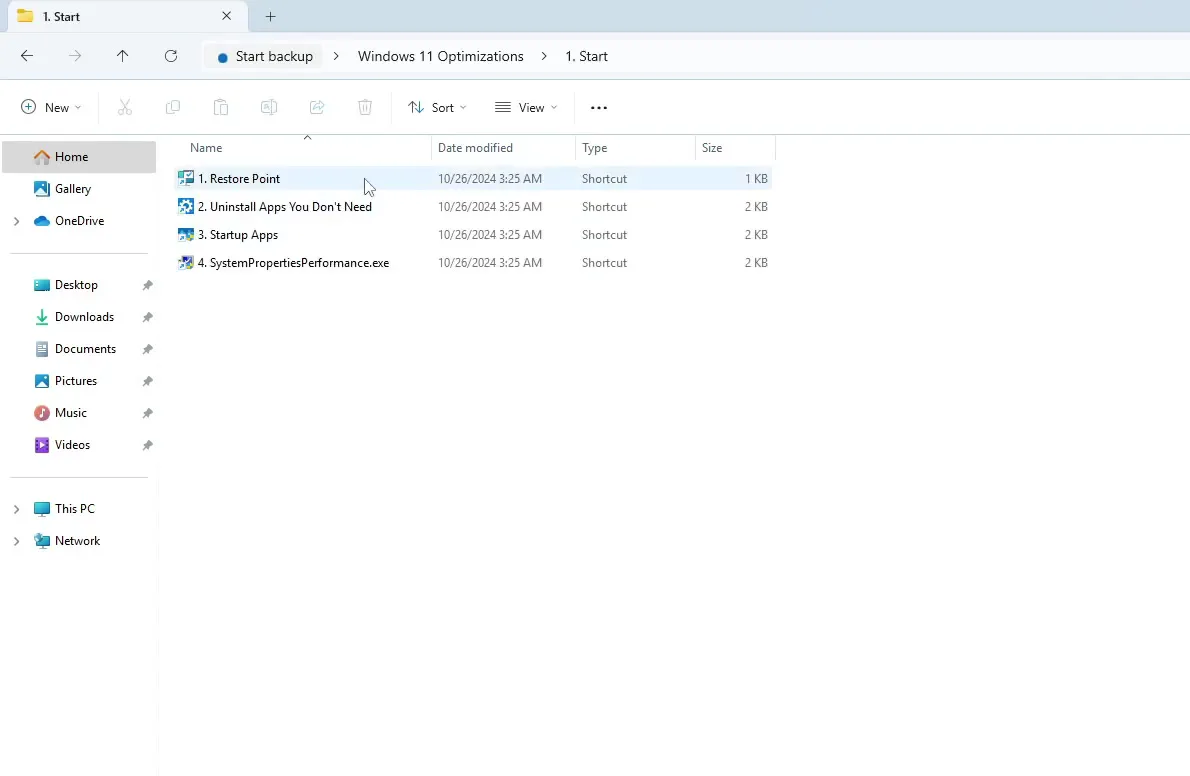
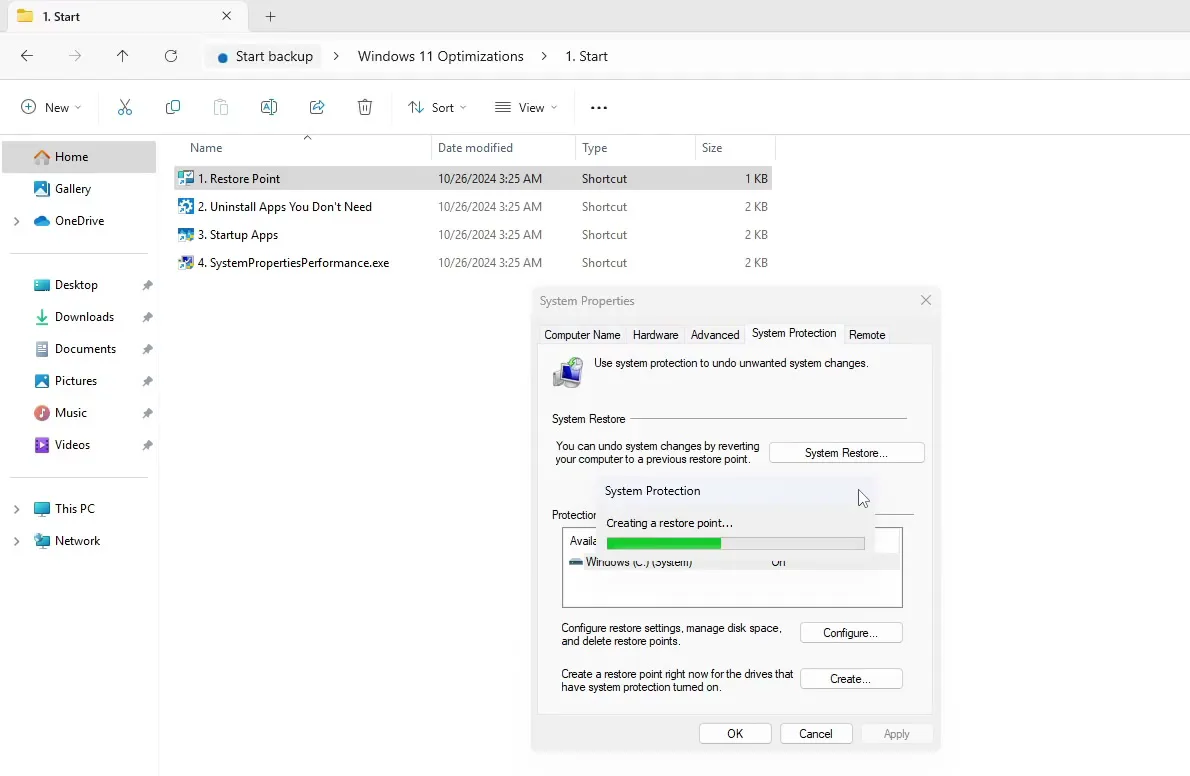
Open the 1. Start folder and double-click 1. Restore Point. In System Properties click Create, type a name (the video uses riptweeks) and click Create again. Wait until Windows says it is done.
1. Start1. Restore PointCreateName itCreate
How to undo it
To go back: close the folder, open System Restore, click Next, pick the restore point you named, click Next and Finish. Windows returns to that state and your files stay where they are.
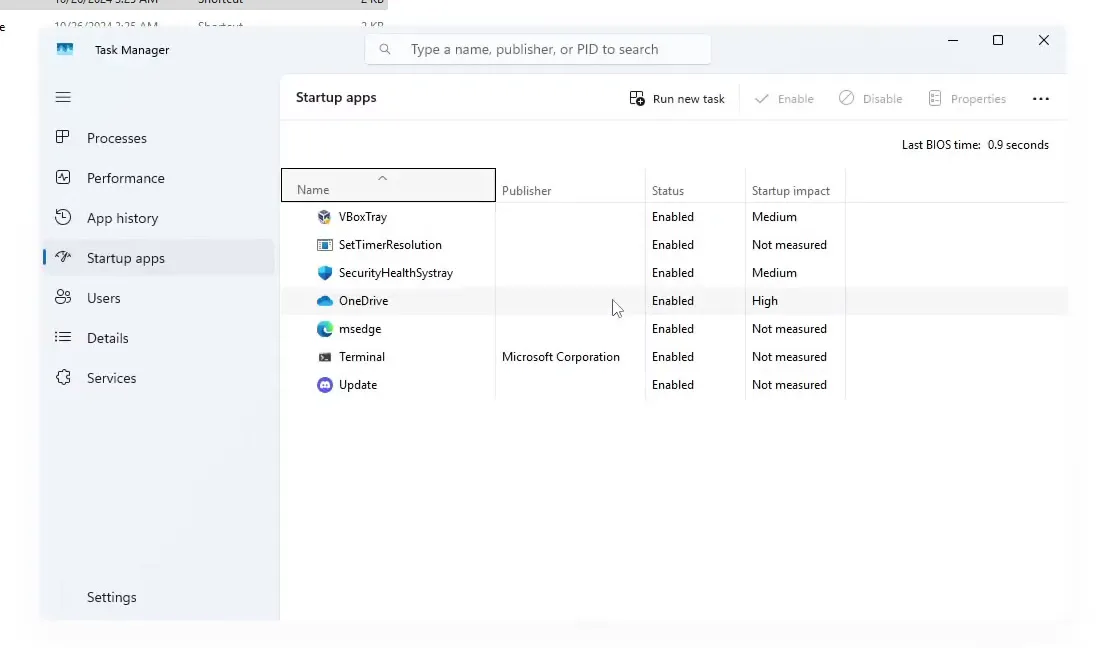
Three small jobs in the same folder. 2. Uninstall Apps You Don't Need opens the app list: remove what you never use (the video removes a monitoring tool it does not need). 3. Startup Apps opens Task Manager on the Startup apps tab: right-click anything that does not have to start with Windows, such as OneDrive or Discord, and choose Disable.
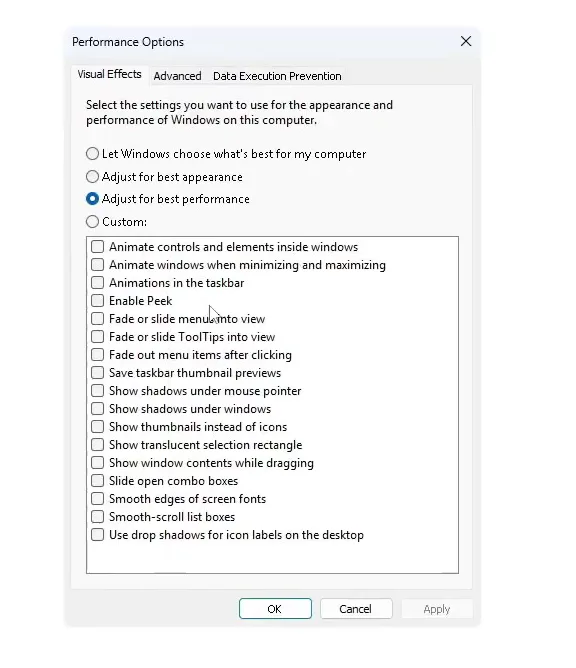
Then run 4. SystemPropertiesPerformance. Choose Adjust for best performance and click Apply. Windows now looks plain. To get most of the look back at almost no cost, tick Show window contents while dragging and Smooth edges of screen fonts and click Apply again.
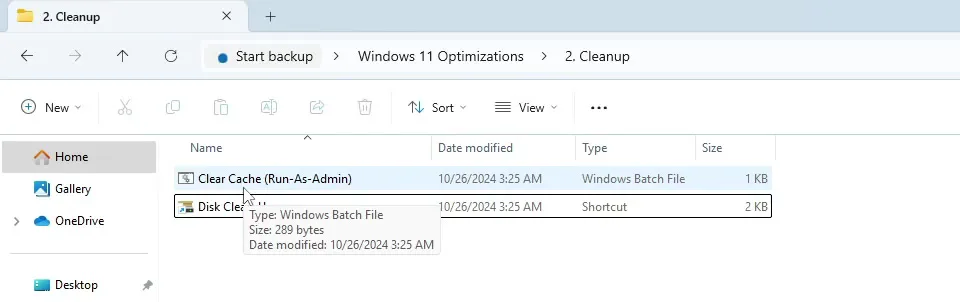
The 2. Cleanup folder has two items. Clear Cache (Run-As-Admin) deletes temporary files, the temp folder and prefetch. Right-click it, choose Run as administrator, and if SmartScreen blocks it click More info, then Run anyway, then Yes. It is a short batch file, and the video points out you can right-click it, choose Edit and read it first.
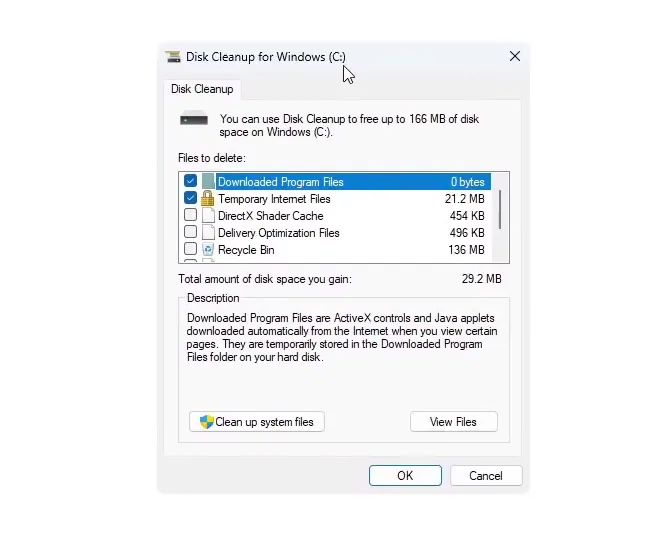
Then open Disk Clean-Up, tick everything you are happy to lose (the video names DirectX Shader Cache and the Recycle Bin), and click the clean up system files button.
The 3. Performance folder holds three batch files. Run each one as administrator, in this order:
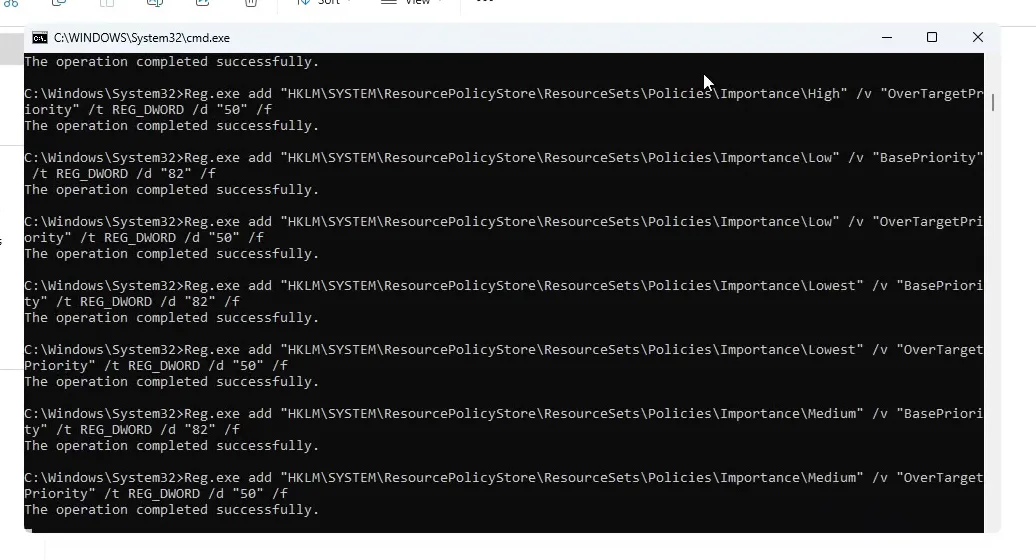
- Power Tweaks (!): a large set of registry changes. The exclamation mark means it is a strong tweak you run at your own risk.
- Services: disables background services you do not need.
- Ultimate Power Plan: makes the Ultimate Performance power plan available and active.
Careful
Create the restore point before Power Tweaks. The video says the Ultimate Performance plan may help a lot on some PCs and not at all on others. If you get stutters, open power plans and switch back to Balanced.
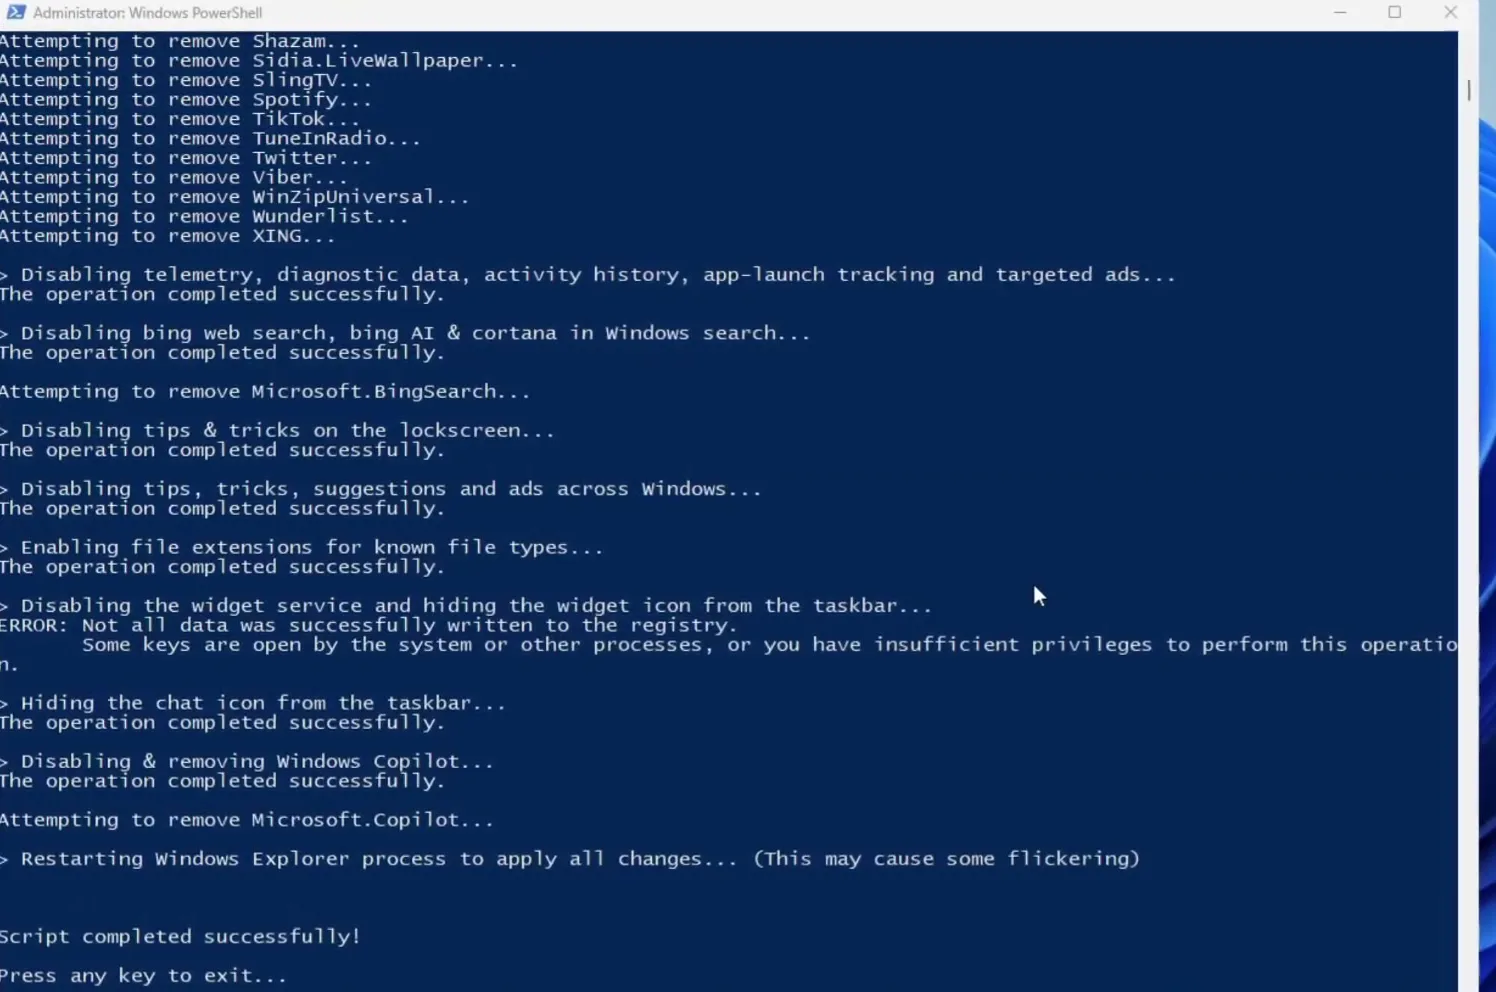
The 4. Debloat folder opens the page of a Windows 11 debloat script on GitHub. Click Download zip, drag the zip to the desktop, open it, drag the master folder out and open it. Double-click Run, click Yes, type 1 and press Enter for the default mode. It removes the default selection of preinstalled apps, telemetry, Bing in search, Cortana and Windows Copilot. When it prints that the script completed successfully, press Enter once more.
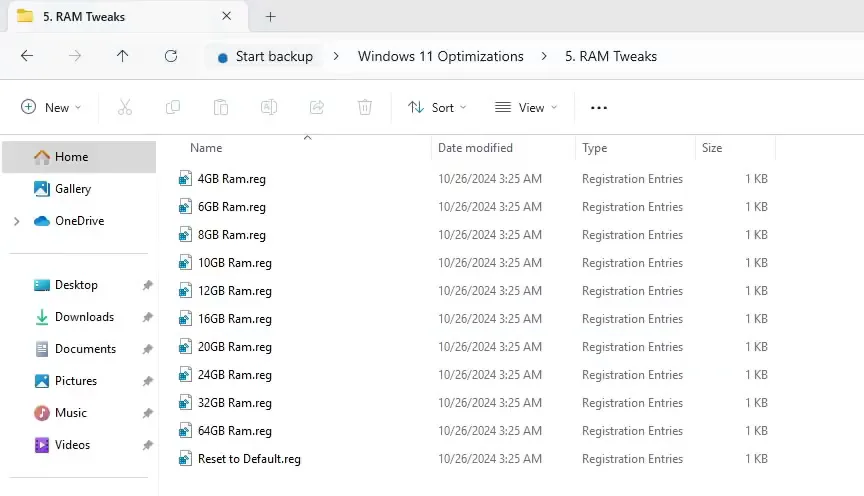
Right-click the taskbar, open Task Manager, go to Performance and read your RAM. In the 5. RAM Tweaks folder double-click the file that matches it (the video has 16 GB, so it runs the 16GB file), then click Yes twice and OK. The folder also has Reset to Default.reg. The video starts from 124 background processes and checks the count again after the last tweak.
In 7. Internet Tweaks first run network restart as administrator. It restarts the whole network stack, the internet may drop for a few seconds, and it is meant for when you are lagging badly. Then open the TCP Optimizer folder, run TCPOptimizer.exe as administrator and wait for it to load.
TCP OptimizerFileImportRIP Tweaks.spgOpenApply changes
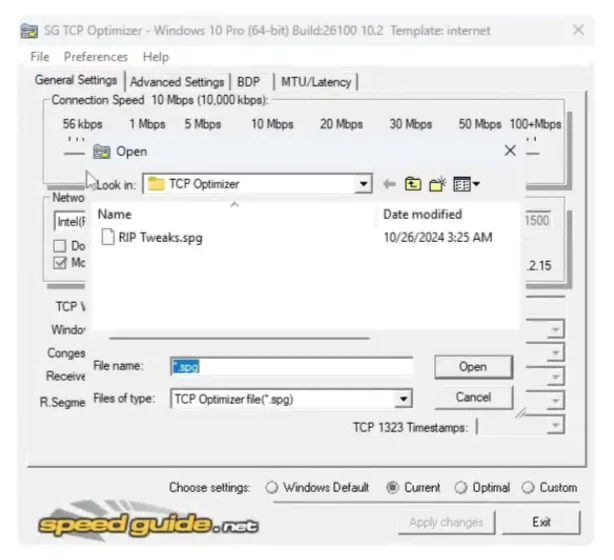
Click OK when it finishes. If it asks to reboot, the video clicks No and reboots later, once all the network steps are done.
How to undo it
To return the TCP settings: in TCP Optimizer choose Windows Default and click Apply changes.
Open the Internet Settings shortcut, go to Advanced network settings, expand your Ethernet adapter and click More adapter options, then Edit. In the adapter properties click Configure and open the Advanced tab. The video sets these values:
- Interrupt Moderation: Disabled
- Interrupt Moderation Rate: Off
- Large Send Offload: Disabled
- Priority & VLAN: Enabled
- Receive Buffers:
512, or1024if you have more RAM - Transmit Buffers: double the receive value (
1024or2048) - Speed & Duplex: leave on Auto
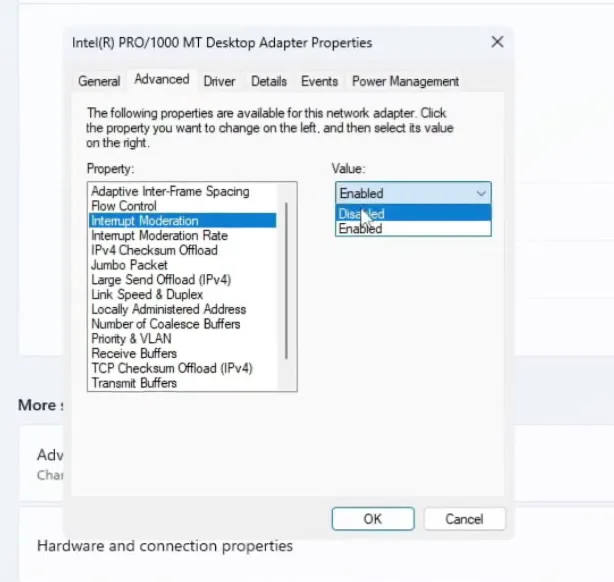
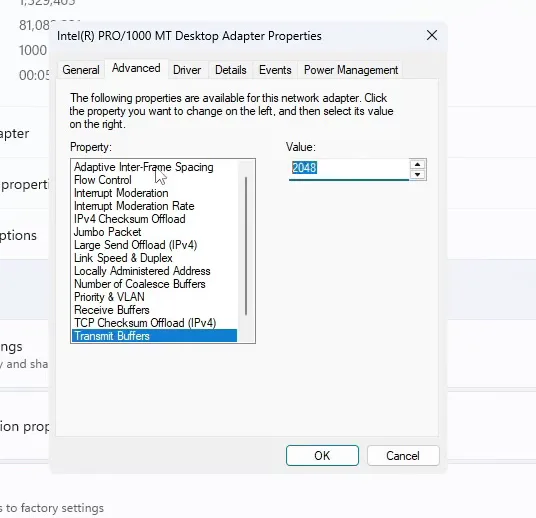
Good to know
The property list depends on your network card. If an entry from the list above is missing on your adapter, skip it. The video's adapter is a different model from yours.
Back in the adapter's list double-click Internet Protocol Version 4 (TCP/IPv4), choose Use the following DNS server addresses and type 8.8.8.8 as preferred and 8.8.4.4 as alternate (Google's public DNS), then OK. The connection may restart for a moment. The video says to test it and keep what suits you most.
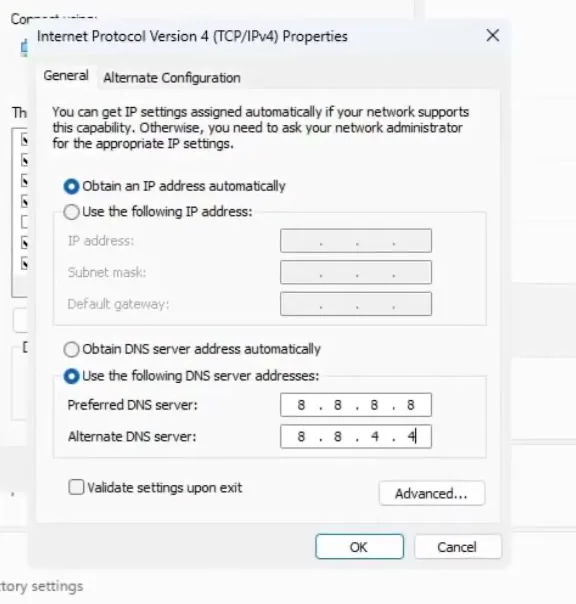
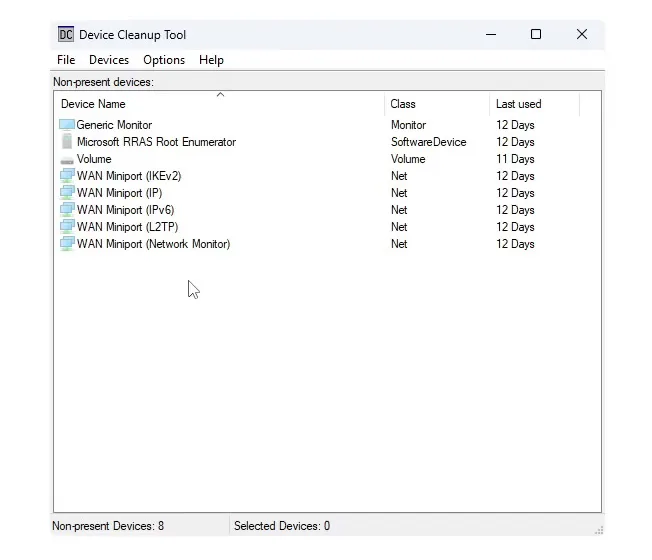
The 8. Input Lag Tweaks folder holds the Device Cleanup Tool. Run it as administrator and click Yes. It lists devices Windows remembers but that are not connected. Highlight the ones you no longer use, right-click and choose Remove device, then close the tool.
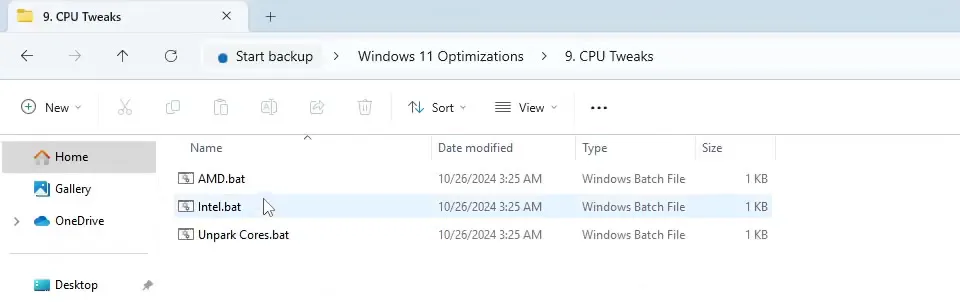
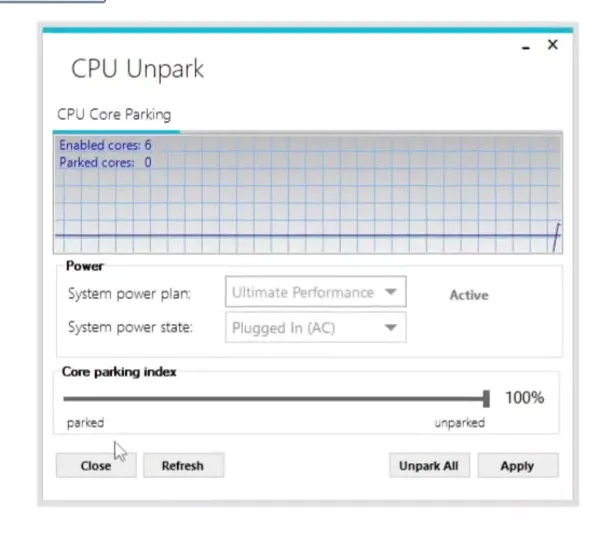
In 9. CPU Tweaks pick the file for your processor, AMD.bat or Intel.bat (Task Manager, Performance shows which you have; the video has AMD), run it as administrator and click Yes. Then download the unpark CPU app, run it and click Unpark All. Make sure the core parking index is at 100% (not 50% or 0), then click Apply.
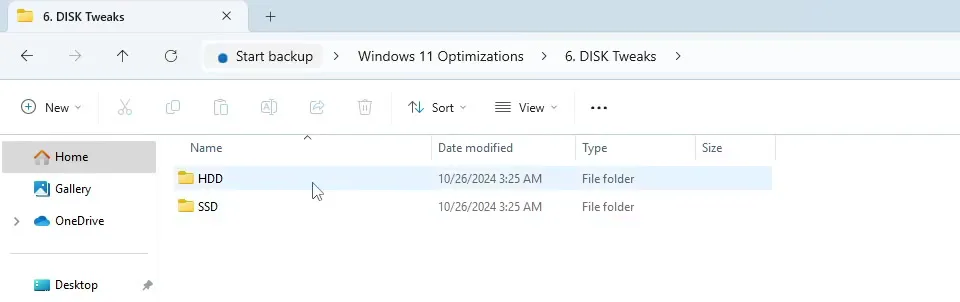
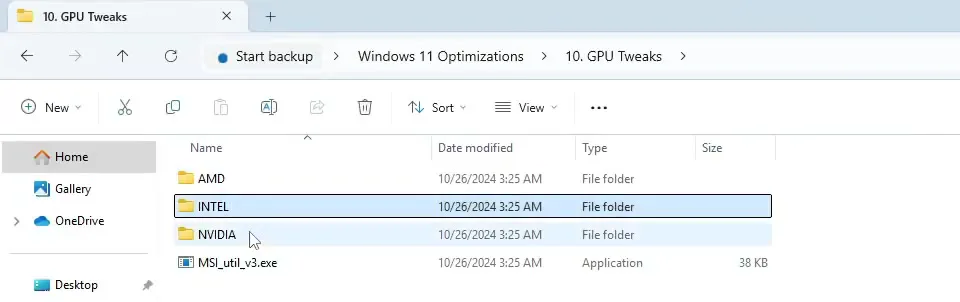
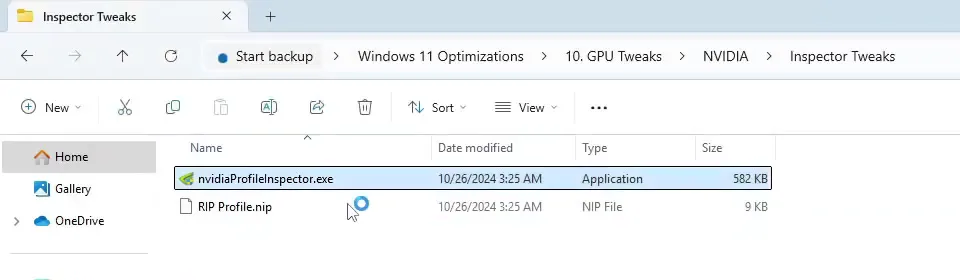
The 10. GPU Tweaks folder has AMD, INTEL and NVIDIA folders plus MSI Utility V3. Open the one for your card and run its tweak as administrator. The Intel folder, for example, has a Command Center item and an Intel power tweak. These are marked with an exclamation mark because they are strong and can disable some Windows functionality, so run them only with a restore point in place.
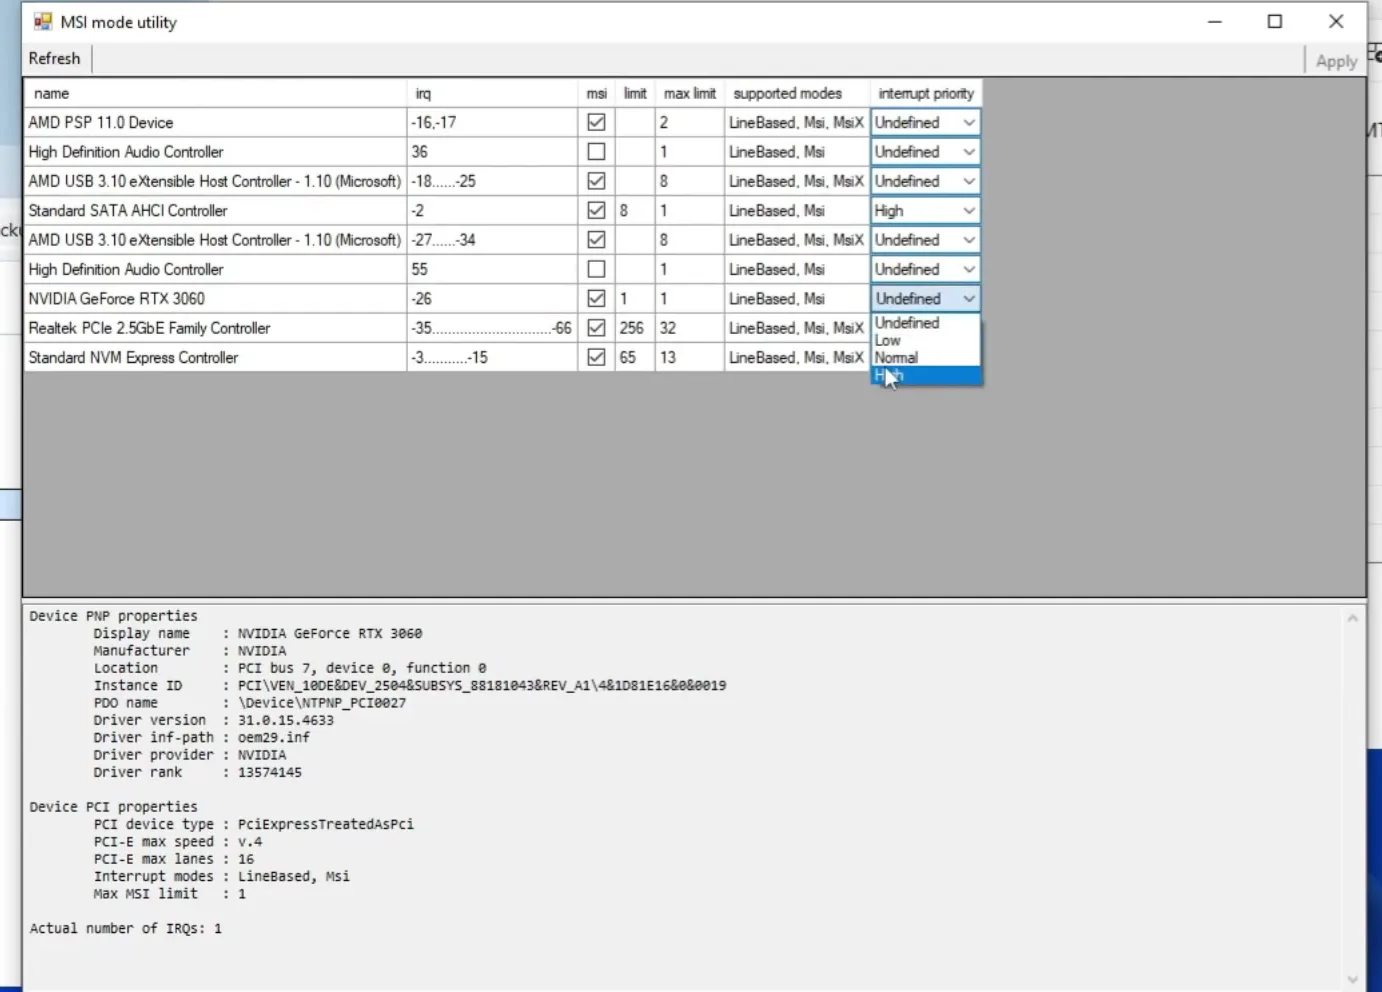
Last, two Windows settings. Open Settings, Gaming, Game Mode and make sure it is on. The video says to test it on and off and keep what feels better. Then open System, Display, Graphics and make sure Optimizations for windowed games is on.
SettingsSystemDisplayGraphicsAdd desktop appYour game .exeGPU preferenceHigh performance
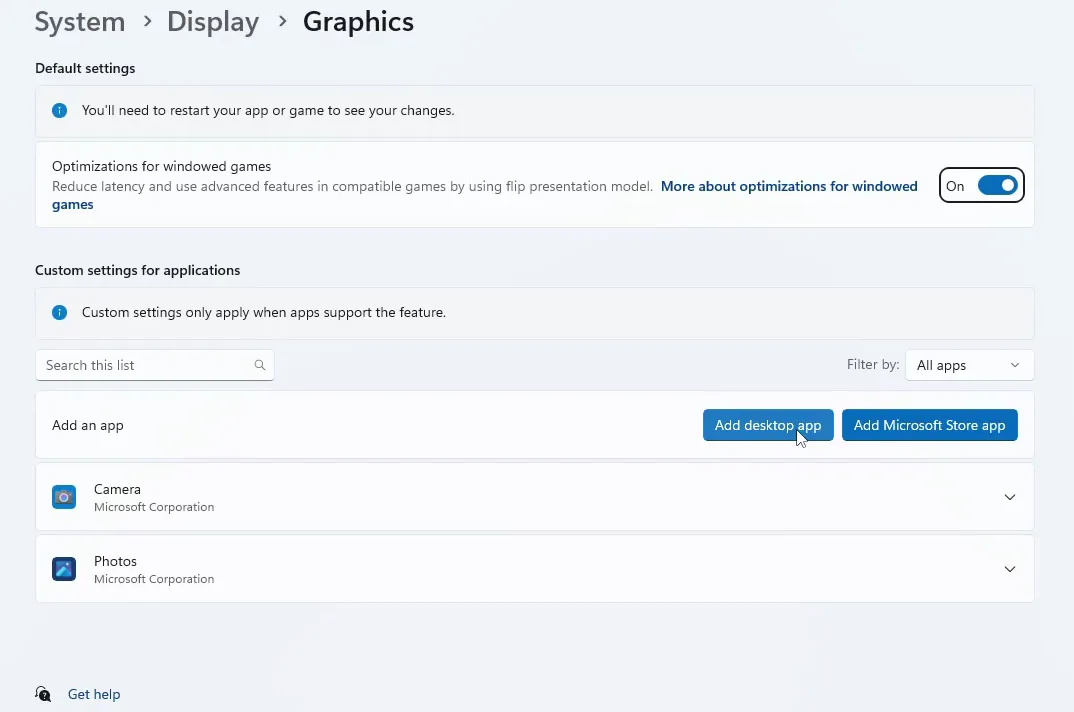
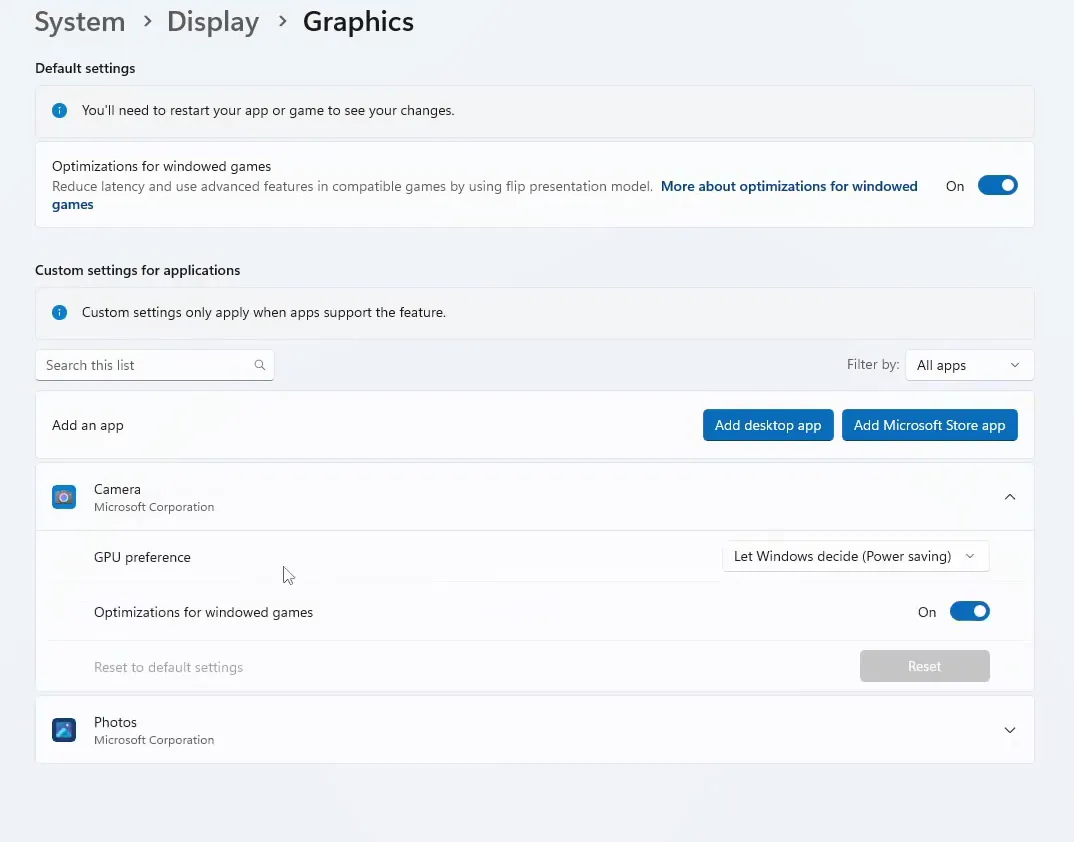
For each game (the video names Fortnite and Valorant) click Add desktop app, pick the game's .exe, open its options, keep the windowed-games setting on and set GPU preference to High performance.
Tip
Reboot once after the network and registry steps, since TCP Optimizer and the registry files only fully apply after a restart.
How to check it worked
- Restart, open Task Manager and compare the process count on the Performance and Processes tabs with the number you saw before (the video starts at 124).
- Open Startup apps and confirm the apps you disabled stay disabled and that Windows boots faster.
- In power options confirm Ultimate Performance is selected, and in the unpark tool confirm 100%.
- Play your game for a session. Judge frame pacing, stutter and input feel on your own PC, and if one step made things worse, undo only that step.
Key settings at a glance
FAQ
Is it safe to optimize Windows 11 with these scripts?
Several steps change the registry and services, and the video labels the strongest ones with an exclamation mark. Create the restore point first, as in the video, and you can return to the earlier state from System Restore.
Which power plan is best for gaming on Windows 11?
The video activates Ultimate Performance and says it helps some PCs a lot and others not at all. If you see stutters, switch back to Balanced and compare.
Should I unpark my CPU cores?
The video does it with a small tool: click Unpark All, keep the core parking index at 100% and apply. It says this improves performance in the long term. The index in the video was already at 100%, so check yours rather than assume.
Which DNS does the video use?
Google's public DNS: 8.8.8.8 preferred and 8.8.4.4 alternate. The video says to test it and see what suits you most.
Do I need to turn Game Mode on?
The video recommends having it on, and says you can try it on and off to see what feels better on your PC.
How do I undo the tweaks?
Use System Restore with the point you created. For single items: choose Windows Default in TCP Optimizer, use Reset to Default.reg in the RAM folder, and pick Balanced in power plans. For a current, guided version of this idea see our Windows 11 gaming optimization guide, and for the restore point habit our restore point and MSI mode guide.
What if my ping is high after the network steps?
Run the network restart again and test your connection. If the lag shows up only under load, see our bufferbloat guide.
 RIP Tweaks
Do it in a few minutes with RIP Tweaks
- Free plan for Windows 10 and 11
- A backup first, and every tweak can be switched off again
- Made for higher FPS, lower input lag and steadier ping
Free · Windows 10 and 11
