Fortnite Fixed Ground Textures and FPS Boost on All PCs (Chapter 6)

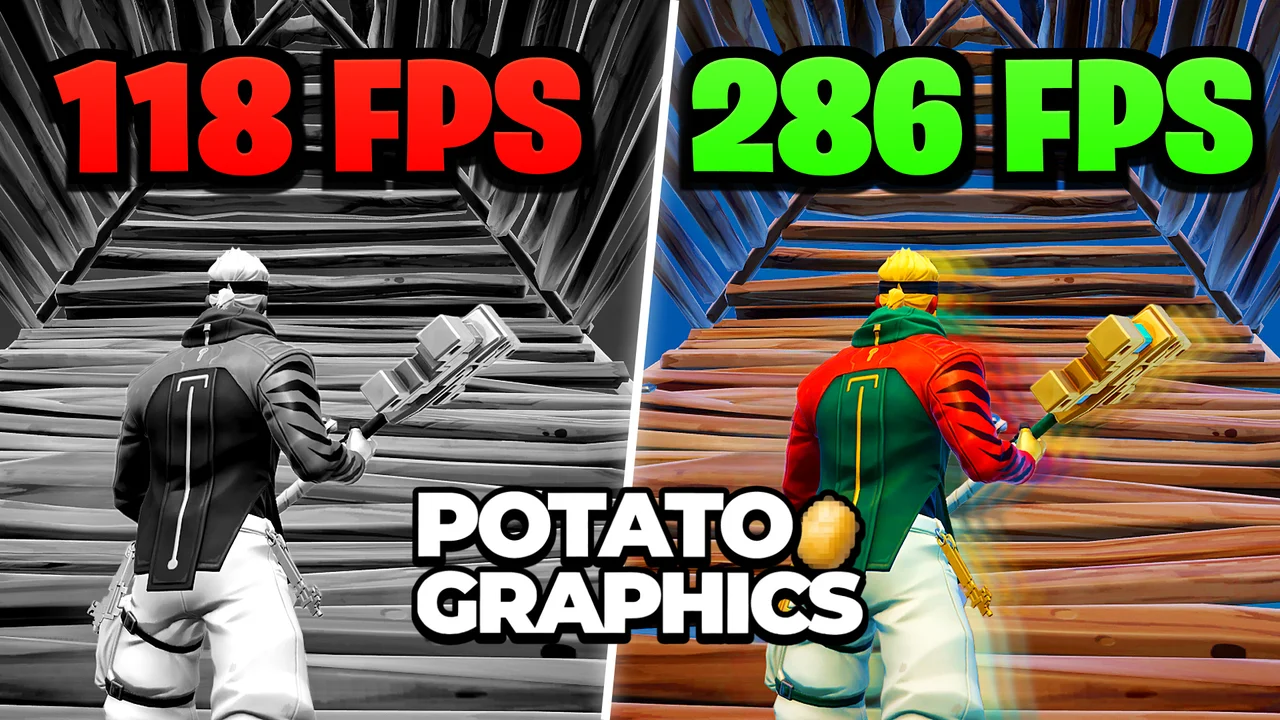
Written version of our video, every step checked against it.
Quick answer
- Download the FORTNITE Potato Graphics pack and put its GameUserSettings file into
FortniteGame\Saved\Config\WindowsClient: this is the file that gives the potato look with fixed ground. - On an NVIDIA card, open NVIDIA Profile Inspector as administrator, select the Fortnite profile, drag fortnite.nip onto the app and click Apply changes.
- Run the RIP Tweaks Free V8 file as administrator and type 1 first to create a restore point.
- In the menu, type 10 for Games and pick Fortnite, then go through CPU, GPU, RAM, Windows, Power, Input-Lag and Network for your own hardware.
- Close the app and start Fortnite. Intel, AMD and NVIDIA PCs all follow the same route.
This guide is for anyone whose Fortnite lags, freezes or drops FPS every few seconds in Chapter 6, or whose ground textures look broken. It follows our video click by click: the settings file swap, the NVIDIA profile, and the numbered tweak menu with the answers the PC in the video uses (AMD CPU, NVIDIA GPU, 32 GB of RAM). Looking for the newer one-click route instead? See our Fortnite potato graphics guide.
In the video the files come from the RIP Tweaks Discord. Join the server, open the YouTube tweaks channel, click Download and then Visit site. The shared folder holds one zip for every video, so pick the one called FORTNITE Potato Graphics and download it.
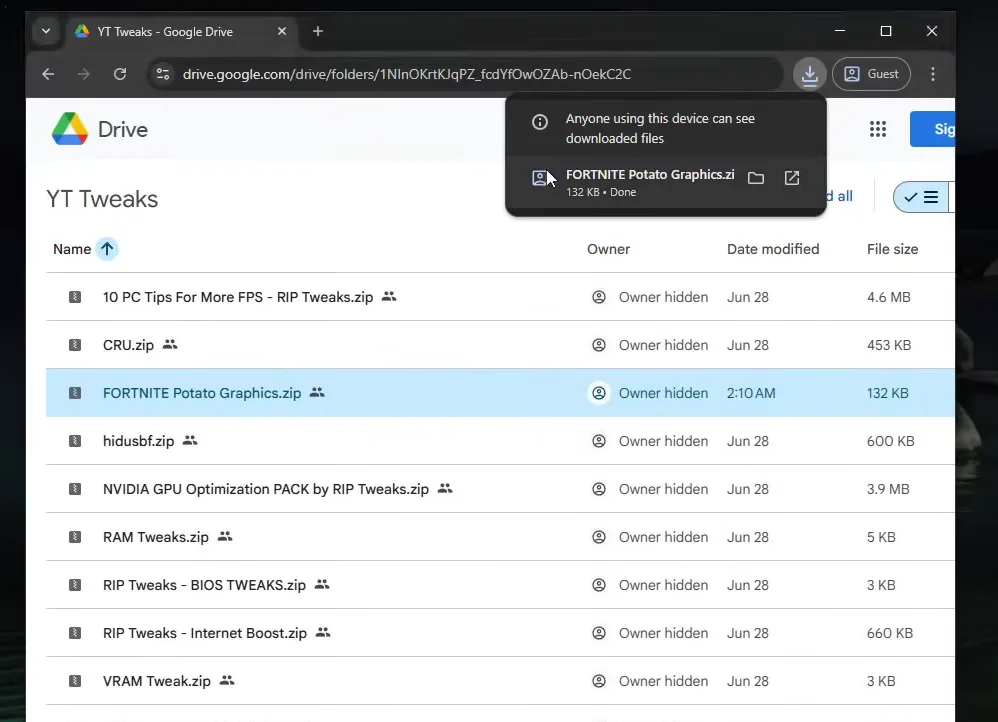
Drag the zip to your desktop, right-click it, choose Open with, then Windows Explorer, and drag the files out. The pack holds fortnite.nip (marked experimental), GameUserSettings and the NVIDIA Profile Inspector.
This file holds the optimized, already preset settings, so you do not have to change anything in the game's video menu. It works for every graphics card. Press Win + R, type appdata, open Local and scroll down to FortniteGame.
Win + RappdataLocalFortniteGameSavedConfigWindowsClient
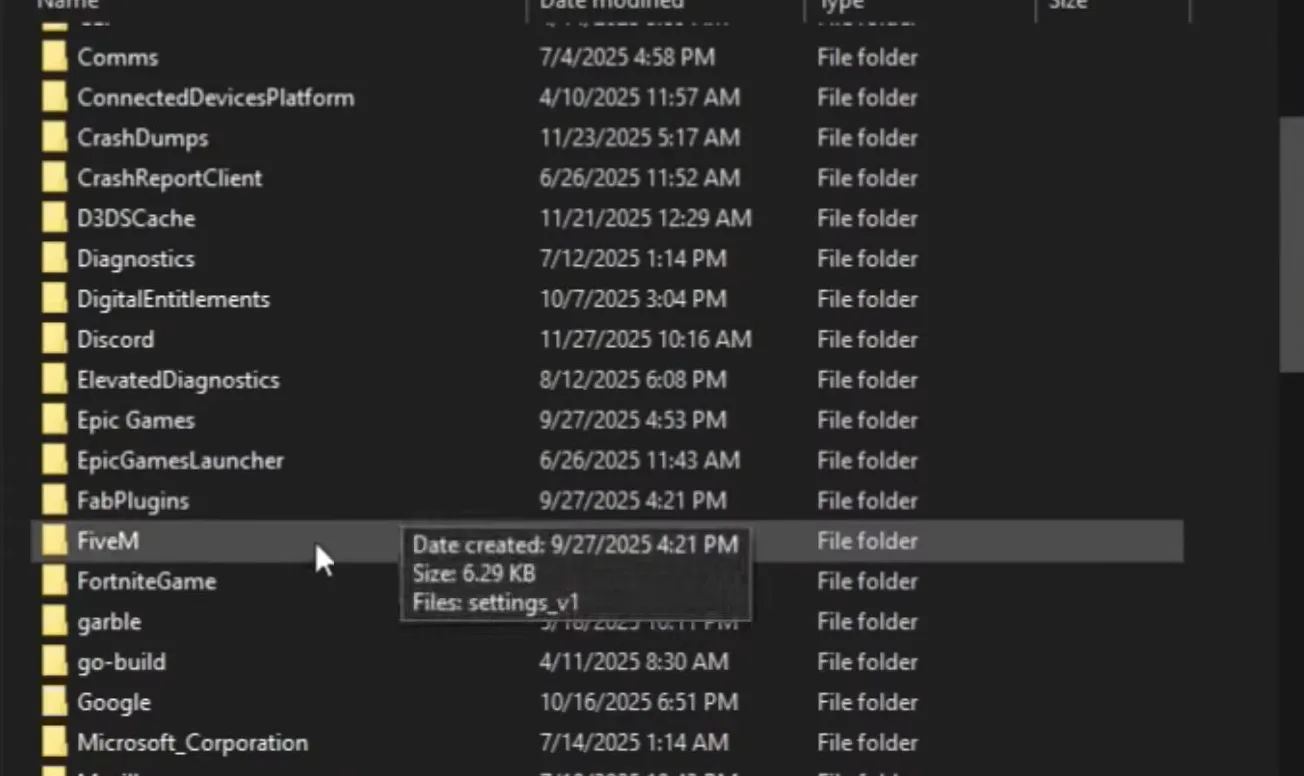
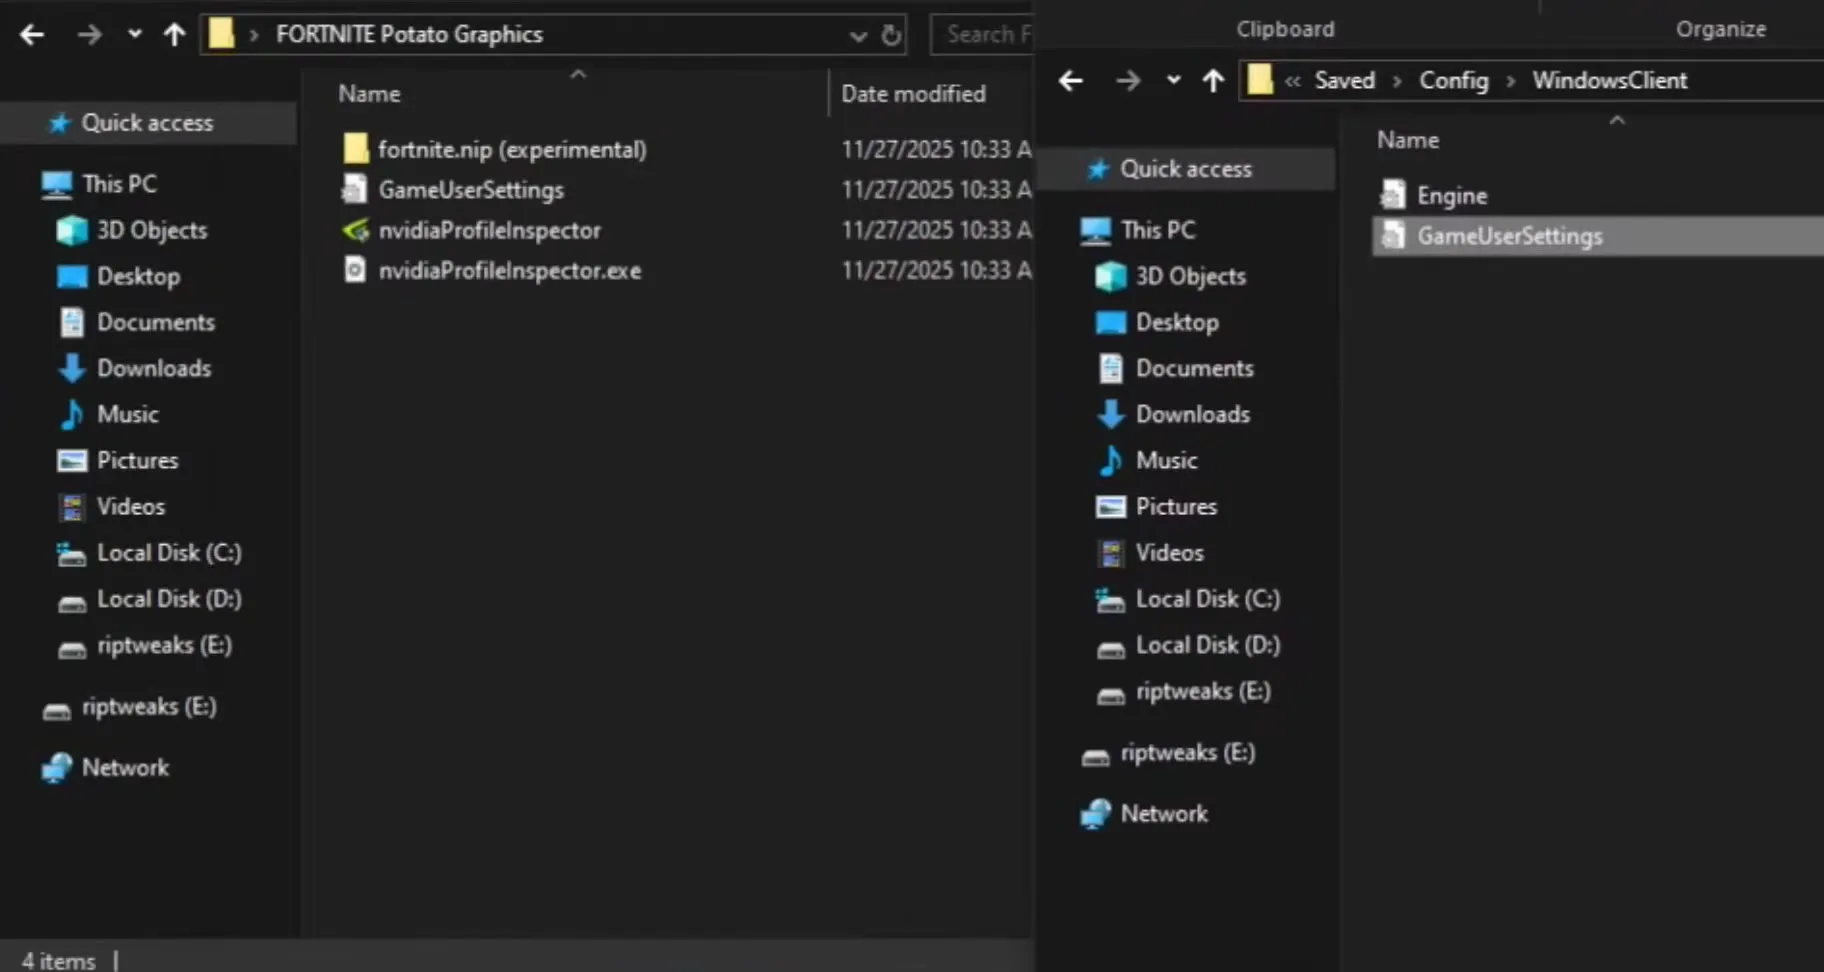
Open Saved, then Config, then WindowsClient. Delete the current GameUserSettings file or drag it to your desktop, and drag the new one from the pack into the folder.
How to undo it
Drag the old file to your desktop instead of deleting it. To go back later, put it into WindowsClient again.
Right-click nvidiaProfileInspector and choose Run as administrator. In the Profiles box type Fortnite and select it. Then drag fortnite.nip onto the open app.
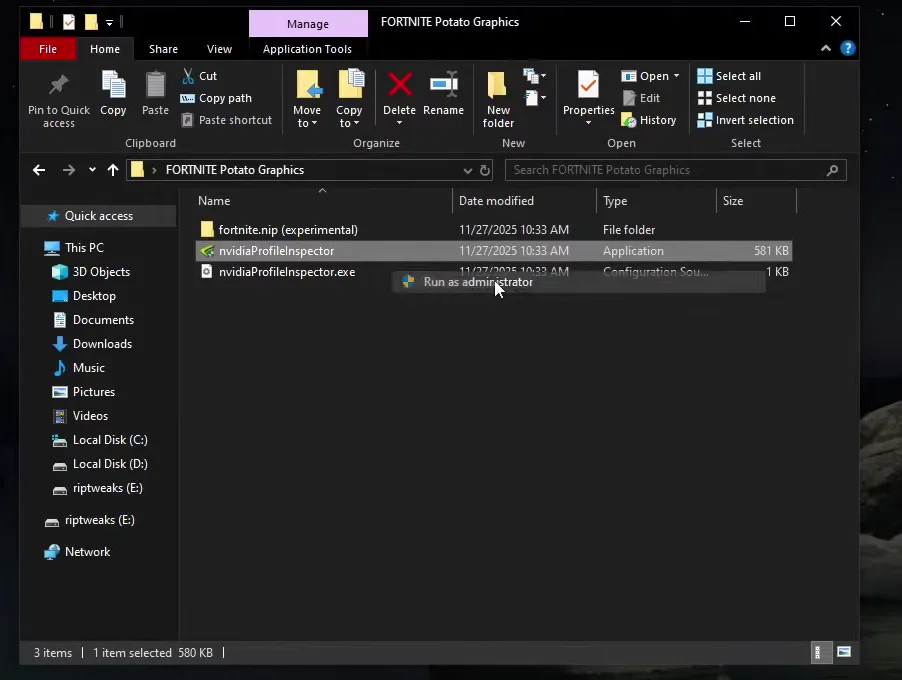
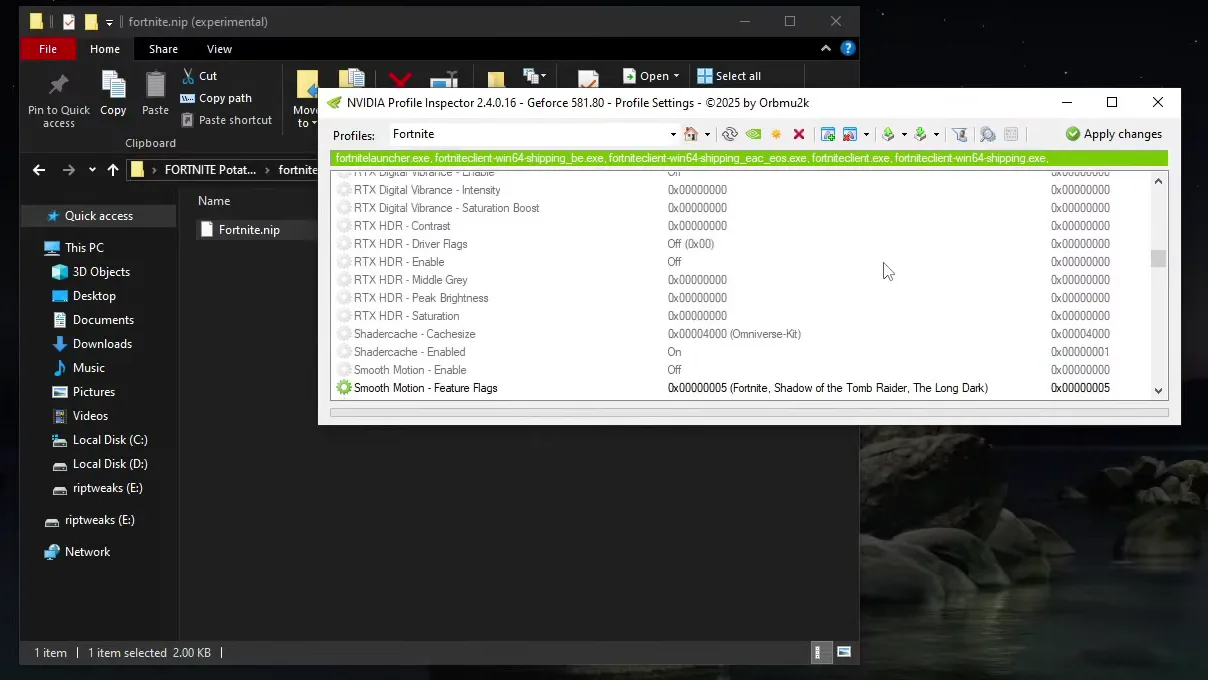
The app confirms that the profile was imported and new settings appear in the list. Click Apply changes, then close the app.
Good to know
This step is for NVIDIA graphics cards. On AMD or Intel graphics, skip it: the GameUserSettings file from the step before works for everyone.
Back in the Discord, open the free tweaks channel, click the download button and then Visit site. Click the red Download for Windows button and drag the file to your desktop. Right-click it, choose Open with, then Windows Explorer, and drag the two files out.
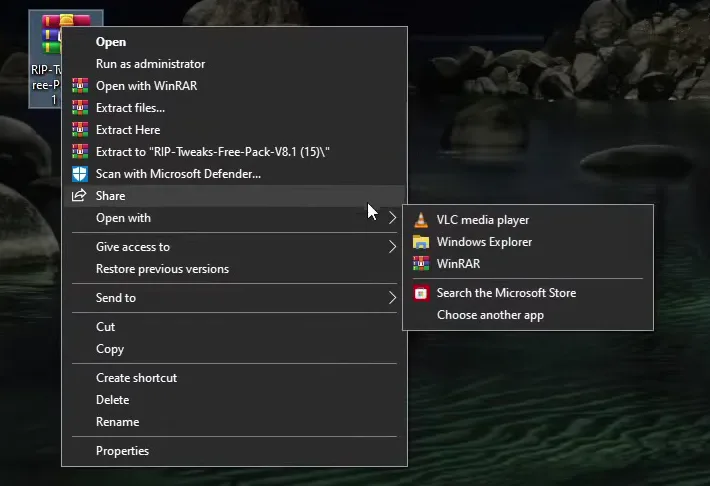
Right-click the RIP Tweaks Free Pack V8 file, choose Run as administrator and click Run.
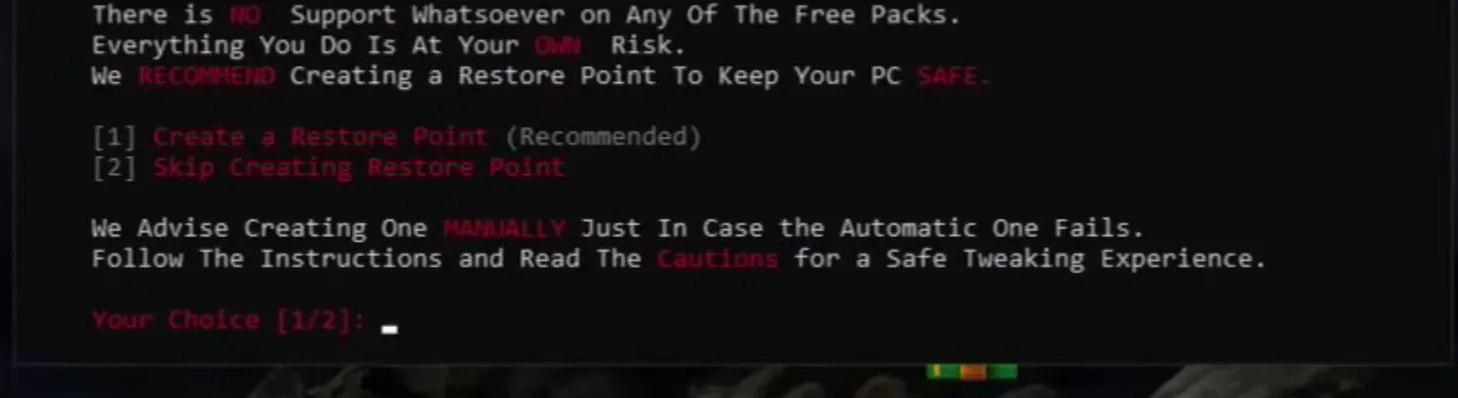
The first screen asks about a restore point. Type 1 for Create a Restore Point. If anything goes wrong or you want to revert changes later, you can go back to it.
How to undo it
Do not skip the restore point. The main menu also has an R option, Revert, if you want to undo what the tweaks changed.
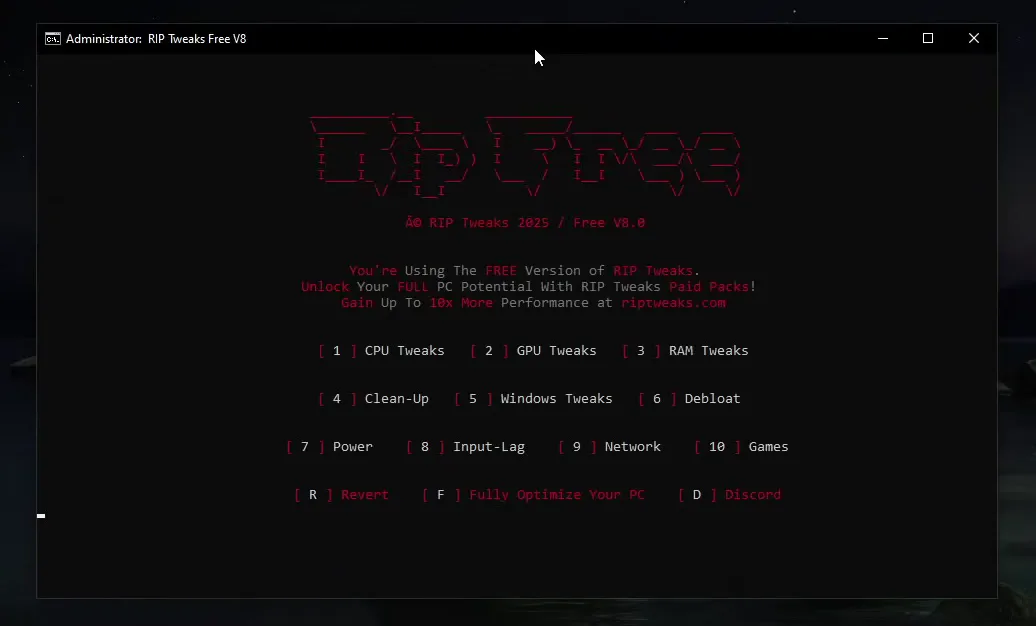
After the restore point finishes, the main menu opens with CPU, GPU, RAM, Clean-Up, Windows Tweaks, Debloat, Power, Input-Lag, Network and Games. Type 10 for Games, then 1 for Fortnite. When the tweaks have been applied, type 11 to go back to the main menu.
10 Games1 Fortnite11 Go Back (Main Menu)
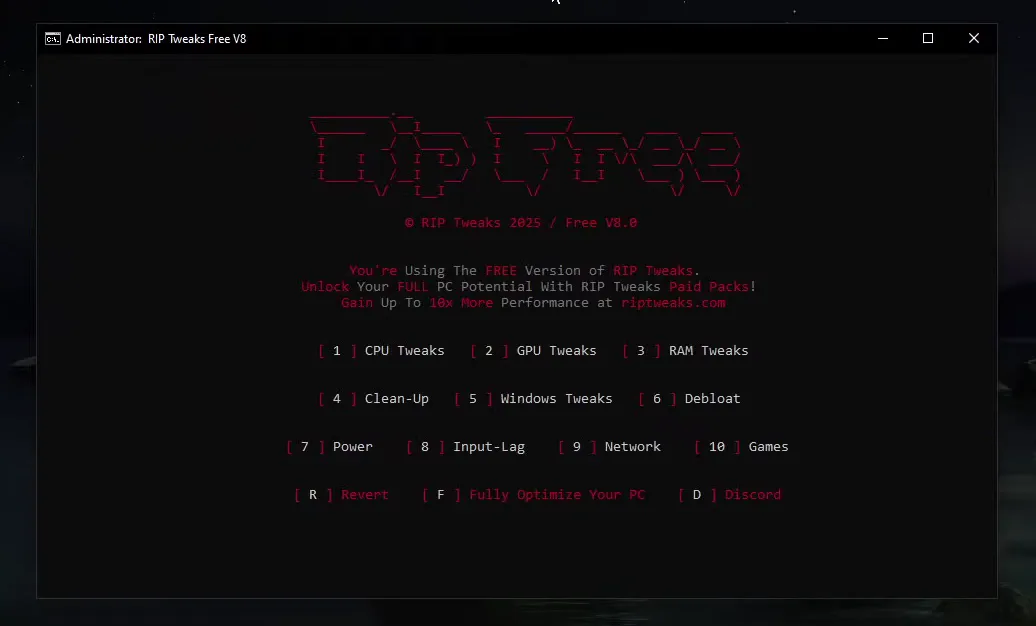
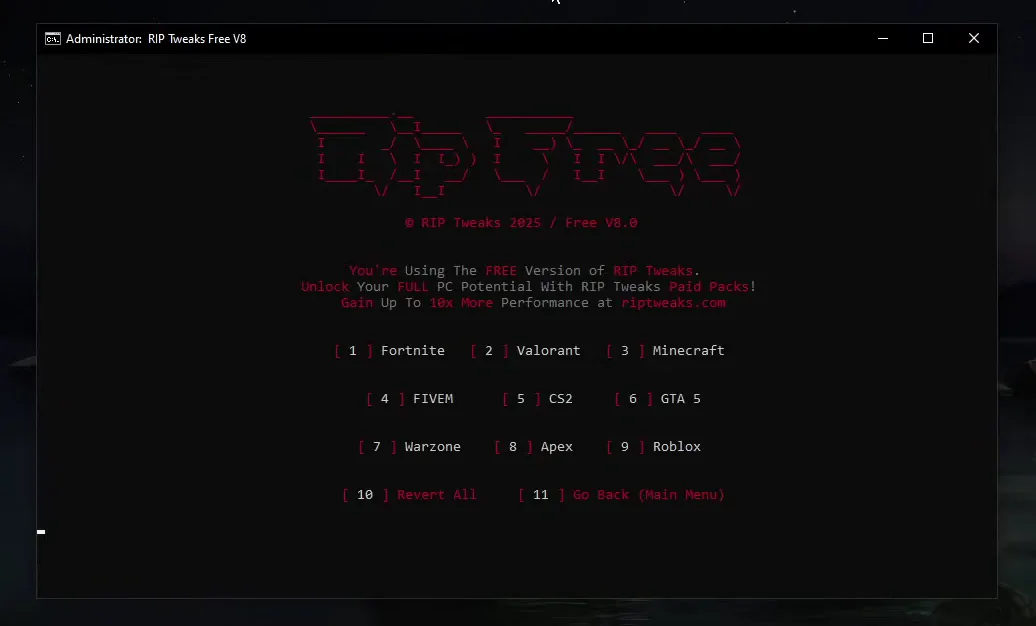
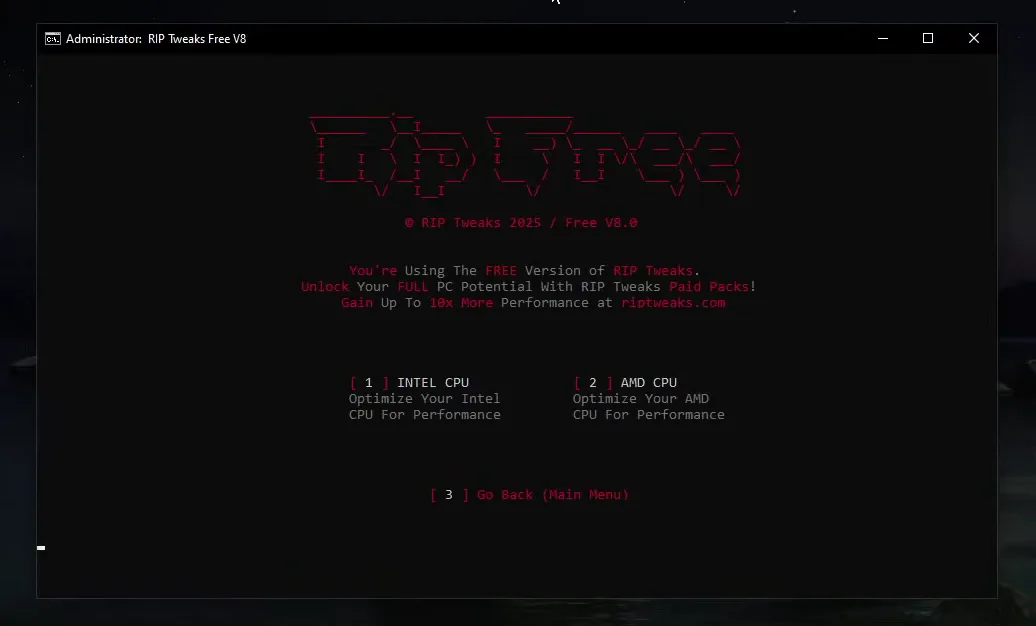
Now go through the hardware sections. Open CPU with 1: type 1 for an Intel CPU or 2 for an AMD CPU. The PC in the video has an AMD CPU, so it types 2. Go back with 3, open GPU with 2 and select the options for your graphics card; the PC in the video has an NVIDIA card.
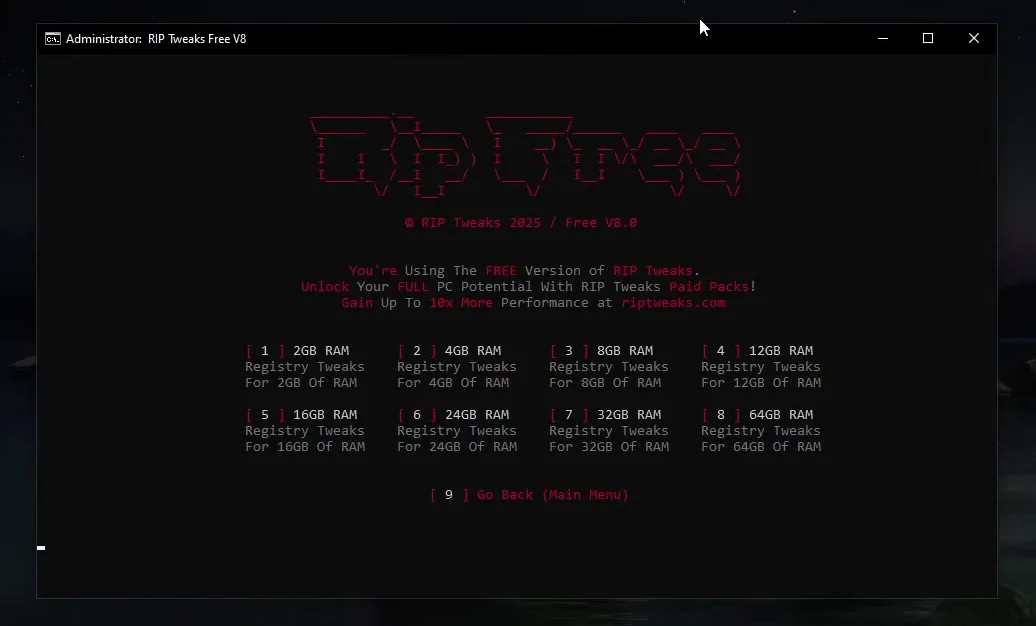
For RAM (option 3) pick the amount you have. The PC in the video has 32 GB, which is 7.
Tip
Not sure what you have? Right-click the taskbar, open Task Manager and look at the Performance tab: it lists your CPU, your memory in GB and your GPU brand. The video also checks whether you are on Wi-Fi and whether you have an SSD.
Back in the main menu, the video goes through the rest in order: Clean-Up and Windows Tweaks, then Debloat (number 1 inside it), then Power (7). Input-Lag (8) removes input lag in general and also has USB tweaks and keyboard and mouse optimization. Each choice prints its progress in the window.
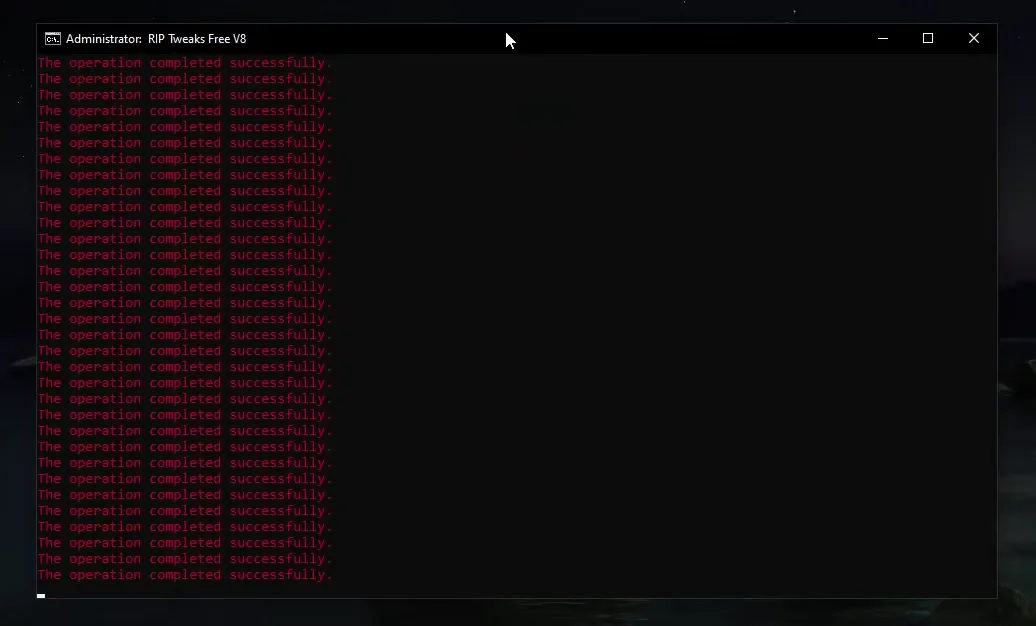
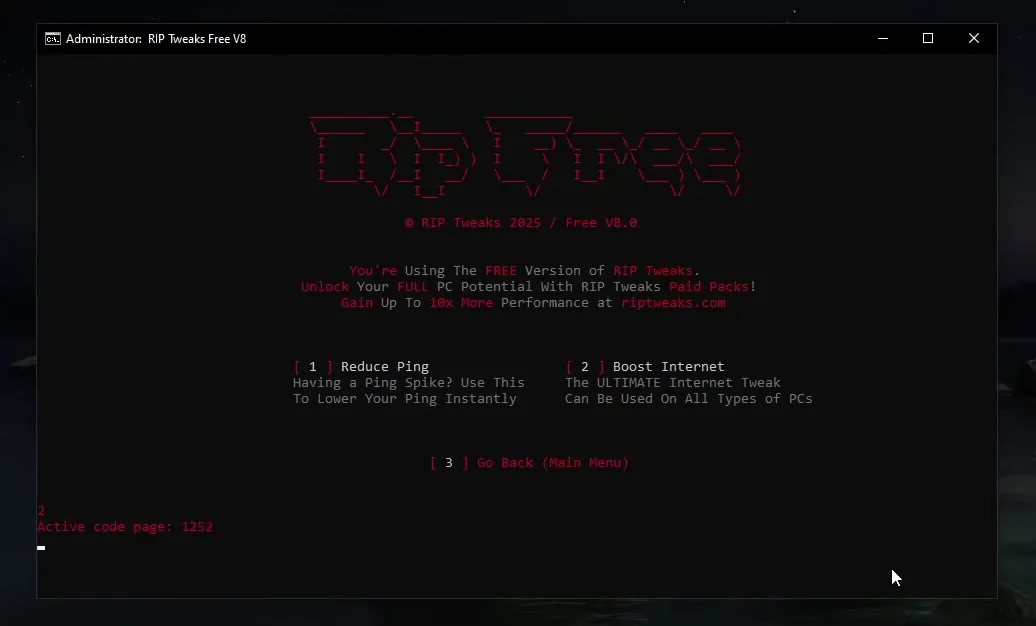
Open Network with 9. Option 1, Reduce Ping, restarts your internet connection as a whole by closing all connections and refreshing everything, which is aimed at lowering ping. Then pick 2, Boost Internet, which applies a lot of network tweaks. It can take some time, so just let it finish.
9 Network1 Reduce Ping2 Boost Internet
Careful
Reduce Ping restarts your connection, so expect a short disconnect. Do it when you are not in a match or a call.
How to check it worked
Do a short check before you queue for a real match:
- Open Fortnite and look at the ground first: the broken textures from before should be gone and the settings should be the preset ones from the file.
- Drop into a busy area and watch your FPS and ping. Look at how steady the frame rate stays, not only the average.
- If the settings look like your old ones, check that the new GameUserSettings file is really in
WindowsClientand that Fortnite was closed while you copied it.
Results depend on your PC and your internet. Our Fortnite FPS, input delay and ping guide covers what else to look at if lag remains.
Key settings at a glance
FAQ
How do I fix broken ground textures in Fortnite?
In the video the fix is the preset GameUserSettings file from the potato graphics pack. Put it into FortniteGame\Saved\Config\WindowsClient in place of the old one while Fortnite is closed.
Does this work on AMD and Intel graphics?
Yes. The settings file and the numbered tweak menu are for every PC. Only the NVIDIA Profile Inspector step is for NVIDIA cards, so skip it on other graphics cards.
Where is the Fortnite GameUserSettings file?
Press Win + R, type appdata and open Local. Then go to FortniteGame, Saved, Config, WindowsClient. The video also shows an Engine file there; you only replace GameUserSettings.
Is it safe to replace the settings file?
It is a settings file Fortnite creates by itself, the same kind the in-game video menu changes. Keep your old copy on the desktop and you can put it back at any time. The tweak menu has its own restore point as a second safety net.
How do I undo everything?
Copy your original GameUserSettings file back into WindowsClient, use the restore point you created with option 1, and use the R Revert option in the main menu. If you imported the NVIDIA profile, you can reset the Fortnite profile in NVIDIA Profile Inspector.
Does it help with ping and input lag too?
The menu has sections for that: Input-Lag and Network, where Reduce Ping and Boost Internet are aimed at lower ping. How much changes depends on your PC and connection, so test it on yours. For a one-click version, see our free PC optimizer for Fortnite FPS.
Is there a manual way to do the NVIDIA part?
Yes, our Fortnite potato textures with Profile Inspector page covers the profile and the config file on their own.
 RIP Tweaks
Do it in a few minutes with RIP Tweaks
- Free plan for Windows 10 and 11
- A backup first, and every tweak can be switched off again
- Made for higher FPS, lower input lag and steadier ping
Free · Windows 10 and 11
