One PC Tweaking App With an FPS Counter, Cleanup and App Updates (Full Tour)

Written version of our video, every step checked against it.
Quick answer
- One app can replace several small tools: a live hardware monitor, Cleanup, Debloat, an app installer and updater, an FPS counter, crosshairs and a USB Windows installer.
- Look before you change: the hardware page shows CPU, GPU and RAM usage and temperature every second, so you know what is normal on your PC.
- Cleanup and Debloat free disk space and remove things you do not use, and Debloat marks each item Safe or risky and can be reverted.
- The FPS counter shows FPS, minimum, maximum, average, 1% low, 0.1% low and frame time in any corner while you play.
- RIP mode frees memory for a session: on the PC in the video, Task Manager showed RAM use drop from about 6.8 GB to about 3 GB.
Most PC tweaking tools are a menu of settings with a different colour on top. This video is a full tour of the other kind: one app that monitors your hardware, cleans Windows, installs and updates your programs, shows an FPS counter while you play and gets your PC ready for a session. It is an older video, recorded on an earlier version of RIP Tweaks, so this page explains the ideas and settings it covers, not how every screen looks in the app today.
The video starts by showing the previous release, a normal-looking tweaker with specs, a few game pages, internet, input lag, an overclocking guide and crosshairs, and then goes straight to what changed. For the FPS counter alone, read our FPS counter overlay guide. For what to tweak first on a gaming PC, start with the PC optimization guide.
The first page of the app is a live graph. Pick CPU, GPU or RAM, then Usage or Temp, and the graph shows the last 59 seconds, updated every second. In the video it shows the temperature of an RTX 3060. Move the mouse over the graph to see the value at that moment.
HardwareGPUTemp
Expert Mode, at the bottom right, goes deeper. It lists every component with its details: CPU cores, bus speed, memory, power, voltage and temperature, the GPU, the RAM (used, available, load), storage, your displays with refresh rate and resolution, networks, Bluetooth and the connected devices. You can read all of this without a separate monitoring program.
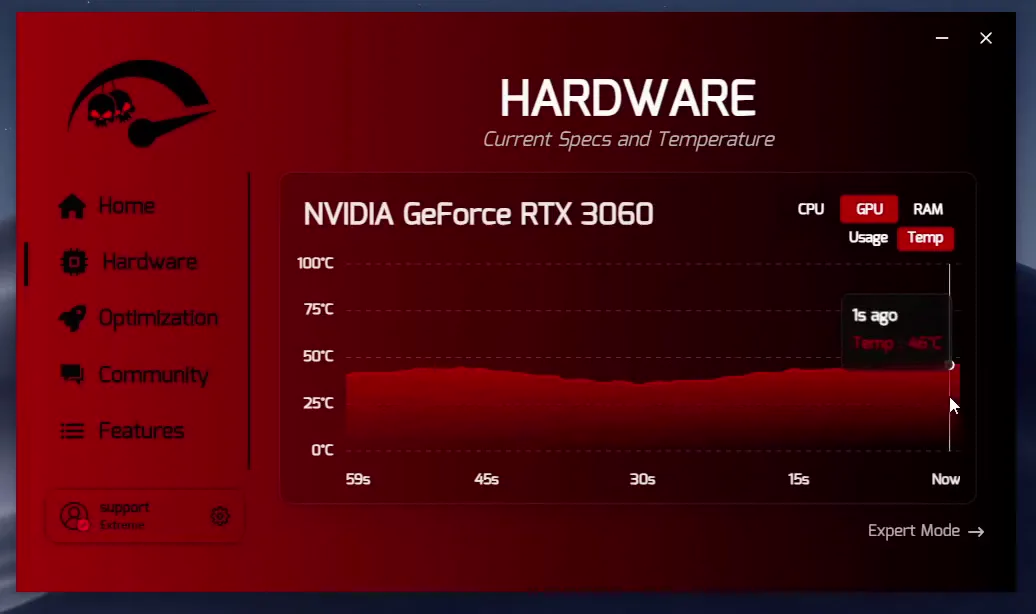
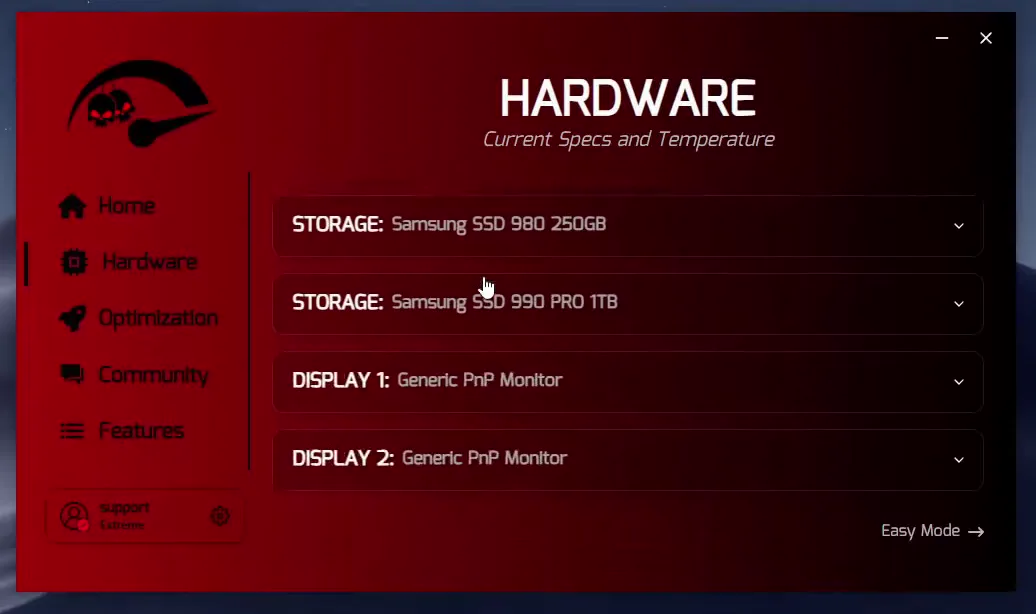
Write down the idle temperatures and usage once. When you tweak later, you compare against your own baseline, not against someone else's screenshot.
The video skips the usual CPU, GPU, RAM, BIOS, SSD and hard drive pages ("every app has them") and goes to the Windows section, where Cleanup is rebuilt. Tick what you want removed, check the Estimated Size at the bottom and press Start.
OptimizationWindowsCleanupStart
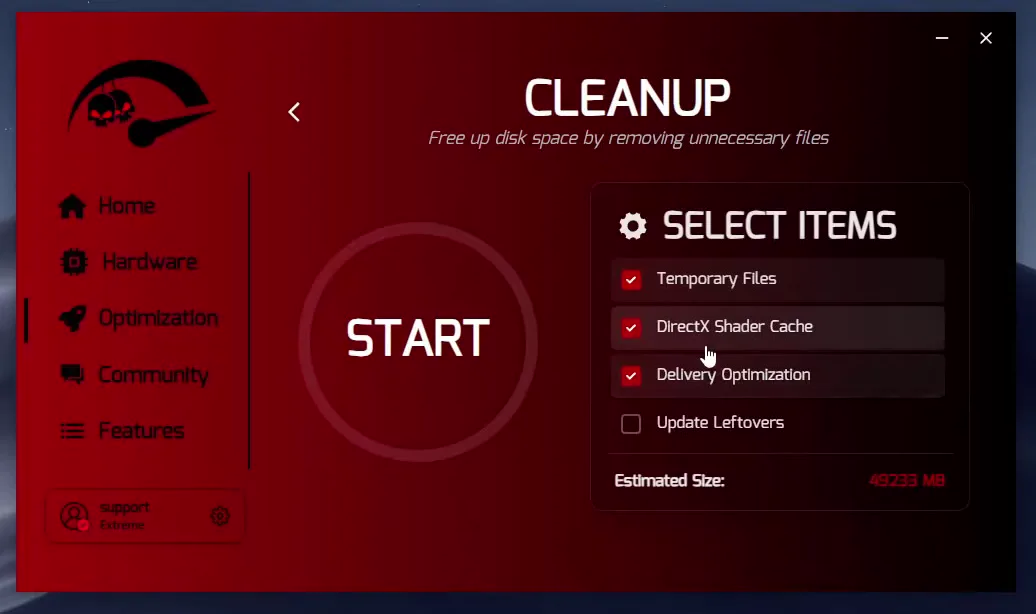
On the PC in the video the estimate was around 50 GB. That is that PC's own number: it depends on how long Windows has gone without cleaning, and it says nothing about FPS. A cleanup mainly gives you disk space.
Careful
Cleanup deletes files. Read the ticked list before you press Start. Shader cache is rebuilt by games, so the first launch afterwards can load a bit slower.
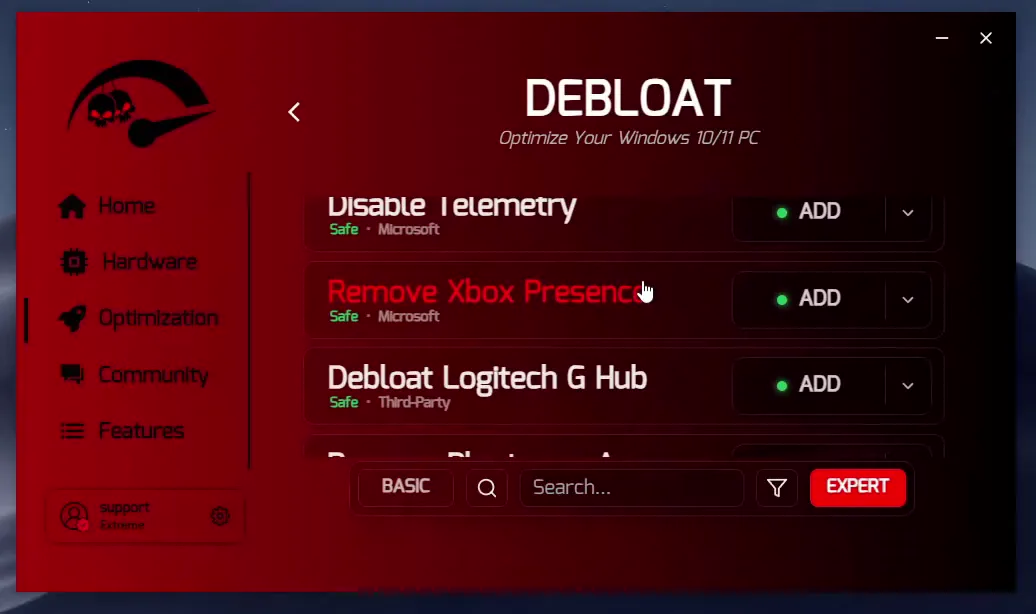
Debloat is a list of tweaks and preinstalled apps, and every row has a label such as Safe with its source (Microsoft or third-party) and an explanation behind the arrow. You can search, filter, add several rows with ADD and deploy them all at once. Switch between BASIC and EXPERT at the bottom. You can also revert everything you applied, which is the point of a list that tells you what each change does.
OptimizationWindowsDebloatADD
Next to it is a Windows module that works as a launchpad. With one click it switches startup apps and process priority, disables background apps, and opens tools you would otherwise hunt for: the troubleshooter, the event viewer, device manager and your network connections.
How to undo it
Revert Debloat items from the same list, and make a backup first (see RIP mode below). Only remove what you know you do not use.
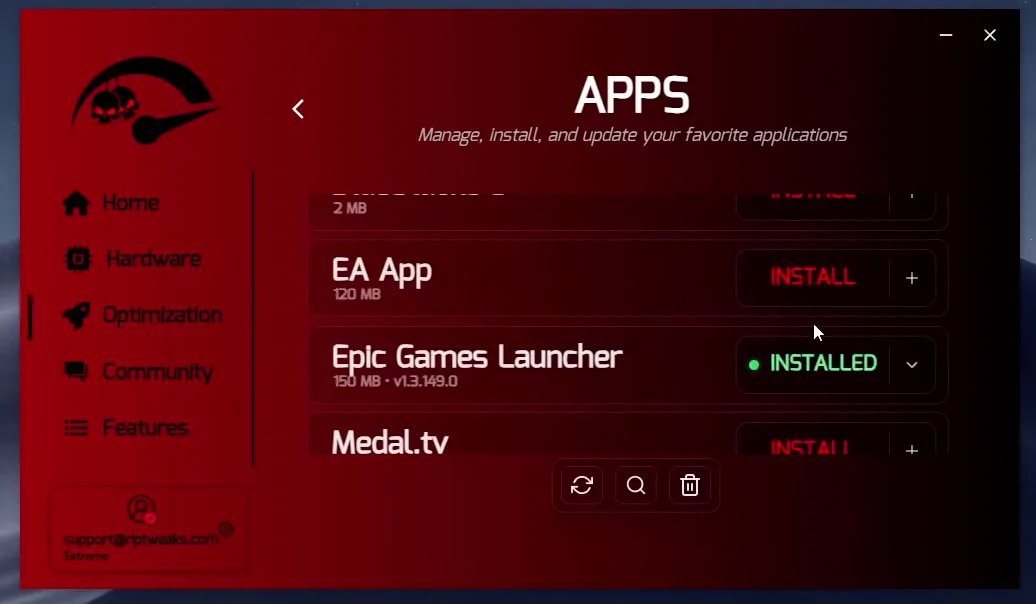
After a fresh Windows install, the hard part is remembering what to install. The Apps page lists the programs most people use: Discord, Teams, Telegram, WhatsApp, game launchers such as Epic Games Launcher and EA app, GPU apps and overclocking tools. Press INSTALL and the app downloads the file. Installed apps show a green INSTALLED label.
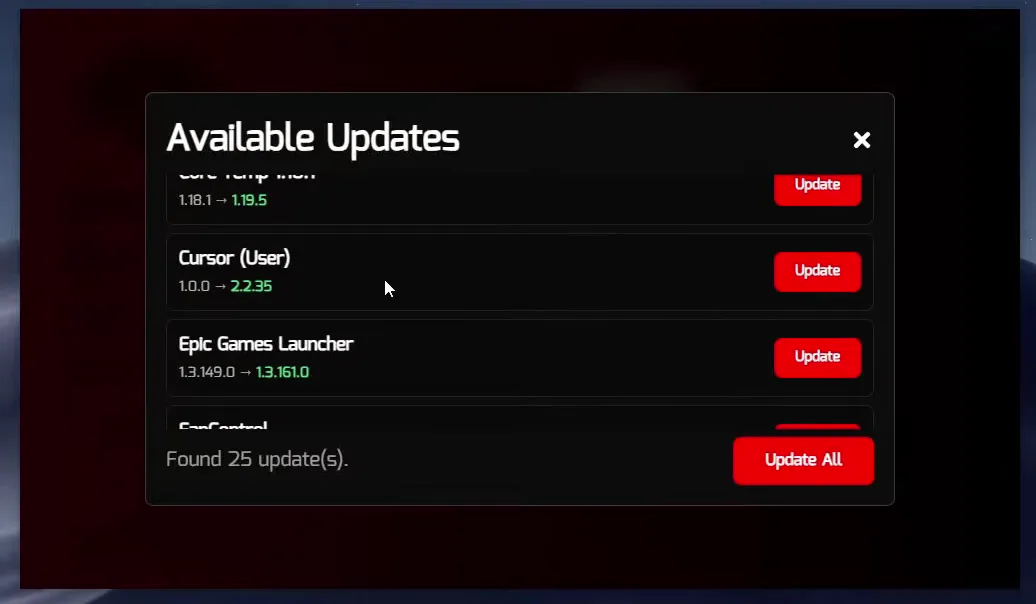
The refresh button at the bottom scans for updates. On the PC in the video it found 25 and listed each one with its old and new version number. Update All updates them with one click.
OptimizationWindowsAppsRefreshUpdate All
The trash-can button opens the uninstaller. It shows how big each program is (500 MB for one of them in the video), has search, and can filter to gaming apps such as Discord, Slack, Teams and AMD software, so you can see what something is before you remove it.
The tweak pages are Performance, Network, Input Lag and Overclocking, and each has only a few buttons. The video says it on purpose: no 50 options you may not understand, just the tweaks the team considers best for your PC packed behind a button. The Network page has two buttons, and Overclocking works the same way.
OptimizationWindowsPerformance
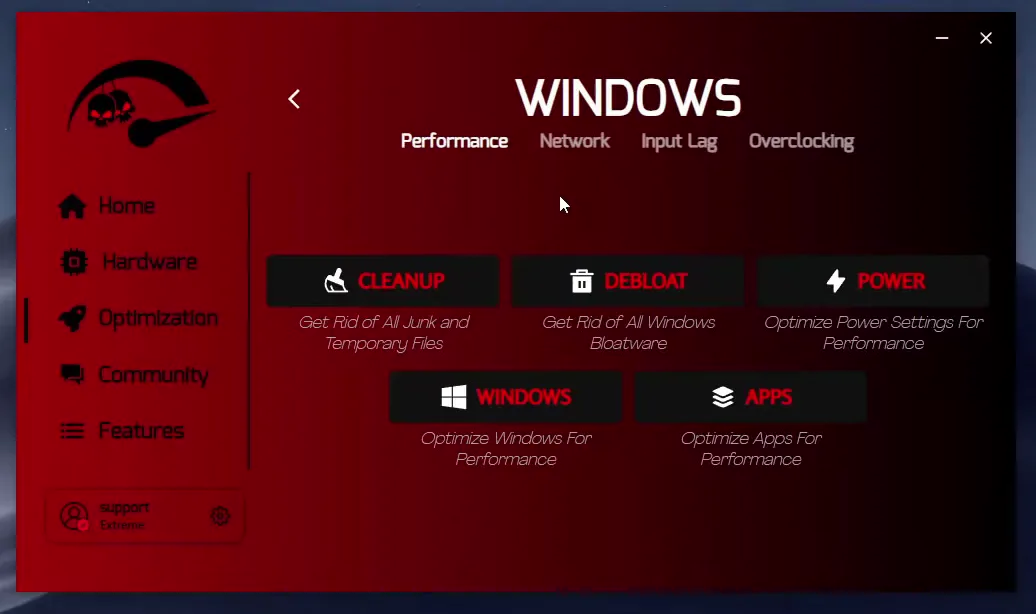
This is the older app. Page names and layout have changed since, so for today's screens use the what RIP Tweaks does page.
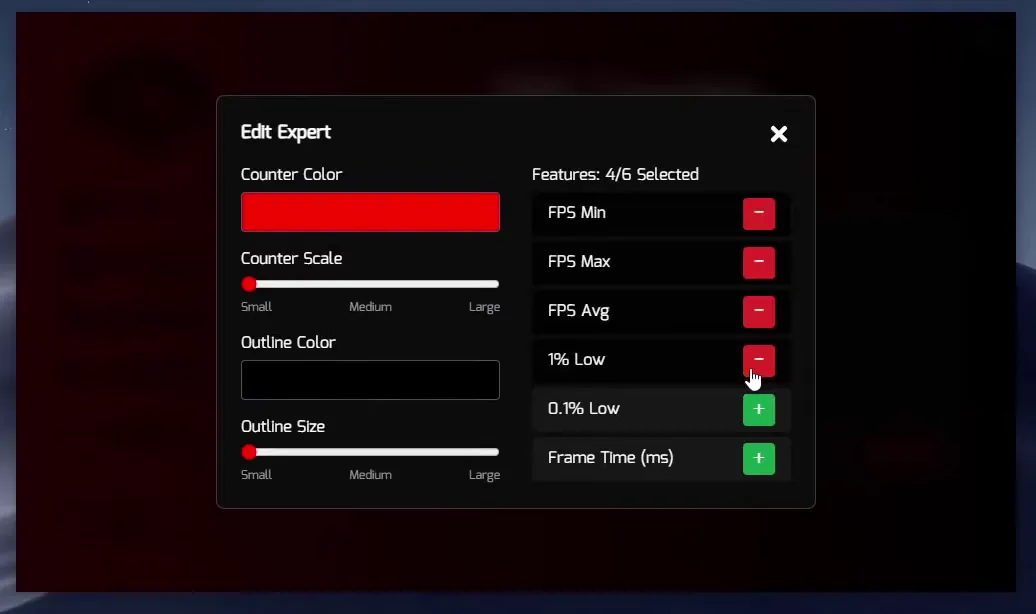
In the Features tab the video lists drivers, FPS counter, crosshairs, OS reinstall and RIP mode. The FPS counter is an overlay you place in the top left, top right, bottom left or bottom right. The Expert counter adds FPS Min, FPS Max, FPS Avg, 1% Low, 0.1% Low and Frame Time (ms). The counter colour, size and outline are set in the same window.
FeaturesFPS counterEdit Expert1% Low
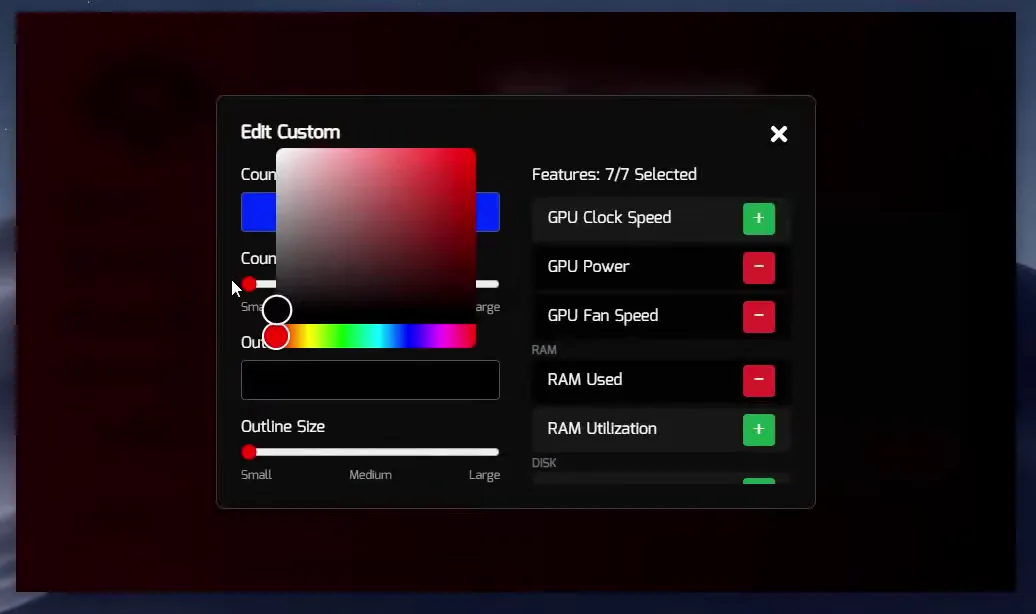
The Custom counter pulls in the data from the hardware page: CPU temperature, load, voltage and clock speed, GPU fan and power, and memory use. Pick a larger size and a medium outline, press Launch and the values appear in the corner while you play, updated every second. The averages can look fine while the 1% and 0.1% lows show the stutter you feel in a fight, so those are the numbers to watch. More in our FPS counter metrics guide.
Tip
Test in the same place every time, for example the same map or the same few minutes of a match, so your before and after numbers compare fairly.
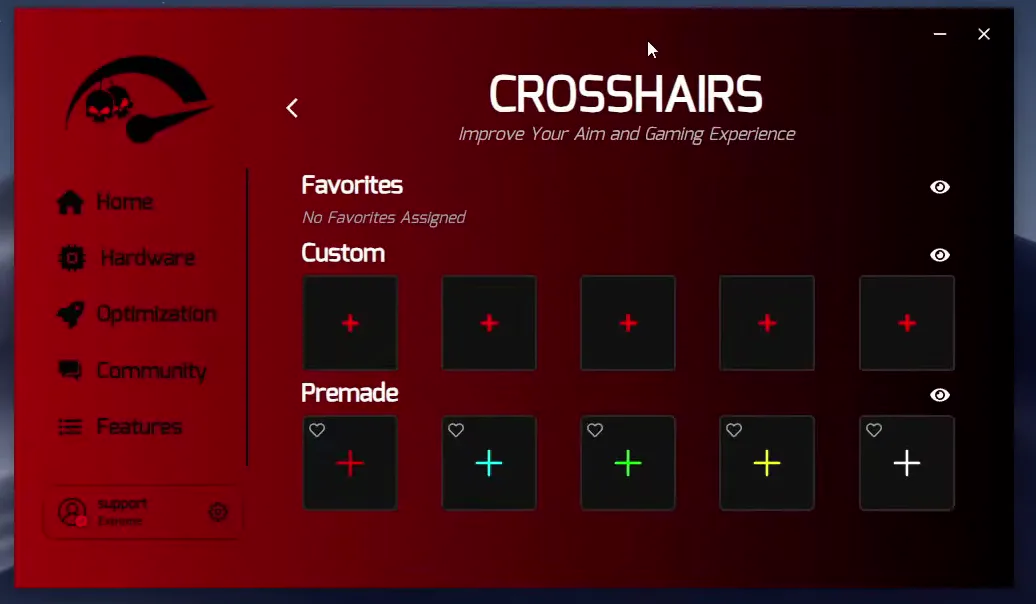
The crosshair page has a Favorites row, five Custom slots and a Premade row of ready-made crosshairs. To make your own, press a plus in the Custom row, type a name, pick a colour and change the length. The video makes a blue one, then changes the centre dot, the outline and the shape (an X). You can also upload an image, change its width, height and transparency, save it and relaunch the overlay to see it on screen.
FeaturesCrosshairsCustom (+)Create
Don't do this
Check whether a game or its rules allow overlay crosshairs before you use one in ranked or tournament play. Our overlays and anti-cheat page explains what to check.
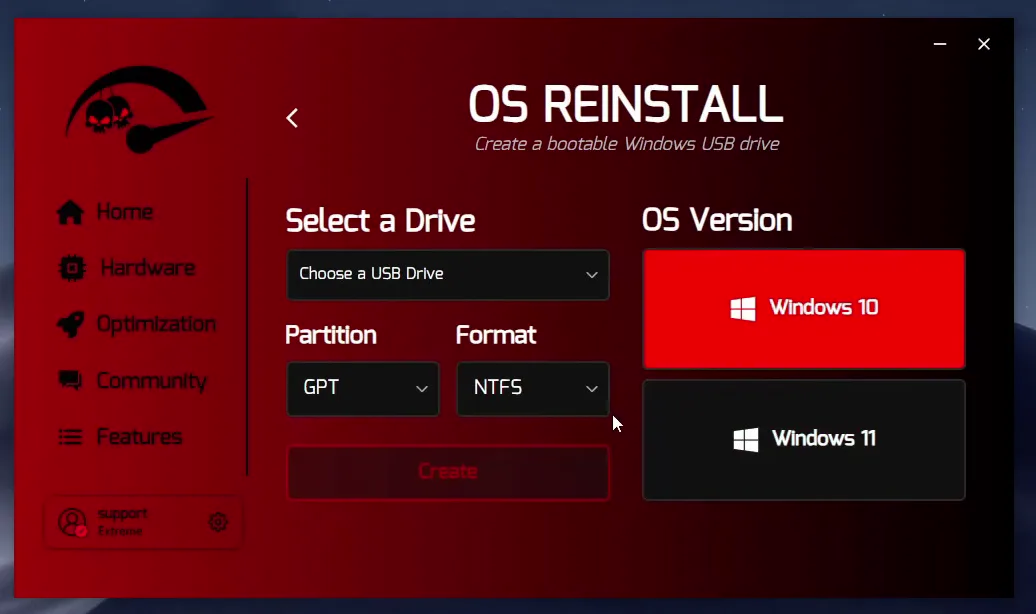
For a clean install, plug in a USB drive, choose it under Select a Drive, set the Partition (GPT in the video) and the Format (NTFS), pick Windows 10 or Windows 11 and press Create. When it is done, on-screen instructions with a QR code tell you what to do next, and you can follow them from your phone.
FeaturesOS ReinstallSelect a DriveWindows 10 / 11Create
Careful
Making a bootable USB normally wipes the drive you pick. Move your files off it first.
RIP mode is for when you want the PC light right now. Under Customize you add Stop Explorer, Clear Cached RAM, Disable Animations and Background Apps (choose which ones), then press Launch.
FeaturesRIP ModeCustomizeLaunch
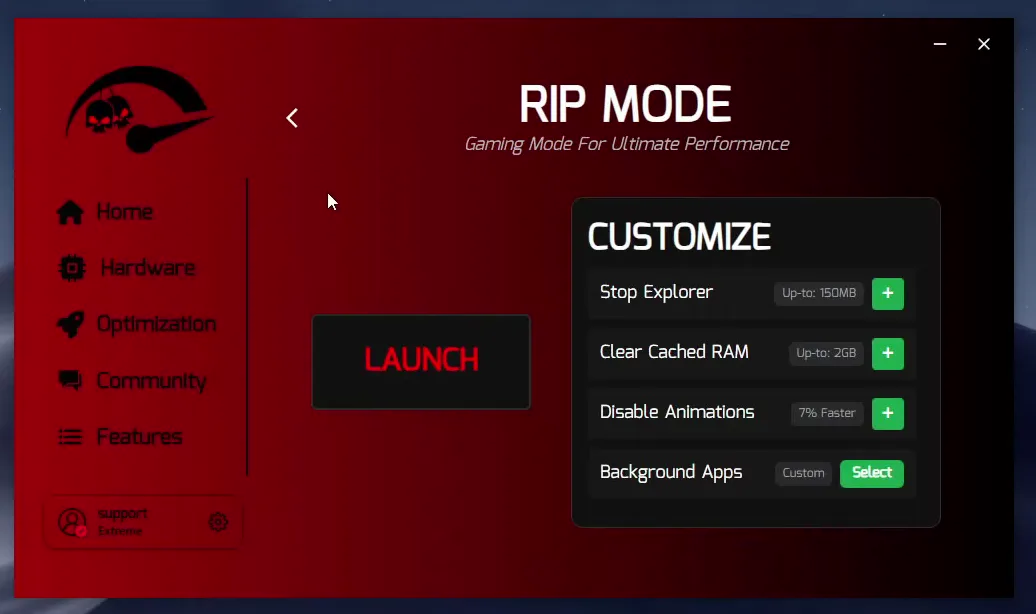
The video opens Task Manager first: memory read about 6.8 GB. After ticking Clear Cached RAM and pressing Launch, it dropped from about 6 GB to about 3 GB on that PC. That is Leon's result on his own PC; yours depends on what you have running. The last minute of the video shows Settings, which has short tutorials for applying a tweak and for creating a backup (Backups, create new backup, name it, next, finish), plus a link to support on Discord.
Create the backup before you apply any tweak. It is the fastest way back if something does not behave the way you want.
How to check it worked
- Disk space: note the free space on your system drive, run Cleanup, and compare. The estimate in the app is the amount it expects to remove.
- Apps: after Update All, run the scan again. It should say it found no updates, or only the ones that failed.
- FPS: play the same few minutes of the same game with the counter on before and after, and look at the 1% lows and frame time, not only the average.
- Memory: open Task Manager, then Performance, then Memory. Read it before and after RIP mode.
Every PC starts from a different place, so the numbers you get are your own, and typically a PC that already runs lean gains little.
Key settings at a glance
FAQ
Is this the RIP Tweaks app as it looks today?
No. The video was recorded on an earlier version. The ideas carry over, but screens and names have changed, so use the current app and our guides as the reference.
Do I need a separate FPS counter or monitoring program?
Not for the basics. The app shows live hardware data and has its own FPS counter with 1% lows and frame time, so you can monitor while you play without a second program.
What are 1% lows and why do they matter?
The 1% low is the FPS of your slowest 1% of frames. A game can average a high FPS and still feel choppy when the lows dip, so the lows tell you more about smoothness than the average.
Does the FPS counter overlay slow the game down?
The video says it does not get in the way of the game and updates once a second. As with any overlay, check a game's own rules before using it in competitive play.
Can I undo Cleanup, Debloat and tweaks?
Debloat items can be reverted in the app and a backup created first brings the PC back. Cleanup deletes temporary files, so read the list before you confirm. See also why some tweaks revert after a restart.
Will RIP mode raise my FPS?
It frees memory and stops background work for the session, and that can help on a PC that is short on RAM. The video shows only the memory drop, not an FPS result, so measure your own game with the counter.
What else was in the video?
A Community tab with points for supporting the channel, leaderboards by PC and network that reset every 30 days, a looking-for board and a chat sidebar. They are not tweaks, so this page leaves them out.
 RIP Tweaks
Do it in a few minutes with RIP Tweaks
- Free plan for Windows 10 and 11
- A backup first, and every tweak can be switched off again
- Made for higher FPS, lower input lag and steadier ping
Free · Windows 10 and 11
