10 Hidden Windows Tweaks for Max FPS and Low Input Lag (2026)

Written version of our video, every step checked against it.
Quick answer
- Make a backup in RIP Tweaks first, then set Win32 Priority Separation to
26 Hexand disable your startup programs. - Turn on CPU Core Unparking, Disable CPU C-States and Disable Power Throttling, set PCIe Link State Power to Off and run the Basic debloat.
- In Windows Settings: Game Mode Off, your game on High performance in Graphics, Xbox Game Bar Off and Allow downloads from other PCs Off.
- In Performance Options pick Custom, untick everything except Smooth edges of screen fonts and Show thumbnails instead of icons.
- In
msconfigset the highest Number of processors, untick the services of apps you don't use and restart: around 250 FPS stable in Fortnite on the laptop in the video.
This guide is for anyone on Windows 10 or 11 who wants more FPS and less input lag in Fortnite, Valorant, CS2 or any other game without buying new parts. It follows our video setting by setting: the tweaks we apply in the free RIP Tweaks app, the Windows Settings pages most people never open, the visual effects list and the two MSConfig tabs, ending with the FPS counter on a gaming laptop.
In this video
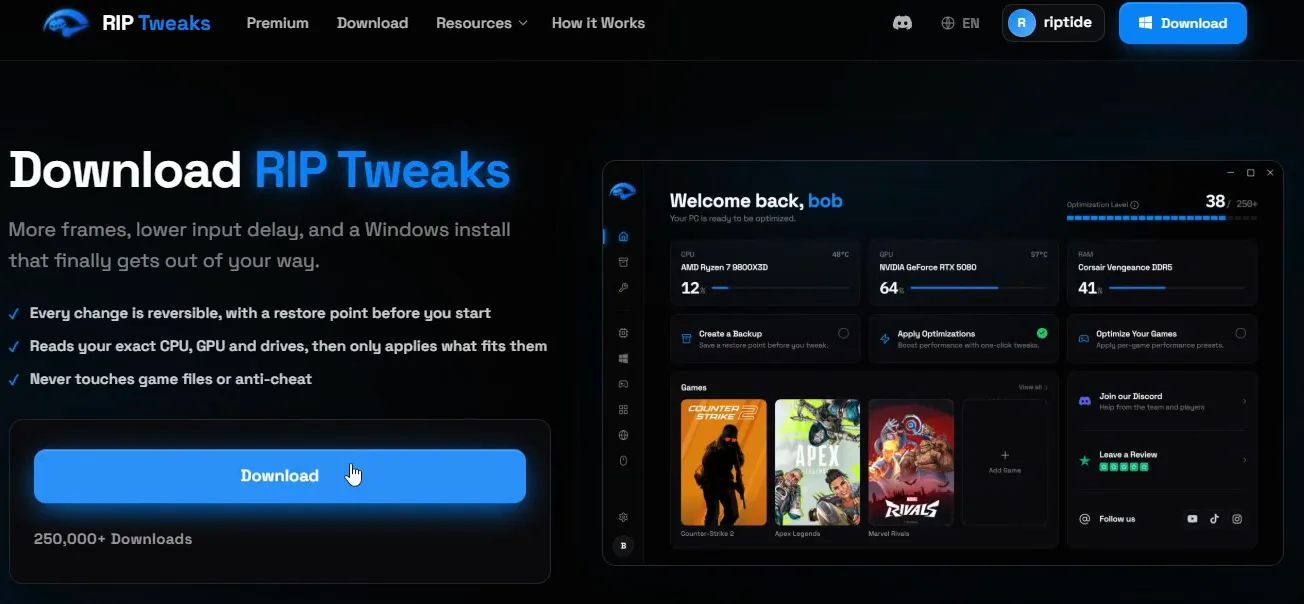
The video gets the app from the RIP Tweaks Discord (discord.gg/riptweaks): join the server, open the free tweaks channel and click the download RIP Tweaks button. You can also download it straight from riptweaks.com. Run the installer, create an account with a username, email and password, and fill out the short questionnaire.
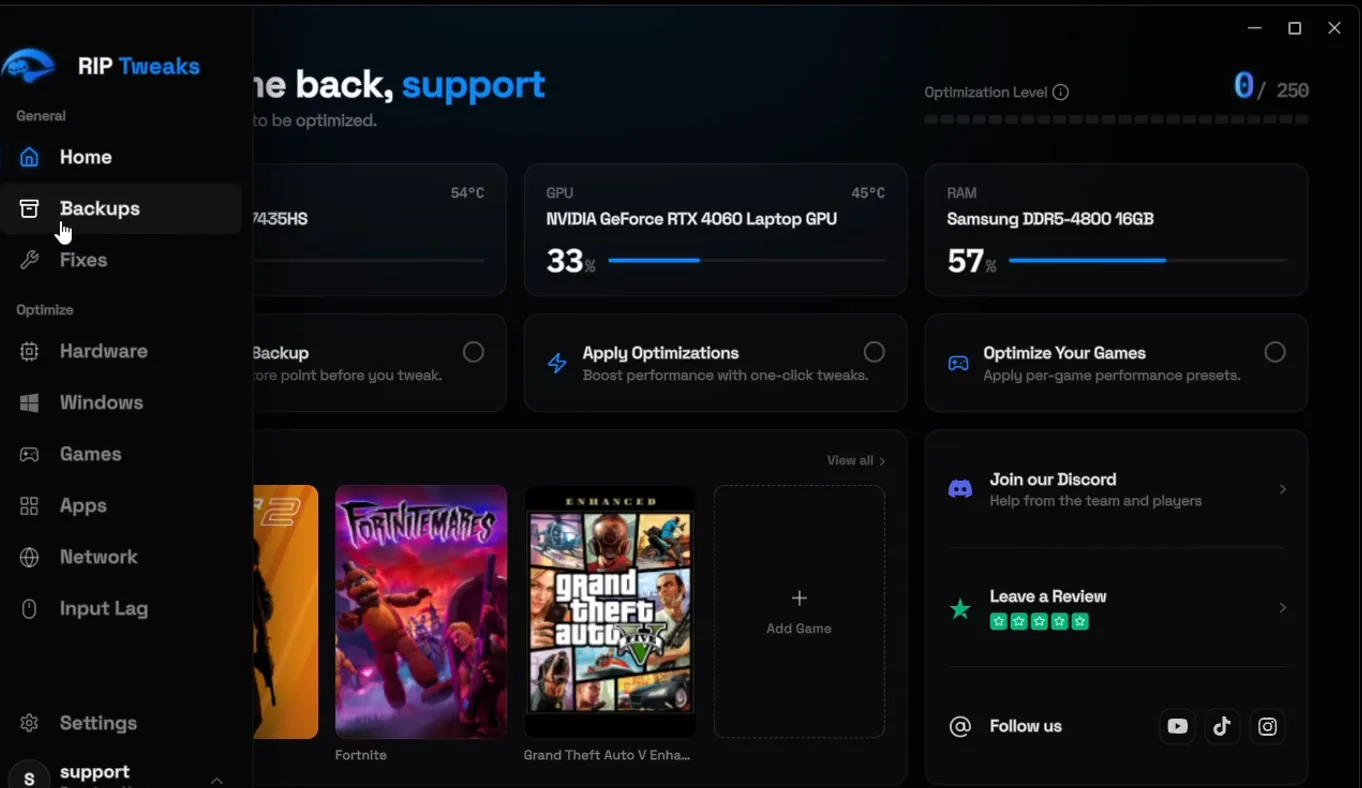
Before you touch any setting, open Backups in the left sidebar, click Create new, name it something like "before tweaks" and click Create. Wait until it finishes. This is your way back if anything feels off later.
BackupsCreate newbefore tweaksCreate
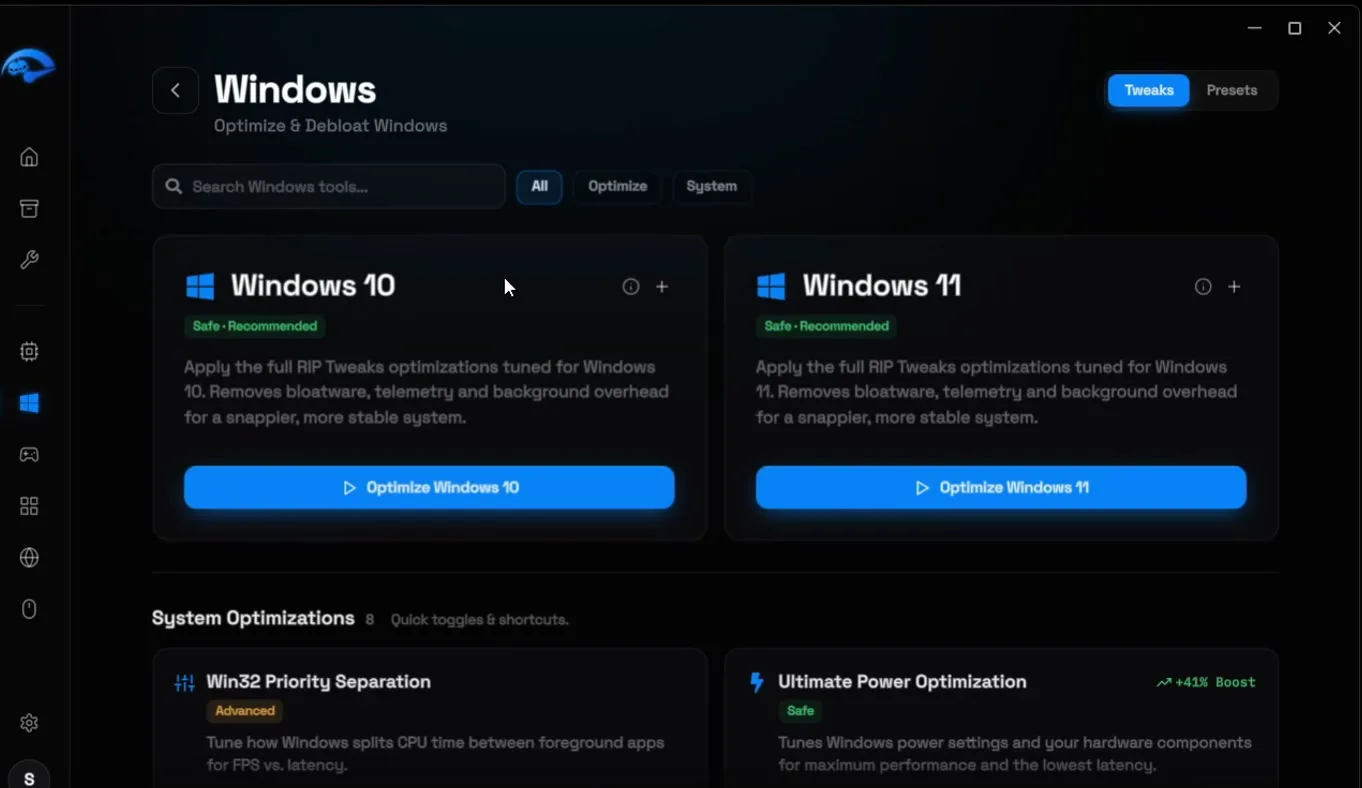
Open Windows in the sidebar. Click Optimize Windows 10 or Optimize Windows 11, whichever you have: the video uses Windows 11.
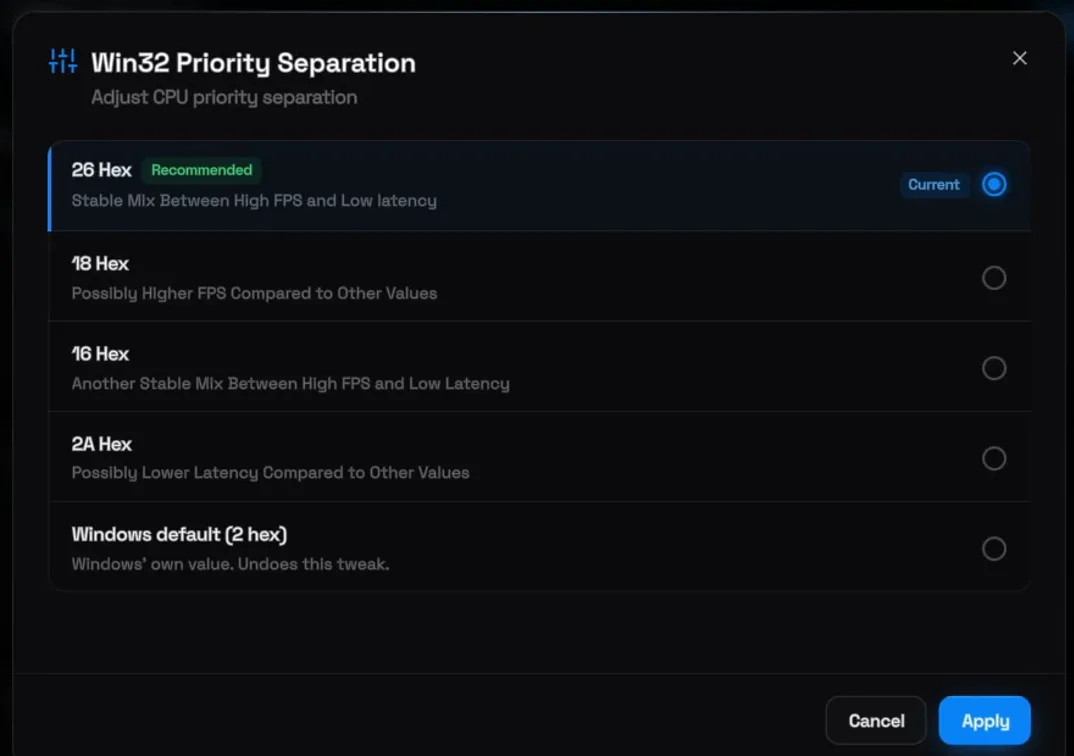
Scroll down to Win32 Priority Separation. It decides how Windows splits CPU time between the game in front and the apps behind it. Select 26 Hex, which the app marks as Recommended (a stable mix between high FPS and low latency), and click Apply. Then switch on the other System Optimizations the video turns on, the ones that disable background apps and give your PC the most performance, until they show Active.
WindowsWin32 Priority Separation26 HexApply
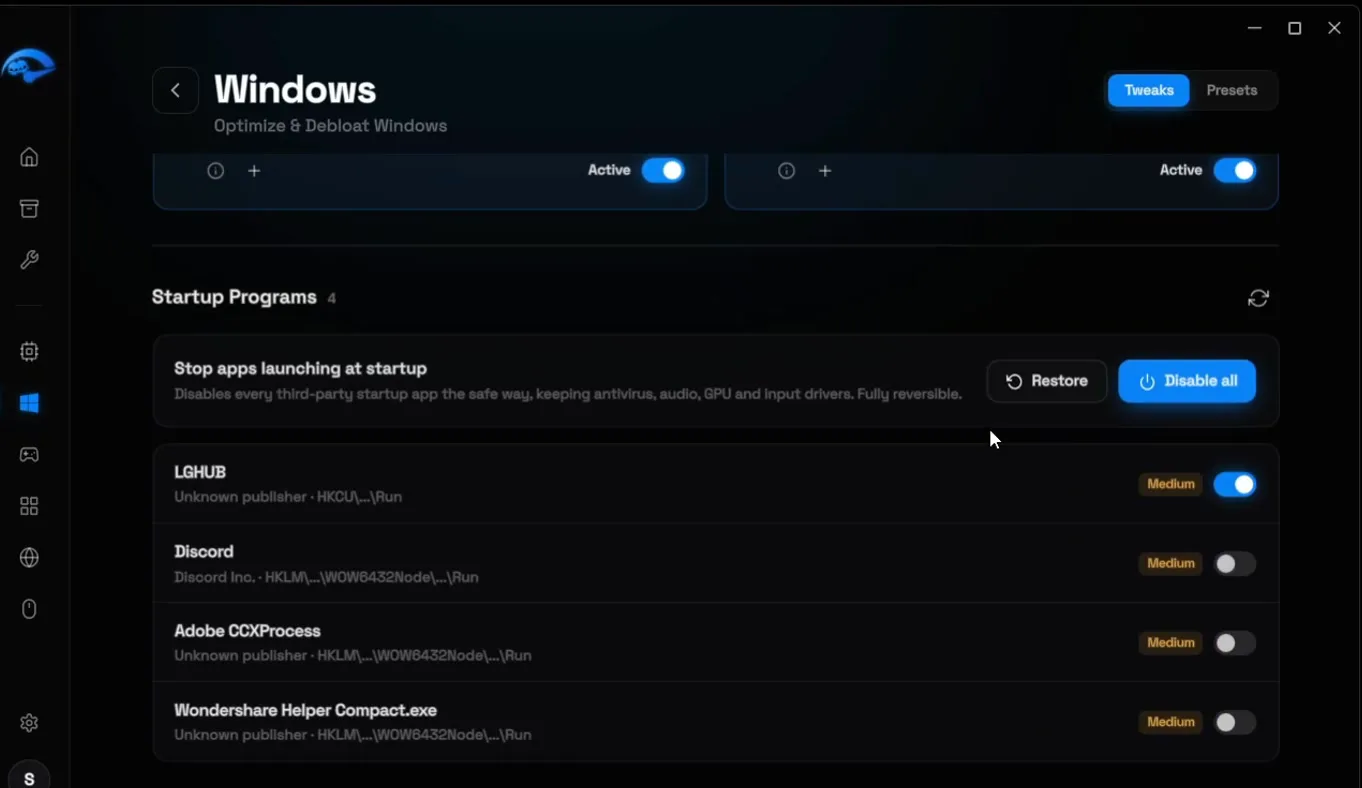
Further down is Startup Programs. Switch off every app that launches with Windows, one by one, or click Disable all. Fewer startup apps means fewer programs running in the background while you play.
Tip
The app says Disable all keeps antivirus, audio, GPU and input drivers running and is fully reversible: the Restore button next to it brings every startup app back.
Go back and open Power. The video turns on three tweaks here: CPU Core Unparking (every core stays awake and ready), Disable CPU C-States (no deep idle states mid-game) and Disable Power Throttling (Windows stops throttling apps to save power).
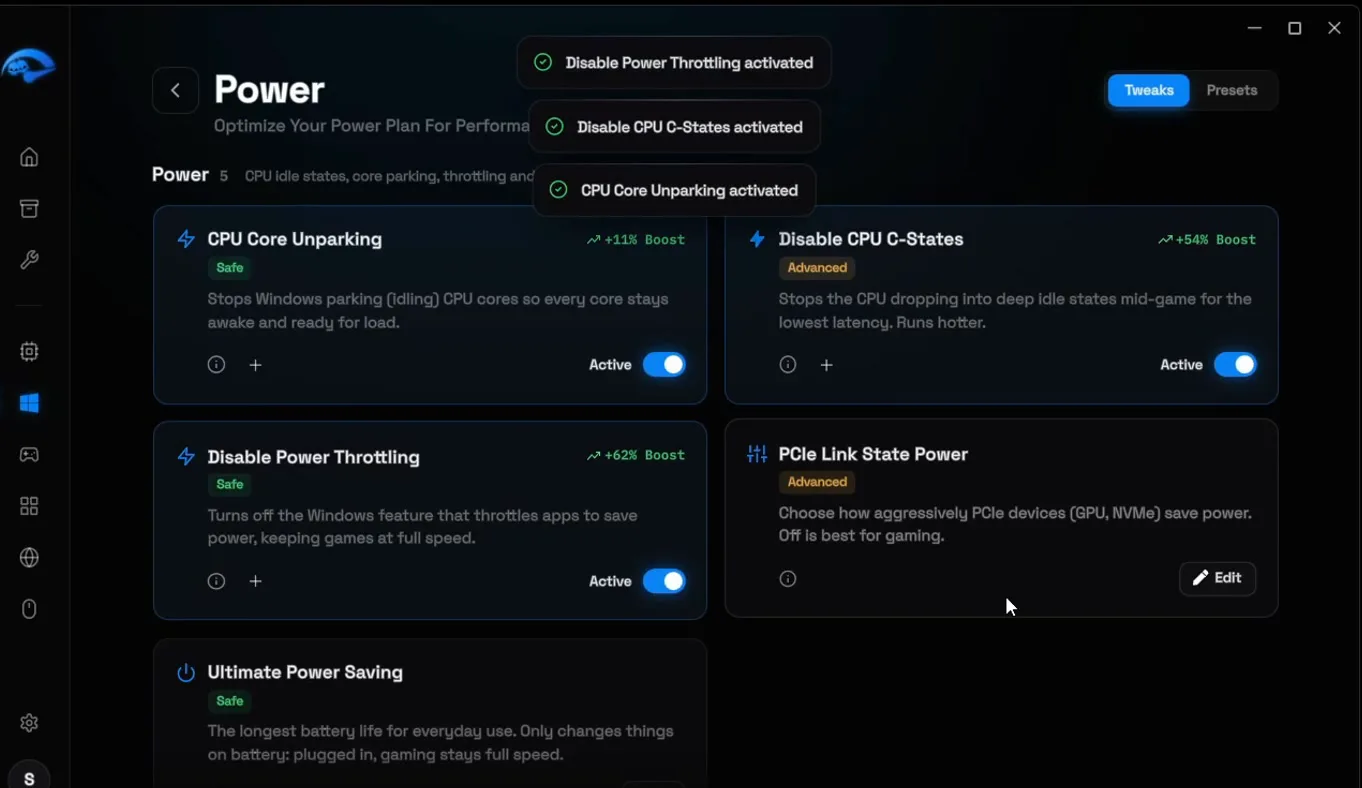
The fourth is PCIe Link State Power, which controls how hard PCIe devices like your graphics card and NVMe drive save power. Click Edit, set it to Off and apply. Leave Ultimate Power Saving alone: it is a battery-life option.
PowerPCIe Link State PowerEditOff
Good to know
The Disable CPU C-States card says it runs hotter. On a laptop, play plugged in and keep the vents free. If temperatures climb too high, switch only that tweak off again.
Go back and open Debloat. The video runs the Basic debloat, the free option the app marks Safe and Recommended: it removes Microsoft extras, turns off telemetry and quiets idle background services. Click Run Basic.
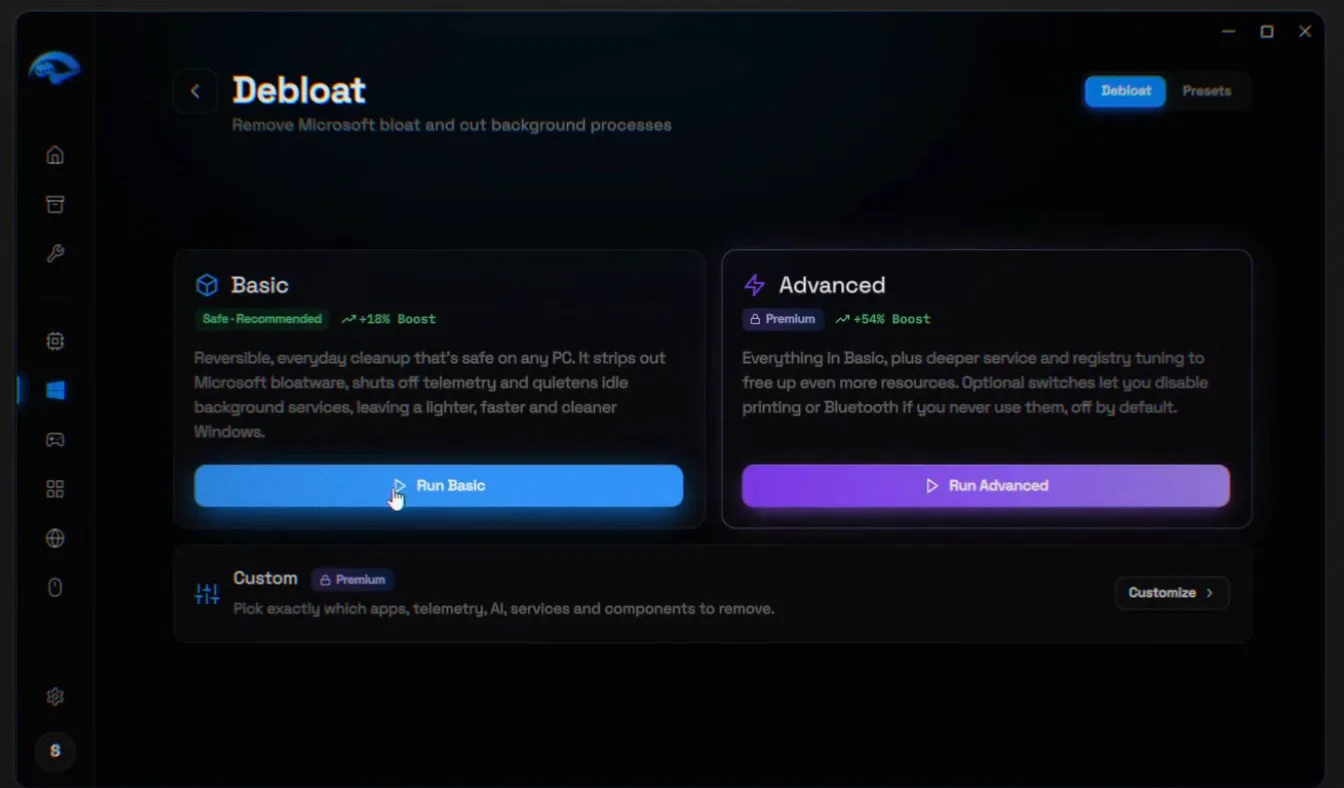
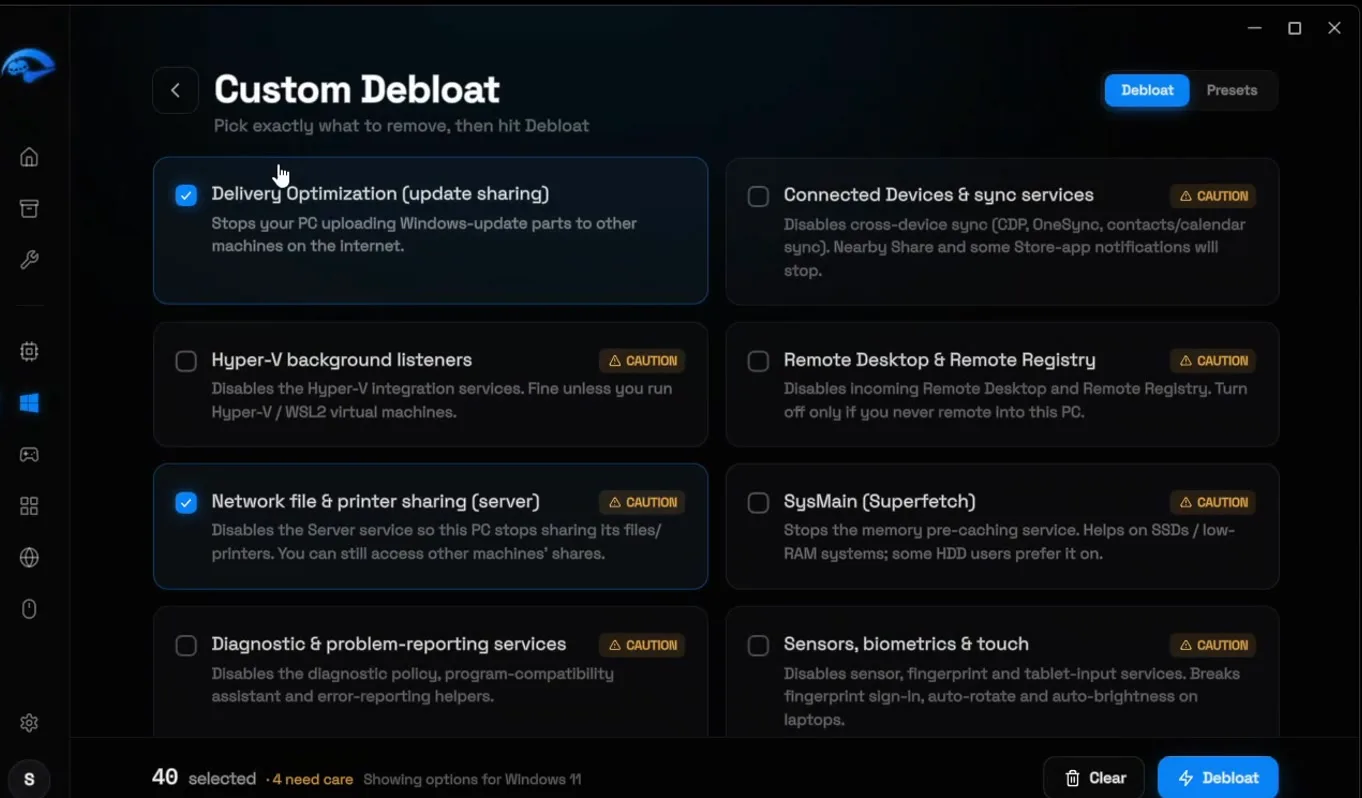
With Premium you also get Advanced and Custom. Custom lets you pick exactly what goes: Store apps, telemetry, AI features you don't use, services, Xbox services, Maps and more. Tick what you want, click Debloat and confirm. On the PC in the video, 40 items were removed. For more on cutting what runs in the background, see our guide to reducing background processes on Windows 11.
Close RIP Tweaks and open the Windows Settings app. Click Gaming, then Game Mode, and set it to Off. This is the video's choice for this setup.
SettingsGamingGame ModeOff
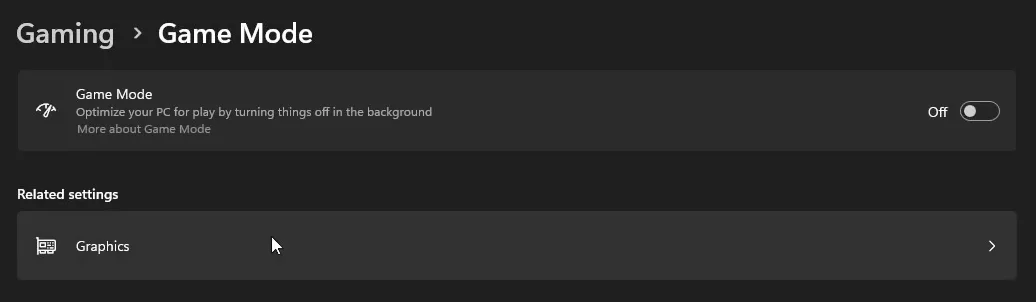
On the same page click Graphics. Find the game you play (Fortnite in the video), click Options, choose High performance and click Save. On a laptop with two GPUs this makes sure the game runs on the dedicated graphics card. Repeat it for every game you play.
GraphicsFortniteOptionsHigh performanceSave
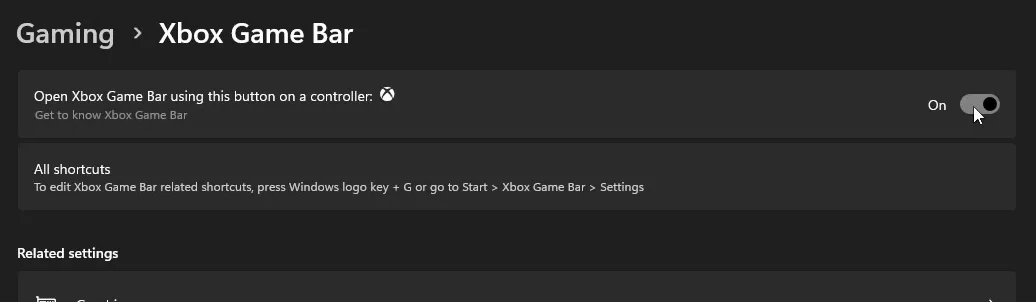
Go back to Gaming and open Xbox Game Bar. Set the switch on this page to Off.
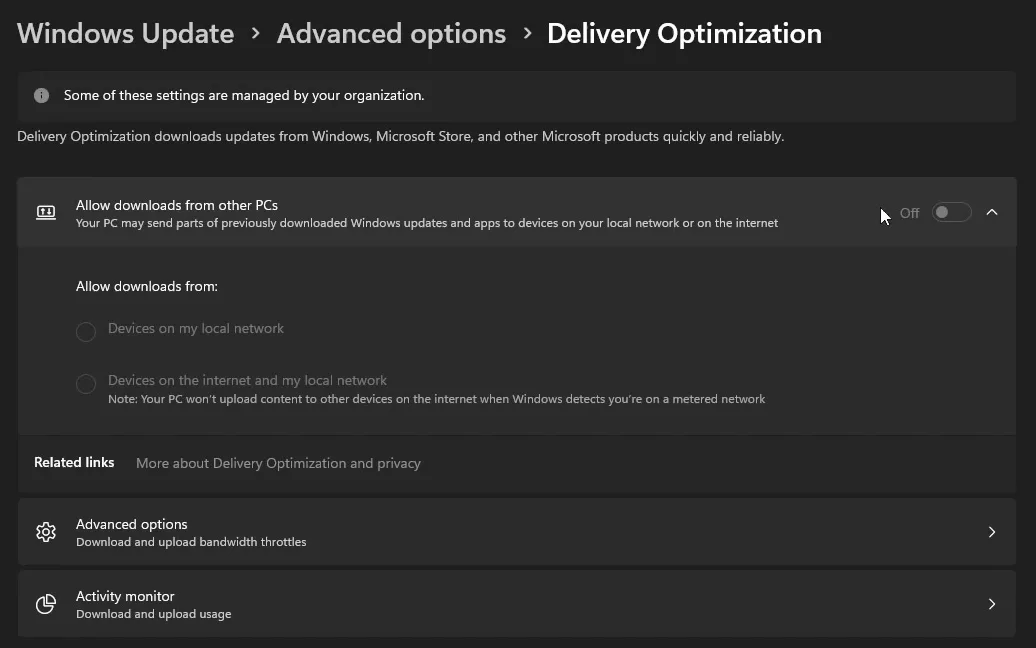
Next open Windows Update, then Advanced options, then Delivery Optimization. Set Allow downloads from other PCs to Off. With it on, your PC may send parts of Windows updates to other devices, which uses your upload while you play.
Windows UpdateAdvanced optionsDelivery OptimizationAllow downloads from other PCs
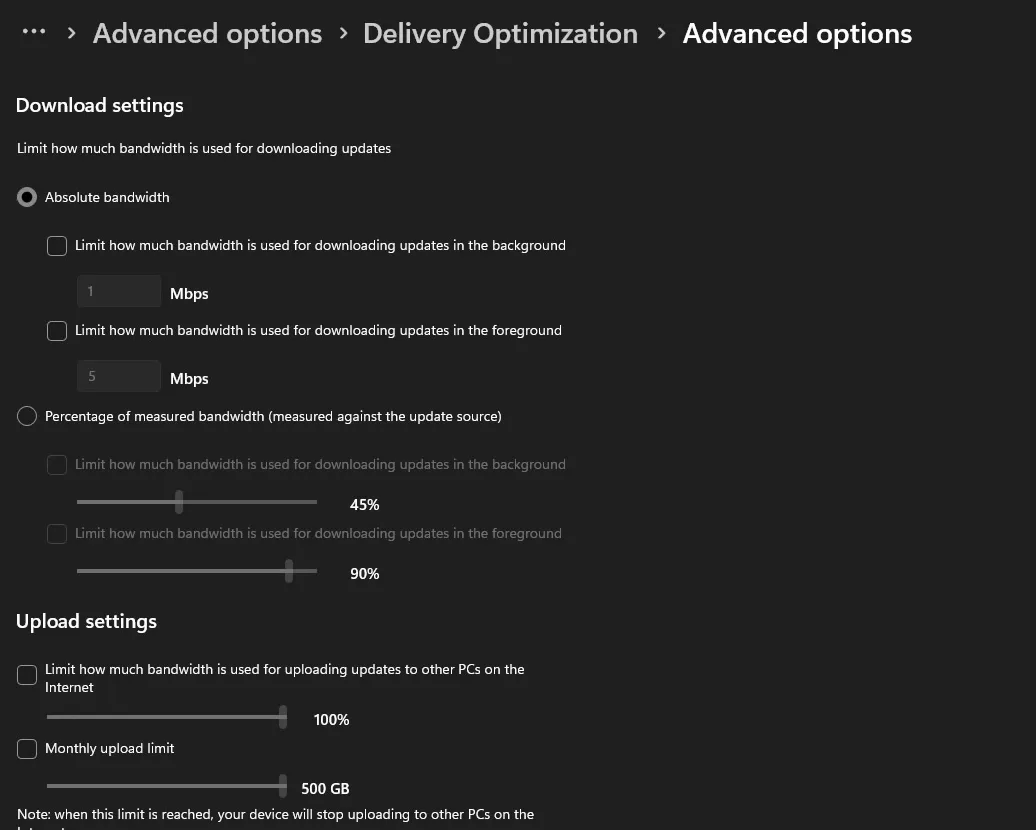
On the same page, click Advanced options and scroll to Upload settings. Uncheck both boxes there, the upload bandwidth limit and the monthly upload limit, then close Settings. A slow connection can cause lag of its own; our bufferbloat guide covers the network side.
Press the Windows key, type performance and open Adjust the appearance and performance of Windows. On the Visual Effects tab, select Custom and untick every box. Then tick only two again: Smooth edges of screen fonts (so text stays readable) and Show thumbnails instead of icons (so your folders still show previews). Click Apply, then OK.
StartperformanceAdjust the appearance and performance of WindowsCustom
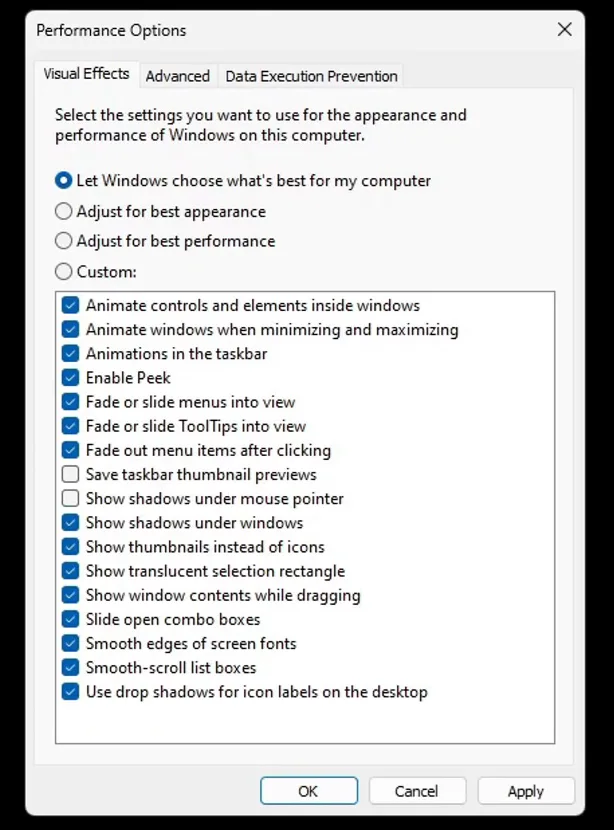
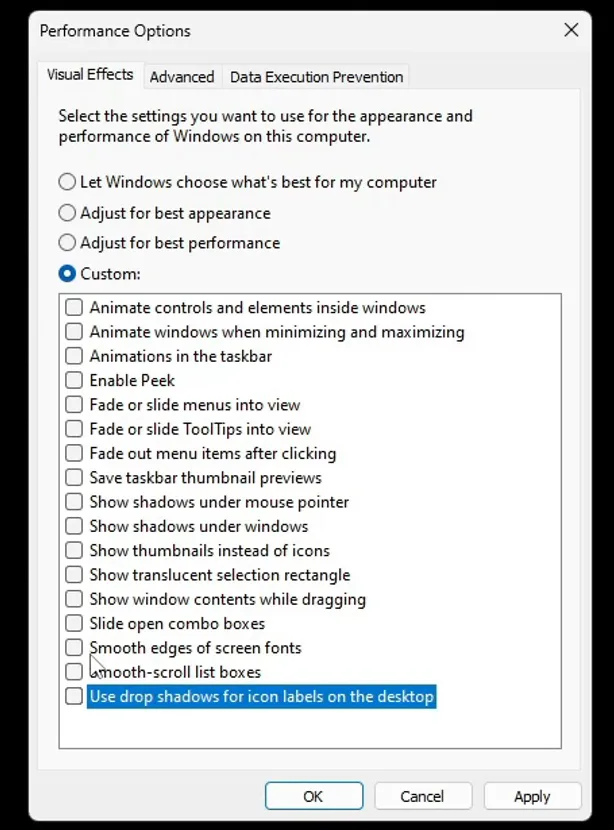
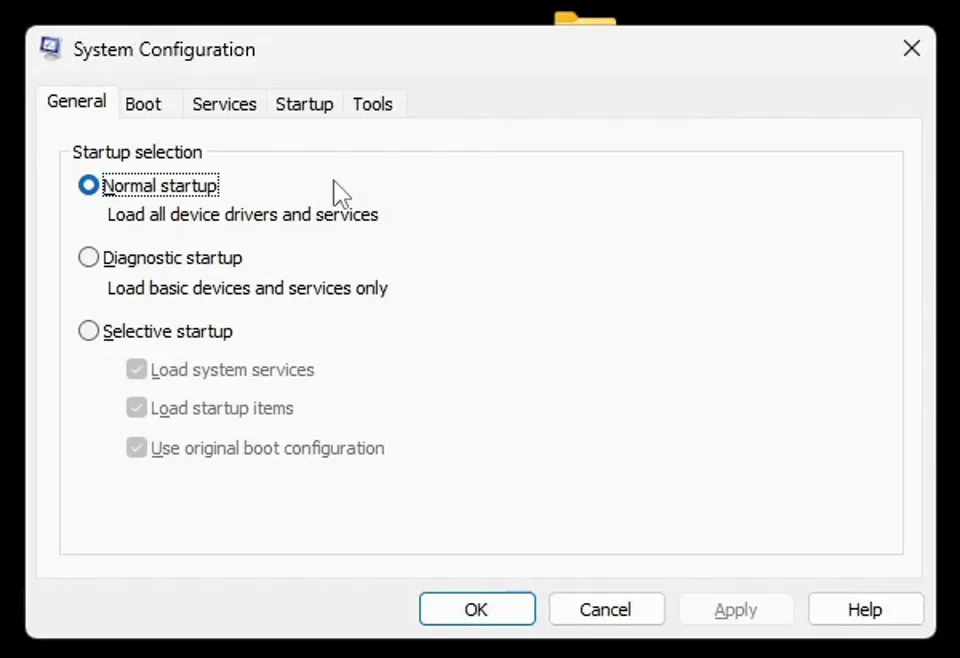
Press Windows + R, type msconfig and press Enter. On the General tab, make sure Normal startup is selected.
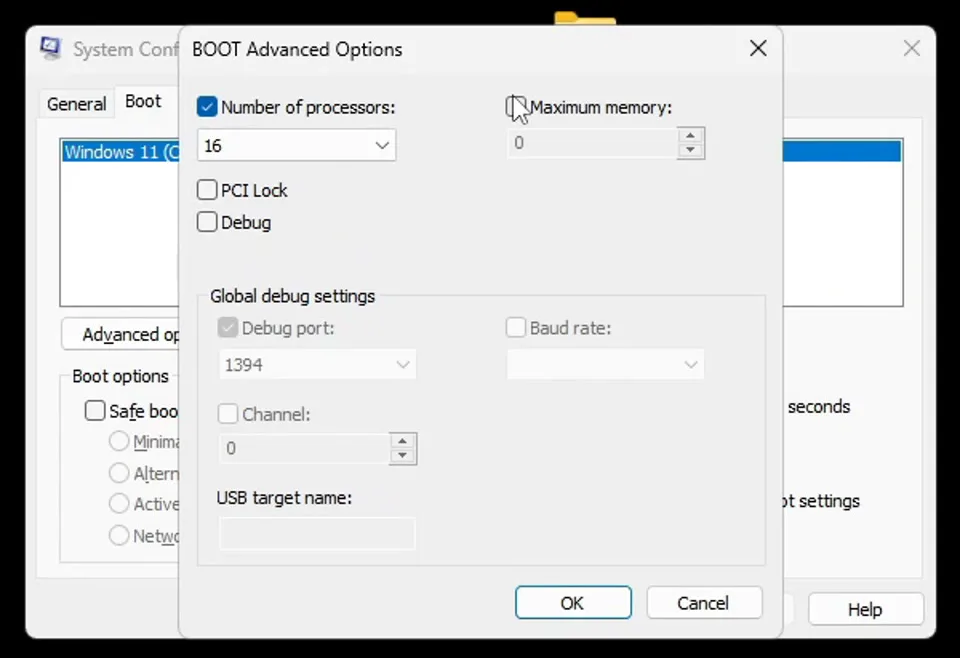
Open the Boot tab and click Advanced options. Tick Number of processors and pick the highest number in the list: 16 on the laptop in the video, yours depends on your CPU. Then tick Maximum memory and let it fill in by itself. Click OK, then Apply.
msconfigBootAdvanced optionsNumber of processors
Careful
Check the number in Maximum memory after you tick it. If it stays at 0 or shows less than your installed RAM, untick the box again: a low value limits how much memory Windows can use.
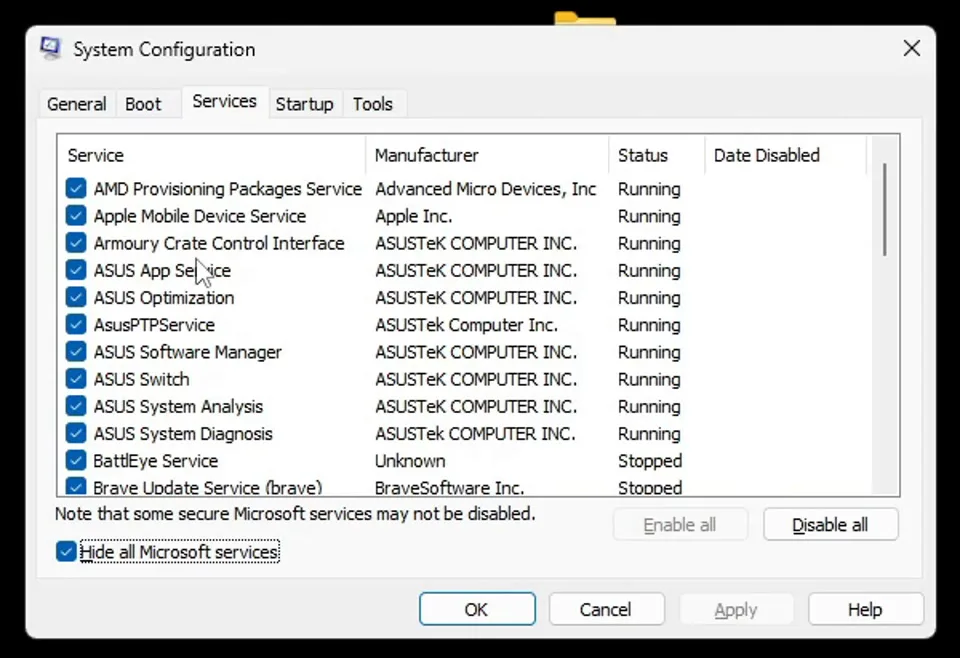
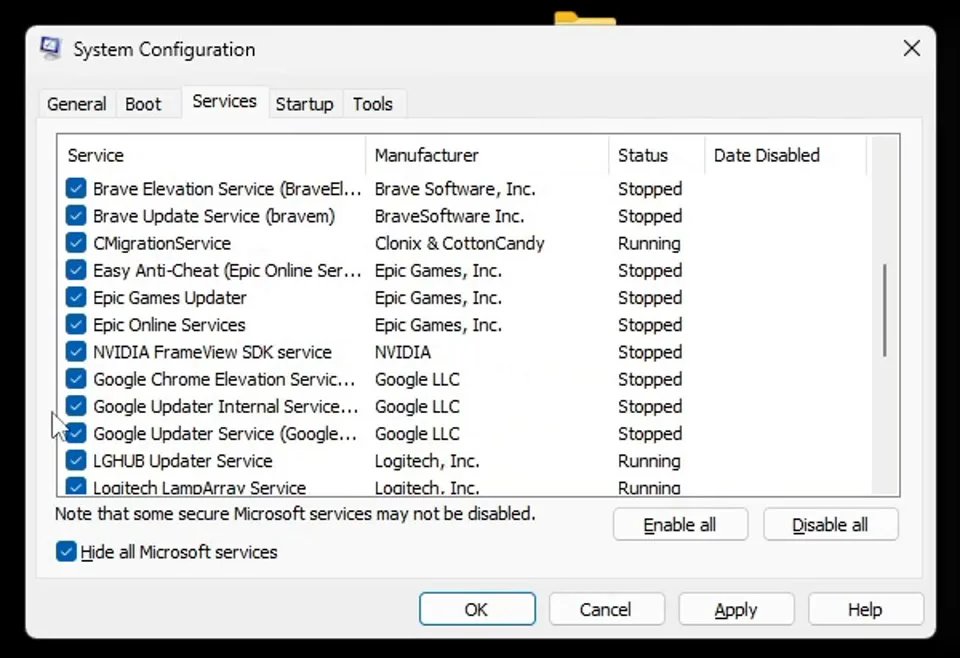
Still in System Configuration, open the Services tab and tick Hide all Microsoft services. What is left are services that other apps installed. Go through the list carefully and untick the ones from software you don't use. The video's examples: ASUS services such as Armoury Crate if you don't use them, anything from Apple, browser updaters like the Google updater and Chrome services, and Firefox services.
msconfigServicesHide all Microsoft servicesApply
Click Apply, close the window and restart your PC so the boot and service changes take effect.
Don't do this
Don't click Disable all on this tab, and keep the services you need: anti-cheat services such as Easy Anti-Cheat and BattlEye (your games need them to start), and the drivers and tools for the mouse, keyboard and graphics card you use.
After all the tweaks and the restart, the video jumps into Fortnite. On the PC in the video, an ASUS TUF gaming laptop with an RTX 4060 Laptop GPU and 16 GB of RAM, the game runs at around 250 FPS stable.
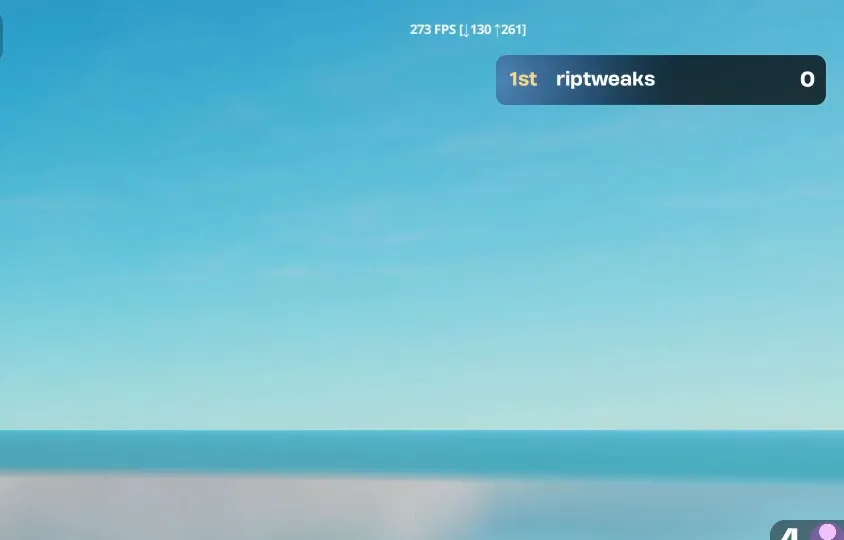
Your number depends on your CPU, graphics card and game settings, so measure your own before and after. For laptop-specific steps, see how to optimize a gaming laptop, and for three more settings from an earlier video, our hidden Windows tweaks for gaming.
How to check it worked
Test right after the restart, in the same game and the same spot you used before:
- Turn on an FPS counter (Fortnite has one in its settings) and compare your FPS in the same place as before. Watch the lows, not just the peak.
- Open RIP Tweaks, Windows, Startup Programs: the apps you switched off should still be off after the restart.
- Run
msconfigagain: Normal startup should still be selected, and on the Services tab the services you unticked stay unticked. - Open Settings, Gaming, Game Mode and Delivery Optimization once more to confirm both are still Off after the restart.
How to undo it
To undo everything at once, restore the "before tweaks" backup in RIP Tweaks. Single tweaks switch off with one click: Windows default (2 hex) for Win32 Priority Separation, Restore for startup apps, and Enable all on the MSConfig Services tab.
Key settings at a glance
FAQ
Should Game Mode be on or off for FPS?
The video turns Game Mode off in Settings, Gaming, Game Mode. Results differ between PCs, so if you want to be sure, compare your FPS counter in the same spot with it on and off and keep the faster one.
What does Number of processors in msconfig do?
It sets how many CPU cores Windows boots with. With the box unticked Windows uses all of them; the video ticks it and picks the highest number in the list (16 on its laptop) so no lower limit is set by mistake. Never pick a number lower than the highest one.
Is 26 hex the best Win32 Priority Separation value?
RIP Tweaks marks 26 Hex as Recommended, a stable mix between high FPS and low latency, and the video uses it. 18 Hex is listed for possibly higher FPS, 2A Hex for possibly lower latency, and Windows default (2 hex) undoes the tweak. Our 16 hex vs 32 hex guide explains how these values work.
Does turning off Delivery Optimization lower ping?
It stops your PC from sending parts of Windows updates to other devices, so that upload no longer shares your connection with your game. That helps most on slower connections; it can't fix a bad route to the game server.
Do these tweaks work on Windows 10?
Yes. RIP Tweaks has an Optimize Windows 10 button next to the Windows 11 one, and Game Mode, Graphics, Delivery Optimization, Performance Options and msconfig exist on Windows 10 too, with some pages laid out a little differently.
Can I undo the tweaks?
Yes. Every change in RIP Tweaks is reversible, and the backup you made at the start restores the earlier state. The Windows settings switch back in the same places, and the MSConfig Services tab has an Enable all button.
How many FPS will I get after these tweaks?
On the PC in the video, a gaming laptop with an RTX 4060 Laptop GPU, Fortnite runs at around 250 FPS stable after all the tweaks. Your result depends on your hardware and game settings, so measure your FPS in the same spot before and after.
Is it safe to untick services in msconfig?
Yes, if you only untick services of apps you don't use and keep Hide all Microsoft services ticked so Windows' own services stay out of the list. Keep anti-cheat services and the tools for your hardware, and never use Disable all on that tab.
 RIP Tweaks
Do it in a few minutes with RIP Tweaks
- Free plan for Windows 10 and 11
- A backup first, and every tweak can be switched off again
- Made for higher FPS, lower input lag and steadier ping
Free · Windows 10 and 11
